Can you paint kitchen cupboards without sanding? Yes, you absolutely can! Painting kitchen cabinets without sanding is a fantastic way to refresh your kitchen’s look without all the dust and mess. This guide will walk you through the entire process, step-by-step, making it easy for even beginners to achieve professional-looking results. We’ll cover everything from choosing the right paint to the final protective coat. Let’s get your kitchen looking brand new!
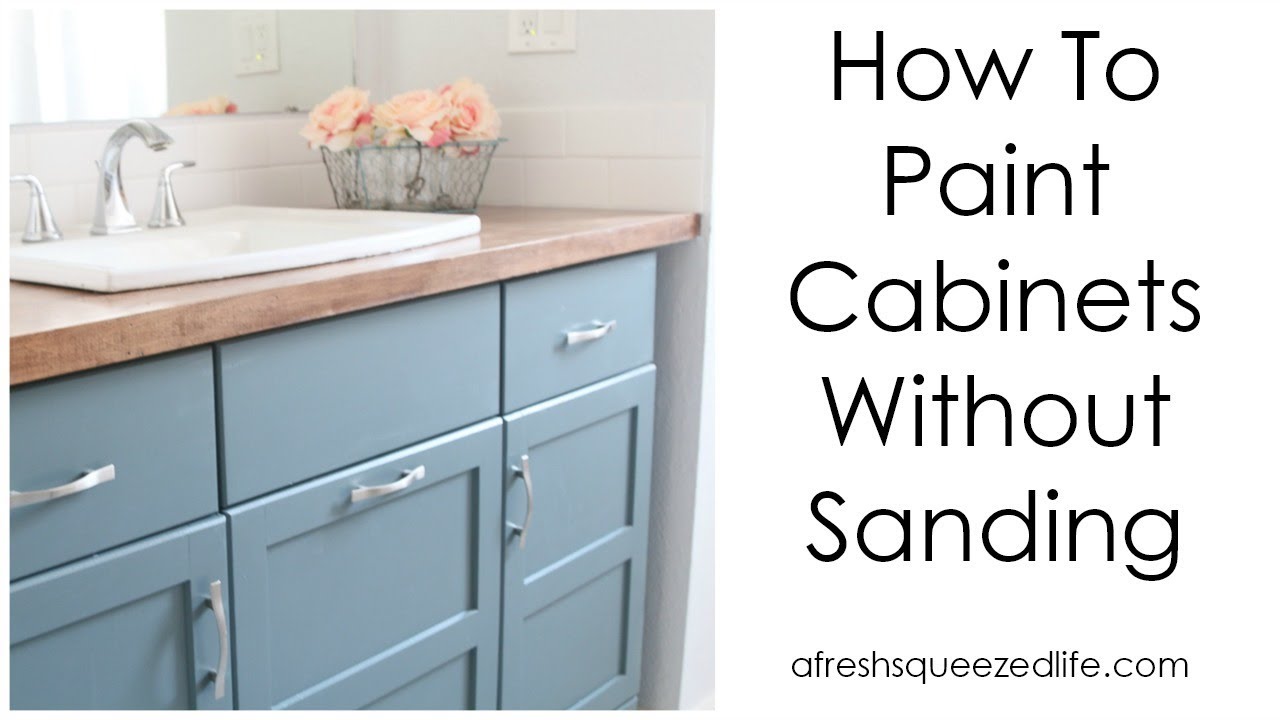
Image Source: i.ytimg.com
Why Skip the Sanding?
Sanding cabinets is often seen as a necessary evil in DIY projects. It’s usually done to create a “tooth” for the new paint to adhere to. However, modern paints have come a long way. Many formulations now offer excellent adhesion to various surfaces, including finished wood and laminate, without the need for rigorous prep work like sanding.
Benefits of No-Sand Painting:
- Saves Time: This is the biggest advantage. Sanding can be incredibly time-consuming, especially for a large kitchen.
- Less Mess: Sanding creates a lot of dust, which can get everywhere and requires thorough cleanup. Skipping this step means a much cleaner workspace.
- Easier for Beginners: Many people find sanding challenging, from achieving an even finish to managing the dust. No-sanding methods are much more forgiving.
- Protects Cabinet Material: For some older cabinets or delicate finishes, sanding can be too aggressive and damage the underlying material.
The Power of the Right Paint and Primer
The secret to successful no-sand cabinet painting lies in using the right products. You can’t just grab any old paint and expect it to stick.
No-Sand Cabinet Paint
There are paints specifically formulated for cabinets that don’t require sanding. These are often hybrid alkyds or acrylic enamels that boast superior adhesion and durability. Look for products that clearly state they are suitable for cabinets and can adhere to pre-finished surfaces. These are often marketed as no-sand cabinet paint or all-in-one cabinet paint.
Cabinet Primer No Sanding
While some paints claim to be “self-priming,” using a dedicated cabinet primer no sanding is highly recommended for the best adhesion and a smooth finish. A good bonding primer will grip the existing finish, providing a uniform surface for your topcoat and preventing any of the old finish from showing through.
Types of Paints to Consider:
- Hybrid Alkyds: These paints combine the best of oil-based and water-based paints. They offer excellent durability, adhesion, and a smooth finish, similar to oil-based paints, but with the easier cleanup of water-based paints.
- Water-Based Acrylic Enamels: Many high-quality acrylic enamels are designed for cabinets and can adhere well without sanding. They are flexible and less prone to cracking.
- Chalk Paint Cabinets No Prep: While chalk paint is known for its matte finish and minimal prep, it often requires a wax or polycrylic topcoat for durability, especially in a high-traffic area like a kitchen. If you choose chalk paint cabinets no prep, be sure to factor in the sealing step for longevity.
- Milk Paint Cabinets No Sanding: Similar to chalk paint, milk paint offers a charming, often matte, finish. Traditional milk paint can chip and distress naturally, but for a smooth, durable kitchen finish, you’ll likely need a binder and a strong topcoat. Some modern milk paint formulations are designed for better adhesion.
Essential Supplies for a Smooth Finish
Before you begin, gather all your supplies to ensure the process flows smoothly.
Supplies Checklist:
- Degreaser for cabinets: Crucial for removing grease and grime.
- Cleaning cloths or sponges: For applying the degreaser and wiping down.
- Rags: For drying and wiping up drips.
- Screwdriver: To remove cabinet doors and hardware.
- Painter’s tape: To protect areas you don’t want to paint.
- Drop cloths or old sheets: To protect your floors and countertops.
- High-quality bonding primer (no sanding formula): As discussed, a good primer is key.
- Cabinet paint (no-sand formula): Choose your desired color and finish.
- Paint rollers (foam or microfiber for smooth finish): Small foam rollers are excellent for cabinet doors.
- Paintbrushes (high-quality synthetic for cutting in): Angled brushes are great for corners and details.
- Paint trays: For rolling and brushing.
- Optional: Spray paint kitchen cabinets: If you’re aiming for the smoothest, most professional finish, a sprayer is a great option.
- Optional: Cabinet primer spray or paint: For use with a sprayer.
- Optional: Topcoat (polyurethane or polycrylic): For added durability, especially in high-moisture areas.
- Safety glasses: Essential if you decide to spray paint.
- Gloves: To protect your hands.
Step-by-Step Guide to Painting Your Kitchen Cupboards Without Sanding
This detailed process will guide you from the initial preparation to the final coat.
Step 1: Cleaning Cabinets Before Painting – The Foundation of Success
This is arguably the most critical step in a no-sand project. Even without sanding, you need a perfectly clean surface for the paint to adhere to. Grease, grime, and food splatters can prevent paint from sticking, leading to peeling.
How to Properly Clean Cabinets Before Painting:
- Remove Hardware: Take off all door handles, knobs, and hinges. Keep them organized, perhaps in a plastic baggie with the corresponding door or drawer front.
- Remove Doors and Drawers: Carefully detach all cabinet doors and drawer fronts. This allows you to paint them flat, which is much easier and yields a smoother finish. Lay them out on a clean, protected surface.
- Degrease Thoroughly: Use a strong degreaser for cabinets before painting. Kitchen cabinets accumulate a lot of grease from cooking. A good degreaser will cut through this film effectively. Apply the degreaser with a sponge or cloth, working it into any nooks and crannies.
- Popular Degreaser Options:
- TSP (Trisodium Phosphate) Substitute: A powerful cleaner that effectively removes grease and grime. Always wear gloves and eye protection.
- Krud Kutter: A readily available and effective degreaser that many DIYers swear by.
- Dish Soap: For lighter grime, a solution of warm water and a good grease-cutting dish soap can work.
- Popular Degreaser Options:
- Wipe Down: After applying the degreaser, use clean, damp cloths to wipe away all residue. You may need to rinse your cloths frequently and go over the cabinets multiple times to ensure no cleaning product is left behind.
- Dry Completely: Let the cabinets air dry thoroughly. You can speed this up with a clean, dry cloth or even a hairdryer on a cool setting. Any lingering moisture can interfere with primer adhesion.
Step 2: Prep Your Workspace
Protecting your kitchen from paint drips is essential.
- Lay Down Drop Cloths: Cover your countertops, stovetop, and floor with drop cloths or old sheets. Secure them with painter’s tape if necessary.
- Tape Off Areas: Use painter’s tape to mask off any areas you don’t want to paint, such as cabinet frames where they meet walls, appliance edges, or backsplash tiles. Ensure the tape is pressed down firmly to prevent paint bleed.
Step 3: Apply the Primer
This step is vital for a durable, professional finish. A good cabinet primer no sanding will bond to your existing cabinet finish and provide a uniform base for your topcoat.
- Stir the Primer: Always stir your primer thoroughly. Do not shake it, as this can create air bubbles.
- Apply Thin, Even Coats:
- Brushing: For cabinet frames and areas that are difficult to reach with a roller, use a high-quality synthetic paintbrush. “Cut in” the edges and corners first.
- Rolling: Use a small foam roller for the flat surfaces of cabinet doors and drawers. Apply the primer in thin, even coats. Avoid overloading the roller, which can lead to drips. Work in a consistent direction.
- Allow Proper Drying Time: Follow the manufacturer’s instructions for drying time between coats and before applying the topcoat. This is crucial for optimal adhesion. Most primers require at least 4-6 hours, but check the can.
- Second Coat (if necessary): For very dark cabinets or if the primer isn’t covering evenly, a second coat of primer may be beneficial. Ensure the first coat is completely dry before applying the second.
Step 4: Painting Your Cabinets
Now for the fun part – applying the color!
- Stir Your Paint: Just like the primer, stir your paint thoroughly.
- Apply Thin, Even Coats:
- Brushing: Use your angled brush for edges and detailed areas. Apply paint in long, smooth strokes.
- Rolling: Use a foam roller for the main surfaces. Aim for thin, even coats. Avoid applying too much pressure, which can create roller marks.
- Work in Sections: Paint one cabinet door or drawer front at a time. This helps you maintain a wet edge and avoid lap marks.
- Allow Drying Time Between Coats: This is crucial. Rushing this step will result in a poor finish. Most cabinet paints require at least 4-8 hours of drying time between coats.
- Apply Subsequent Coats: Apply 2-3 thin coats of paint for full coverage and durability. Some finishes might require more. Always refer to the paint manufacturer’s recommendations.
- Consider Spray Painting Kitchen Cabinets: If you want the smoothest, most factory-like finish, spray paint kitchen cabinets is an excellent option.
- Preparation for Spraying: This requires more thorough masking of your entire kitchen to protect everything from overspray. Ensure good ventilation and wear a respirator mask and safety glasses.
- Sprayer Types: You can use an airless sprayer, HVLP (High Volume Low Pressure) sprayer, or even spray cans for smaller projects.
- Technique: Hold the sprayer at a consistent distance from the surface and use smooth, overlapping strokes. Apply thin coats.
Step 5: Apply a Topcoat (Optional but Recommended)
For added durability and protection, especially in a kitchen environment, a topcoat is a great idea.
- Choose Your Topcoat: Water-based polyurethane or polycrylic are excellent choices. They are clear, durable, and won’t yellow over time.
- Apply Thin, Even Coats: Use a high-quality synthetic brush or a foam applicator. Apply in thin, even coats, following the manufacturer’s drying instructions between coats.
- Allow Thorough Curing: While the paint may feel dry to the touch relatively quickly, it takes time to fully cure and harden. Follow the manufacturer’s recommendations for curing time before reassembling your cabinets and using them heavily. This can take anywhere from 7 to 30 days.
Step 6: Reassemble
Once everything is completely dry and cured, reattach your hardware, doors, and drawers.
Achieving a Smooth Finish: Cabinet Painting Hacks No Sanding
Here are some insider tips and cabinet painting hacks no sanding to help you achieve a professional look:
- Use High-Quality Brushes and Rollers: Cheap tools will leave streaks and an uneven finish. Invest in good quality synthetic brushes and small foam rollers specifically designed for smooth surfaces.
- Thin Coats are Key: It’s always better to apply multiple thin coats than one thick one. Thin coats dry faster, are less prone to drips, and provide a smoother, more even finish.
- Maintain a Wet Edge: When painting, try to work from one edge to the next without stopping for too long. This helps prevent visible “lap marks” where one coat of paint overlaps a slightly dried area.
- Clean Your Tools Thoroughly: Wash your brushes and rollers immediately after use with soap and water (for water-based paints) to keep them in good condition for future projects.
- Test in an Inconspicuous Area: If you’re unsure about how the paint or primer will adhere, test it on the back of a cabinet door or inside a less visible cabinet.
- Consider the Sheen: Higher sheens (like semi-gloss or gloss) tend to be more durable and easier to clean, which is beneficial in a kitchen. However, they also highlight imperfections more than matte finishes. Eggshell or satin are good compromises.
- Lightly Scuff if Using Gel Stain: If you opt for gel stain cabinets no sanding, a very light scuff with a synthetic scrubbing pad (like a 3M blue or green pad) can help adhesion, but it’s not the aggressive sanding usually required. Always test your gel stain on a hidden area first.
- All-in-One Cabinet Paint: Some products are truly all-in-one cabinet paint, meaning they act as a primer and paint in one. While these can save time, a separate, high-quality bonding primer often yields superior adhesion and a more durable finish, especially on slick surfaces.
Durability and Longevity
Painting cabinets without sanding can be very durable if done correctly. The key is proper cleaning and using the right bonding primer. The adherence of the paint is directly tied to how clean and free of contaminants the surface is. The addition of a durable topcoat will further enhance the lifespan of your painted cabinets, protecting them from moisture, wear, and tear.
Popular No-Sand Painting Systems
Beyond general paints, some specific systems are designed for minimal prep.
Chalk Paint Cabinets No Prep & Milk Paint Cabinets No Sanding
As mentioned, chalk paint and milk paint offer a different aesthetic. They are known for their matte, often distressed, finishes.
- Chalk Paint Advantages: Adheres to almost any surface with minimal prep, no priming usually needed, dries very quickly.
- Chalk Paint Disadvantages: Requires a protective topcoat (wax or polycrylic) for durability, can be more expensive, finish is very matte which might not be ideal for all kitchens.
- Milk Paint Advantages: Can create a charming, antique look, eco-friendly options available.
- Milk Paint Disadvantages: Can be prone to chipping (which might be a desired effect), often requires a bonding agent or primer for a smooth finish, needs a protective topcoat.
When using chalk paint cabinets no prep or milk paint cabinets no sanding, the most important thing is sealing the finish properly for kitchen use.
Gel Stain Cabinets No Sanding
Gel stain is a different approach. It’s a stain that sits on the surface rather than penetrating the wood, making it suitable for surfaces that might not take traditional stain well, like laminate or previously finished cabinets.
- Gel Stain Advantages: Can provide a deep, rich color without stripping existing finishes, easier application than traditional stain.
- Gel Stain Disadvantages: Still requires thorough cleaning, the finish might not be as durable as paint without a good topcoat, and it’s primarily for coloring, not for achieving a completely opaque finish like paint. You’ll likely need a topcoat for durability.
Common Mistakes to Avoid
- Skipping the Degreasing Step: This is the number one mistake. Grease is the enemy of adhesion.
- Applying Paint Too Thickly: This leads to drips, brush marks, and uneven drying.
- Not Allowing Adequate Drying/Curing Time: Rushing the process will compromise the durability of your finish.
- Using Cheap Tools: Poor quality rollers and brushes will lead to a poor quality finish.
- Not Testing Products: Always test your primer and paint on a hidden area first.
Frequently Asked Questions (FAQ)
Q1: Can I really skip sanding entirely for kitchen cabinets?
A1: Yes, with modern no-sand cabinet paint and a good bonding primer designed for slick surfaces, you can skip sanding. The key is impeccable cleaning.
Q2: What is the best type of paint for kitchen cabinets without sanding?
A2: High-quality acrylic enamels or hybrid alkyds are excellent choices. Look for products specifically designed for cabinets and labeled as having excellent adhesion.
Q3: How do I clean cabinets before painting without sanding?
A3: Thoroughly degrease the cabinets using a strong degreaser for cabinets before painting like TSP substitute or Krud Kutter, then wipe them down with clean water and dry them completely.
Q4: Do I need a primer if I’m not sanding?
A4: Yes, using a high-quality cabinet primer no sanding is highly recommended. It ensures proper adhesion and a uniform base for your paint.
Q5: Can I use spray paint for my kitchen cabinets without sanding?
A5: Yes, you can spray paint kitchen cabinets without sanding. Ensure you use a primer and paint suitable for spraying and follow proper application techniques.
Q6: How many coats of paint will I need?
A6: Typically, 2-3 thin coats of paint are needed for full coverage and durability.
Q7: How long do painted cabinets last without sanding?
A7: If done correctly with quality products and a proper topcoat, painted cabinets can last many years. The most crucial factors are the cleaning and priming steps.
Q8: What’s the difference between chalk paint and regular paint for cabinets?
A8: Chalk paint typically has a matte finish and adheres well with minimal prep, but requires a wax or polycrylic topcoat. Regular cabinet paints (like acrylic enamels) are often more durable on their own and come in various sheens. For chalk paint cabinets no prep, the topcoat is essential.
Q9: Can I use gel stain on my cabinets without sanding?
A9: Yes, gel stain cabinets no sanding is possible. Gel stain is designed to adhere to surfaces that might not take traditional stains. Ensure thorough cleaning and consider a durable topcoat.
Q10: What are the best cabinet painting hacks no sanding?
A10: Key hacks include using high-quality tools, applying thin coats, maintaining a wet edge, and ensuring the cabinets are impeccably clean.
By following this comprehensive guide, you can transform your kitchen cabinets with a beautiful, durable finish, all without the hassle of sanding. Enjoy your newly refreshed kitchen!