Image Source: www.twelveonmain.com
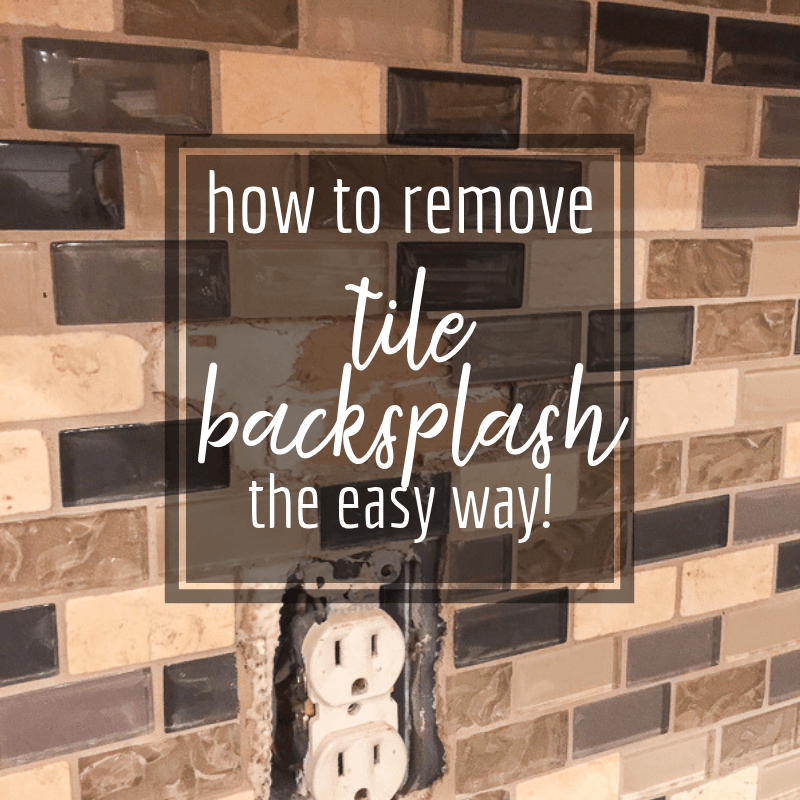
How To Remove Backsplash Tiles In Kitchen Step-by-Step
You can demo your kitchen backsplash by carefully taking off the old tiles. It involves getting ready, taking off grout, prying tiles, and cleaning up the wall. This guide will show you how to do it the right way. Taking out old tiles can make your kitchen look fresh. It is a job many homeowners can do themselves. With the right steps and tools, you can remove backsplash tiles safely.
Getting Ready to Remove Your Backsplash
Before you start pulling tiles, you need to get ready. This step is very important. It helps keep your kitchen clean and safe. It also makes the whole process easier.
Gathering Your Tools and Safety Gear
You need specific tools for removing backsplash tile. Using the right tools makes the job faster. It also lowers the chance of hurting yourself or the wall.
Here are the Tools for removing backsplash tile:
- Safety Glasses or Goggles: Protect your eyes from dust and flying bits.
- Work Gloves: Keep your hands safe from sharp edges.
- Dust Mask or Respirator: Stop breathing in dust. Tile dust can be bad for you.
- Utility Knife: Good for cutting caulk or trim.
- Painter’s Tape: Use to tape off areas.
- Plastic Sheeting or Tarps: Cover counters, cabinets, and the floor. This stops dust and debris from getting everywhere.
- Putty Knife or Scraper: Use these to scrape away grout or adhesive. Get different sizes.
- Chisel: A wide chisel works well for getting under tiles.
- Hammer: You will need this with the chisel.
- Pry Bar: A small pry bar or flat bar helps lift tiles. This is key for how to pry off backsplash tile.
- Bucket: For putting old tiles and debris in.
- Shop Vacuum: Great for cleaning up dust and small pieces. Make sure it has a good filter.
- Oscillating Multi-Tool (Optional but Helpful): Can be used for cutting grout or getting under tiles. Often considered the best tool for removing tile adhesive on small bits.
Here is a simple table of tools:
| Tool Type | Why You Need It |
|---|---|
| Safety Glasses/Goggles | Protect your eyes |
| Gloves | Protect your hands |
| Dust Mask/Respirator | Protect your lungs from dust |
| Plastic Sheeting/Tarps | Keep dust and debris off surfaces |
| Painter’s Tape | Hold plastic in place, protect edges |
| Utility Knife | Cut caulk or trim |
| Putty Knife/Scraper | Scrape grout and adhesive |
| Chisel & Hammer | Get under tiles to pry them off |
| Pry Bar | Lift tiles away from the wall |
| Bucket | Hold old tiles and trash |
| Shop Vacuum | Clean up dust and debris |
| Oscillating Multi-Tool | Cut grout, scrape adhesive (very useful tool!) |
Protecting Your Kitchen Space
Dust will go everywhere when you remove tiles. Covering things up saves you a lot of cleaning later.
- Empty your counters completely. Move small appliances, decorations, and anything you don’t want to get dirty or broken.
- Cover all countertops with thick plastic sheeting or tarps. Tape the edges down with painter’s tape. Make sure the tape seals well.
- Cover the front of your cabinets, especially base cabinets below the backsplash. Dust can get into drawers and cabinets.
- Cover the floor directly below the backsplash. Extend the covering out a few feet. Dust falls.
- Turn off power to any outlets or switches in the backsplash area. It is safer to work with no power running through the wires. You can usually turn off the breaker for the kitchen circuit. Tape over the outlets with painter’s tape once the power is off. This keeps dust out of the boxes.
The Kitchen Tile Removal Process Begins
Now that you are ready, you can start the actual work. The kitchen tile removal process involves several steps. Start at one end and work your way across.
Removing Trim and Fixtures
Sometimes, there is trim around the backsplash. This might be wood, tile edge pieces, or other decorative bits. Remove these first if they are there. A utility knife can cut caulk or paint lines. A small pry bar can gently lift trim away.
Also, if there are any light fixtures or outlet covers on the backsplash, take them off. Remember you turned the power off first. Keep screws and covers in a safe place, like a small baggie.
Dealing with Grout: The First Barrier
The grout between the tiles holds them together. You need to remove some grout to get tiles off. This makes it easier to pry under them. It also helps prevent damage to the wall if the tiles are less tightly stuck to each other. This step is removing grout from backsplash.
- You can use a grout saw. This is a hand tool with a rough blade. You rub it back and forth along the grout lines.
- An oscillating multi-tool with a grout removal blade is much faster. It vibrates quickly to grind away the grout.
- Focus on the grout around the first few tiles you plan to remove. You don’t need to remove all the grout from the whole backsplash at once.
- Remove grout along the top edge where the backsplash meets the upper wall or cabinets. Also, remove grout along the bottom edge where it meets the counter. This helps break the seal.
- Work carefully. Don’t press too hard into the wall behind the grout. The wall is likely drywall, which is soft.
Removing the grout makes it easier to get your tools behind the tiles. It weakens the overall hold of the tile sheet.
Prying Off the Tiles
This is the main part of how to demo kitchen backsplash. Once the grout is loosened, you can start taking off the tiles. This is where you will use your chisel, hammer, and pry bar. This is how to pry off backsplash tile.
Starting the Removal
- Pick a starting point. An edge or corner is often easiest. If there is a tile that is already cracked or loose, start there.
- Put on your safety glasses and gloves.
- Place the tip of a wide chisel against the wall right behind a tile edge. Angle it slightly towards the wall, not straight in. You want to get under the tile, not just hit it from the side.
- Gently tap the end of the chisel with a hammer. You should feel the chisel starting to go behind the tile.
- Work the chisel along the edge of the tile. The goal is to break the bond between the tile and the adhesive on the wall.
- Don’t use too much force right away. Too much force can damage the drywall behind the tiles.
Prying Techniques
- Once you can get the chisel partly under a tile, you might switch to a scraper or a small pry bar.
- Slide the pry bar or scraper under the tile as far as you can.
- Gently lever the tool to lift the tile away from the wall. The tile might pop off in one piece. More often, it will break.
- Continue working your way along the row of tiles. Get under each tile and pry it off.
- Put the removed tiles and debris into your bucket right away. This keeps the area tidy and reduces mess.
- Some tiles will be harder to remove than others. They might be stuck with more adhesive or mortar. Be patient and keep working the tool behind the tile.
- For tough spots, you might need to break the tile more deliberately to get pieces off. Use the hammer and chisel to carefully break the tile face. Then, remove the smaller pieces. Be careful of sharp edges.
Different Tile Types: Ceramic and Subway
The process is much the same for removing ceramic tile backsplash as it is for other types like glass or stone. Removing subway tile backsplash follows the same steps. Subway tiles are often ceramic or glass and are just a specific shape.
The main difference might be the thickness of the tile or the type of adhesive used. Ceramic tiles are common and usually come off fairly predictably. Glass tiles can shatter easily, so wear good gloves and eye protection. Stone tiles might be thicker or heavier.
The key is always to try to get behind the tile and break the adhesive bond. The less you fight against the adhesive by just pulling outwards, the less damage you will do to the wall.
Dealing with the Adhesive and Wall Surface
After the tiles are off, you will see the wall underneath. It will likely have old adhesive or mortar stuck to it. There might also be damaged areas in the drywall.
Removing Old Adhesive or Mortar
You need a smooth surface for putting up a new backsplash or preparing the wall. Removing the old adhesive is important.
- Use a scraper or putty knife to scrape off as much of the old adhesive or mortar as you can. Hold the scraper at a low angle to the wall. Push firmly.
- The best tool for removing tile adhesive varies based on the adhesive type and how hard it is. For softer adhesives, a good sharp scraper might be enough. For harder, cement-based mortars, you might need more power.
- An oscillating multi-tool with a scraping attachment works very well for removing stubborn adhesive. It vibrates quickly to chip it away.
- You can also use a random orbital sander with a coarse grit sandpaper (like 50 or 60 grit) to grind away adhesive. Be careful not to sand through the drywall paper layer. This creates a lot of dust, so use a good mask and ventilation.
- Some very hard adhesives might need a chipping hammer or grinder, but these tools can easily damage drywall. For typical kitchen backsplashes on drywall, try scraping, the multi-tool, or sanding first.
The goal is to get the wall as flat and clean as possible. It doesn’t have to be perfect, but remove any bumps or ridges of old adhesive that would stop a new tile from lying flat.
Assessing and Repairing Wall Damage
Removing tiles almost always causes some damage to the drywall surface. This is normal. The paper face of the drywall might tear. Small chunks of the drywall core might come off.
- Look closely at the wall surface. Note where the paper is torn or where there are holes or dents.
- You need to repair drywall after backsplash removal. This makes a smooth base for your new backsplash or paint.
- Scrape away any loose paper or debris from damaged spots.
- For torn paper, you can apply a thin coat of drywall joint compound (mud) directly over the torn paper edge to stick it down and seal it. Some people also use a special primer like a stain-blocking primer over torn paper to seal it before applying mud.
- For small dents and holes, use a putty knife to apply drywall joint compound. Press the mud into the hole and smooth it flat with the wall surface.
- For larger holes, you might need a drywall patch kit. These often involve a mesh or solid patch that you stick over the hole, then cover with joint compound.
- Apply thin layers of joint compound. Let each layer dry completely according to the product instructions. Drying time can take several hours.
- Once dry, lightly sand the patched area with fine-grit sandpaper (like 150 grit or higher) until it is smooth and level with the rest of the wall.
- You might need to apply a second or third thin coat of joint compound and sand again to get a perfectly smooth finish.
- Wipe away sanding dust with a damp cloth.
A smooth, flat wall is needed for installing new tile. If you plan to paint the wall instead of tiling, the repair needs to be perfect and then primed before painting.
Cleaning Up and Next Steps
After all the tiles and adhesive are removed and the wall is repaired, it’s time for cleaning and planning what comes next.
Final Clean Up
- Use your shop vacuum to vacuum up all the dust and debris from the walls, counters, and floor.
- Carefully roll up the plastic sheeting and tarps. Try to keep the dust contained inside as you roll them up.
- Take the rolled-up plastic and the bucket of old tiles and adhesive out of the kitchen. Dispose of them properly.
- Wipe down counters and any other surfaces with a damp cloth to remove any remaining dust.
- Clean your tools. Scrape off any adhesive or mud before it hardens completely.
What to Do After Removing Backsplash
So, what to do after removing backsplash? You have a few options:
- Install a New Tile Backsplash: This is a popular choice. The repaired wall gives you a good base. You will need to plan your new tile layout, get supplies (tile, thinset mortar, grout), and install it.
- Paint the Wall: If you want a cleaner, simpler look, you can paint the wall area where the backsplash was. Make sure your wall repairs are very smooth. You will need to prime the repaired areas (and possibly the whole wall for an even color) before painting.
- Install a Different Type of Backsplash: You could install peel-and-stick tiles, a solid panel backsplash (like glass, metal, or laminate), or wood panels. The preparation needed depends on the new material. Usually, a smooth, clean wall is best.
Before doing anything else, make sure the wall is truly ready. It should be smooth, clean, and dry. If you repaired drywall, make sure the joint compound is fully cured.
Advanced Tips and Potential Problems
Sometimes, removing a backsplash can have challenges. Knowing what to look for helps.
Older Homes and Materials
In older homes, the backsplash might be set in thick mortar on metal lath, not just adhesive on drywall. This is a much harder removal job. You will need heavier tools like a jackhammer or chipping hammer. This type of removal creates much more dust and debris. It is also more likely to cause big damage to the wall structure behind it. In these cases, you might consider hiring a professional.
Dealing with Stubborn Adhesive
If the adhesive is really hard to remove, try different tools. A heat gun on a low setting can sometimes soften certain types of adhesive. Be very careful if using heat near drywall, as you can damage it or even cause a fire. Only use heat as a last resort and with extreme caution. Chemical adhesive removers also exist, but they can be messy, have strong fumes, and might damage the wall surface. Always test a small area first and use lots of ventilation.
Preventing Excessive Drywall Damage
While some damage is expected, you want to avoid large holes or ripping off huge sections of drywall paper.
- Score the grout lines with a utility knife before starting. This helps tiles break away from each other rather than pulling the wall paper off.
- Use wide, flat tools like scrapers and wide chisels. They spread the force out more.
- Angle your tools behind the tile. Don’t try to pry straight out from the front.
- Work slowly and patiently. If a tile is not coming off easily, try getting under it from a different angle or removing more grout around it. Don’t just force it.
Frequently Asked Questions About Backsplash Removal
Removing a kitchen backsplash brings up common questions. Here are answers to some of them.
H4: How long does it take to remove a kitchen backsplash?
The time needed depends on the size of the backsplash, the type of tile, the adhesive used, and your skill level. A small, simple backsplash might take a few hours. A large backsplash with difficult tile or adhesive could take a full day or more, not counting wall repair time.
H4: Can I tile over the old backsplash?
In some cases, yes, but it is usually not the best way. Tiling over an old backsplash makes the new one stick out further. It can also fail if the old backsplash is not well attached or is uneven. Removing the old backsplash gives you a flat, clean surface, which is the best base for new tile.
H4: Do I need to turn off the power?
Yes, absolutely. You must turn off the power to any outlets or switches in the backsplash area. Working near electrical boxes with metal tools is very dangerous if the power is on. Find the right breaker in your home’s electrical panel and turn it off. Test the outlets to make sure they are off before you start working.
H4: What kind of mess should I expect?
Expect a lot of dust and debris. Removing grout and adhesive creates fine dust. Breaking tiles creates sharp pieces. This is why protecting your counters, cabinets, and floors is so important. Good clean-up as you go helps manage the mess.
H4: How do I protect my countertop?
Use thick tarps or plastic sheeting. Lay them over the entire countertop area. Tape the edges securely with painter’s tape to the cabinets or wall below the backsplash line. This stops debris from scratching or falling onto the counter surface. If you have delicate counters like granite or quartz, be extra careful when scraping or using tools near the surface.
H4: Is removing backsplash hard on the walls?
Yes, it almost always causes some surface damage to drywall. The adhesive is strong and often pulls off the paper face of the drywall or small pieces of the core when tiles are removed. This is normal and expected. The damage can be fixed with drywall joint compound, as described in the repair steps.
H4: How much does it cost to remove a backsplash?
If you do it yourself, the cost is low. You only pay for tools (if you don’t have them) and repair materials (drywall compound, sandpaper). If you hire someone, the cost varies a lot by location and the size/difficulty of the job. It could range from a few hundred dollars to over a thousand dollars.
H4: What is the best way to remove thinset mortar?
Thinset mortar is harder than typical tile adhesive. A sturdy scraper or chisel can work for smaller bits. An oscillating multi-tool with a scraper blade is very effective. For large areas of thick, hard thinset, a concrete grinder with a diamond cup wheel is the fastest way, but it creates extreme dust and should only be used with heavy-duty respirators and dust collection. For most DIY kitchen backsplashes, physical scraping and possibly an oscillating tool are sufficient.
Final Thoughts on Removing Your Kitchen Backsplash
Taking out your old kitchen backsplash is a home improvement job you can likely handle. It takes patience, the right tools, and care. The steps involve getting your space ready, removing the grout, and then carefully prying off the tiles. Expect some work to clean the wall and fix any spots before you put up something new. By following these steps, you can successfully remove your backsplash and get your kitchen ready for a fresh, new look. Remember safety first, always.