Experiencing a kitchenaid dishwasher not draining can be frustrating. Can you drain a Kitchenaid dishwasher manually? Yes, you can. This guide will walk you through how to drain your Kitchenaid dishwasher safely and efficiently, whether you’re facing a minor backup or preparing for maintenance. We’ll cover common reasons for draining issues, simple solutions, and essential kitchenaid dishwasher maintenance tips to prevent future problems.
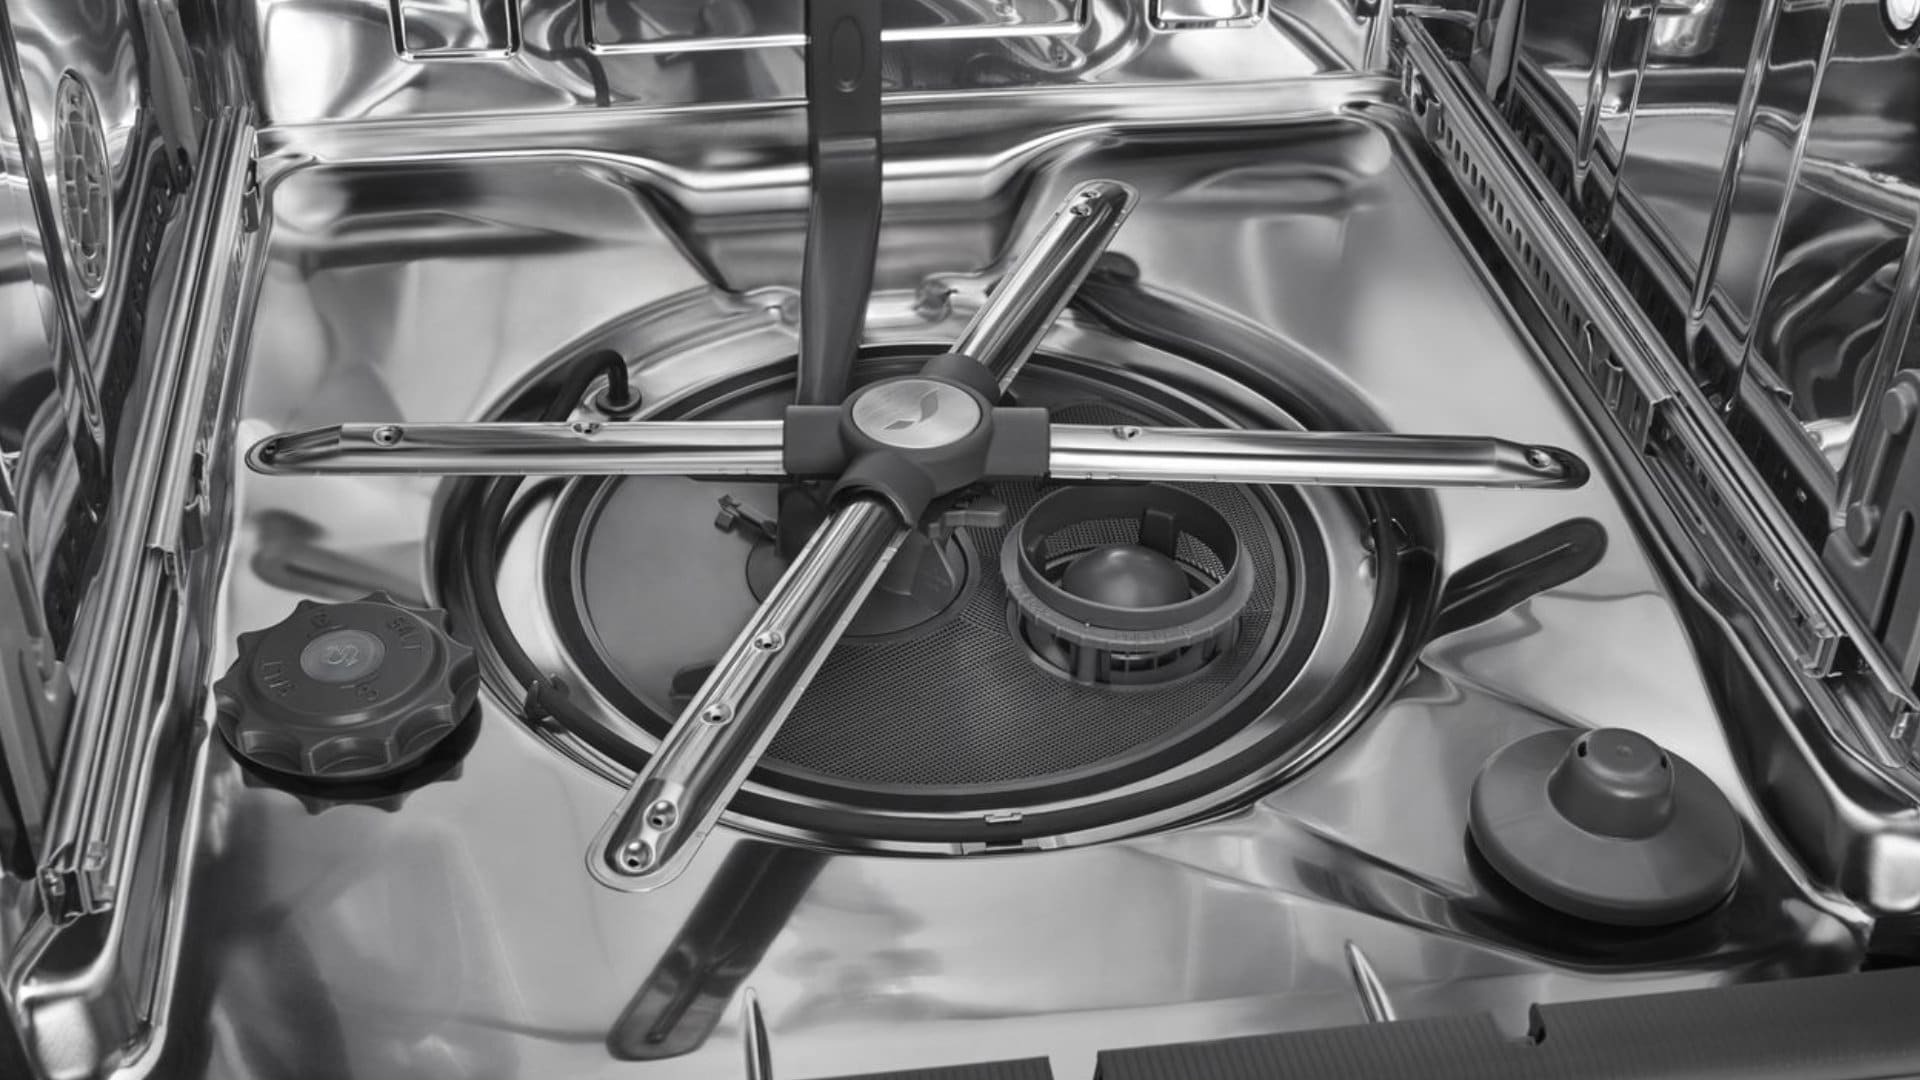
Image Source: flamingoappliance.com
Why Isn’t My Kitchenaid Dishwasher Draining?
Several factors can contribute to kitchenaid dishwasher draining issues. When water remains in the bottom of your dishwasher after a cycle, it’s a clear sign something is amiss. Let’s explore the most frequent culprits:
Common Causes of Drainage Problems
- Clogged Filter: This is by far the most common reason. Food debris, labels, and other gunk can accumulate in the dishwasher’s filter, blocking the flow of water.
- Kinked or Blocked Drain Hose: The kitchenaid dishwasher hose that carries water away can become kinked, twisted, or blocked internally with debris.
- Faulty Drain Pump: The kitchenaid dishwasher pump is responsible for expelling the water. If it’s malfunctioning or clogged, water won’t be removed.
- Blocked Air Gap or Garbage Disposal: If your dishwasher drains into a garbage disposal, a clog in the disposal or the air gap (a small device often found on the sink’s backsplash) can prevent proper drainage.
- Issues with Sink Plumbing: Sometimes, the problem isn’t with the dishwasher itself but with the kitchenaid dishwasher plumbing connected to your sink’s drain.
Step-by-Step Guide to Draining Your Kitchenaid Dishwasher
Before you start, gather these items:
- Towels (plenty!)
- A bucket or shallow pan
- Screwdriver (usually Phillips head)
- Pliers (optional)
- Gloves (recommended)
Safely Removing Standing Water
The first step in addressing kitchenaid dishwasher draining issues is to remove water kitchenaid dishwasher has retained.
Step 1: Disconnect Power
Safety is paramount. Before doing anything else, ensure the dishwasher is unplugged or the circuit breaker controlling the dishwasher is turned off. This prevents any accidental starts and potential electric shock.
Step 2: Access the Drain Area
You’ll typically need to remove the lower access panel of your dishwasher. This panel is usually held in place by screws at the bottom front of the unit.
Step 3: Locate the Drain Hose Connection
Once the panel is removed, look for where the kitchenaid dishwasher hose connects to the dishwasher’s pump or the drain outlet. It’s usually a flexible rubber hose.
Step 4: Prepare for Water Release
Place towels and a shallow pan or bucket directly beneath the hose connection point. This will catch the water as it drains.
Step 5: Disconnect the Hose (The Manual Drain)
- You might see a clamp holding the hose to the dishwasher. Use a screwdriver to loosen this clamp.
- Carefully pull the hose off the connection point. Be prepared for water to flow out immediately.
- Alternatively, some models have a drain filter located at the bottom of the tub. Removing this filter can also allow water to drain out. Consult your owner’s manual for its exact location.
Step 6: Collect the Water
Let the water drain into your prepared pan or bucket. You may need to empty the pan several times if there’s a significant amount of water.
Step 7: Reconnect and Test
Once most of the water has drained, carefully reattach the hose and secure the clamp. You can then restore power and run a short rinse cycle to check for leaks and proper drainage.
Troubleshooting Kitchenaid Dishwasher Drainage Problems
If manually draining the water is just a temporary fix, or if you want to troubleshoot kitchenaid dishwasher drainage more thoroughly, here’s what to check:
Checking the Kitchenaid Dishwasher Filter
A dirty filter is a frequent cause of a kitchenaid dishwasher not draining.
How to Clean Your Kitchenaid Dishwasher Filter
- Locate the Filter: Most Kitchenaid dishwashers have a filter system at the bottom of the dishwasher tub, beneath the lower spray arm. It usually consists of a coarse filter and a fine mesh filter.
- Remove the Filter: Twist and lift the filter assembly. It might come out as one piece or in two separate parts.
- Clean Thoroughly: Rinse the filter components under running water. Use a soft brush (an old toothbrush works well) to gently scrub away any stuck-on food particles or debris.
- Inspect the Filter Housing: While the filter is out, check the area where it sits for any obstructions.
- Reassemble: Place the clean filter back into its housing, ensuring it’s properly seated and locked.
Table: Filter Cleaning Frequency
| Use Level | Recommended Cleaning Frequency |
|---|---|
| Light Use | Every 1-2 months |
| Moderate Use | Monthly |
| Heavy Use | Every 2 weeks |
| Visible Debris | Clean immediately |
Inspecting the Kitchenaid Dishwasher Hose
The kitchenaid dishwasher hose can be a point of failure.
Steps to Inspect the Drain Hose
- Access the Hose: You’ll need to pull the dishwasher out from under the counter slightly to get a good look at the hose behind it. Ensure power is off!
- Check for Kinks: Carefully examine the entire length of the drain hose for any sharp bends or kinks that could restrict water flow. Gently straighten any kinks.
- Look for Blockages: If the hose is accessible and you suspect a blockage, you can try disconnecting it from the wall drain or garbage disposal connection and blowing through it, or using a plumbing snake. Be prepared for potential water to come out when disconnecting from the wall.
- Check the Air Gap: If your dishwasher is connected to an air gap (a small cylinder on your sink or countertop), remove its cover and clean out any debris.
- Garbage Disposal Connection: If your dishwasher drains into a garbage disposal, ensure the disposal itself is clear. Sometimes, a knock-out plug inside the disposal’s dishwasher inlet port needs to be removed when the dishwasher is first installed – if it wasn’t, this will cause drainage issues.
Examining the Kitchenaid Dishwasher Pump
The kitchenaid dishwasher pump is the workhorse of the draining system.
Diagnosing Pump Issues
- Listen for Sounds: When the dishwasher is supposed to be draining, can you hear the pump motor running? If you hear humming but no draining, the pump might be jammed. If you hear nothing, the pump motor might have failed.
- Check for Debris: Sometimes, small objects like glass shards or cherry pits can get lodged in the pump impeller, preventing it from spinning. Accessing the pump usually involves removing the lower spray arm and filter, and then potentially removing a cover plate to reach the pump. This can be more involved and may require consulting your specific model’s manual or a professional.
Reviewing Kitchenaid Dishwasher Plumbing
The kitchenaid dishwasher plumbing refers to how the dishwasher connects to your home’s drain system.
Common Plumbing Bottlenecks
- Sink Drain Clog: If your sink is also draining slowly, the clog is likely in your main sink plumbing, affecting the dishwasher as well.
- Improper Connection: Ensure the drain hose has a “high loop” or is connected to an air gap. This prevents dirty sink water from backing up into the dishwasher. The high loop is typically achieved by securing the hose up as high as possible under the countertop before it connects to the drain.
How to Remove Water Kitchenaid Dishwasher Manually (When All Else Fails)
If your dishwasher is full of water and the drain isn’t working, and you need to remove water kitchenaid dishwasher quickly, here are a few methods:
Method 1: Using the Drain Hose (Revisited)
This is the most common and often easiest way to drain the bulk of the water.
- Disconnect Power: Crucial first step.
- Access the Hose: Lower front panel off.
- Position Container: Place towels and a wide, shallow pan or bucket under the connection point of the drain hose.
- Disconnect Hose: Loosen the clamp and pull the hose off.
- Drain Slowly: Guide the hose into the container. If the water level is high, you might need to drain it into a mop bucket or directly into the sink if it’s not clogged.
- Empty and Reconnect: Once drained, secure the hose and replace the panel.
Method 2: Using a Wet/Dry Vacuum
This is an effective way to suck out residual water.
- Prepare Vacuum: Ensure your wet/dry vacuum is set up for liquid pickup.
- Access Drain Area: With power off and the lower panel removed, locate the drain pump outlet or the end of the drain hose.
- Create a Seal: Place the vacuum hose end firmly against the drain outlet or the disconnected end of the drain hose. You might need to use a towel or some tape to create a better seal.
- Vacuum Water: Turn on the vacuum and suck out as much water as possible from the tub.
Method 3: Siphoning with a Hose
This method uses gravity to drain the water.
- Get a Hose: Use a flexible hose (like a garden hose, but ensure it’s clean).
- Submerge One End: Place one end of the hose into the standing water in the dishwasher tub.
- Create Suction: Put the other end of the hose in your mouth and gently suck on it until water starts flowing. DO NOT SWALLOW THE WATER.
- Direct Flow: Once water is siphoning, quickly remove your mouth and place the end of the hose into a bucket or drain.
- Monitor: Keep an eye on the hose to ensure it doesn’t fall out of the dishwasher or the collection container.
Important Safety Note: Always ensure the power is disconnected before attempting any of these manual draining methods.
Preventative Maintenance for Your Kitchenaid Dishwasher
Regular kitchenaid dishwasher maintenance is key to avoiding kitchenaid dishwasher draining issues.
Tips for a Healthy Dishwasher
- Scrape Plates: Always scrape off large food particles before loading dishes. While the filter catches smaller bits, large chunks can clog the system more quickly.
- Clean the Filter Regularly: As mentioned, this is crucial. Make it a habit to clean your kitchenaid dishwasher filter monthly, or more often if you notice any performance issues.
- Run Hot Water: Before starting a cycle, run hot water at your sink. This ensures the dishwasher fills with hot water from the start, which helps break down grease and prevent buildup in the drain line.
- Use a Dishwasher Cleaner: Periodically use a dishwasher cleaning product to remove built-up grease and mineral deposits from the pump and hoses.
- Check for Kinks: Occasionally, pull out your dishwasher slightly to ensure the drain hose isn’t kinked or crushed.
- Garbage Disposal Maintenance: If connected, run the garbage disposal regularly and flush it with cold water to keep the dishwasher drain line clear.
When to Call a Professional
While many kitchenaid dishwasher draining issues can be resolved with DIY steps, there are times when professional help is needed.
Signs You Need Expert Assistance
- Persistent Drainage Problems: If you’ve tried all the troubleshooting steps and your dishwasher still isn’t draining, there might be a more significant issue with the pump, control board, or internal plumbing.
- Water Leaks: If you notice water leaking from the unit, especially during the draining cycle, it could indicate a problem with a seal or hose connection that requires expert repair.
- Unusual Noises: While some pump noises are normal, grinding, rattling, or loud banging sounds could point to a serious pump malfunction.
- Electrical Issues: If you suspect any electrical problems or are uncomfortable working with electrical components, it’s best to leave it to a qualified technician.
- Complex Repairs: Tasks like replacing the drain pump or dealing with internal hose routing are often best left to professionals.
Frequently Asked Questions (FAQ)
Q1: How often should I clean my Kitchenaid dishwasher filter?
A1: It’s recommended to clean your kitchenaid dishwasher filter at least once a month. If you frequently run your dishwasher or notice food debris accumulating quickly, cleaning it every two weeks is advisable.
Q2: My Kitchenaid dishwasher is making a humming noise but not draining. What could be wrong?
A2: This typically indicates that the kitchenaid dishwasher pump is receiving power but is jammed. Debris, such as glass shards or pits, might be obstructing the impeller. You’ll need to access and clean the pump area.
Q3: Can I connect my Kitchenaid dishwasher drain hose directly to the sink drain without an air gap?
A3: While some installations might bypass an air gap, it’s highly recommended for proper sanitation and to prevent dirty sink water from entering the dishwasher. The kitchenaid dishwasher plumbing code often requires an air gap or a high loop to prevent backflow.
Q4: How can I tell if the problem is with my garbage disposal and not the dishwasher?
A4: If your sink also drains slowly or not at all, the issue is likely with the garbage disposal or sink plumbing. Run the garbage disposal and flush it with cold water. If that doesn’t resolve the sink’s drainage, the clog is there.
Q5: Is it safe to use chemicals to clear a clogged dishwasher drain hose?
A5: It’s generally not recommended to use harsh chemical drain cleaners in a dishwasher. They can damage internal components and hoses. Mechanical cleaning methods or specialized dishwasher cleaning tablets are safer alternatives.
By following these steps and kitchenaid dishwasher maintenance tips, you can effectively drain your dishwasher and keep it running smoothly, avoiding those frustrating kitchenaid dishwasher not draining moments.