Can I change the color of my kitchen cabinets myself? Yes, you absolutely can change the color of your kitchen cabinets yourself! This DIY guide will walk you through the entire process, from choosing the perfect new shade to applying the final coat of paint or stain. It’s a fantastic way to refresh your kitchen’s look without the hefty cost of full replacement. This comprehensive guide covers everything you need to know for a successful DIY cabinet makeover.
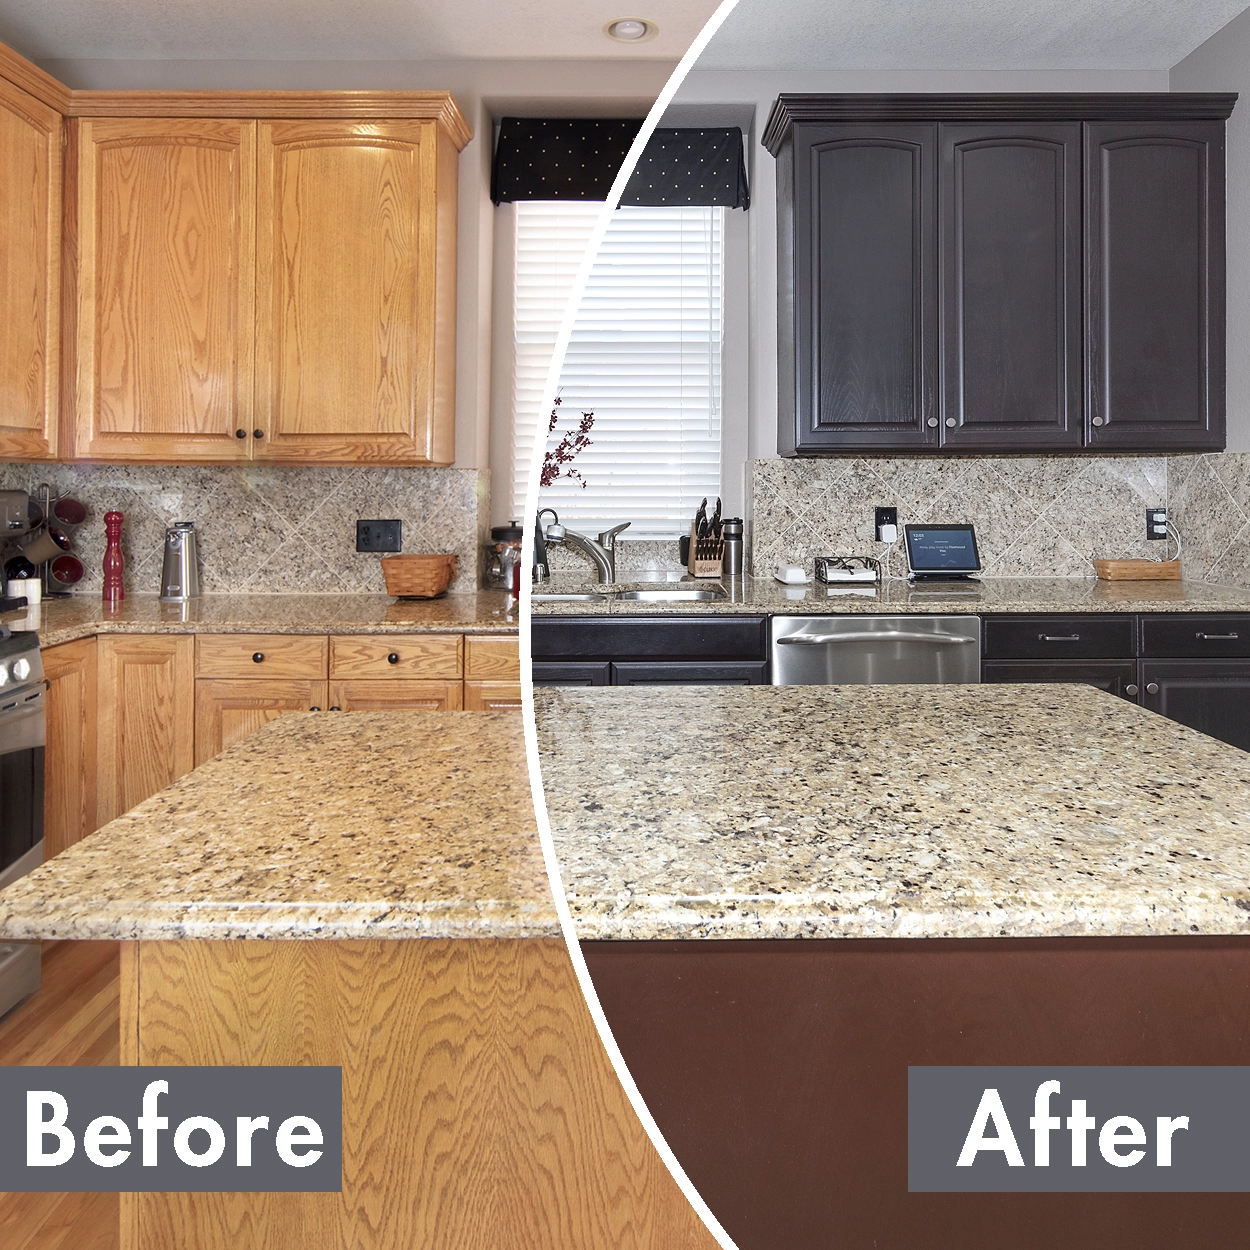
Image Source: www.nhance.com
Dreaming Up New Cabinet Color Ideas
The first step in any DIY cabinet makeover is deciding on your new color. This is where you can really let your personality shine! Consider your kitchen’s overall style, the colors of your countertops and backsplash, and the amount of natural light you get.
Popular Cabinet Color Trends
- Timeless Whites and Off-Whites: Crisp white, creamy ivory, or soft greige are perennially popular for a reason. They brighten spaces and offer a clean, classic look that pairs well with almost any decor.
- Earthy Greens: Sage green, olive green, or a muted forest green can bring a sense of calm and nature into your kitchen. They work wonderfully with wood tones and natural materials.
- Bold Blues: Deep navy, classic royal blue, or a softer sky blue can add a touch of sophistication and personality. Blue cabinets can be surprisingly versatile, from coastal to modern farmhouse.
- Warm Neutrals: Taupe, beige, and warm grays offer a cozy and inviting feel. They provide a sophisticated backdrop for bolder accent colors.
- Dramatic Blacks and Grays: For a modern and chic look, consider charcoal gray or deep black. These colors make a statement and can highlight other kitchen features beautifully.
- Natural Wood Tones: If you have older cabinets, cabinet staining methods can reveal beautiful wood grain. Light stains can modernize, while darker stains offer a rich, traditional feel.
Factors to Consider When Choosing a Color
- Kitchen Size: Lighter colors can make a small kitchen feel larger and airier. Darker colors can add drama and coziness to larger spaces.
- Lighting: Consider both natural and artificial light. A color that looks great in daylight might appear different under warm kitchen lights. Test samples!
- Existing Elements: Your countertops, backsplash, flooring, and appliance finishes should all be considered. The new cabinet color needs to complement these existing features.
- Style: Are you going for modern, farmhouse, traditional, minimalist, or eclectic? Your color choice should align with your desired aesthetic.
- Durability and Maintenance: Lighter colors can show dirt and scuffs more easily. Darker colors might show dust and fingerprints. Consider how much cleaning you’re willing to do.
Gathering Your Supplies: What You Need for Cabinet Painting
Having the right tools and materials is crucial for a professional-looking finish. Investing in quality supplies will make the process smoother and yield better results.
Essential Tools and Materials
- Screwdriver: To remove cabinet doors and hardware.
- Painter’s Tape: High-quality tape is essential for clean lines.
- Drop Cloths or Plastic Sheeting: To protect your floors and surrounding areas.
- Sanding Sponges or Sandpaper: Various grits (e.g., 120, 180, 220) for preparation.
- Degreaser or Kitchen Cleaner: To thoroughly clean cabinets.
- TSP (Trisodium Phosphate) or TSP Substitute: For heavy-duty cleaning.
- Priming: High-quality primer specifically designed for cabinets or wood.
- Paint or Stain: The best paint for kitchen cabinets is typically a durable acrylic enamel or a specialized cabinet paint. For staining, choose a wood stain.
- Brushes: High-quality synthetic brushes for cutting in edges and details.
- Rollers: Small foam rollers or high-density microfiber rollers for smooth surfaces.
- Paint Sprayer (Optional but Recommended): For the smoothest, most professional finish.
- Stir Sticks: To mix paint and stain thoroughly.
- Rags or Tack Cloths: For wiping away dust.
- Gloves: To protect your hands.
- Safety Glasses: Especially if spray painting.
- Masks: A good quality dust mask for sanding and a respirator for spray painting.
- Work Surface: Sawhorses or a clean, flat area for drying.
Mastering Cabinet Preparation for Paint
This is arguably the most important step in achieving a durable and beautiful finish. Skipping or rushing cabinet preparation for paint will lead to peeling, chipping, and an unprofessional look.
Step-by-Step Preparation Process
- Empty and Remove Doors and Drawers: Take everything out of your cabinets. Carefully remove all doors and drawers. It’s a good idea to label them with painter’s tape as you remove them (e.g., “Upper Left,” “Drawer 2”) to ensure they go back in the right place.
- Remove Hardware: Unscrew all hinges, knobs, and pulls. Store them in a safe place, perhaps in a labeled baggie.
- Clean Thoroughly: This is crucial! Kitchen cabinets are exposed to grease and grime. Use a good degreaser or a TSP solution to wash down every surface. Rinse thoroughly with clean water and allow to dry completely.
-
Sand Everything:
- Light Sanding: Use 120-grit sandpaper or a sanding sponge to scuff up the existing finish. You’re not trying to remove the old finish, just to create a surface the new paint or primer can adhere to.
- Sanding Edges and Corners: Pay attention to the edges and any ornate details.
- Drawer Fronts and Doors: Sand both the front and back of doors and drawer fronts.
- Important: After sanding, wipe down all surfaces with a tack cloth or a slightly damp microfiber cloth to remove all dust. Dust is the enemy of a smooth finish.
-
Repair Imperfections: Fill any holes, dents, or scratches with wood filler. Let it dry completely, then sand smooth with fine-grit sandpaper (around 220 grit). Wipe away dust again.
- Degrease Again (Optional but Recommended): After sanding and filling, a final wipe down with a clean cloth dampened with mineral spirits can remove any lingering oils or residues, especially from your hands.
Priming for Perfection: Why and How
Primer acts as a bridge between your old cabinet surface and your new paint. It helps with adhesion, blocks stains (like tannins from wood), and ensures a more even color.
Choosing the Right Primer
- Oil-Based Primer: Excellent for blocking stains and providing a strong base, especially on wood that might bleed through. However, it can have strong fumes and requires mineral spirits for cleanup.
- Water-Based (Latex/Acrylic) Primer: Easier to use and clean up, with lower VOCs. Many high-quality water-based primers today offer excellent stain-blocking properties. Look for primers specifically labeled for cabinets or high-adhesion primers.
- Shellac-Based Primer: The ultimate stain blocker, perfect for woods like oak or maple that are prone to bleeding. It dries very quickly but can be a bit trickier to work with due to its fast drying time and specific cleanup requirements.
Application Tips
- Apply Thin Coats: Don’t try to get full coverage in one go. Apply thin, even coats.
- Brush or Roll: Use a quality brush for edges and corners, and a foam roller for larger flat surfaces.
- Allow Proper Drying Time: Follow the manufacturer’s instructions for drying time between coats.
- Light Sanding Between Coats: Once the primer is completely dry, lightly sand with 220-grit sandpaper. This smooths out any imperfections and creates an even better surface for the paint. Wipe away dust with a tack cloth.
Exploring Cabinet Painting Techniques
The method you choose for applying paint will significantly impact the final look. Each technique has its pros and cons.
Brush and Roller Method
This is the most common DIY approach.
- Pros: Accessible, requires less specialized equipment, good control.
- Cons: Can be time-consuming, may leave brush strokes or roller marks if not done carefully.
Technique for Brushing:
* Use a high-quality synthetic brush (for latex/acrylic paint) or a natural bristle brush (for oil-based paint).
* Load the brush with paint, but don’t overload it.
* Apply paint in the direction of the wood grain.
* For doors and flat surfaces, use long, even strokes.
* Use the brush to “cut in” the edges and details of the cabinet frames and doors.
Technique for Rolling:
* Use a small foam roller or a high-density microfiber roller. These provide the smoothest finish.
* Dip the roller in paint, then roll it onto a scrap piece of cardboard or a roller tray to distribute the paint evenly and remove excess.
* Roll onto the cabinet surface in a “W” or “M” pattern, then “back-roll” over the area without reloading the roller to smooth out the paint.
* Avoid applying too much pressure, which can create texture.
Spray Painting Kitchen Cabinets
Spray painting kitchen cabinets offers the most professional, factory-like finish.
- Pros: Extremely smooth finish, no brush strokes or roller marks, efficient for large jobs.
- Cons: Requires a significant upfront investment in a sprayer, needs extensive masking and ventilation, can be messy if not done properly, requires practice.
Steps for Spray Painting:
1. Masking is Key: This is non-negotiable. Cover everything you don’t want painted with plastic sheeting and painter’s tape. This includes walls, ceilings, floors, countertops, appliances, and even the inside of your cabinets if you’re not painting them.
2. Choose Your Sprayer: Airless sprayers are powerful but can be overkill for cabinets. HVLP (High Volume, Low Pressure) sprayers are ideal for cabinets as they provide better control and less overspray.
3. Thin Your Paint: Most paints need to be thinned to the correct viscosity for spraying. Follow the paint and sprayer manufacturer’s recommendations.
4. Practice: Before spraying your actual cabinets, practice on cardboard or scrap wood to get a feel for the spray pattern, distance, and trigger control.
5. Apply Thin, Even Coats: Hold the sprayer a consistent distance (usually 10-12 inches) from the surface. Move in consistent, overlapping strokes.
6. Back-Roll (Optional but Recommended): Some professionals lightly back-roll immediately after spraying to ensure adhesion and an ultra-smooth finish, especially on doors.
7. Ventilation: Ensure excellent ventilation in your workspace.
Selecting the Best Paint for Kitchen Cabinets
The paint you choose needs to withstand daily wear and tear, moisture, and cleaning.
Types of Paint
- Acrylic Enamel: A popular choice for cabinets. It’s durable, flexible, and cleans up with water. Look for high-quality acrylic enamels labeled for cabinets or trim.
- Latex Paint: While many latex paints are good, not all are suitable for the high-traffic environment of a kitchen. Ensure it’s a premium acrylic latex.
- Alkyd (Oil-Based) Paint: Offers a very hard, durable finish and excellent leveling properties (fewer brush marks). However, it has strong fumes, requires mineral spirits for cleanup, and can yellow over time.
- Cabinet-Specific Paints: Many brands offer paints formulated specifically for kitchen cabinets. These often have superior durability and adhesion.
Key Paint Features to Look For
- Durability and Hardness: The paint should be able to withstand scuffs, chips, and frequent cleaning.
- Adhesion: Crucial for preventing peeling. A good primer helps, but the paint itself needs to adhere well.
- Washability: Kitchen cabinets need to be cleaned regularly. The paint should be able to be wiped down without damaging the finish.
- Sheen:
- Satin: A good all-around choice. It offers a subtle sheen, hides imperfections well, and is reasonably durable and washable.
- Semi-Gloss: More durable and easier to clean than satin, but the higher sheen can highlight imperfections.
- Gloss: The most durable and easiest to clean, but will show every flaw in the surface. Generally too shiny for most kitchen cabinets.
- Matte/Flat: Not recommended for kitchen cabinets as they are harder to clean and less durable.
Cabinet Staining Methods: A Different Approach
If you prefer a natural wood look or want to update the color of existing wood cabinets, cabinet staining methods are the way to go.
When to Stain vs. Paint
- Choose Stain If: You have beautiful wood grain you want to showcase, you want a more natural look, or you’re aiming for a specific wood tone.
- Choose Paint If: Your cabinets are laminate or veneer, you want a bold color, or the wood grain is undesirable.
Staining Process
- Preparation is Similar to Painting: Clean, sand thoroughly, and repair any imperfections. For staining, you’ll want to sand to a finer grit (e.g., 220-320) to ensure the stain penetrates evenly.
- Apply Pre-Stain Wood Conditioner (Highly Recommended): This product evens out the wood’s porosity, preventing blotchiness, especially on woods like pine or maple. Apply it according to the manufacturer’s instructions and let it penetrate for the recommended time.
- Apply Stain:
- Method: Apply the stain with a high-quality natural bristle brush or a lint-free rag. Work in the direction of the wood grain.
- Application: Apply a liberal amount of stain and immediately wipe it off with a clean rag, again following the grain. The longer you leave the stain on, the darker it will become.
- Evenness: Work in manageable sections to ensure consistent application and wiping.
- Second Coat (Optional): For a deeper color, apply a second coat after the first has dried, repeating the application and wiping process.
- Apply Topcoat (Sealer/Varnish): Stain alone is not durable enough for kitchen cabinets. You must apply a protective topcoat.
- Types: Polyurethane (oil-based or water-based), lacquer, or varnish are common. Opt for a durable, clear finish.
- Application: Apply thin, even coats using a high-quality brush or a foam roller. Follow the manufacturer’s instructions for drying times.
- Light Sanding Between Coats: After each topcoat is dry, lightly sand with very fine-grit sandpaper (320-400 grit) to create a smooth surface for the next coat. Wipe away dust with a tack cloth.
- Number of Coats: Apply 2-3 coats of topcoat for adequate protection.
The Application Process: Painting Your Cabinets
Once preparation is complete and you’ve chosen your paint and technique, it’s time to apply the color.
Painting Cabinet Frames
- Start with Frames: It’s generally easier to paint the cabinet frames while the doors are off.
- Apply Paint: Use a brush for the edges and tight spots, and a foam roller for the larger flat areas.
- Thin Coats are Key: Apply 2-3 thin, even coats, allowing adequate drying time between each.
- Light Sanding: Lightly sand with 220-grit sandpaper between coats after the paint is fully dry. Wipe away dust with a tack cloth.
Painting Cabinet Doors and Drawer Fronts
- Work in Batches: If you have many doors, work in batches.
- Set Up a Drying Station: Lay doors flat on sawhorses or a clean, protected surface. You might want to place them on painter’s pyramids or small blocks to avoid sticking and allow paint to reach the edges.
- Paint the Backs First: It’s often easier to paint the back sides of the doors first. This allows the front side to dry undisturbed.
- Paint the Fronts: Apply your paint using your chosen method (brush/roller or spray). Again, thin coats are best.
- Allow Ample Drying Time: Doors need to dry thoroughly before reattaching. This can take 24 hours or more for the finish to harden sufficiently.
Reassembly and Finishing Touches
The final steps involve putting everything back together and adding those little details that make a big difference.
Reattaching Hardware
- Ensure Paint is Dry: Make sure the paint or stain on your doors and frames is completely dry and hardened before reattaching hardware.
- Reinstall Doors and Drawers: Carefully reattach the doors and drawer fronts using your original hardware or new pieces.
- Adjust Hinges: You may need to adjust hinges to ensure doors hang straight and close properly.
Cabinet Hardware Updates
Updating your hardware is an easy yet impactful way to enhance the new look of your cabinets.
- Knobs and Pulls: Replacing old knobs and pulls is a simple DIY task.
- Style Coordination: Choose hardware that complements your new cabinet color and the overall kitchen style.
- Placement: If you’re changing the size of the hardware, you might need to fill the old holes and drill new ones. Measure carefully!
Cabinet Restoration Tips for Long-Lasting Results
These tips can help ensure your newly painted cabinets look great for years to come.
- Patience is Key: Don’t rush the drying times between coats. This is crucial for a durable finish.
- Clean Gently: Avoid abrasive cleaners or scrubbing pads that can scratch the paint. Use a soft cloth and mild detergent.
- Touch-Ups: Keep a small amount of your paint handy for any minor touch-ups that may be needed over time.
- Ventilation During Drying: Ensure good ventilation in your kitchen during the drying process to help the paint cure properly and to dissipate any lingering odors.
- Protect High-Wear Areas: Consider a spray-on ceramic coating for added durability on doors that get a lot of use, though this is an advanced step.
- Cabinet Color Ideas Revisited: If you’re unsure about a bold color, start with a complementary neutral. You can always repaint later if your taste changes.
- Cabinet Refinishing is Rewarding: The process of kitchen cabinet refinishing can seem daunting, but the results are incredibly satisfying.
Frequently Asked Questions (FAQ)
Q: How long does it take to paint kitchen cabinets?
A: The actual painting time might only be a few hours, but the entire process, including preparation, drying, and reassembly, can take anywhere from a long weekend to a week or more, depending on your pace and the number of cabinets.
Q: What’s the difference between cabinet painting and cabinet refinishing?
A: Cabinet painting involves applying a new color coat over the existing finish. Cabinet refinishing can include painting, staining, or even stripping down to bare wood and reapplying a finish to restore the original look or change it dramatically.
Q: Can I paint over laminate cabinets?
A: Yes, but proper preparation is even more critical. You’ll need a specialized bonding primer designed for laminate or slick surfaces to ensure the paint adheres properly.
Q: What if I don’t want to remove my cabinet doors?
A: While it’s highly recommended to remove doors for the best results, you can paint them while they are still attached. However, it’s much harder to get an even finish, especially on the edges and back of the doors, and you’ll need to mask off your walls and appliances meticulously.
Q: How do I get a smooth, brush-stroke-free finish?
A: Use high-quality brushes and rollers, apply thin coats, avoid over-brushing or over-rolling, and consider spray painting for the ultimate smooth finish. Lightly sanding between coats also helps achieve a smoother surface.
Q: What are the best cabinet color ideas for a small kitchen?
A: Light colors like white, off-white, pale gray, or soft pastels can make a small kitchen feel larger and brighter.
This comprehensive guide provides a solid foundation for your DIY cabinet makeover. With careful preparation and the right techniques, you can transform your kitchen cabinets and give your entire kitchen a beautiful, updated look. Enjoy the process and the stunning results!