Can I vent a kitchen sink under a window? Yes, you can vent a kitchen sink under a window, but it requires careful planning to ensure compliance with plumbing codes and proper functionality of your drain-waste-vent system.
A well-vented kitchen sink is crucial for a smoothly running household. It prevents unpleasant sewer gases from entering your home and ensures water flows correctly down the drain. When your kitchen sink is situated under a window, special considerations come into play for installing or modifying its venting. This guide will walk you through the process, explaining the “why” and the “how” of venting your kitchen sink, especially when that window presents a spatial challenge.
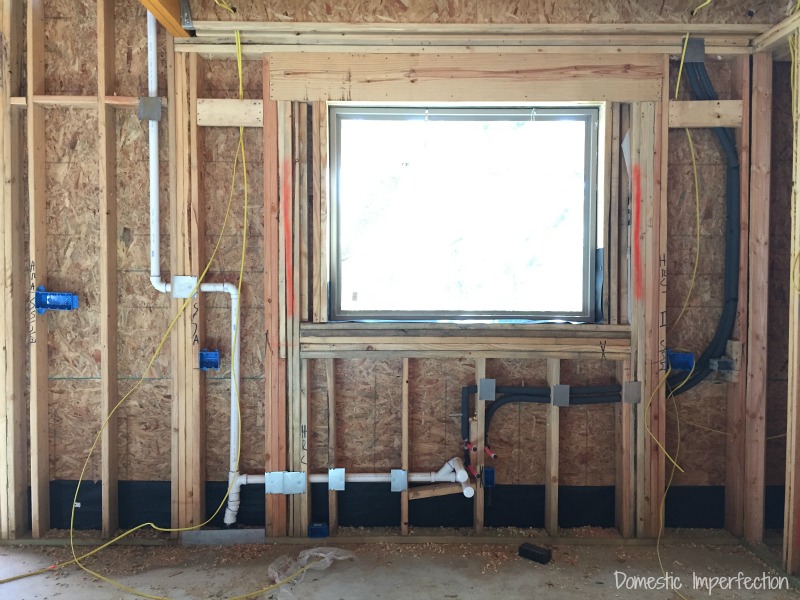
Image Source: www.domesticimperfection.com
Fathoming the Drain-Waste-Vent System
Before we dive into the specifics of venting under a window, let’s get a firm grasp on the drain-waste-vent (DWV) system. This intricate network is the unsung hero of your plumbing, keeping your sinks, toilets, and showers functioning without a hitch.
The DWV system has three main components:
- Drains: These pipes carry wastewater away from fixtures like your kitchen sink.
- Wastes: Similar to drains, these pipes handle wastewater, often from fixtures that don’t have a lot of solid waste, like sinks.
- Vents: These pipes are the key to a properly functioning DWV system. They allow air into the pipes, which equalizes pressure and helps wastewater flow freely. Without proper venting, you can experience slow drains, gurgling sounds, and even the unpleasant possibility of sewer gases backing up into your home.
The Role of a Sanitary Vent
A sanitary vent, specifically, is a critical part of the DWV system. Its primary job is to allow air into the drainage pipes. When water flows down a drain, it creates a vacuum. Without a vent to let air in, this vacuum can suck water out of the P-trap (the U-shaped pipe under your sink that holds water to block sewer gases). If the P-trap empties, sewer gases can enter your living space. Vents also allow sewer gases to escape your home safely through the vent stack, which typically rises through the roof.
Why Venting Matters
Proper venting serves several vital functions:
- Prevents Siphonage: As mentioned, vents prevent the vacuum created by flowing water from siphoning the water out of P-traps.
- Allows Free Flow: By equalizing pressure, vents ensure that wastewater flows smoothly down the drain, preventing sluggish drainage.
- Eliminates Sewer Gases: Vents provide an escape route for sewer gases, preventing them from entering your home through drains.
- Avoids Gurgling Noises: Gurgling sounds often indicate a venting problem where air is struggling to escape or enter the system.
Venting Strategies for Sinks Under Windows
When your kitchen sink is under a window, the usual route for a vent pipe might be blocked by the window frame, the wall structure, or simply limited space. This is where understanding your options becomes essential.
Option 1: Connecting to an Existing Vent
The most straightforward approach, if feasible, is to connect your kitchen sink’s kitchen sink drain pipe to an existing plumbing vent in your wall or ceiling.
Steps Involved:
- Locate the Nearest Vent: Identify an existing vent pipe that is appropriately sized and located within a reasonable distance. This might require opening up a section of your wall.
- Drill Through Studs: Carefully drill through wall studs to run a new vent pipe from your sink’s drain assembly towards the existing vent. Always follow local plumbing codes regarding hole size and placement to maintain the structural integrity of the wall.
- Join the Vent Pipes: Use appropriate fittings (like a sanitary tee or wye) to connect your new vent pipe to the existing vent pipe. Ensure these connections are airtight and watertight.
- Slope the Vent Pipe: Like drain pipes, vent pipes need a slight upward slope (typically ¼ inch per foot) to allow any condensation or debris to flow back into the drainage system, preventing blockages.
Considerations for Window Placement:
- Clearance: Ensure the new vent pipe doesn’t interfere with the window’s operation or the window frame itself.
- Aesthetics: If the vent pipe needs to be visible, consider how it will look and if you can conceal it with a soffit or by running it within a cabinet.
Option 2: Installing a New Vent Stack (Less Common for Single Fixtures)
In some rare cases, if no suitable existing vent is available and extending to one is impossible or impractical, you might consider installing a new vent stack. This is a more involved process, typically requiring a direct line to the outside, often through the roof.
Considerations:
- Major Renovation: This is usually a significant undertaking and may require professional help and permits.
- Roof Penetration: Proper sealing of any roof penetration is critical to prevent leaks.
- Building Codes: Strict adherence to plumbing codes is paramount for this type of installation.
Option 3: Using an Air Admittance Valve (AAV)
For situations where running a traditional vent is difficult or impossible, an Air Admittance Valve (also known as a Studor valve or AAV) can be an excellent solution. These devices allow air to enter the drainage system when negative pressure occurs but close to prevent sewer gases from escaping into the living space.
How AAVs Work:
- One-Way Airflow: AAVs are designed to open inward, allowing outside air into the DWV system when a vacuum is created by draining water.
- Sealing Against Gases: When there’s no negative pressure, the valve seals itself, preventing sewer gases from escaping.
- Installation Simplicity: AAVs are typically installed vertically on a vent pipe above the fixture they serve.
Installing an AAV Under a Window:
- Locate the Vent Connection Point: You’ll still need a vent pipe run from your kitchen sink drain pipe that goes up to an appropriate height. This pipe needs to terminate above the flood level rim of your fixtures.
- Install the AAV: Mount the AAV vertically on the end of this vent pipe. It’s crucial that the AAV is installed in a location where it can receive adequate air circulation, typically in a well-ventilated area, and not be completely enclosed.
- Height Requirements: Plumbing codes will specify the minimum height at which an AAV must be installed above the fixture’s flood level rim. For a kitchen sink, this is usually quite low, making them a good option for under-window scenarios.
- Maintenance: AAVs are generally maintenance-free, but it’s good practice to check them periodically to ensure they are not clogged or damaged.
Advantages of AAVs:
- Space Saving: They eliminate the need to run vent pipes to the outside or to a common vent stack, saving space and simplifying installation, especially under a window.
- Flexibility: They offer greater flexibility in plumbing layouts.
Disadvantages of AAVs:
- Code Approval: While widely accepted, always verify that your local plumbing codes permit the use of AAVs.
- Failure Potential: Like any mechanical device, AAVs can fail, though this is rare. If an AAV fails, it can lead to the same issues as a lack of venting.
- No Gas Escape: It’s important to note that AAVs only allow air in. They do not allow sewer gases to escape in the same way a traditional vent stack does.
Essential Plumbing Components for Your Sink
Regardless of your venting strategy, several key components are involved in your sink plumbing, and each needs to be correctly installed and functional.
The P-Trap
The P-trap is the U-shaped pipe under your sink. Its primary function is to hold a small amount of water, creating a seal that prevents foul-smelling sewer gases from entering your kitchen. It’s essential that the P-trap retains its water seal at all times.
Importance of Proper Venting for the P-Trap:
- Prevents Dry Traps: If the vent isn’t working, the water in the P-trap can be siphoned out, allowing gases to escape.
- Aids Drainage: A properly vented P-trap allows air to enter the system, facilitating the smooth flow of water and waste.
The Dishwasher Drain
If your kitchen also has a dishwasher, its drain hose needs to be connected to the kitchen sink drain pipe. This connection point is critical for preventing backflow and ensuring proper drainage.
Best Practices for Dishwasher Drains:
- High Loop: The dishwasher drain hose should always have a “high loop” or connect to an air gap before connecting to the drain pipe. This high loop, or air gap, prevents dirty drain water from flowing back into the dishwasher.
- Connection Point: The connection is typically made above the P-trap, often through a special fitting on the sink tailpiece or directly into the vent side of the drain pipe assembly. This location helps prevent sewer gases from entering the dishwasher.
Factors to Consider When Venting Under a Window
Working around a window introduces several unique challenges.
Space Limitations
Windows are designed to let in light and air, which often means limited wall space behind or around them for plumbing.
Strategies for Tight Spaces:
- Smaller Diameter Vent Pipes: While plumbing codes dictate minimum pipe sizes for drains and vents, ensure you’re using the smallest permissible size for the vent pipe run to minimize its footprint.
- Offsetting the Vent: You might need to create a slightly offset route for the vent pipe to navigate around window framing or support structures.
- Cabinet Concealment: If the vent needs to run within the kitchen cabinetry, plan the layout carefully to ensure it doesn’t impede storage or accessibility.
Aesthetics and Functionality
You don’t want unsightly pipes compromising the look of your kitchen or blocking the window’s view.
Maintaining Visual Appeal:
- Concealment: Whenever possible, run vent pipes within walls, soffits, or cabinets.
- Paint: If exposed pipes are unavoidable, consider painting them to match the wall color for a less obtrusive appearance.
Building and Plumbing Codes
This cannot be stressed enough: always consult your local plumbing codes. These codes are in place for safety and public health. They dictate everything from pipe sizing and material to vent termination points and the types of venting methods allowed.
Key Code Considerations:
- Vent Pipe Sizing: The size of the vent pipe is determined by the number and size of fixtures it serves.
- Vertical Rise: Codes specify how high vent pipes must rise before they can turn horizontally.
- Termination: Vent pipes must terminate at a specific height above the roof or, in the case of AAVs, above the flood level rim of the fixtures.
- Prohibited Locations: Some codes might restrict venting directly adjacent to operable windows due to potential odor issues.
Tools and Materials You Might Need
Successfully venting your kitchen sink under a window will likely require a specific set of tools and materials.
Essential Tools:
- Pipe Cutter: For clean cuts on PVC or ABS pipes.
- Deburring Tool: To smooth the edges of cut pipes.
- Measuring Tape: For accurate measurements.
- Drill and Hole Saw Bits: For drilling through studs and joists.
- Level: To ensure proper pipe slope.
- Screwdriver or Wrench: For securing fittings and clamps.
- PVC/ABS Cement and Primer: For solvent-welding plastic pipes.
- Safety Glasses and Gloves: For personal protection.
Common Materials:
- PVC or ABS DWV Pipe: The standard for drain-waste-vent systems.
- Pipe Fittings: Elbows, tees, wyes, couplings, and reducers as needed.
- Pipe Hangers and Clamps: To secure pipes in place.
- Primer and Solvent Cement: For joining plastic pipes.
- Air Admittance Valve (AAV): If opting for this method.
- Caulk or Sealant: For sealing any wall penetrations.
- Optional: Drywall saw, stud finder, flashing for roof penetrations (if applicable).
Step-by-Step Installation Guide (General)
This is a general guide. Always refer to your local plumbing codes and manufacturer instructions for specific details.
Planning and Preparation
- Assess the Situation: Examine the space under the window, the existing plumbing, and identify the most feasible venting strategy.
- Consult Codes: Review local plumbing codes to ensure your plan is compliant.
- Gather Materials and Tools: Purchase all necessary supplies.
- Turn Off Water: Shut off the main water supply to your home.
- Clear the Area: Remove any obstacles from around the sink and the proposed pipe route.
Running the Drain Pipe and P-Trap
- Install the P-Trap: Connect the P-trap to the sink’s tailpiece and the start of the drain line. Ensure the trap arm has a slight downward slope towards the main drain.
- Connect to Existing Drain: Connect the P-trap outlet to your existing kitchen sink drain pipe using appropriate fittings (often a sanitary tee or wye). Maintain proper slope for the drain line (typically ¼ inch per foot).
Venting the System
Method A: Connecting to an Existing Vent
- Locate Vent Access: Identify where you can tap into an existing vent. This might involve opening a wall.
- Drill Pathways: Carefully drill through studs to create a path for the new vent pipe. Ensure you don’t compromise structural integrity.
- Run the Vent Pipe: Install the vent pipe, ensuring it slopes upwards (¼ inch per foot) towards the existing vent.
- Connect to Existing Vent: Use a sanitary tee or wye to join your new vent pipe to the existing vent stack. Seal all connections.
Method B: Installing an Air Admittance Valve (AAV)
- Install a Vent Riser: Run a vent pipe from the drain assembly up to the required height above the sink’s flood level rim. This riser needs to be able to receive air from the AAV.
- Mount the AAV: Install the AAV vertically onto the top of the vent riser. Ensure it’s in a location with good air circulation.
- Seal Connections: Properly cement all pipe and fitting connections.
Connecting the Dishwasher Drain
- Create Connection Point: If you don’t have one, install a dishwasher tailpiece or a diversion fitting on the drain line above the P-trap.
- Install High Loop/Air Gap: Form a high loop with the dishwasher drain hose, or connect it to an air gap device.
- Connect Hose: Connect the dishwasher drain hose securely to the tailpiece or air gap fitting.
Testing and Finalizing
- Turn Water Back On: Slowly turn the main water supply back on.
- Check for Leaks: Run water through the sink and dishwasher. Inspect all joints and connections for leaks.
- Test Venting: Pour a large amount of water down the sink quickly. Listen for gurgling sounds and observe if the P-trap retains its water. If using an AAV, ensure it operates correctly when water drains.
- Seal Openings: Seal any holes made in walls or cabinets to prevent drafts and pests.
Frequently Asked Questions (FAQ)
Q1: Will venting under a window affect the window’s function?
A1: Properly planned venting should not interfere with the window’s operation. Careful measurement and placement are key to avoiding this.
Q2: Can I just skip venting if it’s too difficult under the window?
A2: No, skipping venting is a significant plumbing error. It will lead to drainage problems, potential P-trap siphoning, and the entry of harmful sewer gases into your home.
Q3: What is the minimum height for an air admittance valve?
A3: This varies by code, but generally, an AAV must be installed at least 4 inches above the flood level rim of the highest fixture it serves. Always check your local plumbing codes.
Q4: How do I know if my kitchen sink is properly vented?
A4: Signs of good venting include water draining quickly without gurgling, no sewer smells from the drain, and the P-trap always retaining water. If you notice slow drains, gurgling, or odors, your vent might be blocked or improperly installed.
Q5: Can I use a wet vent for my kitchen sink under a window?
A5: A wet vent is a drain pipe that also serves as a vent for another fixture. While possible in some configurations, it’s often more complex to implement correctly, especially in tight spaces under a window, and requires strict adherence to code regarding which pipes can be wet-vented. It’s generally safer and simpler to provide a dedicated vent or use an AAV.
Q6: What material is best for sink plumbing?
A6: For sink plumbing, including the drain pipes and P-traps, PVC or ABS are the most common and code-approved materials. They are durable, corrosion-resistant, and easy to work with.
Q7: What if my window is a casement window that opens outwards?
A7: If your window opens outwards and directly obstructs the path of a needed vent pipe, you’ll need to explore alternative routes, such as running the vent vertically within the wall cavity before reaching the window or using an AAV.
By carefully planning and adhering to best practices and plumbing codes, you can ensure your kitchen sink, even when situated under a window, is properly vented, contributing to a healthy and functional home.