Can you use a KitchenAid mixer to make bread dough? Yes, the KitchenAid mixer, especially with its dough hook attachment, is an excellent tool for making bread dough, handling kneading tasks efficiently and consistently.
A KitchenAid stand mixer is a culinary powerhouse, transforming how we approach baking and food preparation. From whipping delicate meringues to kneading robust bread dough, this iconic appliance is more than just a kitchen gadget; it’s a versatile partner for any home cook. This guide will dive deep into unlocking the full potential of your KitchenAid mixer, covering its basic operation and exploring the wide array of attachments that extend its capabilities. Whether you’re a seasoned baker or just starting, we’ll equip you with the knowledge to master your mixer.
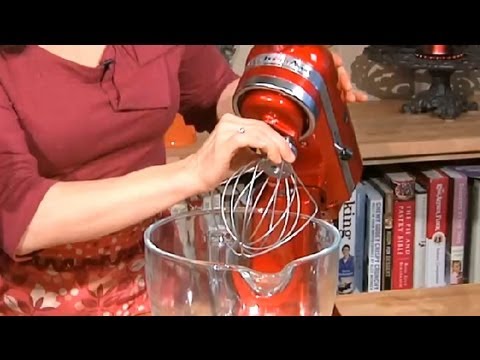
Image Source: i.ytimg.com
Getting Started: Your KitchenAid Mixer Basics
Before diving into specialized tasks, it’s essential to grasp the fundamental operation of your KitchenAid stand mixer. These machines are designed for durability and ease of use, but a little familiarity goes a long way.
Assembling Your Mixer
Setting up your KitchenAid mixer is straightforward. Each model might have slight variations, but the core components remain consistent.
- The Bowl: Most KitchenAid mixers come with a stainless steel bowl. Ensure it’s clean and dry before use.
- The Attachment Hub: Located at the front of the mixer head, this is where all the magic happens. You’ll see a screw and a cover plate.
- The Beater/Attachment: Select the appropriate attachment for your task (we’ll cover these in detail later).
- Mounting Attachments:
- Remove the cover plate from the attachment hub.
- Align the attachment with the hub. Note that attachments have specific shapes that will only fit one way.
- Slide the attachment into the hub.
- Insert the hub screw and tighten it to secure the attachment. Make sure it’s snug but not overly tight.
Speed Settings Explained
Your KitchenAid mixer typically features multiple speed settings, each designed for different tasks. Knowing when to use each speed is crucial for achieving optimal results and preventing damage to your mixer or ingredients.
- Speed 1 (Stir/Fold): This is the lowest speed, ideal for gently incorporating ingredients, starting a mix, or when using delicate attachments like the flex edge beater for scraping. It’s also good for starting to mix dry ingredients before adding liquids.
- Speed 2 (Mix/Combine): A gentle mixing speed, perfect for combining ingredients without overworking them, such as when adding flour to wet ingredients or folding in chocolate chips.
- Speed 3 (Beat/Cream): This speed is excellent for creaming butter and sugar, beating eggs, or mixing cake batters. It provides a good balance of aeration and incorporation.
- Speed 4 (Beat/Whip): A faster beating speed, useful for whipping cream or egg whites to stiff peaks, or for mixing cookie dough.
- Speed 5 (Whip/Moderate): This speed is for more vigorous whipping and mixing, suitable for lighter batters and meringues.
- Speed 6 (Whip/Fast): The second-fastest speed, ideal for quickly incorporating ingredients or for recipes that require rapid mixing.
- Speed 10 (Whip/Very Fast): The highest speed, reserved for tasks requiring maximum aeration, like whipping egg whites to their fullest volume or creating very light and fluffy batters.
Key KitchenAid stand mixer tips: Always start on a lower speed and gradually increase as needed to prevent splashing and ensure even mixing.
Adjusting the Mixer Head Height (Tilt-Head Models)
For tilt-head models, adjusting the height of the mixer head can be essential for optimal performance, especially when dealing with different batch sizes.
- Loosen the Adjustment Screw: Locate the screw at the base of the mixer head, usually on the side or back.
- Adjust the Head: With the mixer unplugged, tilt the head up or down slightly. If the beater scrapes the bottom of the bowl too much, raise the head. If it doesn’t reach the bottom to scrape properly, lower the head.
- Tighten the Screw: Once the desired clearance is achieved, tighten the adjustment screw. Test by mixing a small amount of batter. The beater should come close to the bottom without scraping or hitting it.
Locking the Mixer Head (Bowl-Lift Models)
Bowl-lift models secure the bowl in place with a lever. Ensure the bowl is correctly positioned and locked before operating the mixer. The lever to lower the bowl is typically on the side.
Mastering the Attachments: Expanding Your Culinary Horizons
The true versatility of a KitchenAid stand mixer lies in its vast array of attachments. Each is designed to perform specific culinary tasks with precision and efficiency.
The Essential Trio: KitchenAid Mixer Attachment Guide
Every KitchenAid mixer comes with a few core attachments that cover most basic needs.
The Dough Hook
KitchenAid dough hook usage is fundamental for any bread baker. This C-shaped attachment is specifically designed to mimic the kneading action of human hands, developing gluten in dough.
- When to Use: Primarily for yeast-based doughs for bread, pizza, bagels, and enriched doughs like brioche.
- How to Use:
- Ensure your dough ingredients are combined in the bowl.
- Attach the dough hook to the attachment hub.
- Start the mixer on Speed 2.
- Gradually increase to Speed 2 or 4, depending on your recipe and mixer power.
- Let the mixer knead the dough for the time specified in your recipe, typically 8-10 minutes.
- The dough should gather around the hook, pull away from the sides of the bowl, and become smooth and elastic.
- Stop the mixer periodically to scrape down the sides of the bowl if necessary, though the dough hook is quite effective at this on its own.
- Tips: For very stiff doughs, you might need to reduce the mixer speed slightly to avoid straining the motor. If the dough is too sticky, add a tablespoon of flour at a time. If it’s too dry, add a teaspoon of water at a time.
The Flat Beater (Paddle Attachment)
The KitchenAid paddle attachment, also known as the flat beater, is your workhorse for general mixing tasks. Its wide, flat design effectively scrapes the sides and bottom of the bowl.
- When to Use:
- Creaming butter and sugar for cakes and cookies.
- Mixing cake batters, cookie doughs, and muffin batters.
- Shredding cooked meats.
- Mashing potatoes.
- Mixing quick breads and pancakes.
- How to Use:
- Attach the flat beater to the hub.
- Start on Speed 2 to combine ingredients.
- Increase to Speed 4 or 6 for creaming and general mixing.
- Follow your recipe’s instructions for mixing times. Avoid overmixing flour-based batters, as this can develop too much gluten, leading to tough baked goods.
- Tips: The flex-edge beater attachment, a variation of the flat beater, has a silicone edge that scrapes the bowl continuously, ensuring all ingredients are incorporated and reducing the need for manual scraping.
The Wire Whisk
The KitchenAid whisk attachment, also called the balloon whisk, is designed to incorporate air into your mixtures, making them light and fluffy.
- When to Use:
- Whipping cream to make whipped cream.
- Whipping egg whites to stiff peaks for meringues, macarons, or angel food cake.
- Creating fluffy frostings.
- Emulsifying dressings and sauces.
- How to Use:
- Attach the wire whisk to the hub.
- Start on a low speed (Speed 2 or 4) to begin incorporating air.
- Gradually increase to Speed 8-10 for maximum aeration.
- Watch your ingredients closely as they can go from perfectly whipped to over-whipped very quickly.
- Tips: Ensure your bowl and whisk are completely clean and dry, as even a tiny bit of grease or yolk can prevent egg whites from reaching their full volume. For best results with egg whites, use room-temperature eggs.
Exploring the Attachment Universe: Beyond the Basics
KitchenAid offers a vast ecosystem of attachments that transform your stand mixer into a multi-functional kitchen appliance.
Pasta Maker Attachments
The KitchenAid pasta maker instructions are part of a system that allows you to create fresh pasta from scratch with ease. The primary attachments include the pasta roller and cutter attachments.
- Pasta Roller Attachment: This attachment rolls out your pasta dough to a consistent thickness, from thin sheets for lasagna to thicker sheets for fettuccine.
- Prepare your pasta dough according to your recipe.
- Knead the dough thoroughly (using the dough hook is recommended).
- Let the dough rest.
- Attach the pasta roller to the hub.
- Set the roller to its widest setting (usually ‘1’).
- Pass the dough through the roller.
- Fold the dough in half or thirds and pass it through again. Repeat this folding and rolling process 2-3 times to create a smooth, pliable dough.
- Gradually decrease the roller setting (e.g., to ‘2’, then ‘3’, and so on) until you reach your desired thickness. Lightly flour the dough between passes if it becomes sticky.
- Pasta Cutter Attachments: Once your dough is rolled, you can attach one of the cutter attachments (like spaghetti or fettuccine cutters).
- Feed the rolled pasta sheet through the cutter.
- Catch the cut pasta strands as they emerge.
- Hang the pasta on a drying rack or lay it flat on a lightly floured surface.
- Tips: Keep your pasta dough slightly firmer than a typical bread dough for best results with the roller and cutters. Work with manageable portions of dough at a time.
The Food Grinder Attachment
The KitchenAid grinder guide opens up a world of possibilities for fresh ground meats, homemade sausages, and even coarse breadcrumbs.
- What it does: This attachment grinds raw or cooked meats, hard cheeses, and vegetables. It comes with different grinding plates (fine, medium, coarse) and sometimes sausage stuffing tubes.
- How to Use:
- Assemble the grinder: attach the grinding plates and blades to the grinder body.
- Attach the grinder assembly to the mixer hub.
- Prepare your ingredients: cut meat into uniform cubes that fit the grinder’s feed chute. Slightly chilling the meat can help it grind more cleanly.
- Place the appropriate collection bowl under the grinder.
- Turn the mixer on Speed 4-5.
- Feed the meat cubes into the chute using the food pusher. Do not use your fingers.
- For sausage making, attach the stuffing tubes and casings after grinding.
- Tips: Clean the grinder thoroughly immediately after use to prevent food particles from drying and becoming difficult to remove. Some parts may be dishwasher safe, but check your manual.
The Ice Cream Maker Attachment
Creating homemade ice cream is a delightful experience with the KitchenAid ice cream maker how-to, which transforms your stand mixer into a churner.
- What it does: This attachment includes a frozen bowl that you pre-chill in the freezer, a dasher, and a lid. It churns and freezes your ice cream base.
- How to Use:
- Crucial Step: Place the ice cream bowl in the freezer for at least 12-24 hours before use. It must be completely frozen solid.
- Prepare your ice cream base and chill it thoroughly in the refrigerator.
- Attach the dasher to the ice cream maker lid.
- Attach the ice cream maker assembly to the mixer hub.
- Turn the mixer on Speed 1 or 2.
- Pour the chilled ice cream base into the frozen bowl through the opening in the lid.
- Churn for 20-30 minutes, or until the ice cream reaches a soft-serve consistency.
- Transfer the soft ice cream to an airtight container and freeze for at least 2-4 hours to harden.
- Tips: Do not try to churn ice cream if the bowl is not fully frozen; it will not work. Ensure the ice cream base is well-chilled; a warmer base will take longer to freeze and may not achieve the desired texture.
The Food Processor Attachment
This attachment significantly enhances your mixer’s capabilities, acting like a mini food processor.
- What it does: The KitchenAid food processor attachment can slice, shred, julienne, and dice a variety of fruits and vegetables. It typically comes with different discs for these functions.
- How to Use:
- Attach the food processor unit to the mixer hub.
- Select and insert the desired slicing, shredding, or dicing disc. Ensure the disc is securely seated.
- Place a collection bowl or your main mixer bowl underneath the chute.
- Turn the mixer on Speed 4.
- Feed your prepared ingredients down the food chute, using the food pusher.
- Tips: Cut ingredients to a size that fits comfortably in the chute. For slicing, ensure items are uniform for even results. Always unplug the mixer before changing discs.
The Blender Attachment
For models that support it, a blender attachment can provide a convenient way to make smoothies, purees, and sauces directly in your mixer bowl.
- What it does: The KitchenAid blender usage is similar to a standalone blender, with the mixer’s motor powering the blades.
- How to Use:
- Attach the blender jar to the designated port on the mixer head (this is usually a different location than the attachment hub).
- Add your ingredients to the blender jar.
- Secure the lid.
- Turn the mixer on Speed 10 or a dedicated “blend” setting if available.
- Process until smooth.
- Tips: Do not overfill the blender jar. Start with liquids at the bottom. Unplug the mixer before adding or removing the blender attachment.
Advanced Techniques and Maintenance
To get the most out of your KitchenAid mixer, consider these advanced tips and essential maintenance practices.
Cleaning Your Mixer and Attachments
Proper cleaning is vital for the longevity and performance of your mixer.
- The Mixer Body:
- Always unplug the mixer before cleaning.
- Wipe the exterior with a damp cloth.
- For stubborn spots, use a mild soap and water solution, then wipe dry.
- Never immerse the mixer body in water.
- Stainless Steel Bowls and Attachments:
- Most stainless steel bowls and standard attachments (dough hook, flat beater, wire whisk) are dishwasher safe. Check your specific model’s manual.
- If hand washing, use warm, soapy water and rinse thoroughly. Dry immediately to prevent water spots.
- Specialized Attachments (Grinder, Pasta Maker, etc.):
- These often require more specific cleaning. Consult your attachment’s manual.
- The grinder components should be disassembled and washed with warm, soapy water, then dried thoroughly, especially the metal parts, to prevent rust.
- Pasta cutters and rollers should be brushed clean and dried promptly. Avoid soaking them.
- Wire Whisk: The wires can sometimes loosen. Ensure they remain securely attached.
Troubleshooting Common Issues
Even the best appliances can have hiccups. Here are some common KitchenAid mixer problems and their solutions.
| Problem | Possible Cause | Solution |
|---|---|---|
| Mixer not turning on | Not plugged in; power outage; thermal overload protection activated. | Ensure it’s plugged in securely. Check circuit breaker. Allow mixer to cool down for 30-60 minutes if it overheated. |
| Beater hits the bowl | Mixer head adjustment screw needs tightening or bowl height is incorrect. | Adjust the mixer head height screw (tilt-head models) or ensure the bowl is correctly seated and locked (bowl-lift models). |
| Attachment not spinning | Attachment not secured properly; internal mechanism issue. | Re-seat the attachment and tighten the hub screw. If still not working, contact KitchenAid support. |
| Motor smells hot | Overloading the mixer; prolonged use on high speed; internal issue. | Reduce batch size; avoid overmixing. Allow the mixer to cool down. If the smell persists or is strong, discontinue use and contact support. |
| Ingredients not mixing well | Wrong speed used; incorrect attachment; bowl or attachment cleanliness. | Refer to speed guide. Ensure correct attachment for the task. Clean bowl and attachments thoroughly. Adjust bowl height. |
| Dough hook not kneading well | Dough too wet/dry; not enough time; wrong speed. | Adjust dough consistency with small amounts of flour/water. Ensure adequate kneading time (8-10 mins). Use recommended speed (Speed 2-4). |
| Wire whisk not aerating well | Egg whites/cream too cold; bowl or whisk dirty/greasy. | Ensure ingredients are at room temperature (for egg whites) or properly chilled (for cream). Clean bowl and whisk meticulously. |
Extending Your Mixer’s Life
- Respect the Wattage: While KitchenAid mixers are powerful, avoid overloading them, especially with very thick doughs or for extended periods. This can strain the motor.
- Regular Maintenance: Keep the mixer clean and store attachments properly.
- Use the Right Attachment: Don’t try to knead dough with the whisk or whip cream with the paddle.
- Listen to Your Mixer: Unusual noises can indicate a problem. If you hear grinding or straining, stop and investigate.
Frequently Asked Questions (FAQ)
Q1: Can I use my KitchenAid mixer for more than just baking?
A1: Absolutely! With its diverse attachments, you can grind meat, make pasta, make ice cream, process food, and much more, making it a versatile kitchen workhorse.
Q2: What is the best attachment for making bread?
A2: The KitchenAid dough hook is specifically designed for kneading bread dough. It efficiently develops gluten, which is essential for a good rise and texture in bread.
Q3: How do I clean my KitchenAid pasta maker attachments?
A3: Clean them with a brush or damp cloth immediately after use. Avoid soaking. Ensure they are completely dry before storing to prevent rust. Some parts might be dishwasher safe – always check your specific manual.
Q4: My KitchenAid mixer is making a strange noise. What should I do?
A4: First, unplug the mixer. Check if any attachments are loose or if there’s an obstruction. If the noise persists after reassembling or clearing any obvious issues, it’s best to contact KitchenAid customer support for diagnosis.
Q5: Can I use generic attachments with my KitchenAid mixer?
A5: While some third-party attachments exist, it’s generally recommended to use genuine KitchenAid attachments. They are designed to fit and perform optimally with your specific mixer model, ensuring safety and best results. Using unverified attachments could potentially damage your mixer or void your warranty.
Q6: How often should I replace the wire whisk or paddle attachment?
A6: These attachments are generally quite durable. Replace them if the wires on the whisk become loose or bent, or if the coating on the paddle attachment starts to chip or wear significantly.
Mastering your KitchenAid mixer is a journey of culinary exploration. By familiarizing yourself with its basic functions, understanding the purpose of each attachment, and adhering to proper cleaning and maintenance, you’ll unlock a world of delicious possibilities. Happy mixing!