Taking apart a Kitchenaid mixer can seem scary, but it’s something you can do yourself with care and the right steps. People often take apart their mixers for Kitchenaid mixer repair tasks, like dealing with loud noises or fixing parts that don’t move right. This guide will show you how to take apart a Kitchenaid mixer safely, step by step. It covers key parts of Kitchenaid mixer disassembly needed for things like Kitchenaid gearcase regreasing or even Kitchenaid planetary removal. By following these steps, you can learn about Fixing Kitchenaid stand mixer problems and maybe save money.
Image Source: guide-images.cdn.ifixit.com
Safety First
Your Kitchenaid mixer uses electricity. Before you touch any part of it, you must do one very important thing.
Pull the power plug from the wall socket.
Make sure the mixer is off.
Make sure it is unplugged. This stops any chance of getting a shock. Safety is the most important part of this job. Do not skip this step.
Gathering Your Tools
You need the right tools for Kitchenaid repair. Having the right tools makes the job easier. It also helps you not damage parts. You won’t need lots of special tools. Most people have these items at home.
Here are the tools you will likely need:
Tools for Taking Apart Your Mixer
- Screwdrivers: You will need a few sizes.
- Look for Phillips head screwdrivers. These are the ones with a cross shape tip.
- You might need a flat head screwdriver too.
- Get small ones and medium-sized ones.
- Wrench Set: Small wrenches or a socket set can help.
- They are good for holding nuts while you turn screws.
- You might need these for certain bolts.
- Needle-Nose Pliers: These are good for grabbing small things.
- They help with wires or small clips.
- They are also useful for tiny screws or pins.
- Punch and Hammer: You might need a small punch.
- This is for removing pins.
- You tap the punch with a small hammer.
- Use a hammer you can control well.
- Small Container or Tray: This is very important.
- Put all the screws and small parts in it.
- Use different spots in the tray for different types of screws.
- This helps you remember where each part goes.
- Marker or Tape: You can use tape.
- Write notes on the tape.
- Stick it on parts you remove.
- This helps you remember how things connect.
- Work Surface: Find a clean, flat place to work.
- Lay down a towel or mat.
- This protects your table.
- It also stops small parts from rolling away.
- Safety Glasses: Protect your eyes.
- Small pieces can fly up.
- Grease can get in your eyes.
- Always wear safety glasses.
Using the right tools makes the job safer and simpler. Do not force things. If a screw is hard to remove, make sure you use the right size screwdriver. Forcing it can damage the screw head. Then it becomes very hard to remove.
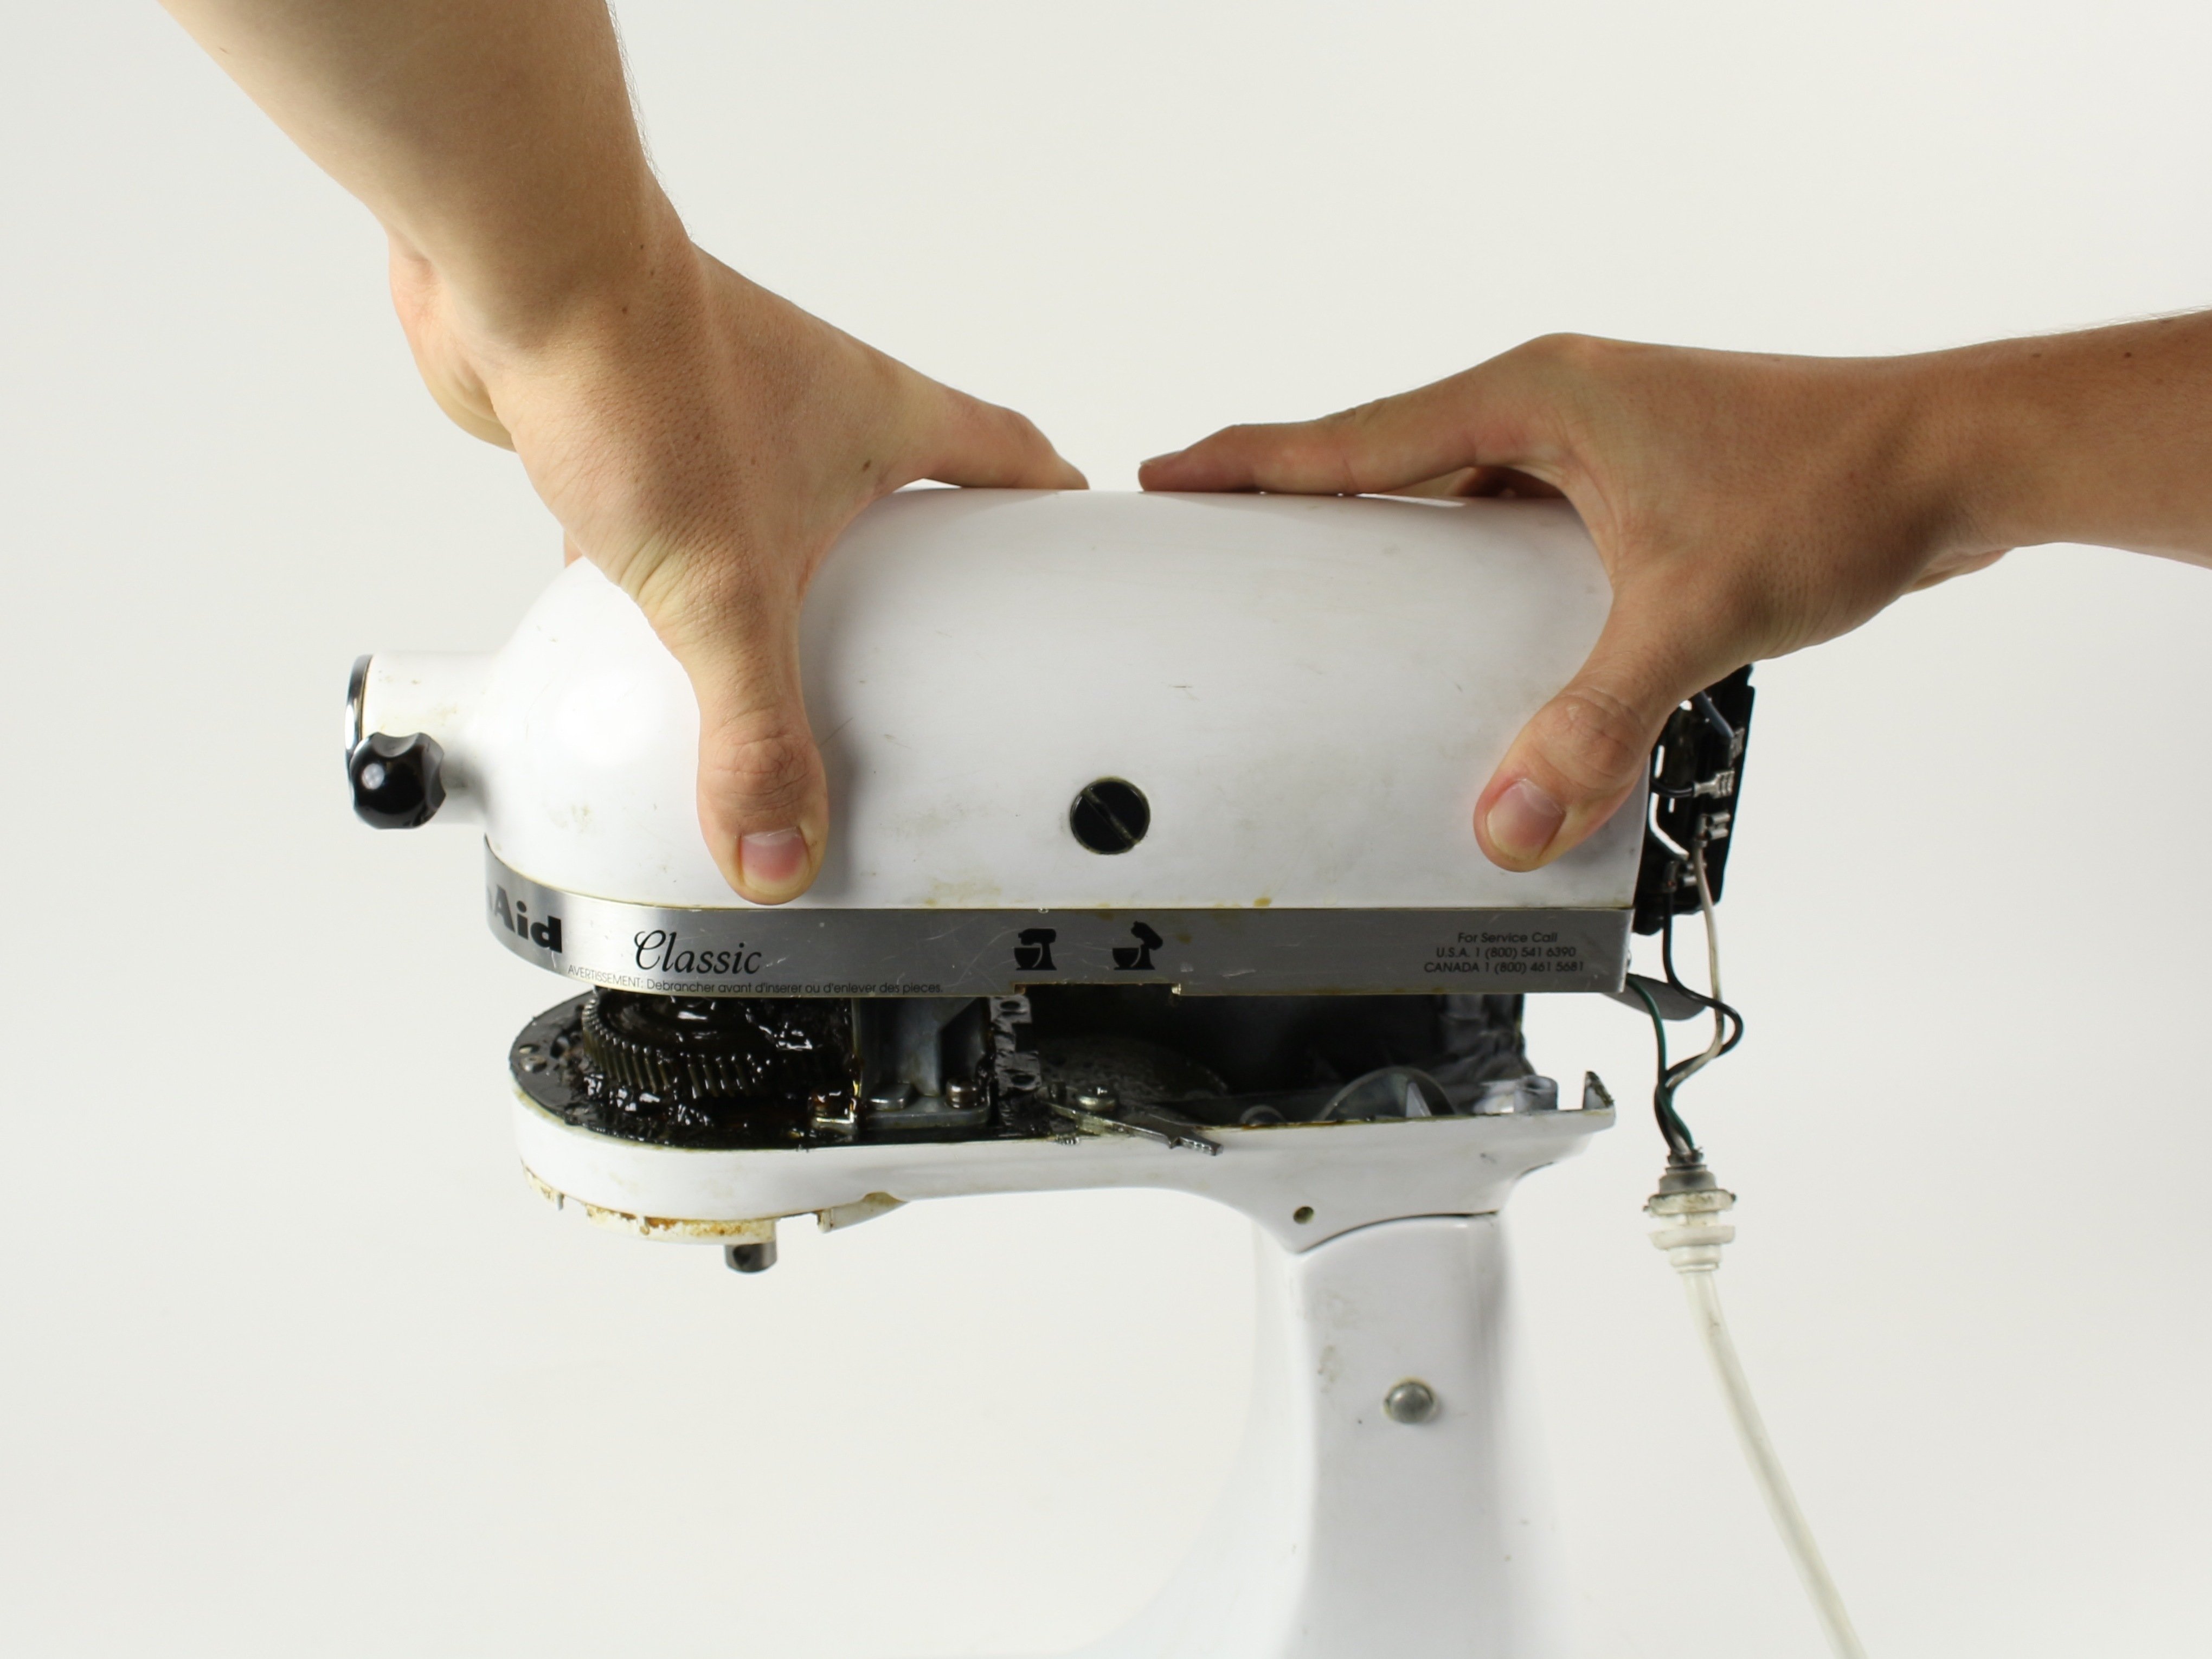
Starting the Process: Outer Shell Removal
The first step in Kitchenaid mixer disassembly is taking off the outer shell. This is the part you see every day. Removing it gives you access to the inside parts.
Different Kitchenaid models might have slightly different steps. But the main idea is the same. Look for screws holding the shell together.
Locating the Outer Shell Screws
- Turn the mixer on its side carefully.
- Place it on your work surface.
- Put it on the towel or mat.
- Look underneath the mixer.
- You will see some rubber feet.
- Sometimes, screws are hidden under these feet.
- You might need to pull off the rubber feet gently.
- Look at the base of the mixer.
- There might be screws around the edge.
- Some are on the bottom plate.
- Look at the back of the mixer head.
- Near where the power cord comes out.
- There are often screws here.
- Look near the speed control knob.
- Sometimes there are screws under a cap.
- You might need to gently lift a small cover.
- Look at the trim band.
- Some mixers have a metal band around the head.
- Screws might be under this band.
Removing the Shell Pieces
- Once you find a screw, use the right screwdriver.
- Turn the screw counter-clockwise (left).
- Keep turning until the screw is loose.
- Take the screw out completely.
- Put the screw right into your small container.
- Maybe make a note or put it in a spot for “bottom screws”.
- Find all the screws holding the shell on.
- Remove every screw you see on the outside.
- Some parts might snap together.
- Be gentle when separating plastic parts.
- Do not pull hard.
- Slowly lift off the shell parts.
- They might come off in sections.
- Some parts are the main body shell.
- Others are plastic trim pieces.
- Lay these shell parts aside carefully.
- This shows you the metal frame and inner parts.
This first step gives you your first look inside your Kitchenaid mixer. You will start to see the motor and the gear system.
Removing the Planetary Assembly
The planetary is the part at the bottom of the head. It holds the beater, whisk, or dough hook. It spins in a circle while the attachment also spins. Removing the planetary is often needed for Kitchenaid gearcase regreasing or other repairs.
Steps for Kitchenaid Planetary Removal
- Look at the planetary assembly.
- This is the part with the attachment hub.
- It hangs down from the mixer head.
- Find the pin that holds the planetary on.
- This is usually a roll pin or a solid pin.
- It goes through the mixer shaft and the planetary part.
- It is often on the side of the planetary assembly.
- You need the punch and hammer here.
- Choose a punch that is smaller than the pin.
- Place the tip of the punch on one end of the pin.
- Hold the punch straight.
- Tap the end of the punch with the hammer.
- Use gentle taps at first.
- The pin should start to move out the other side.
- Keep tapping until the pin comes all the way out.
- Be careful not to hit your fingers.
- Put the pin in your parts container.
- Once the pin is out, the planetary can be removed.
- It might slide off the shaft.
- Sometimes it needs a gentle wiggle.
- Pull it straight down.
- Be ready to catch it.
- It might have grease on it.
- Lay the planetary assembly aside.
Removing the planetary gives you better access to the main shaft. It is a necessary step for many internal repairs, including reaching the gearcase effectively.
Opening the Mixer Head
Now that the outer shell is off, you need to open the main head casing. This is where the motor and the gearcase live. This step lets you see the heart of the mixer.
How to Open the Head Casing
- Look at the mixer head from the side.
- You will see screws holding the two halves together.
- These screws are usually located around the edge or seam of the head.
- There might be screws near the neck where the head attaches to the body.
- Find all these screws.
- Use the right screwdriver for each.
- Remove each screw one by one.
- Place them in your parts container.
- Keep these screws separate from the outer shell screws if they look different.
- The two halves of the head casing should now be loose.
- Gently separate the halves.
- They might still be connected by wires or internal parts.
- Do not pull them far apart.
- Just open them enough to see inside.
- It might be like opening a book.
- Look inside the head.
- You will see the motor, the gearcase, and wires.
- Take a moment to look at how things are placed.
- Maybe take a photo with your phone. This helps later.
Opening the head is a big step. You can now see the main parts that make your mixer work. Be careful not to pull on wires too hard.
Inspecting and Accessing the Gearcase
The gearcase is where the magic happens. It contains several gears that transfer power from the motor to the planetary shaft. Over time, the grease in the gearcase can become hard or dry. This is a common reason for Kitchenaid mixer repair, specifically Kitchenaid gearcase regreasing.
Getting to the Gearcase
- With the head open, locate the gearcase.
- It is usually a metal housing inside the head.
- It looks like a small box or shape holding gears.
- The planetary shaft connects to it.
- The gearcase might be held in place by screws or bolts.
- Find these fasteners.
- Use your screwdriver or wrench.
- Carefully remove the screws or bolts.
- Put them in your parts container.
- The gearcase might lift out.
- It can be heavy because of the metal and the gears inside.
- Lift it straight up carefully.
- It will likely be covered in grease.
- Have some paper towels ready.
Inside the Gearcase: Grease and Gears
- Once the gearcase is out or open, you will see the gears.
- There is usually a lot of grease inside.
- This grease helps the gears move smoothly.
- It also keeps them from wearing out fast.
- Check the condition of the grease.
- Good grease is soft and like thick jelly.
- Old grease can be hard, crusty, or discolored.
- This hard grease doesn’t protect the gears well.
- This is why Replacing Kitchenaid grease is important.
- Look at the gears themselves.
- The Kitchenaid worm gear is a key part.
- It connects directly to the motor shaft.
- It turns another gear, which then turns the planetary shaft.
- Check the teeth on the gears.
- Are any teeth broken?
- Are they worn down?
- Broken or worn gears need to be replaced. This is part of Fixing Kitchenaid stand mixer issues.
Replacing the old grease is a common repair. You will need to clean out the old grease first. Then put in new grease designed for Kitchenaid mixers. Do not use just any grease. Use grease made for food safe machines like this.
Deeper Access: Motor and Other Parts
Sometimes, the problem is not just the grease or simple gears. It might be the motor or other electrical parts. Accessing these means going a bit deeper into the mixer’s structure. This is more complex.
Accessing the Motor
- The motor is usually next to the gearcase inside the head.
- It is a large, heavy part.
- It has wires connected to it.
- The motor is held in place by screws or mounts.
- Find these fasteners.
- Before removing them, look at the wires.
- See how they connect to the motor and other parts.
- Taking a clear photo of the wiring helps a lot before disconnecting anything.
- Disconnect the wires carefully.
- Note which wire goes to which connection point.
- Some wires use push-on connectors.
- Some might be held by screws.
- Use your needle-nose pliers if needed for connectors.
- Remove the screws or mounts holding the motor.
- Lift the motor out.
- The motor can be heavy. Be ready.
- Put it aside safely.
Kitchenaid motor replacement is less common for DIYers unless you are comfortable with electrical parts. If the motor is humming but not turning, or sparks, it might need replacing. However, check simpler things first, like if the gears are seized up from old grease. Often, Fixing Kitchenaid stand mixer problems starts with the gearcase, not the motor.
Other parts you might see include:
* Speed control board: This board controls how fast the mixer spins.
* Speed control lever: The physical lever you move to change speed.
* Power cord connection points.
These parts are also held by screws and connected by wires. If you need to access them, always note wire connections carefully.
Mapping the Parts: Using a Diagram
When you take apart something complex like a mixer, it helps to have a map. A Kitchenaid mixer parts diagram is like a map of your mixer. It shows all the pieces and how they fit together.
How a Parts Diagram Helps
- Seeing all the parts: A diagram shows you every screw, gear, and wire.
- Knowing names: You can learn the names of different parts, like the Kitchenaid worm gear or the planetary shaft.
- Finding part numbers: If you need to order a new part, the diagram usually has part numbers.
- Seeing how things connect: The diagram shows the order of parts and how they fit. This is very helpful for putting it back together.
- Checking for missing parts: When reassembling, you can check the diagram to make sure you haven’t forgotten anything.
You can often find a Kitchenaid mixer parts diagram for your specific model online. Search for your mixer model number and “parts diagram”. Keep it handy while you are working. It is a vital tool for Kitchenaid mixer repair.
Putting It Back Together: Reassembly
Putting the mixer back together is often the hardest part. It is basically the reverse of taking it apart. This is where your careful notes, photos, and parts container are lifesavers.
Steps for Reassembling Your Mixer
- Start with the inner parts you removed last.
- If you removed the motor, put it back first.
- Connect the wires back exactly as they were. Refer to your photos or notes.
- Fasten the motor mounts or screws.
- Install the gearcase.
- If you did Kitchenaid gearcase regreasing, make sure it’s full of new grease but not overflowing.
- Place the gearcase back into its spot.
- Fasten its screws or bolts.
- Make sure it sits correctly.
- Close the mixer head.
- Line up the two halves of the head casing.
- They should fit together neatly.
- Put the screws back into the head casing.
- Do not tighten them too much at first. Just get them all in place.
- Then go around and tighten them gently. This helps the halves pull together evenly.
- Reattach the planetary assembly.
- Slide the planetary assembly back onto the shaft.
- Line up the hole in the planetary with the hole in the shaft.
- Get the pin you removed earlier.
- Place the pin in the hole.
- Use your hammer to gently tap the pin back into place.
- Tap it until it is centered and flush on both sides. This completes the Kitchenaid planetary removal and reinstallation.
- Put the outer shell back on.
- Fit the shell pieces back around the mixer frame.
- Line up the screw holes.
- Start putting the outer shell screws back in.
- Remember where each screw came from (bottom, back, etc.). Your parts container labeling helps here.
- Put all screws in before tightening them down.
- Then tighten all the screws gently until snug. Do not overtighten plastic parts.
- Put rubber feet back on if you removed them.
Double-check everything. Make sure no screws are left out. Make sure no wires are pinched.
Testing Your Mixer After Repair
After putting your mixer back together, you need to test it.
- Clear your work area. Remove tools and loose screws.
- Make sure your hands are dry and clean of grease.
- Plug the mixer back into the wall socket.
- Turn the speed control to the lowest setting.
- Turn the mixer on.
- Listen for strange noises.
- Watch how the planetary spins.
- Slowly increase the speed.
- Does it sound smooth? Does it work at all speeds?
- If something sounds wrong or doesn’t work, unplug it immediately. Go back and recheck your work. Look for loose wires or parts not fitted right.
This testing step is key for Fixing Kitchenaid stand mixer issues you worked on.
Common Repairs Covered by Disassembly
Taking apart your mixer lets you fix many common problems.
- Noise: Old, hard grease makes gears noisy. Replacing Kitchenaid grease fixes this. Also, checking gears for damage (like the Kitchenaid worm gear) that makes clicking or grinding sounds.
- Seizing: If the mixer stops or slows down under load, hard grease is often the cause. Kitchenaid gearcase regreasing solves this by letting gears move freely.
- Loose Attachments: If the beater hits the bowl, it might be an adjustment issue. But sometimes it relates to the planetary assembly or its connection, which you access during disassembly.
- Speed Problems: While speed control boards are inside, accessing them requires opening the head.
Kitchenaid mixer repair often starts with opening the mixer to see what is happening inside.
Troubleshooting During Disassembly
Sometimes things don’t go smoothly when you take apart your mixer.
- Stuck Screws: If a screw won’t turn, make sure you use the right size screwdriver. Press down hard while turning slowly. For very stuck metal screws, a tiny bit of penetrating oil (use very little and be careful of plastic) might help, but be very cautious. Heat is generally not recommended on kitchen appliances.
- Stuck Pins: If the planetary pin is hard to remove, make sure your punch is centered. Use firm, steady taps. Do not hit very hard, or you could damage the shaft or casing. A little lubricating spray might help, but again, use very little and clean it well before reassembly.
- Plastic Parts: Plastic covers or shell pieces can be brittle. Do not force them. Look for hidden clips or screws holding them on. Use a plastic prying tool (like those for opening cell phones) instead of a metal screwdriver to avoid scratches and breakage.
- Wires: Wires can be fragile. Pull connectors, not the wires themselves. Note where every wire goes. If a wire looks damaged ( insulation cracked), it might need repair or replacement by someone who knows electrical work.
Taking your time and being patient is the best way to avoid problems.
When to Stop and Get Help
You don’t have to fix everything yourself. Some issues are complex or need special skills.
- If you open the mixer and feel lost, it’s okay to stop.
- If the problem seems electrical (like motor sparks, burning smell, tripped breaker), and you are not comfortable with electricity, get help. Kitchenaid motor replacement or complex electrical board issues might need a professional.
- If a part is badly broken (like a cracked metal casting) and you can’t easily replace it, a repair shop might be needed.
- If you can’t find a replacement part, or the repair seems too hard, look for a local appliance repair service that works on Kitchenaid mixers.
It’s better to know when to stop than to damage your mixer further or hurt yourself.
Maintaining Your Mixer After Repair
Once you have taken apart and fixed your mixer, good care helps it last longer.
- Clean the outside regularly.
- Do not overload the mixer with very stiff doughs if it’s not a heavy-duty model.
- Listen to your mixer. If it starts making new noises, it might need attention.
- If you did Kitchenaid gearcase regreasing, remember that the grease might need checking or replacing again after many years, especially with heavy use.
Taking care of your mixer after repair helps prevent future problems.
Comprehending Internal Parts
Looking inside your mixer shows you many parts working together. Seeing the Kitchenaid worm gear spinning the other gears, or how the motor connects, helps you understand how the mixer powers its attachments. Using a Kitchenaid mixer parts diagram while you look inside makes it easier to see how everything connects. It’s like seeing the engine of a car; it helps you grasp how the machine does its job. This knowledge is valuable for any future Kitchenaid mixer repair you might do.
Grasping the Purpose of Each Component
Each part inside has a specific job. The planetary allows the attachment to reach all parts of the bowl. The gearcase changes the fast spinning of the motor into the slower, stronger turning needed for mixing dough. The Kitchenaid worm gear is key in this speed reduction. Replacing Kitchenaid grease keeps these moving parts smooth and cool. Knowing what each piece does helps you figure out what might be wrong if the mixer isn’t working right.
Interpreting Common Issues
By opening your mixer, you can interpret what certain symptoms mean. A grinding noise often means the gears are running dry or are damaged. A seized mixer usually means the old grease has hardened like glue. A clicking sound could be a damaged gear tooth, perhaps on the Kitchenaid worm gear or another gear in the case. Seeing the parts helps you interpret the cause of the problem. This makes Fixing Kitchenaid stand mixer issues much more direct.
Frequently Asked Questions (FAQ)
Here are answers to common questions about taking apart and repairing your Kitchenaid mixer.
Q: What kind of grease should I use for Kitchenaid gearcase regreasing?
A: You need to use food-grade grease, often called “mixer grease” or “stand mixer grease.” It’s important that it’s safe in case it gets into food. Kitchenaid brand grease is available, or look for third-party food-grade lubricants specifically made for stand mixers. Do NOT use car grease or other non-food-safe lubricants.
Q: Where can I find a Kitchenaid mixer parts diagram for my model?
A: The best place is online. Search for “Kitchenaid [Your Model Number] parts diagram”. Websites that sell appliance parts often have these diagrams available for free viewing or download. Your model number is usually on a sticker on the bottom of the mixer.
Q: Can I reuse the old grease if it looks okay?
A: It is highly recommended to replace the old grease entirely. Even if it looks okay, it might have lost some of its important properties, like its ability to lubricate or its heat resistance. Old grease can also contain tiny metal particles from gear wear. Replacing Kitchenaid grease with new food-grade grease ensures the best performance and lifespan for your gearcase.
Q: How much grease should I put in the gearcase?
A: You should fill the gearcase mostly full, but not completely packed. There needs to be some space for the grease to move around and coat the gears as they spin. A common recommendation is to fill it about 2/3 to 3/4 full. Referencing the fill level in a parts diagram or repair video for your specific model can help.
Q: What if I lost a screw or a small part during disassembly?
A: This is why using a parts container and being organized is important! If you do lose a common screw, you might be able to find a replacement at a good hardware store. For unique screws or specific internal parts, you might need to order a replacement based on your Kitchenaid mixer parts diagram. If it’s a critical part, you might need to wait for a replacement to arrive before reassembling.
Q: My mixer makes a clicking noise after reassembly. What could be wrong?
A: A clicking noise often means something is not aligned right in the gearcase, or a gear tooth is chipped or broken. Unplug the mixer immediately. You will likely need to open the head and gearcase again. Recheck the position of all gears. Make sure the Kitchenaid worm gear and other gears are seated correctly. Inspect all gear teeth for damage. If a gear is damaged, it needs replacement.
Q: Is Kitchenaid motor replacement a hard job?
A: Yes, Kitchenaid motor replacement is one of the more complex repairs. It involves dealing with electrical connections and correctly positioning the new motor. If you are not comfortable working with electrical components, this is a repair best left to a professional Kitchenaid mixer repair service.
Conclusion
Taking apart your Kitchenaid mixer is a job that requires patience and care. It lets you perform common Kitchenaid mixer repair tasks like Kitchenaid gearcase regreasing or replacing a worn Kitchenaid worm gear. By following safe steps, using the right Tools for Kitchenaid repair, and keeping track of parts, you can successfully complete Kitchenaid mixer disassembly. Remember to unplug the mixer, take photos, use a Kitchenaid mixer parts diagram, and keep all screws organized. Replacing Kitchenaid grease is a very common reason to do this. If you get stuck or face a complex issue like Kitchenaid motor replacement, don’t hesitate to seek professional help for Fixing Kitchenaid stand mixer problems. With careful work, you can likely extend the life of your beloved mixer.