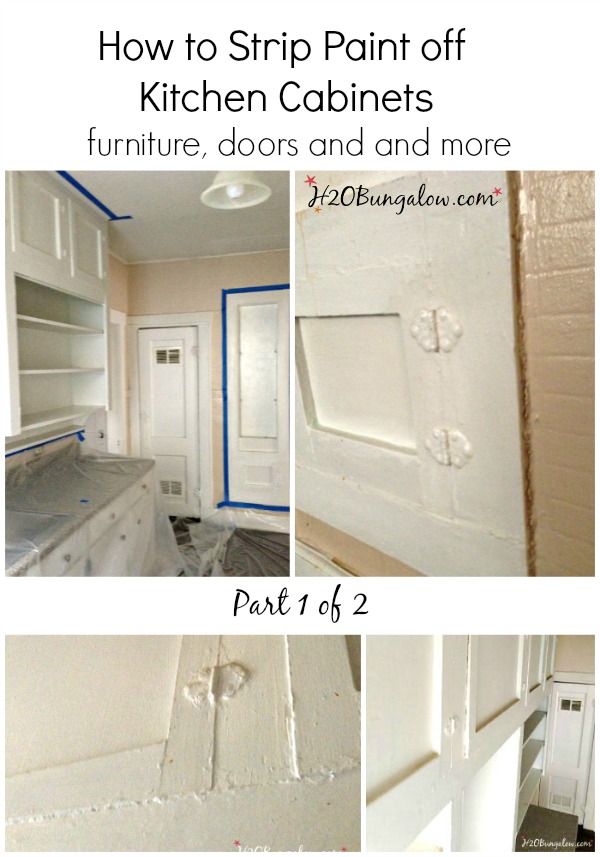
Image Source: h2obungalow.com
How To Strip Paint Off Kitchen Cabinets Safely: DIY Guide for Refinishing
Can you strip paint off kitchen cabinets yourself? Absolutely! This comprehensive DIY guide will walk you through how to safely and effectively remove paint from your kitchen cabinets, paving the way for a stunning kitchen cabinet makeover paint job or a beautiful natural wood finish. We’ll cover everything you need to know, from selecting the right tools and products to the essential preparation steps and detailed process. Whether you’re looking to remove paint kitchen cabinets for a fresh coat or aiming for a complete restoration, this guide is your roadmap to success.
Why Strip Paint from Kitchen Cabinets?
There are several compelling reasons to undertake the task of stripping paint from your kitchen cabinets. Perhaps you’ve inherited a home with dated, painted cabinetry that hides beautiful wood underneath. Or maybe the existing paint job is chipped, peeling, or just not your style anymore. Refinishing your cabinets by stripping the old paint offers a fantastic opportunity for a significant visual upgrade without the hefty cost of entirely new cabinets. It’s a rewarding DIY project that can dramatically transform the heart of your home.
Preparing for the Paint Stripping Process
Proper preparation is key to a successful and safe paint-stripping project. Rushing this phase can lead to poor results and unnecessary frustration.
Step 1: Assess Your Cabinets
Before you buy a single product, take a good look at your cabinets. What are they made of? Are they solid wood, or are they laminate? This is crucial because the best paint stripper for wood might not be suitable for other materials.
- Solid Wood: Most older cabinets are solid wood. You’ll be able to strip these with confidence using various methods.
- Veneered Wood: These have a thin layer of real wood over a core material. Be gentle when stripping to avoid damaging the veneer.
- Laminate: Stripping laminate cabinets is tricky. Most chemical strippers will damage the laminate surface. For laminate, light sanding or using a bonding primer for a new paint job is usually a better approach. If you must strip laminate, use caution and test a small, inconspicuous area first.
Step 2: Gather Your Essential Supplies
Having all your tools and materials ready before you start will make the process smoother.
- Paint Stripper: We’ll discuss the different types later, but you’ll need a suitable paint stripper for your cabinet material.
- Protective Gear: This is non-negotiable.
- Chemical-resistant gloves: Nitrile or neoprene gloves are essential.
- Safety glasses or goggles: To protect your eyes from splashes and fumes.
- Respirator mask: A good quality respirator with organic vapor cartridges is crucial, especially when using chemical strippers.
- Old clothing: Wear long sleeves and pants you don’t mind getting messy.
- Applicator Tools:
- Paintbrushes: For applying the stripper. Natural bristles are best for some chemical strippers; synthetic for others. Check the stripper’s instructions.
- Putty knives or scrapers: Metal or plastic, with rounded corners to avoid gouging the wood.
- Steel wool or synthetic stripping pads: For scrubbing and removing softened paint.
- Cleaning Supplies:
- Drop cloths or tarps: To protect your floors and surrounding areas.
- Rags and paper towels: For wiping and cleaning.
- Mineral spirits or denatured alcohol: For cleaning residue.
- Bucket: For water and cleaning solutions.
- Sanding Supplies:
- Sandpaper: Various grits (e.g., 100, 150, 220).
- Sanding block or orbital sander: For smoother sanding.
- Disposal Bags: For safe disposal of paint and stripper residue.
Step 3: Ventilate and Protect Your Workspace
Good ventilation is paramount for safety when working with paint strippers. Open windows and doors to create a cross-breeze. If you don’t have good natural ventilation, consider using fans to direct fumes away from you and out of the room.
Cover your work area thoroughly with drop cloths. This includes floors, countertops, and any appliances nearby. Remove cabinet doors and drawers and work on them individually in a well-ventilated area, ideally outside or in a garage.
Step 4: Degrease Kitchen Cabinets Before Stripping
This is a critical, often overlooked, step. Grease, grime, and cooking residue on your cabinets can interfere with the stripper’s effectiveness and lead to uneven results.
- How to degrease: Use a solution of warm water and a good degreaser. Trisodium Phosphate (TSP) is a powerful option, but it’s caustic, so wear gloves and eye protection. A simpler, safer alternative is a strong dish soap solution.
- Application: Wipe down all cabinet surfaces thoroughly with the degreasing solution. Use a sponge or cloth.
- Rinsing: After degreasing, wipe down the cabinets again with a clean, damp cloth to remove any soap residue. Allow the cabinets to dry completely before proceeding with paint stripping. This ensures the stripper can work directly on the paint layer.
Methods for Stripping Paint from Kitchen Cabinets
There are several ways to tackle paint removal. The best method for you will depend on the type of paint, the cabinet material, and your comfort level with different products.
Method 1: Chemical Paint Strippers
Chemical paint removers are highly effective at breaking down paint layers, making them easier to scrape off. This is often the preferred method for chemical paint removal wood cabinets.
Choosing the Right Paint Stripper
The market offers various types of paint strippers, each with its own strengths and weaknesses.
- Methylene Chloride-Based Strippers: These are the most aggressive and fastest-acting. They can strip multiple layers of paint in one application. However, they are also the most hazardous and produce strong fumes, requiring excellent ventilation and robust protective gear. Due to their toxicity, many DIYers opt for safer alternatives.
- Safer Alternatives (Citrus-Based, Soy-Based, or Biodegradable Strippers): These are significantly less toxic and have fewer fumes than methylene chloride strippers. They work more slowly, often requiring longer dwell times or multiple applications, but they are a much safer choice for home use. These are generally the best paint stripper for wood for DIYers concerned about health and safety.
- Caustic Strippers (Lye-Based): These work by saponifying the paint (turning it into a soap-like substance). They are effective but can raise the grain of the wood and require neutralization afterward. They can also discolor some wood species.
Table: Comparison of Paint Stripper Types
| Stripper Type | Effectiveness | Speed | Safety/Fumes | Wood Impact | Best Use Case |
|---|---|---|---|---|---|
| Methylene Chloride | Very High | Fast | Low (High Fumes) | Can be harsh | Thick, multiple layers of stubborn paint |
| Citrus/Soy/Biodegradable | Moderate | Slow | High | Gentle on wood | Single layers, lighter paints, safer option |
| Caustic (Lye-Based) | High | Moderate | Moderate | Can raise grain, discolor | Tough paints, but requires careful handling |
How to Use Chemical Paint Strippers
- Apply the Stripper: Using an old paintbrush, generously apply a thick, even layer of the stripper to a small section of the cabinet door or drawer. Work in one direction, following the wood grain if applicable. Avoid brushing it out too thinly.
- Allow Dwell Time: Let the stripper sit for the time recommended on the product label. You’ll see the paint begin to bubble and wrinkle as it softens. This can take anywhere from 15 minutes to several hours, depending on the stripper and the paint.
- Scrape Off the Paint: Once the paint is softened, use a putty knife or scraper to gently push the softened paint away from the surface. Work in the direction of the wood grain to avoid scratching. For intricate areas or carvings, use smaller scrapers or stiff brushes.
- Remove Residue: After scraping, use steel wool or a stripping pad dampened with the stripper to remove any remaining paint residue.
- Clean the Surface: Once most of the paint is removed, clean the cabinet surface thoroughly with a rag dampened with mineral spirits or denatured alcohol (check stripper instructions for recommended cleaner). This removes any remaining stripper residue, which can interfere with new finishes.
- Repeat if Necessary: For stubborn paint layers, you may need to repeat the process on certain areas.
Method 2: Sanding to Remove Paint
Sanding kitchen cabinets to remove paint is another viable option, particularly for lighter paint layers or when you’re aiming to refinish the wood surface. It can be used as a primary method or as a follow-up to chemical stripping.
When to Choose Sanding
- Light Paint Layers: If the paint is thin and not too damaged, sanding can be an efficient way to remove it.
- Preparing for Refinishing: Sanding is essential for preparing any surface for a new paint or stain finish.
- Alternative to Chemicals: If you want to avoid chemicals entirely, sanding is your go-to.
How to Sand Paint Off
- Start with Coarse Grit: Begin with a coarser grit sandpaper (e.g., 80 or 100 grit) to quickly remove the bulk of the paint.
- Use a Sanding Block or Orbital Sander: For flat surfaces, an orbital sander will speed up the process. Use a sanding block for edges and detailed areas to maintain control and avoid rounding them over.
- Work in Sections: Sand in small, manageable sections. Apply even pressure and sand in the direction of the wood grain.
- Progress to Finer Grits: Once the paint is mostly removed, switch to finer grits (e.g., 150 grit, then 220 grit) to smooth the wood surface and remove any sanding marks from the coarser grit.
- Clean Between Sanding: After each grit, wipe the surface with a tack cloth or a slightly damp rag to remove dust. This helps you see any remaining paint and ensures a smooth finish.
Important Note on Dust: Sanding creates dust, which can contain lead if your cabinets were painted before 1978. Always wear a dust mask (N95 or higher) and consider doing this outdoors or in a well-ventilated area with dust containment measures.
Method 3: Heat Gun Stripping
A heat gun uses hot air to soften paint, making it pliable enough to scrape off. This method is effective for multiple paint layers, but it requires care to avoid scorching the wood.
How to Use a Heat Gun
- Set the Temperature: Start with a medium heat setting.
- Apply Heat: Hold the heat gun a few inches away from the paint surface and move it constantly to avoid overheating any one spot.
- Scrape Softened Paint: As the paint softens and bubbles, use a scraper to lift it off. Work in small sections.
- Be Cautious: Never leave the heat gun unattended. Keep it away from flammable materials. Do not use on plastic components or laminate.
- Follow Up: After using a heat gun, you’ll likely need to use a chemical stripper or sandpaper to remove any stubborn residue.
Dealing with Specific Cabinet Materials
Stripping Laminate Cabinets
As mentioned, stripping laminate cabinets is generally not recommended with harsh chemicals. The laminate surface can be easily damaged, and you may end up with an unsightly mess.
- Best Approach for Laminate: If your laminate cabinets are painted and you dislike the color, consider these options instead of stripping:
- Lightly Sand and Prime: Very lightly scuff-sand the laminate with fine-grit sandpaper (220 grit) to create a surface for adhesion. Then, use a good quality bonding primer designed for slick surfaces. After priming, you can paint with a durable cabinet paint.
- Contact Paper or Veneer: For a dramatic change, consider covering the laminate with decorative contact paper or a thin wood veneer.
- Replacement: If the laminate is peeling or severely damaged, replacing the cabinet doors might be the most practical solution.
Restoring Old Kitchen Cabinets
When restoring old kitchen cabinets, the goal is often to reveal the natural beauty of the wood. After stripping, you’ll need to prepare the wood for its new finish.
Post-Stripping Preparation
Once you’ve successfully removed the paint, the job isn’t quite done. The surface needs to be cleaned and prepped for its next stage, whether that’s staining, painting, or a clear protective coat.
Step 1: Final Cleaning
After stripping and scraping, there will likely be a fine residue of paint and stripper.
- Wash Thoroughly: Use a clean cloth dampened with mineral spirits or denatured alcohol (as recommended by your stripper manufacturer) to wipe down all surfaces. This removes any residual stripper and softened paint.
- Rinse: Some strippers may require a rinse with water. Always follow the product’s instructions. If you use water, ensure the cabinets dry completely.
Step 2: Sanding for a Smooth Finish
Even after scraping, the wood surface may feel rough or have minor imperfections.
- Smooth with Finer Grits: Use 150-grit sandpaper, followed by 220-grit sandpaper, to create a smooth, ready-to-finish surface. Always sand in the direction of the wood grain.
- Address Imperfections: Inspect the wood for any remaining paint flecks, glue residue, or gouges. Use a wood filler for any deep scratches or dents, then sand the filled areas smooth once dry.
Step 3: Tack Cloth and Dust Removal
A tack cloth is a sticky cloth designed to pick up fine dust particles. This is crucial for a clean finish.
- Wipe Down Surfaces: Gently wipe down all cabinet surfaces with a tack cloth to remove any lingering dust from sanding.
Finishing Your Stripped Cabinets
With the paint successfully removed and the cabinets prepped, you’re ready to apply your chosen finish.
- Staining: If you’re aiming for a natural wood look, apply a wood stain. Test the stain on an inconspicuous area or a scrap piece of wood from your cabinets to ensure you like the color. Apply evenly with a brush or rag, wipe off excess, and let dry according to the product instructions.
- Painting: If you’re repainting, apply a high-quality primer specifically designed for cabinetry. Once the primer is dry, apply your chosen cabinet paint. It’s usually best to apply multiple thin coats rather than one thick coat, allowing each coat to dry thoroughly.
- Clear Coat: To protect your stained or painted cabinets, apply a clear topcoat, such as polyurethane or lacquer. This adds durability and a polished look.
Safety First: A Recap of Crucial Precautions
When you’re working to remove paint kitchen cabinets, safety should always be your top priority.
- Ventilation is Key: Always work in a well-ventilated area. Open windows and doors, and use fans if necessary.
- Wear Protective Gear: Never skip gloves, eye protection, and a respirator mask when using chemical strippers.
- Read Product Labels: Always follow the manufacturer’s instructions and safety warnings for any paint stripper or finishing product.
- Test in an Inconspicuous Area: Before applying any product to your entire cabinet, test it on a small, hidden spot to ensure it works as expected and doesn’t damage the material.
- Proper Disposal: Dispose of paint, stripper residue, and used rags properly. Check local regulations for hazardous waste disposal.
Frequently Asked Questions (FAQ)
Q1: What is the best way to strip paint off kitchen cabinets?
The best way depends on the paint, cabinet material, and your comfort with chemicals. Chemical paint strippers are highly effective for most wood cabinets. For lighter paint jobs or if you want to avoid chemicals, sanding is a good option. Always prioritize safety and ventilation.
Q2: Can I strip laminate cabinets?
Stripping laminate cabinets is difficult and can damage the laminate surface. It’s generally better to lightly scuff-sand and use a bonding primer before painting laminate, or explore options like contact paper.
Q3: How do I safely dispose of paint stripper and residue?
Check your local waste disposal guidelines. Many communities have specific procedures for hazardous waste. Do not pour paint stripper down drains or into regular trash.
Q4: Do I need to degrease kitchen cabinets before stripping?
Yes, it’s highly recommended. Degreasing removes oils and grime that can prevent the stripper from working effectively and lead to uneven results.
Q5: How long does it take to strip paint from kitchen cabinets?
The time can vary significantly depending on the paint thickness, the type of stripper used, and the size of your kitchen. A small kitchen might take a weekend, while a larger one could take several days.
Q6: What’s the difference between methylene chloride and safer paint strippers?
Methylene chloride strippers are very fast and strong but pose significant health risks due to their toxicity and strong fumes. Safer alternatives like citrus or soy-based strippers are less toxic and have fewer fumes but work more slowly and may require multiple applications.
By following these detailed steps and prioritizing safety, you can successfully strip paint off your kitchen cabinets and embark on a rewarding DIY cabinet refinishing project, giving your kitchen a fresh new look.