Experiencing issues with your KitchenAid refrigerator’s ice maker can be frustrating, especially when you’re expecting a cool drink with ice. Can you reset a KitchenAid ice maker? Yes, in many cases, a simple reset can resolve common problems. This guide will walk you through the easy steps to reset your KitchenAid ice maker and tackle other common troubleshooting scenarios.
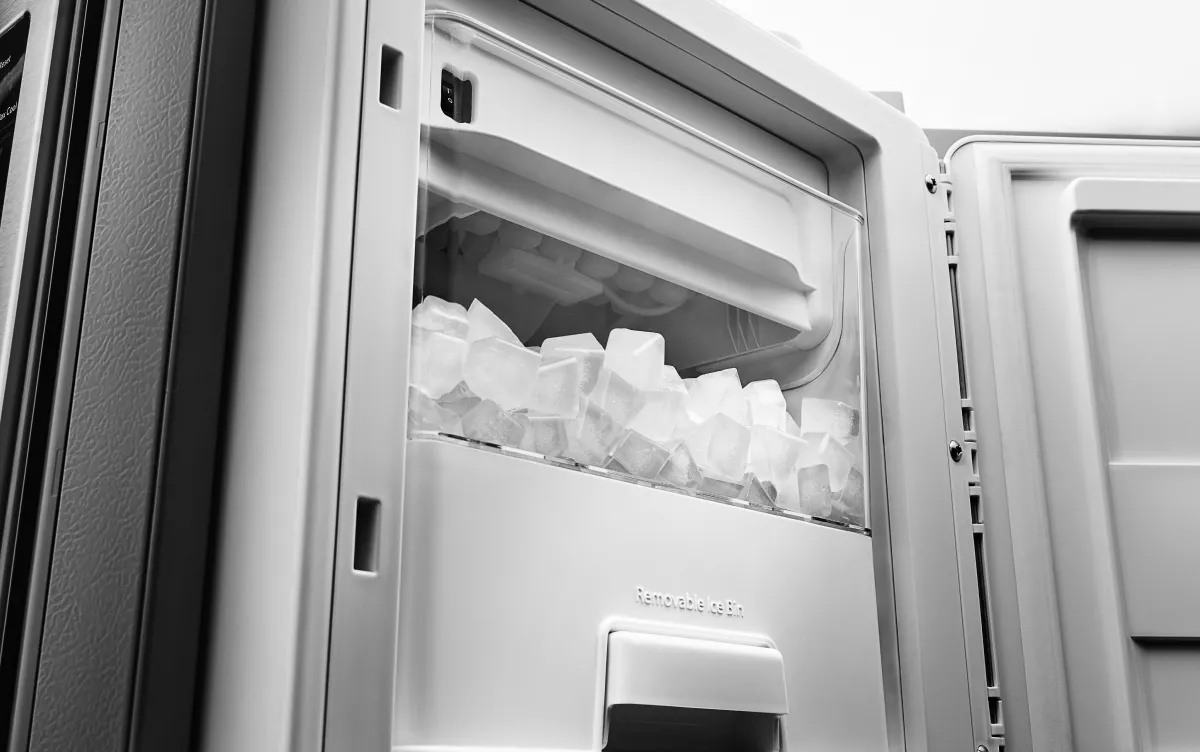
Image Source: kitchenaid-h.assetsadobe.com
Resetting Your KitchenAid Ice Maker: When and Why
Before diving into the reset process, it’s crucial to understand why your ice maker might need one. Often, a KitchenAid refrigerator ice maker reset can fix minor glitches that cause it to stop producing ice or to behave erratically. Common reasons include power interruptions, sensor errors, or software hiccups. If your KitchenAid ice maker not working, a reset is often the first and easiest troubleshooting step.
Locating the KitchenAid Ice Maker Reset Button
The KitchenAid ice maker reset button location can vary slightly depending on your refrigerator model. However, it’s usually found in a straightforward place.
Where to Find the Reset Button:
- Inside the Freezer Compartment: Open the freezer door and look for the ice maker assembly. This is typically located on the top wall of the freezer, or sometimes attached to the side.
- On the Ice Maker Module: The ice maker itself is a unit that produces and dispenses ice. The reset button is almost always located directly on this unit. It might be a small, recessed button, often black or red.
- Look for Labels or Markings: Sometimes, the button will have a small “reset” label next to it. If not, it’s often a tactile button that you can press.
Tip: If you’re having trouble locating it, consult your KitchenAid refrigerator ice maker manual. It will provide a diagram and specific instructions for your model.
The Simple Steps to Reset Your KitchenAid Ice Maker
Once you’ve found the reset button, the process is generally quite simple.
Step-by-Step Reset Procedure:
- Turn Off the Ice Maker: Before pressing the reset button, locate the ON/OFF switch for the ice maker. This might be a small lever or switch on the ice maker unit itself. Flip it to the OFF position.
- Press and Hold the Reset Button: Using a pen tip, paperclip, or your finger, press and hold the reset button for approximately 3 to 5 seconds.
- Turn the Ice Maker Back On: After releasing the reset button, flip the ON/OFF switch back to the ON position.
- Wait and Observe: Your refrigerator will now attempt to restart the ice-making cycle. It can take up to 24 hours for the ice maker to start producing ice again. Be patient.
Troubleshooting When Your KitchenAid Ice Maker Isn’t Working
If resetting the ice maker doesn’t solve the problem, don’t worry. There are several other KitchenAid ice maker troubleshooting steps you can take. If your KitchenAid ice maker not producing ice, it could be due to a few common reasons.
Common Issues and How to Address Them:
1. Is the Ice Maker Turned On?
- Check the ON/OFF Switch: As mentioned in the reset steps, ensure the ice maker switch is in the ON position. It’s easy to accidentally turn it off.
2. Is the Water Supply Connected and Turned On?
- Water Line Connection: Make sure the water line is securely connected to the back of your refrigerator and to the house’s water supply.
- Water Valve: Check if the water valve for the refrigerator is fully open. This is usually a shut-off valve connected to the water line.
3. Is the Water Filter Clogged?
- Replace the Filter: A clogged water filter can restrict water flow to the ice maker. If you haven’t replaced your water filter in a while, it might be time for a new one. Consult your manual for the correct filter type and replacement instructions.
4. Is the Freezer Temperature Cold Enough?
- Optimal Temperature: The freezer needs to be at a consistent temperature of 0°F (-18°C) or lower for the ice maker to function correctly.
- Check Settings: Verify your freezer temperature settings. If it’s too warm, adjust the thermostat.
- Airflow: Ensure that vents inside the freezer are not blocked by food items, as this can disrupt cold air circulation.
5. Is the Water Inlet Valve Blocked?
- Location: The water inlet valve is usually at the back of the refrigerator where the water line connects.
- Check for Freezing: Sometimes, mineral deposits or ice can build up in the inlet valve, preventing water from entering the ice maker. If you suspect this, you might need to disconnect the water line and check for blockages. This can be a more involved step, and if you’re uncomfortable, it’s best to call a technician.
Addressing a KitchenAid Ice Maker Stuck in a Cycle
Sometimes, you might find your KitchenAid ice maker stuck. This can manifest in a few ways, such as the ejector arm being perpetually in the down position, or the ice maker continuously trying to cycle.
What to Do When the Ice Maker is Stuck:
- Manually Move the Ejector Arm: If the ejector arm is stuck in the down (ice-making) position, you can try to gently push it up. Be careful not to force it. Sometimes, a slightly misaligned arm can cause this.
- Power Cycle the Refrigerator: A full power cycle can sometimes reset a stuck ice maker.
- Unplug the refrigerator from the wall outlet.
- Leave it unplugged for at least 5 minutes.
- Plug it back in.
- This might reset the control board and clear the stuck cycle.
- Check for Ice Buildup: Excessive ice buildup around the ice maker can cause it to jam. If you see ice where it shouldn’t be, you may need to manually remove it.
- Turn off the ice maker.
- Use a plastic scraper or a hairdryer on a low setting to gently melt any ice. Never use sharp metal objects, as they can damage the ice maker.
- Clean up any water and ensure the area is dry before turning the ice maker back on.
Interpreting and Resolving KitchenAid Ice Maker Error Codes
Modern KitchenAid refrigerators often have diagnostic capabilities, and you might encounter a KitchenAid ice maker error code. These codes provide valuable information about what’s wrong.
How to Handle Error Codes:
- Consult Your Manual: The most important step is to refer to your KitchenAid refrigerator ice maker manual. It will have a section explaining specific error codes and their meanings.
- Common Error Code Meanings: While codes vary, some common issues they might indicate include:
- Temperature Sensor Fault: The refrigerator might not be reading the freezer temperature correctly.
- Water Fill Issue: The ice maker is not detecting water filling the mold.
- Motor or Actuator Problem: The motor that drives the ice making or dispensing mechanism might have an issue.
- Perform a Reset After Identifying the Code: Once you know what the error code signifies, perform the reset procedure. Sometimes, the code is a temporary glitch that a reset can clear.
- Check Related Components: If the error code points to a specific component (e.g., water fill), check that component for obvious issues like blockages or loose connections.
What to Do If Your KitchenAid Ice Maker is Overflowing
A KitchenAid ice maker overflowing is less common but can happen. This usually means the water fill valve is not shutting off properly.
Fixing an Overflowing Ice Maker:
- Turn Off the Ice Maker: Immediately switch the ice maker to the OFF position to prevent further water issues.
- Check the Water Inlet Valve: The most likely culprit is the water inlet valve. If it’s faulty, it might not be closing completely, leading to continuous water flow. You may need to replace this part.
- Inspect the Water Line: Ensure the water line isn’t kinked or damaged in a way that could affect the pressure or flow regulation.
- Water Pressure: Extremely high household water pressure can sometimes overwhelm the ice maker’s fill system. If your water pressure is unusually high, consider installing a pressure regulator on your main water line.
KitchenAid Ice Maker Troubleshooting Steps: A Comprehensive Checklist
If you’re still facing issues after trying the basic reset, here’s a more comprehensive list of KitchenAid ice maker troubleshooting steps.
Advanced Troubleshooting Checklist:
- Clean the Ice Maker Components: Over time, mineral deposits or small ice particles can accumulate and interfere with operation.
- Ice Bin: Remove the ice bin and wash it with warm, soapy water. Rinse thoroughly and dry.
- Ice Ejector Arm: Ensure the arm moves freely.
- Water Dispensing Tube: Check the tube that fills the ice mold for any blockages.
- Check the Ice Level Control: Most ice makers have a wire arm or sensor that tells the unit when the ice bin is full. If this is out of position or obstructed, it can stop ice production.
- Ensure the arm is in the correct position.
- If it’s a sensor, make sure it’s clean and not blocked.
- Test the Water Inlet Valve: This is a more technical step. You can often test the valve by manually applying voltage to it (if you’re comfortable with basic electrical checks) to see if it opens and closes. However, it’s safer to have a professional do this.
- Inspect Door Seals: A poor freezer door seal can lead to frost buildup and affect ice maker performance. Check that the door seals are clean and creating a tight seal. Run a dollar bill between the door and the frame; if you can pull it out easily, the seal might be weak.
- Defrost Cycle Issues: If the refrigerator has recently gone through a defrost cycle, it’s normal for the ice maker to pause temporarily. Ensure the refrigerator is cooling properly overall.
- Control Board: In rare cases, the main control board of the refrigerator might be malfunctioning, affecting the ice maker. This is a complex issue that requires professional diagnosis.
When to Call a Professional
While many ice maker issues can be resolved with simple KitchenAid ice maker troubleshooting steps, some problems require the expertise of a qualified appliance repair technician.
Signs You Need Professional Help:
- Persistent Error Codes: If you’ve followed the manual and performed resets, but error codes continue to appear.
- Water Leaks: Any significant water leaks coming from the ice maker unit or water lines.
- Electrical Issues: If you suspect electrical problems with the water inlet valve, control board, or wiring.
- Unusual Noises: Strange grinding or clunking sounds from the ice maker.
- Lack of Confidence: If you’re not comfortable performing any of the troubleshooting steps, it’s always best to let a professional handle it to avoid further damage.
Frequently Asked Questions (FAQ) about KitchenAid Ice Makers
Here are some common questions people have about their KitchenAid ice makers:
FAQ
Q1: How long does it take for a KitchenAid ice maker to start making ice after a reset?
A1: After a successful reset, it typically takes 12 to 24 hours for the ice maker to begin producing ice.
Q2: My KitchenAid ice maker is making hollow ice cubes. What’s wrong?
A2: Hollow ice cubes can indicate a problem with the water fill level or that the water is freezing too quickly. Ensure your freezer temperature is at the correct setting (0°F/-18°C) and check for any obstructions in the water line or inlet valve.
Q3: Can I turn off my KitchenAid ice maker without unplugging the fridge?
A3: Yes, most KitchenAid ice makers have an ON/OFF switch directly on the ice maker unit itself. Look for a lever or toggle switch.
Q4: Why is my KitchenAid ice maker not dispensing ice?
A4: This could be due to several reasons: the ice bin is full (the arm is up), the ice maker is turned off, there’s a blockage in the dispenser chute, or the ice maker mechanism itself is faulty. Check the ice level arm first.
Q5: I don’t have an ice maker reset button. What should I do?
A5: While most models have one, some newer or different designs might not have a physical reset button. In such cases, the primary method is a full power cycle of the refrigerator. Unplug it for at least 5 minutes, then plug it back in. Refer to your KitchenAid refrigerator ice maker manual for specific instructions.
By following these steps, you should be well-equipped to troubleshoot and reset your KitchenAid ice maker, getting you back to enjoying a steady supply of ice. Remember, patience and careful observation are key when dealing with appliance issues.