Image Source: i.ytimg.com
How To Replace Filter In Kitchenaid Refrigerator Easy Steps
Can you replace a KitchenAid refrigerator water filter yourself? Yes, absolutely! Replacing your KitchenAid refrigerator water filter is a straightforward process that most homeowners can accomplish with minimal effort and no special tools. How often should you replace your KitchenAid refrigerator water filter? It’s generally recommended to replace your KitchenAid refrigerator water filter every six months to ensure optimal water and ice quality.
Having clean, great-tasting water and ice directly from your refrigerator is a modern convenience many of us rely on. When that water flow slows down, or the ice starts tasting a bit off, it’s a clear signal that your KitchenAid refrigerator water filter needs attention. Thankfully, the process to change a KitchenAid fridge filter is designed to be user-friendly, meaning you don’t need to be a repair expert to get the job done. This guide will walk you through everything you need to know, from locating your filter to resetting your indicator light, making your Kitchenaid refrigerator water filter replacement a breeze.
Locating Your KitchenAid Refrigerator Filter
The first step in any Kitchenaid refrigerator water filter replacement is knowing where is Kitchenaid refrigerator filter located. KitchenAid, like many appliance manufacturers, often places their water filters in accessible yet somewhat hidden spots to maintain the refrigerator’s sleek design. The exact location can vary slightly depending on your specific KitchenAid refrigerator model, whether it’s a Kitchenaid french door refrigerator filter, a Kitchenaid side-by-side refrigerator filter, or a Kitchenaid bottom freezer refrigerator filter.
Here are the most common locations for your KitchenAid refrigerator water filter:
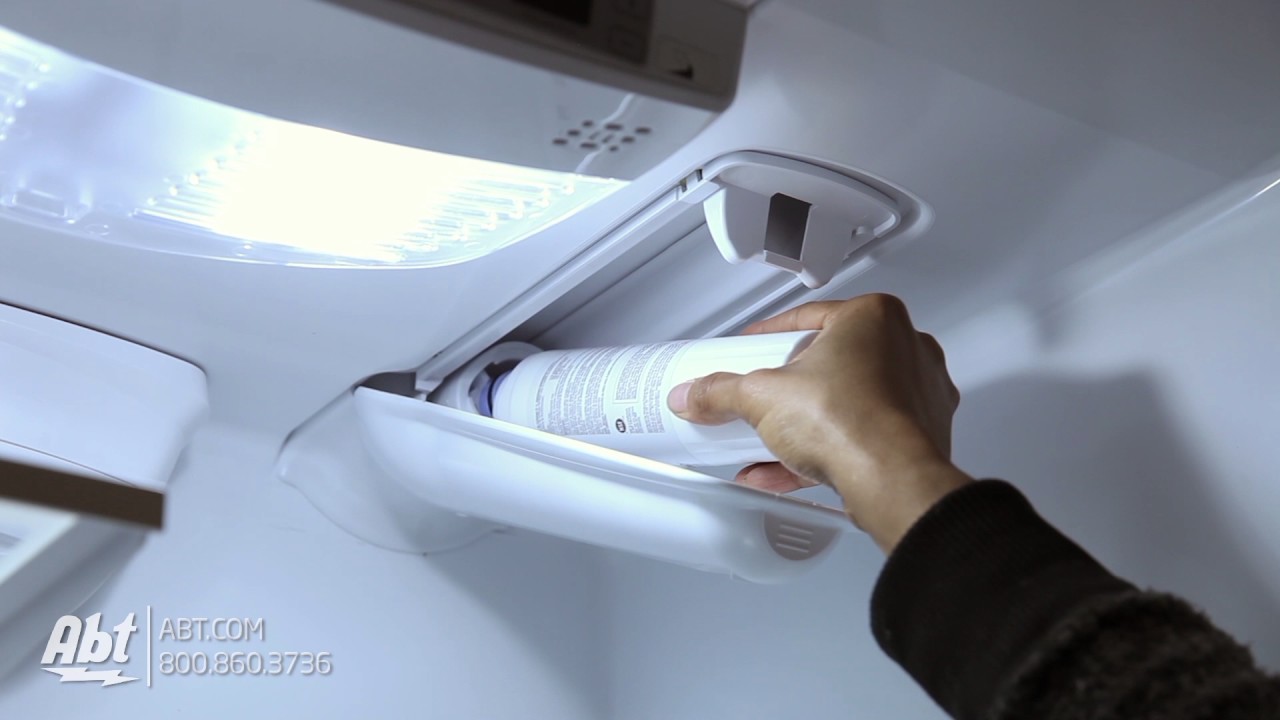
- Inside the refrigerator compartment, upper right corner: This is a very popular spot. You’ll often find a small cover or grille that conceals the filter.
- Behind the toe kick panel at the bottom of the refrigerator: For some models, you’ll need to access the filter from the exterior base of the unit.
- Inside the refrigerator compartment, in the crisper drawer area: Less common, but some models might tuck the filter away in this zone.
- In the fresh food compartment, towards the top: You might see a small knob or a push-button release for the filter housing.
Pro Tip: Always consult your KitchenAid refrigerator’s owner’s manual. It will provide the most accurate and specific location for your model’s water filter. If you no longer have the physical manual, a quick search online for your refrigerator’s model number followed by “owner’s manual” should yield digital results.
Choosing the Best KitchenAid Refrigerator Water Filter
When it comes to replacing your filter, selecting the best KitchenAid refrigerator water filter is crucial for performance and water purity. While generic or compatible filters might seem tempting due to a lower Kitchenaid refrigerator filter cost, sticking with genuine KitchenAid filters or high-quality, certified aftermarket alternatives is generally recommended.
Why choose genuine or certified filters?
- Guaranteed Compatibility: They are specifically designed to fit and function perfectly with your KitchenAid refrigerator, ensuring no leaks or operational issues.
- Superior Filtration: Genuine filters are tested to meet stringent standards for removing common contaminants like chlorine, lead, mercury, and sediment.
- Durability and Longevity: They are built to last the recommended six months or the specified gallon capacity without degrading in performance.
When looking for a replacement, make sure the filter packaging explicitly states it is compatible with your KitchenAid model series. You’ll often see part numbers listed that you can cross-reference.
Step-by-Step Guide: How To Replace Filter In Kitchenaid Refrigerator
Now that you know where to look and what filter to get, let’s dive into the actual Kitchenaid refrigerator water filter replacement process. Remember, the goal is to change Kitchenaid fridge filter smoothly and efficiently.
What You’ll Need:
- New KitchenAid refrigerator water filter (ensure it’s the correct model)
- A towel or small bowl (to catch any residual water drips)
The Easy Steps:
Step 1: Prepare for the Replacement
- Turn off the water supply: While not always strictly necessary for most KitchenAid models, it’s a good precautionary step. Locate the water shut-off valve for your refrigerator (usually behind it or under the sink) and turn it off.
- Have your towel ready: Place a towel or a shallow bowl beneath the filter housing area. This will catch any drips of water that may escape when you remove the old filter.
Step 2: Locate and Remove the Old Filter
This is where the location you found in the previous section comes into play.
- If the filter is in the upper right corner:
- You will likely see a push-button release or a twist-off cap.
- Push-button release: Press the button firmly. The filter should then disengage, allowing you to pull it straight out.
- Twist-off cap: You might need to push the filter inward slightly and then twist it counter-clockwise about a quarter turn. Once it loosens, you can pull it straight out.
- If the filter is behind the toe kick panel:
- You may need to gently pull or unscrew the toe kick panel to access the filter housing.
- The filter might have a handle or a twist-lock mechanism. Follow the same push-and-twist or pull-straight-out method as above.
- For other locations: Observe the housing. There will usually be an obvious way to disengage the filter, often involving a slight push or a twist.
Important: Do not force the filter out. If it feels stuck, double-check your manual or look for a specific release mechanism you might have missed.
Step 3: Install the New KitchenAid Refrigerator Water Filter
This is the how to install Kitchenaid refrigerator filter part, and it’s just as simple as removal.
- Prepare the new filter: Remove the new filter from its packaging. Make sure to remove any protective caps from the filter ends. Some filters have a plastic cap on the outlet end and a pull-tab on the inlet end; remove both.
- Align and insert:
- Identify the correct orientation for the new filter. There will be a notch or guide on the filter that needs to align with a corresponding slot in the housing.
- Gently push the new filter straight into the housing. You should feel it seat into place.
- Secure the filter:
- Push-button release: Once the filter is fully inserted, it should click into place. The release button might pop out automatically.
- Twist-off cap: Push the filter in firmly and then twist it clockwise about a quarter turn until it locks securely. You might feel a slight stop or resistance when it’s properly seated.
Step 4: Flush the New Filter
This is a critical step often overlooked. Flushing removes any air trapped in the system and any loose carbon fines from the new filter.
- Turn the water supply back on: If you turned off the main water supply, turn it back on now.
- Dispense water: Open the refrigerator’s water dispenser. Let the water run for about 2 to 3 minutes, or dispense at least 2-3 gallons of water.
- Discard the first few batches of ice: If your refrigerator also dispenses ice, discard the first two or three full bins of ice to ensure it’s also free of any carbon fines or air.
- Check for leaks: After flushing, carefully inspect the filter housing and the surrounding area for any signs of leaks.
Step 5: Reset the Filter Indicator Light
Most KitchenAid refrigerators have a filter indicator light that alerts you when it’s time to replace the filter. You’ll need to reset this light after installing a new one. The method for this varies by model, but here are the most common ways to reset the Kitchenaid refrigerator filter indicator:
- Common Reset Method 1 (Push and Hold):
- Locate the “Filter” or “Water Filter” button on your refrigerator’s control panel.
- Press and hold this button for 3-5 seconds. The indicator light should turn off or change color (e.g., from red to green).
- Common Reset Method 2 (Specific Button Combinations):
- Some models might require pressing a combination of buttons. For example, you might need to press and hold the “Temp Up” and “Ice Type” buttons simultaneously for a few seconds.
- Common Reset Method 3 (Menu Navigation):
- If your refrigerator has a more advanced digital display, you might need to navigate through the settings menu. Look for options like “Maintenance,” “Settings,” or “Filter Status” and follow the on-screen prompts to reset the filter.
Always refer to your owner’s manual for the precise instructions for your specific KitchenAid refrigerator model to reset the filter indicator. If you’ve lost your manual, searching online for “[Your KitchenAid Refrigerator Model Number] filter reset” will typically provide the answer.
Maintaining Optimal Performance: Filter Lifespan and Indicators
Following a regular replacement schedule is key to maximizing the effectiveness of your water filtration system.
- The Six-Month Rule: As mentioned, every six months is the standard recommendation for a Kitchenaid refrigerator water filter replacement. This timeframe is based on typical usage and the filter’s capacity to trap contaminants.
- Flow Rate Reduction: A noticeable decrease in water flow from the dispenser is a strong indicator that your filter is clogged and needs changing, even if it hasn’t been six months yet.
- Taste and Odor Changes: If your water or ice starts to develop an off-taste or odor, it’s a sure sign the filter is no longer effectively removing impurities.
- The Indicator Light: Pay attention to the filter indicator light on your refrigerator’s control panel. While it’s a helpful guide, don’t rely on it solely.
Troubleshooting Common Issues During Replacement
Even with easy steps, occasional hiccups can occur. Here’s how to handle them:
- Water Leaking from the Housing:
- Cause: The new filter isn’t fully seated, or the O-rings on the filter are damaged or not properly aligned.
- Solution: Remove the new filter. Check the O-rings for any nicks or tears. Ensure the filter is pushed in firmly and twisted (if applicable) until it locks securely. Re-check for leaks after flushing.
- Filter Won’t Go In or Lock:
- Cause: You might be using the wrong filter model, or the filter is not aligned correctly with the housing guides.
- Solution: Double-check that you have the correct filter part number for your KitchenAid refrigerator. Carefully re-align the filter, ensuring any guides or notches are properly matched. Do not force it.
- Water Dispenser Not Working After Replacement:
- Cause: Air might be trapped in the line, or the filter hasn’t been properly flushed.
- Solution: Ensure the water supply is on. Flush the filter again by dispensing water for several minutes. You may need to try several cycles of dispensing and waiting to get the air out.
Kitchenaid Refrigerator Filter Cost Considerations
The Kitchenaid refrigerator filter cost can vary depending on the brand (genuine KitchenAid vs. compatible aftermarket) and where you purchase it.
- Genuine KitchenAid Filters: These typically range from $30 to $60. While more expensive upfront, they offer the assurance of perfect compatibility and tested performance.
- Compatible Aftermarket Filters: You can often find reputable aftermarket filters for $20 to $40. It’s essential to buy from trusted retailers and ensure they are certified for your specific KitchenAid model.
When comparing Kitchenaid refrigerator filter cost, consider the value you’re getting in terms of water quality, filter lifespan, and the longevity of your refrigerator’s water system. Buying in multi-packs can sometimes offer a slight discount.
Specific Model Insights:
Kitchenaid French Door Refrigerator Filter
For KitchenAid French door models, the filter is most commonly found in the upper right-hand corner of the fresh food compartment. Look for a grille or a small cover. The removal and installation typically involve pushing a button to release the old filter and pushing the new one in until it clicks, or a quarter-turn twist.
Kitchenaid Side-by-Side Refrigerator Filter
KitchenAid side-by-side refrigerators often house the water filter in the grille at the bottom of the refrigerator. You may need to remove or access this grille to twist out the old filter and twist in the new one.
Kitchenaid Bottom Freezer Refrigerator Filter
If you have a KitchenAid refrigerator with a bottom freezer, the filter is usually located behind the toe kick panel. This requires a bit more physical access, as you’ll likely need to remove that panel to get to the filter housing.
Frequently Asked Questions (FAQ)
-
Q1: How do I know if my KitchenAid refrigerator needs a new water filter?
A1: Signs include slower water flow, cloudy ice, or a change in the taste or smell of your water and ice. Also, your refrigerator’s filter indicator light will usually illuminate. -
Q2: Can I use a universal water filter in my KitchenAid refrigerator?
A2: While some universal filters claim compatibility, it’s always best to use a filter specifically designed for your KitchenAid model. Using the wrong filter can lead to leaks, poor filtration, or even damage to your refrigerator’s water system. -
Q3: Do I need to shut off the water supply before replacing the filter?
A3: While many KitchenAid models are designed to prevent significant water leakage, it’s a good practice to turn off the water supply valve to your refrigerator as a precaution. -
Q4: My filter indicator light is still on after replacing the filter. What should I do?
A4: You likely need to manually reset the indicator light. Consult your owner’s manual for the specific reset procedure for your model, as it often involves pressing and holding a particular button or combination of buttons on the control panel. -
Q5: How long does a KitchenAid refrigerator water filter last?
A5: A KitchenAid refrigerator water filter is typically designed to last for approximately six months or 500 gallons of water, whichever comes first. This can vary slightly based on water quality and usage.
By following these detailed steps, you can confidently perform a Kitchenaid refrigerator water filter replacement and continue to enjoy pure, refreshing water and ice from your appliance. Regular maintenance is key to ensuring your refrigerator operates efficiently and provides you with the best quality water.