Can you regrout kitchen counter tile yourself? Yes, you absolutely can regrout kitchen counter tile yourself with the right tools and a little patience. It’s a fantastic way to refresh the look of your kitchen and protect your grout lines from stains and damage. If your grout is looking dingy, cracked, or has lost its color, this guide will walk you through the entire process, from removing the old grout to sealing the new. This guide is perfect for anyone looking to tackle kitchen backsplash regrouting, counter tile repair, or simply replacing grout kitchen tiles.
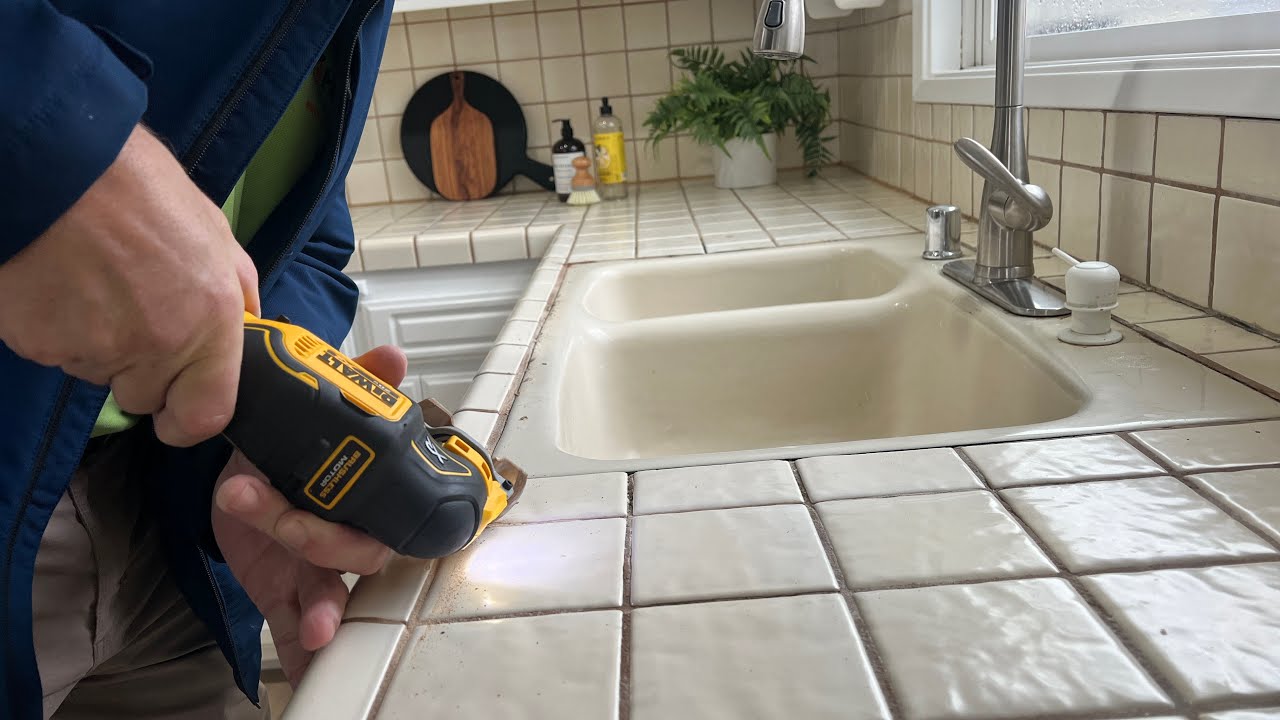
Image Source: i.ytimg.com
Why Regrout Your Kitchen Counter Tile?
Over time, the grout in your kitchen tile can become a breeding ground for dirt, mold, and mildew. It can also crack or crumble due to constant use, moisture, and cleaning. Regrouting not only revitalizes the appearance of your kitchen but also restores the protective barrier that keeps moisture and stains from reaching your countertop’s substrate. It’s a cost-effective alternative to replacing the entire tile installation.
Signs Your Grout Needs Attention
- Discoloration: Grout can darken significantly from spills and dirt.
- Cracking or Crumbling: Grout can lose its integrity and start to break apart.
- Mold or Mildew: Persistent moisture can lead to the growth of mold and mildew, which can be a health concern.
- Loose Tiles: Damaged grout can lead to tiles becoming loose.
- Water Stains: If grout is porous, water can seep through, causing stains underneath.
Gathering Your Supplies: The Essential Toolkit
Before you begin grout removal kitchen counter, make sure you have all the necessary tools and materials. Having everything ready will make the process smoother and more efficient.
Tools You’ll Need:
- Safety Glasses: Essential for protecting your eyes from flying debris.
- Gloves: To protect your hands from chemicals and sharp tools.
- Dust Mask: To avoid inhaling grout dust.
- Utility Knife or Grout Saw: For initial grout removal. A grout saw is specifically designed for this task and is highly recommended.
- Oscillating Multi-Tool with Grout Blade (Optional but Recommended): This power tool makes grout removal kitchen counter significantly faster and easier.
- Putty Knife or Scraper: For scraping away stubborn grout residue.
- Stiff Bristle Brush: For cleaning grout lines.
- Vacuum Cleaner with a Brush Attachment: For removing dust and debris.
- Bucket: For mixing grout and water.
- Grout Float: A specialized tool for applying and pressing grout into the joints.
- Sponge: For cleaning excess grout. Use a damp, not soaking wet, sponge.
- Clean Cloths or Rags: For final cleaning and polishing.
- Painter’s Tape or Masking Tape: To protect surrounding surfaces.
- Caulking Gun and Kitchen-Grade Silicone Caulk: For sealing edges and corners.
Materials You’ll Need:
- New Grout: Choose the best grout for kitchen counters. Consider sanded grout for wider joints (1/8 inch or more) and unsanded grout for narrower joints (less than 1/8 inch). For kitchen counters, especially those prone to stains, epoxy grout is an excellent, durable, and stain-resistant option.
- Grout Sealer: A crucial step to protect your new grout from stains and moisture. Look for a high-quality tile grout sealant kitchen.
- Water: For mixing grout and cleaning.
- Mild Soap or Grout Cleaner: For initial cleaning of the tile surface.
Step-by-Step Guide: How to Regrout Kitchen Counter Tile
This comprehensive guide will take you through each stage of the regrouting process.
Step 1: Preparation is Key
Thorough preparation ensures a clean and efficient workflow.
Protecting Your Workspace
- Clear the Countertop: Remove all items from the countertop, including appliances, dishes, and decorations.
- Tape Off Surrounding Areas: Use painter’s tape to protect adjacent countertops, backsplashes, cabinets, and sinks. This prevents accidental damage from tools and grout.
- Ventilate the Area: Open windows and doors for good airflow, especially when using power tools or grout.
Cleaning the Existing Grout
Even before removal, a good cleaning can help.
- General Cleaning: Use a mild soap and water solution or a dedicated tile and grout cleaner to wash the entire countertop.
- Stubborn Stains: For tougher stains or mildew, a mixture of baking soda and water or a specialized grout cleaner can be effective.
- Rinse Thoroughly: Ensure all cleaning residue is rinsed away and the grout is completely dry before proceeding to removal.
Step 2: Removing the Old Grout
This is often the most labor-intensive part of the process. Take your time to avoid damaging the tiles.
Methods for Grout Removal
- Manual Removal (Utility Knife or Grout Saw):
- Hold the knife or saw at an angle to the grout line.
- Gently saw back and forth, working slowly.
- Focus on removing about half of the grout’s depth to create a clean channel for the new grout.
- Be careful not to let the blade slip and scratch the tile edges.
- Power Tool Removal (Oscillating Multi-Tool):
- Attach a grout removal blade to your oscillating multi-tool.
- Set the tool to a low speed to start.
- Guide the blade along the grout line, allowing the tool to do the work.
- This method is much faster but requires a steady hand to avoid damaging the tiles.
- Work in sections and clean out debris as you go.
Tips for Effective Grout Removal:
- Work in Small Sections: This prevents the dust from becoming overwhelming and allows you to focus.
- Don’t Rush: Patience is crucial here. Aggressive removal can chip or crack your tiles.
- Vacuum as You Go: Regularly vacuum up the dust and debris created during removal.
Step 3: Cleaning the Grout Lines After Removal
Once the old grout is out, the lines need to be pristine for the new grout to adhere properly.
- Vacuum Thoroughly: Use your vacuum cleaner with a crevice tool to suck up all remaining grout dust and debris from the lines.
- Wipe with a Damp Cloth: Lightly dampen a clean cloth and wipe down all the grout lines. This will pick up any fine dust particles.
- Inspect: Check the grout lines to ensure they are clean and free of any old grout remnants. If necessary, use a stiff bristle brush and vacuum again.
- Allow to Dry: Ensure the grout lines are completely dry before proceeding to the next step.
Step 4: Mixing the New Grout
The way you mix your grout can significantly impact its performance and appearance.
Choosing the Right Grout
- Sanded vs. Unsanded Grout: For kitchen counters, especially if you’re regrouting ceramic kitchen tile, the joint width is a key factor. Joints wider than 1/8 inch typically require sanded grout. Unsanded grout is for narrower joints and is less prone to cracking in those situations. However, sanded grout can sometimes scratch softer tiles if not handled carefully.
- Epoxy Grout: For ultimate durability, stain resistance, and water resistance in a kitchen environment, epoxy grout kitchen counter is an excellent choice. It’s more expensive and can be trickier to work with than cementitious grout, but its performance is superior.
- Pre-Mixed Grout: These are convenient but can be more expensive and have a shorter lifespan once opened.
Mixing Cementitious Grout (Sanded or Unsanded)
- Read the Manufacturer’s Instructions: Always follow the specific mixing ratios provided on the grout packaging.
- Add Water Gradually: Pour the dry grout into a clean bucket. Slowly add the recommended amount of water while mixing.
- Achieve the Right Consistency: The goal is a consistency like peanut butter or thick toothpaste. It should be smooth and spreadable, not runny or crumbly.
- Mix Thoroughly: Mix until there are no dry clumps. Avoid overmixing, which can introduce too much air.
- Let it Slake: Most cementitious grouts require a “slaking” period (usually 5-10 minutes) after initial mixing. This allows the chemicals to fully hydrate. Remix briefly after slaking.
- Work in Small Batches: Grout has a limited working time once mixed, so only mix what you can use within about 20-30 minutes.
Mixing Epoxy Grout
- Strict Adherence to Instructions: Epoxy grout typically comes in two or three parts that must be mixed in very precise ratios. Inaccurate mixing will result in improper curing.
- Use a Mechanical Mixer (Optional but Recommended): For larger batches, a mechanical mixer attached to a drill can ensure thorough and consistent mixing.
- Avoid Overmixing: Similar to cementitious grout, overmixing can introduce air bubbles.
- Short Pot Life: Epoxy grout has a much shorter pot life than cementitious grout, so mix only what you can apply immediately.
Step 5: Applying the New Grout
This is where your countertop starts to look new again!
Using a Grout Float
- Load the Float: Scoop a generous amount of mixed grout onto your grout float.
- Apply to Grout Lines: Hold the float at a 45-degree angle to the tile surface.
- Press and Spread: Force the grout into the joints with firm pressure, spreading it diagonally across the tiles. Work in one direction.
- Fill All Joints: Ensure all the grout lines are completely filled. Overlap your strokes to avoid leaving any gaps.
- Remove Excess Grout: As you spread, use the edge of the grout float to scrape off excess grout from the tile surface, holding the float at a sharper angle (almost perpendicular to the tile).
Working in Sections
- Manageable Areas: Apply grout to small, manageable sections at a time to prevent it from drying out before you can clean it.
- Diagonal Strokes: Always apply grout at a 45-degree angle to the grout lines. This helps push the grout deep into the joints and prevents removing too much grout from the joints.
Step 6: Cleaning Off Excess Grout
This is a critical step for achieving a clean finish.
Initial Cleaning (Wiping)
- Wait for the Grout to Set Slightly: Allow the grout to set for about 10-20 minutes (check manufacturer instructions for specific timing). It should be firm enough not to be pulled out of the joints by the sponge.
- Damp Sponge: Dampen your sponge in clean water and wring it out thoroughly. The sponge should be damp, not wet.
- Gentle Wiping: Gently wipe the surface of the tiles in a diagonal motion across the grout lines.
- Rinse the Sponge Frequently: Rinse the sponge in the clean water bucket often, and always wring it out well before wiping the tiles. This is crucial to avoid smearing grout all over the tiles.
- Use a Second Bucket for Rinsing: Having a second bucket of clean water to rinse your sponge before dipping it back into the grout water can help keep your water cleaner longer.
Final Cleaning (Buffing)
- Allow Grout to Cure Further: Let the grout set for another 30-60 minutes, or until it becomes hazy on the tile surface.
- Clean, Dry Cloth: Use a clean, dry, soft cloth or microfiber towel to gently buff away the remaining grout haze from the tile surface.
- Buff in Circles: Work in a circular motion to polish the tiles.
- Repeat if Necessary: If a haze remains, you may need to repeat the buffing process with a clean part of the cloth.
Step 7: Curing and Sealing
Proper curing and sealing are essential for the longevity and protection of your newly regrouted tiles.
Grout Curing Time
- Follow Manufacturer Guidelines: Grout needs time to cure and harden. Cementitious grout typically takes 24-72 hours to cure, while epoxy grout might cure faster but still requires a specific time.
- Avoid Heavy Use: During the curing period, avoid putting any stress on the countertop, especially washing or placing heavy items.
- Keep the Area Dry: Try to keep the area dry during the initial curing phase.
Applying the Grout Sealer
- When to Seal: Once the grout has fully cured (check the grout manufacturer’s recommended curing time, often 72 hours or more), it’s time to seal it.
- Choose Your Sealer: Select a high-quality tile grout sealant kitchen. There are penetrating sealers and topical sealers. Penetrating sealers are generally preferred for kitchen counters as they soak into the grout pores without leaving a surface film that can wear off.
- Application:
- Ensure the grout lines are clean and completely dry.
- Apply the sealer using a small brush, roller, or applicator pad, focusing on the grout lines.
- Wipe off any excess sealer from the tile surface immediately with a clean cloth.
- Multiple Coats: Some sealers recommend applying a second coat after the first has dried. Follow the product instructions.
- Resealing: Reapply grout sealer periodically, typically every 6-12 months, depending on the sealer and the amount of wear and tear your countertop receives.
Step 8: Caulking Edges and Corners
Caulking provides a flexible, waterproof seal at transition points.
- Remove Old Caulk: If there’s existing caulk, carefully remove it using a utility knife or a specialized caulk removal tool.
- Clean the Area: Ensure the edges and corners are clean and dry.
- Apply Silicone Caulk: Cut the tip of the caulk tube at a 45-degree angle to create a small opening. Apply a steady bead of kitchen-grade silicone caulk into the gaps between the countertop and the backsplash, sink, or cabinets.
- Smooth the Bead: Wet your finger or a caulk smoothing tool with soapy water and run it along the caulk bead to create a smooth, uniform finish. Wipe away excess caulk immediately.
- Allow Caulk to Cure: Let the caulk cure completely according to the manufacturer’s instructions before using the area.
Maintaining Your Newly Regrouted Countertop
Proper maintenance will keep your kitchen tile looking its best.
Cleaning Kitchen Tile Grout
- Regular Cleaning: Wipe down your countertop regularly with a damp cloth and mild dish soap.
- Avoid Harsh Chemicals: Stay away from abrasive cleaners, bleach, and acidic products, which can damage the grout and sealer.
- Spill Management: Clean up spills immediately to prevent them from penetrating the grout.
- Use a Soft Brush: For tougher grime in grout lines, use a soft-bristled brush (like an old toothbrush) and a mild cleaner.
What is the Best Grout for Kitchen Counters?
The best grout for kitchen counters depends on your priorities:
- Durability and Stain Resistance: Epoxy grout is king here. It’s highly resistant to stains, moisture, and chemicals, making it ideal for busy kitchens.
- Ease of Use and Cost: Cementitious grout (sanded or unsanded) is more budget-friendly and easier for DIYers to work with. You’ll need to be diligent with sealing if you choose this option.
- Aesthetics: Both types come in a wide range of colors. Consider how the grout color will complement your tile.
Can I Regrout Just a Small Section?
Yes, you can regrout just a small section if only a limited area is damaged or discolored. However, be aware that new grout might look slightly different in color from older grout that hasn’t been replaced, especially if it hasn’t been sealed recently.
Frequently Asked Questions (FAQ)
Q1: How long does it take to regrout a kitchen counter?
A1: For a standard kitchen countertop, the entire process, including removing old grout, applying new grout, cleaning, and sealing, can take anywhere from 4 to 8 hours of active work. However, you must factor in curing times between steps, so it’s best to plan for at least a full weekend or spread the work over a couple of days.
Q2: What is the best way to clean grout before regrouting?
A2: Before starting grout removal, it’s beneficial to give the grout lines a good cleaning. Use a stiff brush and a mild cleaner (like a solution of baking soda and water or a dedicated tile and grout cleaner) to remove surface dirt, grease, and mildew. Rinse thoroughly and allow the grout to dry completely before you begin the removal process.
Q3: How do I prevent grout from staining in the future?
A3: The most effective way to prevent grout from staining is by applying a high-quality tile grout sealant kitchen and reapplying it periodically. Additionally, promptly cleaning up spills, especially acidic foods and drinks like wine, coffee, and tomato sauce, will significantly reduce the risk of staining.
Q4: What’s the difference between regrouting and retiling?
A4: Regrouting involves removing the old grout between existing tiles and replacing it with new grout. This refreshes the look and restores the grout’s protective function. Retiling, on the other hand, involves removing the old tiles themselves and installing entirely new ones. Regrouting is a much less invasive and less expensive process than retiling.
Q5: Can I paint my grout instead of regrouting?
A5: While grout paint is available, it’s generally not recommended for kitchen countertops. Grout paint is typically a topical coating that can wear away relatively quickly with heavy use, cleaning, and abrasion. Regrouting with a proper grout and sealing it will provide a much more durable and long-lasting solution for a kitchen environment.
Q6: What if I chip a tile during grout removal?
A6: If you accidentally chip a tile edge during grout removal kitchen counter, you can often repair it. For minor chips, a tile repair epoxy or filler specifically designed for grout and tile can be used. You can also use colored grout or a touch-up paint designed for tiles to blend in the repair. For significant damage, you might consider replacing the affected tile if possible.
Q7: How do I choose the right color grout?
A7: Grout color can drastically change the appearance of your tile.
* Contrast: A contrasting grout color can make individual tiles pop and create a bold look.
* Complement: A grout color that matches or is similar to the tile color can create a more seamless and unified appearance.
* Practicality: Lighter grout colors tend to show dirt more easily, so darker or medium-toned grout can be more practical for busy kitchen areas. Always get grout color samples to see how they look with your specific tiles before committing.
By following these steps and tips, you can confidently tackle the project of regrouting ceramic kitchen tile or any other type of tile on your kitchen counters. Enjoy your refreshed and protected kitchen!