Can you give your kitchen cabinets a fresh look with stain? Yes, you absolutely can! Refinishing your kitchen cabinets with stain is a great way to update your kitchen’s look without spending a lot of money on new cabinets. It takes work, but it can make your old cabinets look new again and save you a lot of cash.
Refinishing cabinets means giving them a new surface. When you use stain, you add color while still letting the natural look of the wood show through. This is different from paint, which covers the wood completely. If your cabinets are made of real wood and you like the wood grain, staining is a fantastic choice.
Why do this yourself? Paying someone else costs a lot. Doing it yourself costs much less. You only pay for the stuff you need: stain, cleaner, sandpaper, brushes, and a protective coat. This can save you thousands of dollars compared to buying new cabinets or paying a pro to refinish them.
Let’s look at how you can give your cabinets a beautiful new stained finish.
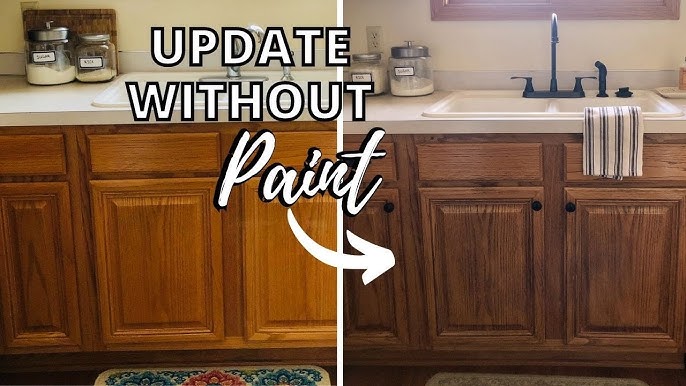
Image Source: i.ytimg.com
Get Ready Before You Start
Good preparation is key. It makes the job easier and the finish look better. Do not skip this step! Preparing cabinets for stain takes time, but it is very important.
Plan What You Need
Make a list of tools and supplies. It is better to have everything ready before you begin.
- Safety Stuff:
- Safety glasses (protect your eyes)
- Gloves (keep hands clean)
- Mask or respirator (protect lungs from dust and fumes)
- Drop cloths or plastic sheets (protect floors and counters)
- Tools:
- Screwdriver (to take off doors and hardware)
- Bucket
- Sponges or rags
- Scrapers (for tough old finish)
- Sandpaper (different grit levels: coarse, medium, fine)
- Sanding blocks or an electric sander
- Paintbrush or foam brush (for stain and sealer)
- Clean cloths or rags (for wiping stain)
- Stir stick (to mix stain)
- Supplies:
- Cabinet cleaner or degreaser
- Wood filler (if needed for holes or dents)
- Wood conditioner (helps stain go on evenly)
- Wood stain (your chosen color)
- Protective top coat (polyurethane, polycrylic, etc.)
- Mineral spirits or paint thinner (for cleaning brushes if using oil-based products)
- Painter’s tape
Set Up Your Work Spot
Find a place to work that is well-aired. A garage or basement is good. Put down drop cloths everywhere to protect floors and other things. Set up sawhorses or blocks to hold doors flat while you work on them.
Take Cabinets Apart
This is the first hands-on step. You need to remove everything from the cabinets. This makes it much easier to work on the frames and the doors separately.
Empty Everything Out
Take all dishes, food, and other items out of the cabinets and drawers. Find a safe place to store them while you work.
Remove Doors and Drawers
Use your screwdriver to take off the doors from the cabinet frames. Also, pull out all the drawers. It helps to number each door and drawer and mark where it goes on the cabinet frame. Use a small piece of tape on the inside edge. This makes putting them back much easier later.
Take Off Hardware
Remove hinges from the doors and frames. Take off knobs and pulls from the doors and drawers. Put all the hardware in a safe place, like a plastic baggie. Label the baggies if needed. You can clean your old hardware or buy new ones later for a fresh look.
Clean Cabinets Very Well
Kitchen cabinets get greasy and dirty. Stain will not stick to dirt or grease. Cleaning is a very important step.
Wash Everything Down
Use a strong cabinet cleaner or degreaser. Mix it in a bucket with water if needed. Wipe down the cabinet frames, doors, and drawer fronts. Pay close attention to areas around the stove and sink. Grease builds up there.
Scrub Away Grime
Use a sponge or rag to scrub all surfaces. For really tough spots, you might need a plastic scraper. Make sure to get into corners and details.
Rinse and Let Dry
After scrubbing, wipe everything down with a clean rag and clean water. Get rid of all cleaner soap. Let all parts dry completely before moving on. This can take some time.
Get Rid of the Old Look
Your cabinets likely have an old finish on them. It might be paint, stain, or varnish. You need to remove cabinet finish so the new stain can soak into the wood evenly. This is a key step for a good stain job.
Choose How to Remove Finish
You have a few ways to do this:
- Chemical Stripper: This is good for many layers of old finish. You put the chemical on, let it work, and then scrape off the old finish. It is messy and needs good air flow because the fumes are strong. Always wear gloves and safety glasses.
- Sanding: This is more work but less messy with chemicals. You sand away the old finish. We will talk more about sanding next.
- Heat Gun: For paint, a heat gun can soften it so you can scrape it off. Be careful not to burn the wood.
Often, you will use a mix of these. You might use a stripper for tough areas and then sand. Or just sand if the old finish is thin.
Using Chemical Stripper (If Needed)
Follow the product’s instructions carefully.
1. Put down lots of drop cloths.
2. Brush the stripper onto a small area.
3. Wait the time told on the can. The finish should bubble or soften.
4. Use a scraper to gently lift off the old finish. Be careful not to dig into the wood.
5. Clean the scraped area with the right cleaner for the stripper you used (often mineral spirits or water).
6. Let it dry completely.
Make Everything Smooth
Sanding cabinets is super important. It gets rid of any old finish left, smooths out the wood, and helps the new stain soak in evenly. The final look depends a lot on how well you sand.
Start with Coarse Sandpaper (Maybe)
If you did not use a stripper or there is still a lot of old finish, start with rougher sandpaper. Something like 80 or 100 grit is good. An electric sander saves a lot of time on flat parts like doors and drawer fronts.
- Sand with the wood grain. Never sand across the grain, or you will make scratches you cannot hide.
- Apply even pressure. Do not push too hard in one spot.
Move to Medium Sandpaper
After getting most of the old finish off, switch to medium grit sandpaper, like 120 or 150. This smooths out the marks left by the rougher paper.
- Keep sanding all surfaces: doors, drawer fronts, and cabinet frames.
- Use a sanding block for flat areas and edges. For curves or details, you might need to fold the sandpaper or use a special sanding sponge.
Finish with Fine Sandpaper
The last step for sanding cabinets is using fine grit sandpaper. Use 180 or even 220 grit. This makes the wood very smooth and ready for stain.
- Sand everything one last time with the fine paper.
- Run your hand over the wood. It should feel very smooth everywhere. If it does not, sand more.
Deal with Refinishing Cabinet Doors
Cabinet doors need extra care. They are the most visible part. Sand the fronts and backs carefully. Pay attention to the edges and any raised panels or details. Hand-sanding might be best for detailed areas to avoid sanding too much or changing the shape.
Get Ready for Stain
After sanding, the wood is ready, but it needs one more cleaning step. This is part of preparing cabinets for stain.
Get Rid of Dust
Sanding makes a lot of dust. This dust must be gone before you stain.
- Use a vacuum with a brush tool to get dust off all surfaces and out of corners.
- Wipe everything down with a clean, dry cloth.
- For the final clean, use a ‘tack cloth’. This is a slightly sticky cloth that picks up fine dust. Wipe gently over all surfaces.
Think About Wood Conditioner
Wood conditioner is a liquid you put on wood before staining. It helps the stain soak in more evenly, especially on woods like pine, maple, or birch that can get blotchy.
- If your cabinets are made of a wood that stains unevenly, use a wood conditioner.
- Apply it with a brush or cloth following the product instructions.
- Let it soak in for the time suggested (usually 5-15 minutes).
- Wipe off any extra before it dries.
- Apply the stain within a certain time window after the conditioner (check the conditioner can).
Pick Your Stain Color
Choosing cabinet stain is a fun part! The color you pick will change the whole look of your kitchen.
Types of Stain
There are different types of stain. The best stain for cabinets depends on the look you want and how easy it is to use.
- Oil-Based Stains: These are common. They go on smoothly and give you more time to wipe them off before they dry. They usually need mineral spirits for cleanup.
- Water-Based Stains: These dry faster and clean up with water. They might raise the wood grain a bit, requiring light sanding after the first coat. Colors can look different than oil-based.
- Gel Stain: Gel stain cabinets is a good option for cabinets that might not be solid wood, like some older cabinets or those with mixed wood types. It sits more on top of the wood instead of soaking in deeply. This means it can be used over old finishes in some cases (check the can!) and helps avoid blotchiness. Gel stain is thick like jelly, which makes it less drippy.
Test Your Stain Color
Always test your stain color on a hidden spot of your cabinet or on a piece of scrap wood of the same type. The color on the can might look different on your wood. Put on one coat, let it dry, and see if you like it. If you want it darker, try two coats.
What is the Best Stain Color?
The “best” color is the one you love!
* Light stains make kitchens feel bigger and brighter.
* Medium stains are classic and warm.
* Dark stains can look modern or rich and traditional.
Think about your kitchen’s size, light, and the color of your walls and floor.
Put the Stain On
Now for the color! Applying wood stain is the step where you really see the change happen. This is a main part of the cabinet staining process.
Work in Sections
It is best to work on one door or one section of the cabinet frame at a time. This way, the stain does not dry before you can wipe off the extra.
Stir the Stain Well
Before you start and while you work, stir the stain in the can. Do not shake it, as this can make bubbles. Stirring mixes the color that might have settled at the bottom.
Apply the Stain
You can use a brush, foam brush, or clean rag.
* Using a brush: Dip the brush in the stain. Put a good amount on the wood, brushing in the direction of the wood grain. Cover the whole section you are working on.
* Using a rag: Dip a lint-free rag into the stain and rub it onto the wood, following the grain. This gives you good control.
Wipe Off Extra Stain
This is a very important step! Stain needs to soak into the wood, but you must wipe off the extra before it dries. This controls how dark the color is and prevents a sticky, uneven finish.
- After putting stain on a section, let it sit for a short time. The longer you leave it, the darker the color will be. Start by waiting only 1-2 minutes.
- Use a clean, lint-free rag to wipe off the extra stain, again wiping with the wood grain.
- Use fresh parts of the rag often so you are not just spreading stain around.
How to Handle Refinishing Cabinet Doors
Stain doors flat on your sawhorses. Stain the edges first, then the back, and finally the front. This way, if you get drips on the back or edges, they are less noticeable. Always wipe with the grain on all parts of the door.
Second Coat (If Needed)
If one coat is not dark enough after it dries, you can apply a second coat. Let the first coat dry completely according to the can instructions (this can take hours). Then apply the second coat the same way you did the first, brushing or wiping it on and wiping off the extra.
Stain the Cabinet Frames
After doing the doors and drawers, stain the frames that are still in your kitchen. Tape off walls and counters to protect them. Work on one section of the frame at a time. Apply stain, wait, and wipe off the extra, following the wood grain.
Protect Your Work
Stain adds color, but it does not protect the wood from water, scratches, and daily use. You need to apply a protective coat, also called a top coat or sealer. Sealing stained cabinets is the final step for a lasting finish.
Choose Your Sealer
There are different types of clear coats.
* Polyurethane: Very durable. Comes in oil-based and water-based. Oil-based is tougher but can yellow over time, especially over light stains. Water-based dries clear and faster but might need more coats.
* Polycrylic: A water-based product often used over water-based stains or paint. It dries clear and is good for projects that need less heavy use than a tabletop. It is easy to clean up with water.
* Varnish: Also durable, often used on furniture or floors.
* Lacquer: Dries very fast and is very durable, but can be tricky to apply without special spray equipment.
For kitchen cabinets, polyurethane or polycrylic are common choices because they are durable and widely available. Choose the type that works best with your stain (oil over oil, water over water is usually safest, but check labels).
Apply the Sealer
Make sure the stain is completely dry before you start sealing. Check the stain can for drying times – it can take 24-48 hours or even more in cool, wet conditions.
- Stir the sealer gently. Do not shake.
- Use a clean brush made for your type of sealer (natural bristles for oil, synthetic for water-based).
- Apply a thin, even coat over all stained surfaces, following the wood grain. Avoid drips.
- Let the first coat dry completely. Check the can for drying times.
- Lightly sand the first coat with very fine sandpaper (like 220 or 320 grit). This makes the next coat stick better and helps make the finish smooth. Sanding dust will be white.
- Wipe away all dust with a tack cloth or clean rag.
- Apply a second thin coat.
- For kitchen cabinets, 2-3 coats of sealer are usually best for good protection. Lightly sand and clean between each coat (except the last one).
Finish Refinishing Cabinet Doors
Apply sealer to the doors while they are flat. Do the edges first, then the back, then the front. Let each side dry fully before flipping. Make sure the final coat on the front is very smooth.
Put It All Back
Once the final coat of sealer is completely dry (this can take several days to fully harden, although they might be dry to touch sooner), you can put your cabinets back together.
Reattach Hardware
Find the baggies with your hinges, knobs, and pulls. Screw the hinges back onto the doors and frames. Attach the knobs and pulls to the doors and drawers.
Hang Doors and Replace Drawers
Use your numbering system to put each door and drawer back in its correct spot. Attach the doors to the cabinet frames. Put the drawers back in their slides.
Put Things Back Inside
Fill your cabinets and drawers with your dishes and other items.
Enjoy Your ‘New’ Kitchen
Step back and look at your work! You have just saved a lot of money by refinishing your kitchen cabinets yourself. The cabinet staining process is complete. You have transformed your kitchen with stain and elbow grease.
Tips for Great Results
- Take Your Time: Do not rush any step, especially drying times.
- Good Air Flow: Work in a place with open windows or use fans, especially when using strippers, stains, or sealers.
- Read the Cans: Every product is a little different. Read the instructions on the stripper, cleaner, conditioner, stain, and sealer.
- Cleanliness: Keep your work area and tools clean. Dust is your enemy when staining and sealing.
- Practice: If you are new to staining, try a practice piece first. Use an old piece of wood or the back of a drawer front.
Gel Stain Cabinets: A Simpler Path?
We mentioned gel stain earlier. It can be a good choice, especially if you want to skip the full removing cabinet finish step.
- Less Prep: With gel stain, you often only need to clean and lightly sand the old finish, not remove it completely. The gel sits more on top.
- Less Mess: Because it is thick, gel stain drips less than liquid stains.
- Good on Difficult Surfaces: Works well on woods that stain unevenly or even over existing finishes that are not fully removed (always test first!).
- How to Use: Apply a thin coat with a brush or rag. Wipe off the extra to control color. You might need more than one coat for solid coverage or darker color. It does not soak in as much as liquid stain, so wiping technique is key.
- Needs Sealing: Like regular stain, gel stain needs a protective top coat.
Gel stain can make the refinishing cabinet doors process simpler by reducing the need for hard sanding or stripping.
Troubleshooting Common Issues
- Blotchy Stain: This happens when stain soaks into wood unevenly. Using wood conditioner helps a lot. Sanding properly also helps.
- Sticky Finish: Usually means extra stain was not wiped off before it dried, or the stain was not fully dry before sealing. Make sure to wipe well and let stain dry completely.
- Bubbles in Sealer: Caused by shaking the can or brushing too hard. Stir gently. Brush smoothly and do not overwork it.
- Dust in Finish: Happens if you do not clean well after sanding or if your work area is dusty. Clean often and use a tack cloth.
Cost Breakdown (Estimate)
Doing it yourself is much cheaper than hiring out or buying new.
| Item | Estimated Cost Range | Notes |
|---|---|---|
| Cleaner/Degreaser | $10 – $20 | |
| Sandpaper | $15 – $30 | Need several grit levels |
| Stripper (if needed) | $20 – $40 | Depends on brand and how much you need |
| Wood Conditioner | $15 – $25 | Optional, but recommended for some wood |
| Wood Stain | $20 – $40 per quart | Need enough for 2 coats on all cabinets |
| Protective Sealer | $30 – $50 per quart | Need enough for 2-3 coats |
| Brushes/Rags | $20 – $40 | Reusable brushes cost more initially |
| Safety Gear | $15 – $30 | Mask, glasses, gloves |
| Drop Cloths | $10 – $20 | |
| Total Estimate | $160 – $395+ | For an average-sized kitchen |
Note: Costs can change based on store, brand, and how many cabinets you have.
Compare this to thousands for new cabinets or professional refinishing!
Frequently Asked Questions
How long does refinishing cabinets with stain take?
It takes several days, maybe a week or more, depending on your kitchen size and how much time you have each day. There are many steps, and drying times take a while. Do not rush it.
Do I have to remove the old finish completely?
For regular stain that soaks in, yes. You need to remove cabinet finish down to bare wood for even color. If you use gel stain, you might only need to clean and lightly sand the old finish, but test first.
Can I stain over painted cabinets?
Regular stain cannot go over paint because it cannot soak into the wood. You would need to remove the paint completely first. Gel stain might work over painted cabinets with just cleaning and light sanding, but test it to be sure it gives the look you want.
What is the best stain for cabinets?
The best stain depends on your wood and what you like. Oil-based is very common and easy to work with for beginners. Gel stain is good for difficult woods or less prep. Always test colors on your wood.
How many coats of stain do I need?
Usually, 1 or 2 coats. One coat gives a lighter color. A second coat makes it darker. Always wipe off the extra stain after each coat.
How many coats of sealer do I need?
For kitchen cabinets, 2 to 3 thin coats of a protective sealer like polyurethane or polycrylic are best. This gives good protection against daily use.
Why is my stain blotchy?
This often happens on woods like pine or maple that soak up stain unevenly. Using a wood conditioner before staining helps a lot to prevent this. Proper sanding also helps.
How do I clean stained cabinets?
Once the sealer is fully hardened (check the product instructions, could be up to 30 days), clean them with a soft cloth and mild soap and water. Avoid harsh cleaners or too much water.
Can I use the same stain on different types of wood?
Yes, but the color might look different on different woods because they soak up stain differently. Always test on each type of wood you plan to stain.
What if my cabinets have veneer instead of solid wood?
You can stain veneer, but you must be very careful when sanding. Veneer is thin, and you can easily sand through it. Sand gently by hand with fine paper. Gel stain might be a safer option for veneer as it does not require sanding down to bare wood.
Putting in the work to refinish your cabinets with stain is a big project, but it can give your kitchen a stunning update for a fraction of the cost of replacing them. Take your time, follow the steps, and you can have beautiful, ‘new’ cabinets!