Can you really paint kitchen cabinets without sanding? Yes, you absolutely can! Painting kitchen cabinets without sanding is a fantastic way to update kitchen cabinets without sanding, saving you time and effort. This method relies on specialized paints and deglossing agents that create a strong bond with your existing cabinet finish, allowing you to paint cabinets no prep or with minimal preparation. You can achieve beautiful, durable results without the dusty mess and labor of traditional sanding. This guide will walk you through how to refinish cabinets without sanding, giving your kitchen a fresh, new look with a cabinet coating without sanding.
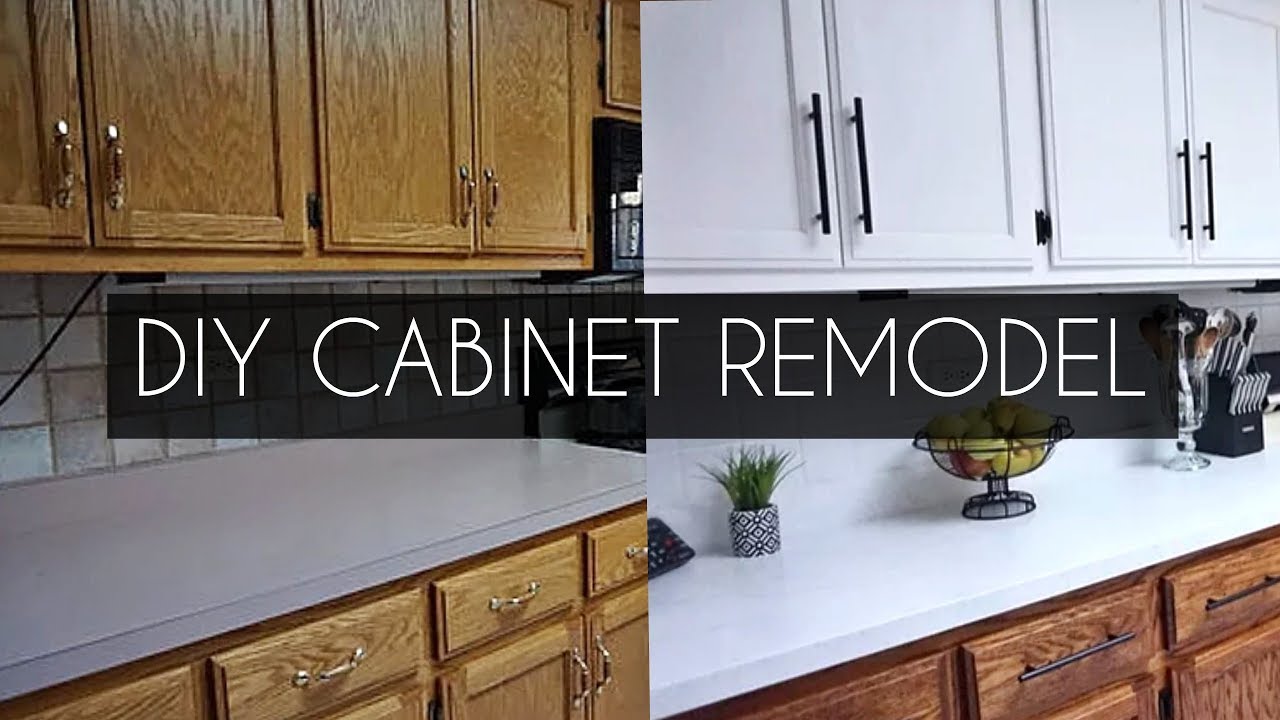
Image Source: i.ytimg.com
Why Skip the Sanding?
Sanding cabinets can be a daunting task. It’s messy, time-consuming, and requires careful attention to detail to avoid damaging the cabinet doors. For many DIYers, the prospect of sanding is enough to postpone or abandon a cabinet painting project altogether. Thankfully, modern advancements in paint technology and surface preparation offer viable alternatives that make this project much more accessible.
Key benefits of painting cabinets without sanding:
- Time-saving: Significantly reduces project duration.
- Less Mess: Eliminates dust and debris associated with sanding.
- Accessibility: Makes cabinet painting achievable for a wider range of DIY skill levels.
- Preserves Original Finish: Avoids potential damage to the underlying material.
- Cost-Effective: Can be cheaper than professional refinishing or extensive prep.
Choosing the Right Products: The Foundation of Success
The success of painting cabinets without sanding hinges on using the correct products. These are not your average wall paints. You need products specifically designed to adhere to pre-finished surfaces.
The Power of Deglossers and Adhesion Primers
Before you even think about paint, you need to ensure the surface is ready to accept it. This is where deglossers and adhesion primers come into play.
Liquid Deglosser for Cabinets
A liquid deglosser is a chemical solution that softens or dulls the existing finish on your cabinets. This process creates a microscopic “tooth” on the surface, allowing the new paint or primer to adhere effectively.
- How it Works: Deglossers typically contain solvents that break down the protective topcoat without removing it entirely. They essentially “etch” the surface at a molecular level.
- Application: Usually applied with a clean cloth. You wipe down the cabinet surfaces, and the deglosser does the work.
- Important Note: Always test a deglosser in an inconspicuous area first to ensure it doesn’t damage your specific cabinet finish. Some older finishes might react differently.
Adhesion Primers: The No-Sand Solution
Adhesion primers are formulated to stick to slick surfaces like laminate, melamine, or varnished wood without the need for sanding. They form a durable base that your topcoat can then adhere to.
- Types of Adhesion Primers:
- Water-based: Easier cleanup, lower VOCs (Volatile Organic Compounds).
- Oil-based/Alkyd: Often offer superior adhesion and durability but have stronger fumes and require mineral spirits for cleanup.
- What to Look For: Brands specifically marketing “cabinet grip,” “adhesion,” or “no-sand” primers. These are engineered for this exact purpose.
No Sand Cabinet Paint
The paint itself is the final layer of protection and color. Some paints are designed with excellent adhesion properties, allowing them to be applied directly over a properly prepared surface (cleaned and deglossed/primed).
- Enamels: These are a popular choice for cabinets due to their durability and smooth finish.
- Water-based Enamels (Acrylic Latex): Offer good durability, easy cleanup, and lower VOCs. Modern formulations are incredibly robust.
- Oil-based Enamels (Alkyd): Traditionally known for exceptional hardness and a smooth finish, but they can be harder to apply, have strong odors, and longer drying times.
- Chalk Paint: Chalk paint kitchen cabinets is a popular choice for a vintage or matte look. It has excellent adhesion properties and often requires minimal prep. However, chalk paint typically needs a topcoat (like polycrylic or wax) for durability, especially in high-traffic areas like kitchens.
- Milk Paint: Similar to chalk paint, milk paint kitchen cabinets can offer a beautiful, often chippy, vintage look. It’s a natural product and adheres well, but also requires a protective topcoat.
Step-by-Step Guide to Painting Cabinets Without Sanding
This process is designed to be as straightforward as possible, allowing you to achieve professional-looking results with less effort.
Step 1: Preparation is Key – Cleaning and Degreasing
Even though you’re skipping sanding, thorough cleaning is crucial. Kitchen cabinets are notorious for accumulating grease, grime, and food splatters. Any residue left on the surface will prevent your new paint or primer from adhering properly.
Materials Needed:
- Mild dish soap
- Warm water
- Clean cloths or sponges
- Degreaser (specifically designed for kitchens or cabinets)
- Gloves
- Safety glasses
Cleaning Process:
- Remove Cabinet Doors and Drawers: Take everything off the cabinet boxes. Label each door and drawer with a number or letter to ensure you put them back in the correct place. Store hardware (hinges, screws) in labeled bags.
- Initial Wipe Down: Mix a solution of mild dish soap and warm water. Use a soft cloth or sponge to wipe down all surfaces of the doors, drawers, and cabinet frames. This will remove loose dirt and dust.
- Tackle Grease and Grime: For tougher grease buildup, use a dedicated kitchen degreaser. Follow the product instructions carefully. Spray the degreaser onto a cloth, not directly onto the cabinets, to prevent drips and over-saturation.
- Rinse Thoroughly: After degreasing, wipe down all surfaces with a clean cloth dampened with plain water. This is essential to remove any degreaser residue, which can interfere with adhesion.
- Dry Completely: Use clean, dry cloths to thoroughly dry all surfaces. Allow ample time for them to air dry as well, especially inside any grooves or edges. Ensure there is absolutely no moisture left.
Step 2: Deglossing the Surface
This is the critical step that replaces sanding. You want to dull the existing sheen without removing the original finish.
Materials Needed:
- Liquid deglosser (e.g., 3M Liquid Sandpaper, Zinsser B-I-N Primer & Sealer – which acts as a deglosser when used as a first coat, or other dedicated cabinet deglossers)
- Clean, lint-free cloths or applicator pads
- Gloves
- Safety glasses
- Well-ventilated area
Deglossing Process:
- Ventilate the Area: Open windows and doors. If using a solvent-based deglosser, consider a fan to help circulate air.
- Apply Deglosser: Dampen a clean cloth with the liquid deglosser. Do not saturate the cloth.
- Wipe Surfaces: Working in small sections, wipe down the cabinet doors, drawer fronts, and cabinet frames. Use a back-and-forth motion. You should see the original finish become dull and less glossy.
- Allow to Dry: Let the deglossed surfaces dry completely according to the product’s instructions. This typically takes about 30-60 minutes, but check your product’s specific drying times.
- Inspect: Once dry, run your hand over the surface. It should feel slightly chalky or dull, not slick and glossy.
Step 3: Applying an Adhesion Primer
This layer is your insurance policy for long-lasting, durable paint. It’s especially important if you’re painting over laminate or melamine, or if you want the absolute best adhesion.
Materials Needed:
- Adhesion primer (specifically for cabinets or slick surfaces)
- High-quality synthetic bristle brush
- High-density foam roller (for smooth surfaces)
- Paint tray
- Painter’s tape
- Drop cloths
- Gloves
- Safety glasses
Priming Process:
- Protect Work Area: Lay down drop cloths to protect your floors and any surrounding surfaces. Use painter’s tape to mask off any areas you don’t want to paint, such as hardware holes or interior cabinet edges.
- Stir Primer: Stir the primer thoroughly. Do not shake it, as this can create air bubbles.
- Apply Thin, Even Coats:
- Brushing: Use a good quality synthetic brush for cutting in edges and corners. Apply the primer in long, even strokes.
- Rolling: Use a foam roller for the larger, flat surfaces of doors and drawer fronts. Apply the primer in a consistent pattern, working in one direction. Avoid overworking the primer, which can lead to streaks.
- Cabinet Frames: Use a combination of brushing and rolling as needed for the cabinet boxes.
- Avoid Runs and Drips: Pay close attention to edges and corners to prevent drips. If you see a drip, smooth it out immediately with your brush.
- Allow Proper Drying Time: Let the primer dry completely according to the manufacturer’s instructions. This is usually at least 2-4 hours, but some primers require longer. Crucially, check if a second coat of primer is recommended by the manufacturer. For very dark cabinets or if you want a flawless color, a second coat of primer can make a significant difference.
- Light De-nibbing (Optional but Recommended): Once the primer is completely dry, you can lightly scuff the surface with a fine-grit sanding sponge (like 220-grit or higher). This is not sanding in the traditional sense; it’s just to knock down any tiny bumps or “nibs” that may have settled into the primer. Wipe away dust with a tack cloth. This step significantly improves the final finish.
Step 4: Painting Your Cabinets
Now for the color! This is where your cabinets start to transform.
Materials Needed:
- Cabinet paint (e.g., water-based enamel, specialized cabinet paint)
- High-quality synthetic bristle brush
- High-density foam roller
- Paint tray
- Painter’s tape
- Drop cloths
- Gloves
- Safety glasses
Painting Process:
- Stir Paint: Stir your chosen paint thoroughly.
- Apply First Coat:
- Apply the paint in thin, even coats using the same brush and roller technique as with the primer.
- Work systematically, ensuring good coverage without overloading the brush or roller.
- Pay attention to the grain direction if you are painting wood.
- Allow Drying Time Between Coats: This is critical for a durable finish. Most paints require at least 4-6 hours between coats, but always check the manufacturer’s recommendations. Some recommend overnight. Rushing this step will lead to a weak, easily damaged finish.
- Apply Second Coat: Apply a second coat following the same method. For very light colors over dark cabinets, or if you want maximum coverage, a third coat might be necessary.
- Apply Third Coat (If Needed): Ensure each coat is fully dry before applying the next.
- Allow Paint to Cure: This is perhaps the most important step after painting. Paint needs time to harden and reach its full durability. This “curing” process can take anywhere from 7 to 30 days, depending on the paint type. During the curing period, be gentle with your cabinets. Avoid harsh cleaning, banging doors, or placing heavy items against them.
Step 5: Reassembling and Enjoying Your New Kitchen
Once the paint has fully cured, it’s time to bring your kitchen back to life.
Process:
- Reattach Hardware: Carefully reattach hinges, knobs, and drawer pulls.
- Rehang Doors and Reinsert Drawers: Align doors and drawers correctly. Adjust hinges if necessary to ensure they hang straight and close properly.
- Clean Up: Remove painter’s tape and drop cloths. Clean your brushes and rollers immediately.
- Admire Your Work: Step back and enjoy the stunning transformation of your kitchen cabinets!
Alternative Methods for a Cabinet Coating Without Sanding
While the deglosser/adhesion primer method is highly effective, there are other popular options for those looking to paint cabinets no prep or with very minimal prep.
Using Specialized Cabinet Paint
Some paints are formulated with advanced adhesion technology, making them specifically suitable for cabinet painting no sanding. These often have built-in primers or unique binders that grab onto slick surfaces.
- Benefits: Can simplify the process by potentially skipping the separate primer step.
- Considerations: Always read the product label carefully. Some “no-sand” paints still recommend a thorough cleaning and deglossing, while others might only require cleaning.
Paint Kitchen Cabinets with Deglosser Only
In some cases, if your existing cabinet finish is in good condition and not overly glossy or worn, you might be able to get away with just cleaning, deglossing, and then applying a high-quality enamel paint.
- When this might work: If your cabinets are already a matte or satin finish and are extremely clean.
- Risks: Adhesion may not be as robust as using a dedicated adhesion primer, potentially leading to chipping or peeling over time, especially in high-moisture areas like kitchens.
Chalk Paint and Milk Paint
As mentioned earlier, chalk paint kitchen cabinets and milk paint kitchen cabinets are popular for their ease of use and unique finishes.
- Pros: Excellent adhesion, often require only cleaning and deglossing.
- Cons: Always require a topcoat (polycrylic, polyurethane, or wax) for durability, especially in a kitchen. This adds an extra step and requires careful application to avoid brush marks or an uneven finish. The final look is typically matte or with a slight sheen, not a high-gloss finish.
Frequently Asked Questions (FAQ)
Q1: Can I really paint my kitchen cabinets without sanding at all?
A1: Yes, you can achieve great results painting kitchen cabinets without traditional sanding. The key is to thoroughly clean and degrease the surfaces, then use a liquid deglosser and/or a high-quality adhesion primer designed for slick surfaces before applying your paint.
Q2: What is the best paint to use for cabinets without sanding?
A2: High-quality water-based enamels are excellent choices. Look for paints specifically labeled for cabinets or trim, as they offer superior durability and a smoother finish. Adhesion primers are also crucial for ensuring the paint sticks well.
Q3: Will painting cabinets without sanding be as durable as sanding and painting?
A3: If done correctly with the right products (degreaser, deglosser, adhesion primer, and quality cabinet paint), the durability can be very comparable. The most critical factors are thorough preparation and using paints designed for adhesion.
Q4: How long will painted cabinets last without sanding?
A4: With proper preparation and high-quality paint, cabinets painted using the no-sand method can last many years, often 5-10 years or more, with good care. Durability depends on the quality of products used, application technique, and how well the cabinets are maintained.
Q5: What if my cabinets are laminate or melamine? Can I still paint them without sanding?
A5: Absolutely! Laminate and melamine are notoriously difficult to paint due to their slick surfaces. Using a specialized adhesion primer is even more critical for these materials. Follow the cleaning, deglossing, and priming steps diligently.
Q6: What is the best deglosser for cabinets?
A6: Look for products specifically labeled as “liquid deglosser,” “liquid sandpaper,” or “surface prep solution.” Brands like 3M, Zinsser, and Krud Kutter offer effective options. Always test in an inconspicuous area first.
Q7: How do I clean grease off my kitchen cabinets before painting?
A7: Use a strong kitchen degreaser. Apply it to a cloth rather than spraying directly onto the cabinets to avoid drips. Wipe down all surfaces thoroughly. Follow up with a clean cloth dampened with water to rinse away any degreaser residue. Dry completely.
Q8: Can I use a hybrid paint for cabinets without sanding?
A8: Hybrid paints, which combine features of latex and oil-based paints, can be excellent choices for cabinet painting without sanding due to their good adhesion and durability. Always check the manufacturer’s recommendations for surface preparation.
Q9: What is the role of a liquid deglosser for cabinets?
A9: A liquid deglosser chemically etches the surface of your cabinets, dulling the existing finish. This dulling creates microscopic roughness (a “tooth”) that allows new paint or primer to adhere much better than it would to a slick, glossy surface. It’s the key step that replaces the mechanical abrasion of sanding.
Q10: How do I update kitchen cabinets without sanding?
A10: To update kitchen cabinets without sanding, you’ll clean them thoroughly, use a liquid deglosser to dull the existing finish, apply a high-adhesion primer, and then paint with a durable cabinet-grade paint. This process revamps the look without the labor of sanding.
This comprehensive guide provides you with the knowledge and steps to successfully paint kitchen cabinets without sanding. By carefully selecting your products and following these detailed instructions, you can achieve a beautiful, long-lasting finish and completely update kitchen cabinets without sanding, giving your kitchen a fresh, modern look.