Image Source: wemovetheworld.com
Step-by-Step How To Pack Kitchen Appliances For Moving
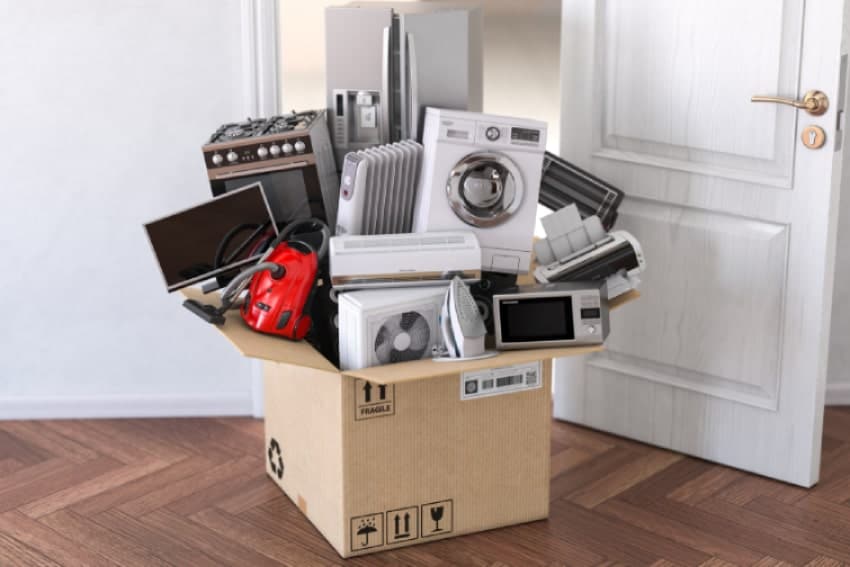
Packing kitchen appliances for a move can feel like a huge task, but doing it right protects your valuable items and makes the moving day much smoother. This guide shows you how to prepare, pack, and move your kitchen gadgets and major appliances safely. We’ll cover everything from defrosting freezer before moving to moving microwave oven safely and packing refrigerator for moving, making sure you know how to handle each item with care. Disconnecting appliance cords, securing appliance doors, and using moving blankets for appliances are all key steps we will go over. We will also discuss packing small kitchen appliances and the best ways to go about packing dishwasher for relocation, along with tips for moving heavy appliances and protecting appliances during transport. Let’s get your kitchen packed and ready for its new home safely and surely.
Getting Ready to Pack Appliances
Before you touch any appliance, a little planning goes a long way. Think about what you need and what needs to be done first.
Gathering Your Supplies
Having the right stuff on hand makes the job easier and safer. Don’t skimp on good packing materials.
- Sturdy moving boxes (various sizes)
- Packing paper (lots of it!)
- Bubble wrap
- Heavy-duty packing tape
- Permanent markers for labeling
- Dolly or hand truck (especially for moving heavy appliances)
- Appliance dolly with straps (best for fridges and washers)
- Moving blankets for appliances or thick furniture pads
- Plastic wrap or shrink wrap
- Dish soap and cleaning supplies
- Towels (old ones are fine)
- Cooler or insulated bags (for frozen items)
Let’s put some of these supplies in a simple table so you can see what goes with what kind of task:
| Supply Type | What it’s used for | Specific Task Examples |
|---|---|---|
| Sturdy Boxes | Packing smaller items, parts, and small appliances | Toaster, blender, cords, trays |
| Packing Paper/Bubble Wrap | Cushioning and wrapping | Filling box spaces, wrapping fragile parts |
| Packing Tape | Securing appliance doors, closing boxes | Holding cords, sealing flaps, taping doors |
| Moving Blankets | Protecting appliances during transport | Wrapping fridges, washers, ovens, microwaves |
| Dolly/Appliance Dolly | Moving heavy appliances safely | Fridge, washer, dryer, oven |
| Plastic/Shrink Wrap | Keeping blankets in place, securing doors | Holding pads on, wrapping oven door |
| Cleaning Supplies | Preparing appliances for packing | Cleaning fridge, dishwasher, oven |
| Towels | Soaking up water | During defrosting freezer before moving, draining dishwasher |
Safety First: Before You Start
Moving appliances can be risky. They are heavy and can be awkward to handle. Always put safety first.
- Unplug everything. Make sure power is off at the wall or breaker box. This is part of disconnecting appliance cords.
- If moving a gas stove, turn off the gas supply safely. If you are unsure how, get help from a pro.
- Get help for moving heavy appliances. Never try to lift or move big items by yourself. A friend or professional movers make it much safer.
- Wear strong, closed-toe shoes.
- Use moving gloves for a better grip.
- Clear a path from the appliance to the moving truck. Remove rugs, toys, or anything you could trip on.
- Have your dolly or hand truck ready to use.
Preparing Major Appliances
Big appliances need the most care and preparation. Let’s go through them one by one.
Readying Your Refrigerator and Freezer
Packing refrigerator for moving is a big job. It takes time, so plan ahead.
h5 Disconnecting Power and Getting Ready
- Pull the fridge away from the wall.
- Find the power cord. Unplug it from the wall. This is the start of disconnecting appliance cords.
- Tape the cord safely to the back of the appliance so it doesn’t get caught or damaged. Use strong packing tape.
h5 Defrosting Your Freezer
This is a must. Defrosting freezer before moving stops water from melting during the move and damaging your floors or other items.
- Turn off the power first (as above).
- Empty everything from the freezer and fridge into coolers. Use ice or dry ice to keep things cold if needed.
- Leave the doors open. Put towels on the bottom shelf and on the floor in front of the freezer to catch water as the ice melts.
- Speed up defrosting by using a hairdryer (on a cool setting, not hot!), fans, or placing bowls of hot water inside. Never use sharp objects to chip away ice; you could damage the freezer walls.
- This can take a full day or more, depending on how much ice you have. Start this step well in advance of moving day.
h5 Cleaning Inside
Once empty and defrosted, clean the inside of both the fridge and freezer well.
- Use warm, soapy water or a mix of baking soda and water.
- Wipe down all surfaces, shelves, drawers, and door seals.
- Rinse with clean water.
- Dry everything completely with a clean towel. This prevents mold and bad smells.
h5 Taking Out Shelves and Drawers
Remove all removable parts like shelves, drawers, and bins.
- Wrap each piece separately in packing paper or bubble wrap.
- Pack these items in a sturdy box.
- Label the box clearly “Fridge Parts” or “Freezer Shelves”.
- You can sometimes pack these parts inside the cleaned fridge if wrapped very well, but boxing them separately is safer.
h5 Securing Appliance Doors
Securing appliance doors is vital for the move. Doors can swing open and get damaged, or damage other things.
- After cleaning and drying, leave the doors open slightly for a few hours to air out. This stops mildew.
- Before moving, close the doors.
- Use appliance straps or heavy-duty packing tape (like mover’s tape) to hold the doors shut. Wrap the tape or strap all the way around the appliance, across the doors.
- Place padding (like a piece of moving blanket or cardboard) under the tape or straps where they touch the appliance finish to prevent marks.
- Make sure the doors are secure but don’t use tape that will harm the finish. Test a small spot first if unsure.
h5 Protecting the Exterior
- Wrap the entire refrigerator in moving blankets for appliances.
- Secure the blankets with plastic wrap or more packing tape. This protects the finish from scratches and dents during moving heavy appliances and transport.
h5 Ready for the Move
Your fridge is now cleaned, defrosted, cord secured, parts packed, doors taped, and wrapped in blankets. It’s ready for moving heavy appliances with a dolly.
Preparing Your Dishwasher
Packing dishwasher for relocation needs draining and cleaning.
h5 Draining Water
Dishwashers hold water in the pump and drain hose. This needs to be drained out.
- Turn off power to the dishwasher at the breaker box first.
- Turn off the water supply line. It’s usually under the sink or behind a kick plate on the dishwasher.
- Disconnect the drain hose and water supply line from the dishwasher. Have a bucket and towels ready, as water will likely come out.
- Lower the drain hose into a bucket to let most of the water run out.
- Sop up any remaining water inside the tub with towels.
h5 Cleaning Inside
Just like the fridge, a clean dishwasher travels better.
- Remove racks and silverware baskets. Clean them separately. You can pack them in a box or secure them inside the dry dishwasher if they are held firmly in place with padding.
- Wipe down the inside of the tub, door, and seals.
h5 Securing Appliance Doors and Parts
Securing appliance doors is needed here too.
- Secure the racks and baskets inside the dishwasher with tape or padding if leaving them inside.
- Close the door.
- Use appliance straps or heavy-duty tape to hold the door shut, just like with the fridge. Pad under the tape or strap.
- Tape the disconnected hoses and cord to the back of the unit.
h5 Protecting the Exterior
- Wrap the dishwasher in moving blankets for appliances or thick padding.
- Secure the padding with plastic wrap or tape. This helps with protecting appliances during transport.
Handling Your Oven and Range
Moving an oven or range depends on if it’s electric or gas.
h5 Disconnecting Power or Gas
- For electric ovens: Turn off the power at the breaker box. Pull the oven out and disconnect the power cord. Tape it to the back.
- For gas ovens: Turn off the gas supply valve. It’s usually behind the stove or nearby. Disconnect the gas line. If you are not trained or comfortable with gas lines, hire a professional. This is a critical safety step. Tape the gas line and cord (if it has one for controls) to the back.
h5 Cleaning
Clean the oven inside and out.
- Use oven cleaner or a self-cleaning cycle if possible (do this well before moving day so it cools down).
- Clean the cooktop.
- Wipe down the outside.
h5 Removing Parts
Remove grates, oven racks, and any other loose parts from the cooktop and oven.
- Wrap each part separately in packing paper or bubble wrap.
- Pack these in a sturdy box. Label it “Oven Parts”.
h5 Securing Appliance Doors
Securing appliance doors for the oven prevents the oven door glass from breaking.
- Close the oven door.
- Use appliance straps or strong tape to hold the door firmly shut. Pad areas where tape or straps touch the finish or glass.
h5 Protecting the Exterior
- Wrap the entire oven or range in moving blankets for appliances.
- Secure the blankets with plastic wrap or tape. This provides protecting appliances during transport.
Moving Microwave Oven Safely
Moving microwave oven safely is easier than the big appliances, but still needs care.
h5 Cleaning and Disconnecting
- Clean the inside of the microwave thoroughly.
- Remove the glass turntable and support ring.
- Unplug the power cord. This is part of disconnecting appliance cords. Tape the cord to the back of the microwave.
h5 Packing the Microwave
- Wrap the glass turntable and support ring in bubble wrap and packing paper. Pack them in a sturdy box. You can pack them with other small kitchen items or inside the microwave if you pack them very carefully.
- Find a box that fits the microwave snugly. If you still have the original box, use it!
- If not, use a strong box slightly larger than the microwave.
- Place padding (like crumpled packing paper or foam) at the bottom of the box.
- Carefully place the microwave in the box.
- Fill any empty spaces around the microwave with more padding to prevent it from shifting.
- Seal the box securely with packing tape.
- Label the box clearly “Microwave” and “Fragile”.
Packing Small Kitchen Appliances
You probably have many smaller gadgets like blenders, toasters, coffee makers, mixers, food processors, etc. Packing small kitchen appliances needs good padding and sturdy boxes.
Strategies for Smaller Gadgets
- Clean each appliance before packing. Remove any food crumbs or spills.
- Gather cords and attachments. Keep them with the right appliance if possible. Use twist ties or rubber bands for cords.
Wrapping and Boxing
- For each appliance, find a box that is a good fit. Don’t overpack boxes; heavy boxes are hard to lift.
- Wrap the appliance fully in packing paper or bubble wrap. Tape the wrapping closed.
- Wrap any removable parts (like blender blades, coffee maker carafe) separately and place them in the same box or a labeled small box. Wrap glass parts well with bubble wrap.
- Place padding (crumpled paper, packing peanuts) in the bottom of the box.
- Put the wrapped appliance in the box.
- Fill empty spaces around the appliance with more padding to stop it from moving around.
- Place wrapped parts in the box, ensuring they are secure.
Adding Cushioning
Make sure there is enough padding that nothing rattles or shifts when you gently shake the box. This is key for protecting appliances during transport.
Labeling Clearly
- Seal the box well with packing tape.
- Label the box clearly on the top and sides. Write what’s inside (e.g., “Blender,” “Coffee Maker”) and which room it goes in at the new place (“Kitchen”).
- If the item is fragile (like a glass carafe is packed inside), write “Fragile” on the box.
Here’s a quick list of common small appliances and how to box them:
| Appliance | Key Parts to Remove & Wrap Separately | Suggested Box Size | Padding Tips |
|---|---|---|---|
| Blender | Pitcher, base, blade (if removable) | Medium | Wrap pitcher/base. Pad box bottom/sides/top. |
| Toaster | Crumb tray | Small/Medium | Wrap well. Ensure crumb tray is clean. Pad box. |
| Coffee Maker | Carafe, filter basket | Medium | Wrap carafe very well. Pad box. |
| Mixer (Stand) | Bowl, attachments | Large/Extra Large | Remove bowl/attachments, wrap separately. Pad box well; very heavy. |
| Food Processor | Bowl, blades, lid | Medium/Large | Wrap all parts separately. Pad box. Blades are sharp! |
| Toaster Oven | Rack, tray | Large | Clean well. Wrap fully. Pad box. |
| Electric Kettle | Base | Small/Medium | Wrap kettle and base. Pad box. |
Remember to keep the weight of the box in mind. Don’t put too many heavy small appliances in one box.
Protecting and Moving
Once appliances are prepped and packed, the next step is getting them onto the truck safely. This involves using moving blankets for appliances, knowing how to handle moving heavy appliances, and overall protecting appliances during transport.
Using Moving Blankets for Appliances
Moving blankets for appliances are essential. They are thick pads that wrap around large items.
- Use enough blankets to cover the entire surface of major appliances like refrigerators, washers, dryers, and ovens.
- Secure the blankets tightly with plastic wrap or strong tape. This stops the blankets from slipping and rubbing during the move, which could still damage the finish.
- For smaller appliances, blankets can be used to fill space in the truck around packed boxes, adding extra cushioning.
Protecting Appliances During Transport
Blankets are just one part of protecting appliances during transport. Here are other tips:
- Shrink Wrap: Wrapping appliances (even with blankets on) in plastic shrink wrap adds another layer of protection and helps hold doors and pads in place.
- Cardboard: Use flattened cardboard boxes or appliance boxes to create extra protection for corners and sensitive areas like control panels. Tape the cardboard in place over the blankets.
- Straps: Use tie-down straps inside the moving truck to secure appliances to the walls of the truck. This prevents them from tipping over or sliding during the drive. Place padding between the strap and the appliance to avoid damage.
- Proper Placement: Load heavy appliances first, at the back of the truck, against the strongest wall. Don’t place lighter items where heavy appliances could fall on them.
Moving Heavy Appliances
Moving heavy appliances is the most dangerous part. Always get help!
- Use an Appliance Dolly: This is designed for fridges, washers, etc. It has straps to secure the item to the dolly. Tilt the appliance back slightly and slide the dolly base under it. Secure it tightly with the built-in straps.
- Walk it Back: With a helper, tilt the appliance back onto the dolly. One person balances it while the other person (often the stronger one) takes the weight and guides it. Walk slowly.
- Going Up/Down Stairs: This is very risky. Use an appliance dolly with stair climbers or get professional movers for items on stairs. Never attempt this alone.
- Lifting: Never lift heavy appliances using only your back. Bend your knees and lift with your legs. Better yet, let the dolly do the work.
- Communication: Talk with your helper. Say when you are going to tilt, when you are ready to move, and watch out for each other’s feet.
Phase 5: Loading and Unloading
Getting the appliances into and out of the truck needs care.
h4 Placement in the Moving Truck
- Load the heaviest and largest appliances first. Place them at the back of the truck, near the cab.
- Position them upright if possible (especially fridges and freezers – check the manufacturer’s guide, some need to stay upright).
- Secure them to the truck’s walls using tie-down straps.
- Place moving blankets for appliances or padding between appliances and between appliances and the truck walls to prevent rubbing and damage during travel.
- Load boxes of small appliances on top of or next to larger items, making sure they are secure and won’t fall. Keep “Fragile” boxes where they are less likely to be crushed.
h4 Care During Unloading
- Use the dolly again to safely remove heavy appliances from the truck.
- Place appliances in a safe spot inside your new home, out of the way of other moving traffic.
- Do not plug in refrigerators or freezers right away. Let them sit upright for at least 2-4 hours (some manufacturers recommend longer, check your manual) before plugging them in. This lets the oils and coolant settle in the compressor.
- Unpack small appliances carefully, checking for any damage.
By following these steps for packing refrigerator for moving, moving microwave oven safely, securing appliance doors, packing small kitchen appliances, using moving blankets for appliances, disconnecting appliance cords, defrosting freezer before moving, moving heavy appliances, protecting appliances during transport, and packing dishwasher for relocation, you can help ensure your kitchen arrives at your new home safely and ready to use. Taking the time for proper preparation and using the right tools and help makes a huge difference.
Frequently Asked Questions (FAQ)
h4 How long does a freezer take to defrost before moving?
- It depends on how much ice is in it and how warm the area is. It can take anywhere from 4-6 hours for a lightly frosted freezer to a full 24-48 hours for one with a lot of ice buildup. Start well in advance!
h4 Can I pack items inside my appliances for the move?
- Generally, no. It’s best to pack appliance cavities empty. Items packed inside can shift during transit, causing damage to the appliance interior or the items themselves. Shelves and drawers can sometimes be packed inside if they are wrapped extremely well and secured so they cannot move at all.
h4 What kind of tape is best for securing appliance doors?
- Use heavy-duty packing tape specifically designed for moving or securing items. Avoid duct tape or masking tape, which can leave sticky residue or damage the finish. Test the tape on a hidden spot first if you are worried about marks. Appliance straps are often a better choice as they don’t touch the finish directly.
h4 What should I do about the water line for my ice maker or water dispenser on my fridge?
- Turn off the water supply line to the fridge, usually located behind it or under the sink. Disconnect the line from the fridge. Drain any water from the line and dispenser into a bucket. Secure the disconnected line safely to the back of the fridge with tape.
h4 How do I move a gas stove or oven safely?
- Turn off the gas supply at the valve behind the stove. Disconnect the flexible gas line. This step should only be done by someone trained or comfortable with gas lines. If unsure, hire a professional plumber or gas company technician to disconnect and reconnect it. Secure the gas line and power cord (if electric start) to the back of the appliance.
h4 How long should I wait to plug in my refrigerator or freezer after moving it?
- Most manufacturers recommend waiting at least 2-4 hours. This allows the oils and refrigerant fluids in the compressor to settle after being moved. Moving can cause these fluids to shift, and plugging it in too soon can damage the compressor. Check your appliance manual for the specific recommended time. If the appliance was transported on its side (which should be avoided if possible), many recommend waiting 24 hours.
h4 Can I lay a refrigerator or freezer on its side to move it?
- It’s best to always move refrigerators and freezers upright to prevent damage to the compressor. If you absolutely must lay it on its side, check your owner’s manual for the correct side to lay it on (usually the side opposite the compressor line). You must then let it sit upright for a longer period (often 24 hours) before plugging it in.
By taking your time and being careful with each step, you can get your kitchen appliances safely packed and ready for your new home. Good luck with your move!