Can you make your own kitchen cabinet drawers? Yes, you absolutely can! With a bit of planning, some basic tools, and a willingness to learn, crafting your own kitchen cabinet drawers is a rewarding and achievable DIY project. This guide will walk you through the entire process, from deciding on drawer construction methods to the final cabinet drawer installation.
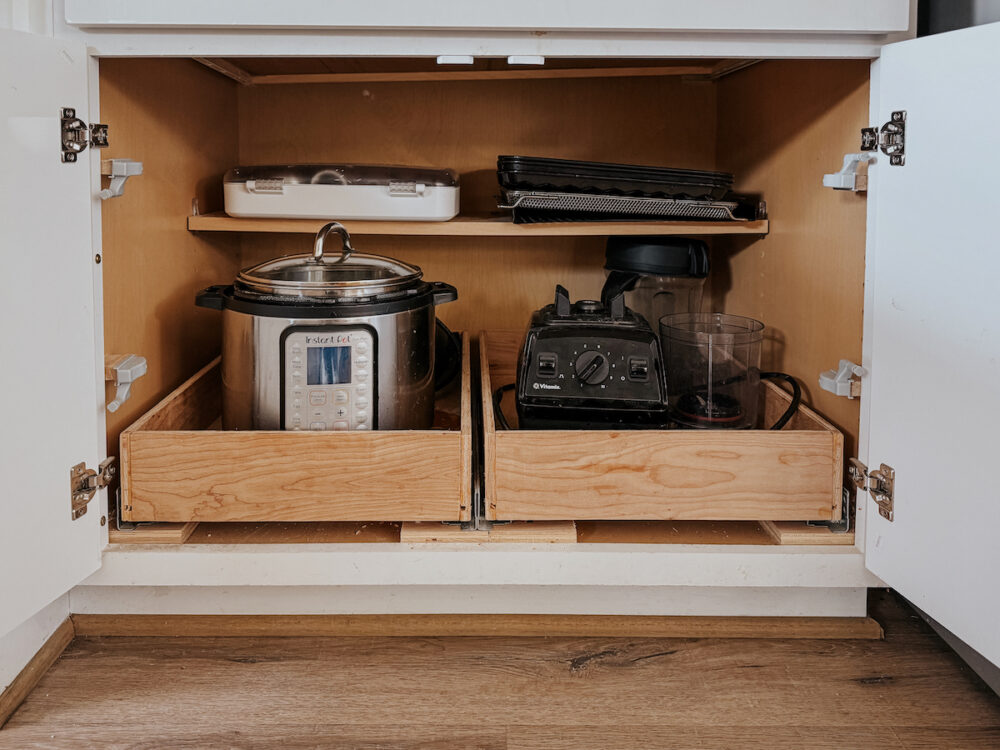
Image Source: www.loveandrenovations.com
Why Build Your Own Kitchen Cabinet Drawers?
There are many reasons why a DIYer might choose to build their own kitchen cabinet drawers instead of buying them. For starters, it can be significantly more cost-effective. You can often purchase raw lumber and hardware for less than the price of pre-made drawers, especially if you’re looking for custom sizes or specific materials.
Beyond savings, building your own drawers offers unparalleled customization. You can match existing cabinetry perfectly, create unique dimensions to maximize storage, or even experiment with different wood species and finishes. It’s a chance to infuse your personal style into your kitchen.
Furthermore, the satisfaction of a job well done is immense. Knowing you designed, cut, assembled, and installed your own functional kitchen components is a fantastic accomplishment. You’ll also gain valuable woodworking skills along the way.
Planning Your DIY Kitchen Drawers
Before you pick up a saw, careful planning is essential. This stage prevents costly mistakes and ensures your new drawers will fit and function perfectly within your existing cabinets.
1. Measure Your Cabinet Openings
This is the most critical step. Accuracy here is paramount.
- Measure the Inside Width: Measure the width of the cabinet opening from the inside face of the cabinet sides. Take three measurements (top, middle, and bottom) and use the smallest one.
- Measure the Inside Height: Measure the height from the bottom of the cabinet frame to the underside of the shelf or drawer above. Again, measure in a few spots and use the smallest measurement.
- Measure the Inside Depth: Measure from the back of the cabinet to the inside of the cabinet door or drawer front. Account for any obstructions like pipes or wiring.
2. Decide on Drawer Box Construction Methods
There are several common drawer box construction methods, each with its pros and cons in terms of strength, appearance, and complexity.
Drawer Box Construction Types
| Method | Description | Skill Level | Strength | Appearance | Notes |
|---|---|---|---|---|---|
| Butt Joint | Simple, with pieces joined at right angles. Usually reinforced with screws or nails. | Beginner | Moderate | Basic | Fast and easy, but can be weaker than other methods. |
| Dado Joint | A groove (dado) is cut into one piece for the other piece to sit in, creating a stronger interlocking. | Intermediate | Good | Clean, integrated | Requires a router or table saw with a dado blade. |
| Dovetail Joints | Interlocking “tails” and “pins” create a very strong and attractive joint. | Advanced | Excellent | Premium, decorative | Time-consuming and requires precise cutting. Hand-cut or machine-cut. |
| Box Joint | Interlocking square “fingers” create a strong joint with a distinctive look. | Intermediate | Excellent | Unique, robust | Easier to cut than dovetails, often done with a router jig. |
| Rabbet Joint | A portion is removed from the end of one piece to overlap the end of another. | Beginner | Good | Neat, flush | Simpler than dado, offers good surface area for glue. |
For DIY kitchen drawers, especially if you’re new to woodworking, a combination of butt joints with screws and glue for the basic box, and then considering rabbet joints for attaching the drawer front, is a good starting point. As you gain experience, you can explore dado or even dovetail joints for enhanced strength and aesthetics.
3. Select Your Materials
The choice of wood significantly impacts the durability, appearance, and cost of your drawers.
- Drawer Sides and Backs:
- Hardwoods (Maple, Cherry, Walnut): Offer excellent durability and a beautiful appearance, but are more expensive.
- Plywood (Baltic Birch): A very stable and strong option, especially for drawer sides, and is generally more affordable than solid hardwoods. Look for 1/2-inch or 3/4-inch thickness.
- Softwoods (Pine, Poplar): More budget-friendly but can dent or scratch more easily. Poplar is a good compromise for a paint-grade finish.
- Drawer Bottoms:
- 1/4-inch Plywood: The most common choice for drawer bottoms due to its stability and cost.
- Hardboard: A very inexpensive option, but less durable.
- Drawer Fronts:
- These are typically made from the same wood as your existing cabinet doors to ensure a cohesive look. Choose hardwoods for a premium finish.
4. Choose Your Drawer Slides
Drawer slides are crucial for smooth operation and longevity. There are several types, each suited to different needs and budgets.
Types of Drawer Slides
| Type | Load Capacity | Extension Type | Mechanism | Features | Best For |
|---|---|---|---|---|---|
| Friction Slides | Low | Full/Partial | Nylon/Plastic | Basic, inexpensive, prone to wear, can be noisy. | Light-duty applications like small organizers, novelty items. Not recommended for kitchen drawers. |
| Side-Mount Ball Bearing | Medium-Heavy | Full | Ball Bearings | Smooth operation, good load capacity, common for kitchen drawers. | Standard kitchen drawers, cabinetry where smooth operation and decent load support are needed. |
| Under-Mount Ball Bearing | Medium-Heavy | Full | Ball Bearings | Concealed for a cleaner look, slightly more complex installation. | High-end cabinetry, where aesthetics are paramount, or when drawer sides are made of attractive wood. |
| Heavy-Duty Slides | Very Heavy | Full/Partial | Ball Bearings/Rollers | High load capacity, often with self-closing or soft-close features. | Large appliance drawers, deep pantry drawers, or anywhere heavy items will be stored. |
| Un-mounted (DIY) Channels | Varies | Full/Partial | Metal Channels | Require precise mounting to drawer and cabinet; offers flexibility. | Custom cabinet builds, situations where specific clearance or mounting angles are required. |
For most DIY kitchen drawers, side-mount ball bearing slides are an excellent choice. They offer a good balance of performance, cost, and ease of installation. When selecting slides, pay attention to the full extension feature, which allows the drawer to be pulled out completely. Also, consider the load rating – ensure it can handle the anticipated weight of your kitchen items.
Creating the Drawer Box
Once you have your measurements and plans, it’s time to start cutting and assembling.
1. Cutting the Drawer Parts
You’ll need four pieces for each drawer box: two sides, a front, and a back. The bottom piece slides into grooves.
- Sides: Cut two pieces to your determined length (cabinet depth minus clearance for the back). The height will be your measured cabinet height minus the thickness of the drawer bottom.
- Front and Back: Cut two pieces to your determined width (cabinet width minus clearance for the drawer sides). The height of these pieces is typically the same as the drawer sides. For a stronger construction, you can make the back piece slightly shorter than the front piece, allowing the bottom to sit flush against the back.
Tip: For a cleaner look and stronger joint, you can cut the ends of your drawer sides at a 45-degree angle to meet the front and back pieces (like a mitered butt joint), or use rabbet joints.
2. Cutting Grooves for the Drawer Bottom
Most drawer boxes have a groove routed into the bottom edge of the sides, front, and back to hold the drawer bottom.
- Groove Location: This groove should be positioned about 1/4 inch up from the bottom edge of the drawer sides, front, and back.
- Groove Size: The width of the groove should match the thickness of your drawer bottom material (typically 1/4 inch). The depth of the groove is usually about 1/4 to 1/2 inch.
- Tools: Use a router with a straight bit or a table saw with a dado blade to create these grooves.
- Important: Ensure the grooves are consistent and perfectly aligned. If using a table saw, you can set up a dado blade and make the cuts in one pass, or make multiple passes with a standard blade.
3. Assembling the Drawer Box
This is where drawer assembly truly takes shape.
- Dry Fit: Before applying glue, assemble the four sides of the drawer box to ensure everything fits snugly and squarely.
- Apply Glue: Apply a generous amount of wood glue to the joining surfaces of the sides, front, and back.
- Insert Drawer Bottom: Slide the drawer bottom into the routed grooves. Make sure it’s fully seated.
- Join the Sides: Bring the sides together and clamp them securely. Ensure the box is perfectly square by measuring the diagonals – they should be equal.
- Reinforce with Screws or Nails: For added strength, especially with butt joints, drive screws or nails through the sides into the front and back pieces. Predrilling pilot holes is essential to prevent splitting, particularly near the ends of the wood. Countersink the screws for a flush finish.
- Clean Up Excess Glue: Wipe away any excess glue that squeezes out with a damp cloth before it dries.
Drawer Construction Methods – Detail
Let’s delve deeper into some of the popular drawer construction methods.
Rabbet Joints for Drawer Assembly
A rabbet joint is a good option for DIY drawers. You cut a rabbet (a step-like recess) along the edge of one piece of wood, and the other piece butts into this recess.
- Cut Rabbets: On the front and back drawer pieces, cut a rabbet along one edge that will mate with the drawer sides. The rabbet should be the width of your drawer side material and about half the depth of your drawer side material.
- Glue and Screw: Apply glue to the rabbeted edges and the ends of the drawer sides. Assemble the box and secure with screws. This creates a stronger corner than a simple butt joint.
Dado Joints for Drawer Construction
Dado joints offer superior strength and a clean look.
- Cut Dados: On the inside faces of your drawer sides, cut grooves (dados) that will receive the ends of your drawer front and back pieces. These dados should be the same width as your drawer front/back material and about half the depth.
- Assembly: Apply glue to the dados and the ends of the front and back pieces. Slide the front and back into the dados on the sides. Clamp and secure with screws.
Dovetail Joints (Advanced)
Dovetail joints are the pinnacle of drawer joinery, offering exceptional strength and a beautiful, traditional look.
- The Craft: This involves cutting interlocking pins and tails into the ends of the drawer pieces.
- Tools: This can be done by hand with a fine-toothed saw and chisels, or with specialized jigs on a router or table saw.
- Complexity: While beautiful, dovetail joints are the most challenging to master and require precision. If you’re aiming for a truly premium finish and have the time and patience, this is the method to consider.
5. Attaching the Drawer Front
The drawer front is usually a separate piece, often made from more decorative wood, and it’s attached after the drawer box is assembled.
- Positioning: Center the drawer box on the back of the drawer front.
- Securing:
- Screws from the Inside: The most common method is to drive screws from the inside of the drawer box into the back of the drawer front. Use appropriately sized screws that won’t poke through the front.
- Pocket Holes: Drilling pocket holes on the inside of the drawer sides and then screwing into the drawer front provides a strong, hidden joint.
- Dovetail or Box Joints: If you’ve chosen these methods for the box, the front piece is already integrated into the joinery.
Drawer Front Mounting Techniques
- Flush Mount: The drawer front is perfectly flush with the front edge of the drawer box.
- Overlay Mount: The drawer front extends beyond the edges of the drawer box, often to create a specific aesthetic or to conceal the drawer box when closed. This is common in face-frame cabinetry.
- Inset Mount: The drawer front sits within a recess in the cabinet face frame.
For most DIY kitchen drawers, a flush mount or a simple overlay mount is the most straightforward to achieve.
Installing Drawer Slides
This is a critical step for ensuring your drawers operate smoothly. The accuracy of your measurements and installation here will directly impact performance.
1. Separating Drawer Slides
Most modern drawer slides come in two parts: one that attaches to the cabinet side and one that attaches to the drawer side. They typically disconnect with a lever or clip. Separate them before installation.
2. Installing Slides in the Cabinet
- Locate Position: Using your measurements, determine the exact position for the cabinet member of the slide on the inside of your cabinet. This is usually a set distance from the top or bottom of the cabinet opening, and parallel to the cabinet floor. Check the manufacturer’s instructions for precise placement.
- Mark Lines: Use a pencil and a level or a combination square to draw precise parallel lines on the cabinet interior. This ensures the slides are mounted straight.
- Pilot Holes: Predrill pilot holes for the screws.
- Attach Cabinet Member: Screw the cabinet portion of the drawer slides firmly in place, ensuring they are perfectly level and aligned. Repeat for all drawers.
3. Installing Slides on the Drawer Box
- Locate Position: Position the drawer member of the slide on the outside of your drawer box. Again, follow the manufacturer’s instructions for placement relative to the bottom and front of the drawer.
- Mark and Drill: Draw a parallel line on the drawer side, and then mark and predrill your screw holes.
- Attach Drawer Member: Screw the drawer portion of the slide to the drawer box. Ensure it is parallel to the bottom edge of the drawer box.
4. Inserting the Drawer
- Align and Slide: Carefully align the drawer members on the drawer box with the cabinet members installed in the cabinet.
- Engage Slides: Gently push the drawer into the cabinet until the slides engage. You should feel or hear a click as they lock into place. Test the drawer’s movement.
Important Considerations for Cabinet Drawer Installation
- Level and Plumb: Ensure both cabinet and drawer members of the slide are installed perfectly level and plumb. Any deviation will cause the drawer to bind or not close properly.
- Manufacturer Instructions: Always refer to the specific instructions provided by the drawer slide manufacturer. Different brands and types may have slightly different installation requirements.
- Clearance: Leave adequate clearance between the drawer box and the cabinet sides for the slides to operate freely. This is usually built into the slide design, but double-check.
Adding Cabinet Hardware
Once your drawers are installed and functioning, it’s time to add the finishing touches with cabinet hardware.
1. Drawer Pulls and Knobs
- Choose Your Style: Select pulls or knobs that complement your kitchen’s aesthetic and your cabinet hardware.
- Marking: Decide on the placement for your hardware on the drawer front. Measure carefully and mark the hole location(s).
- Drilling: Drill holes through the drawer front. For knobs, a single hole is needed. For pulls, you’ll likely need two holes, spaced according to the pull’s design.
- Attach Hardware: From the inside of the drawer, insert screws through the drawer front and into the hardware. Tighten securely.
2. Drawer Front Mounting Techniques – Refined
When attaching the drawer front to the drawer box, consider these refinements:
- Pilot Holes: Always drill pilot holes to prevent splitting the drawer front, especially if it’s a hardwood.
- Countersinking: For a clean finish, countersink the screw heads so they sit flush or slightly below the surface of the drawer box interior. You can then fill these holes with wood filler for an invisible attachment.
- Offset Mounting: If you’re aiming for a precise overlay, you might need to adjust the positioning of the drawer box slightly within the cabinet opening. This is where measuring twice and cutting once really pays off.
Finishing Your DIY Kitchen Drawers
The final step is to finish your drawers to protect the wood and enhance their appearance.
- Sanding: Sand all surfaces of the drawer box and drawer front smooth. Start with a medium grit sandpaper (e.g., 120-grit) and progress to finer grits (e.g., 180 or 220-grit).
- Cleaning: Wipe down all surfaces with a tack cloth or a slightly damp rag to remove dust.
- Staining or Painting: Apply your chosen finish.
- Stain: For wood grain, apply a wood stain evenly with a brush or rag, following the grain. Wipe off excess stain after the recommended time.
- Paint: Apply a primer, then one or more thin coats of paint. Sand lightly between coats for a smooth finish.
- Sealing: Apply a protective topcoat, such as polyurethane or varnish. This protects the wood from moisture and wear. Apply multiple thin coats, sanding lightly between coats for a smooth, durable finish.
Frequently Asked Questions (FAQ)
Q: What is the easiest way to make kitchen cabinet drawers?
A: For beginners, the easiest method involves using butt joints reinforced with glue and screws for the drawer box construction, along with a routed groove for the drawer bottom. Simple overlay drawer fronts attached with screws from the inside are also straightforward.
Q: Can I use any wood for kitchen cabinet drawers?
A: While you can technically use any wood, hardwoods like maple, oak, or cherry, or high-quality plywood like Baltic birch, are recommended for their durability, stability, and resistance to warping in a kitchen environment.
Q: How do I ensure my drawers slide smoothly?
A: Smooth sliding depends on accurate installation of drawer slides. Ensure they are mounted perfectly level and plumb, with adequate clearance, and that you are using quality drawer slides rated for the expected load.
Q: How thick should the wood be for drawer sides?
A: 1/2-inch to 3/4-inch thick material is generally recommended for drawer sides, depending on the drawer size and anticipated load. Plywood or solid hardwoods are good choices.
Q: What is a drawer runner?
A: A drawer runner is synonymous with a drawer slide; it’s the mechanism that allows a drawer to slide in and out of a cabinet smoothly.
Q: How do I attach a drawer front that looks professional?
A: For a professional look, ensure the drawer front is perfectly aligned with the drawer box. Use pocket holes or screws driven from the inside of the box, and countersink them. Fill any screw holes with wood filler and sand smooth before finishing.
Building your own kitchen cabinet drawers is a rewarding project that can save you money and allow for customisation. By following these steps, carefully measuring, and taking your time with the assembly and installation of drawer slides, you can create beautiful and functional drawers that will enhance your kitchen for years to come. Enjoy the process and the satisfaction of your DIY creations!