Can you install a Delta kitchen faucet yourself? Yes, with this guide, you can confidently install a Delta kitchen faucet yourself. This comprehensive, step-by-step DIY guide will walk you through the entire process of replacing your old faucet or installing a brand-new Delta model. We’ll cover everything from gathering your tools to the final checks, making your kitchen sink faucet replacement Delta project a success.
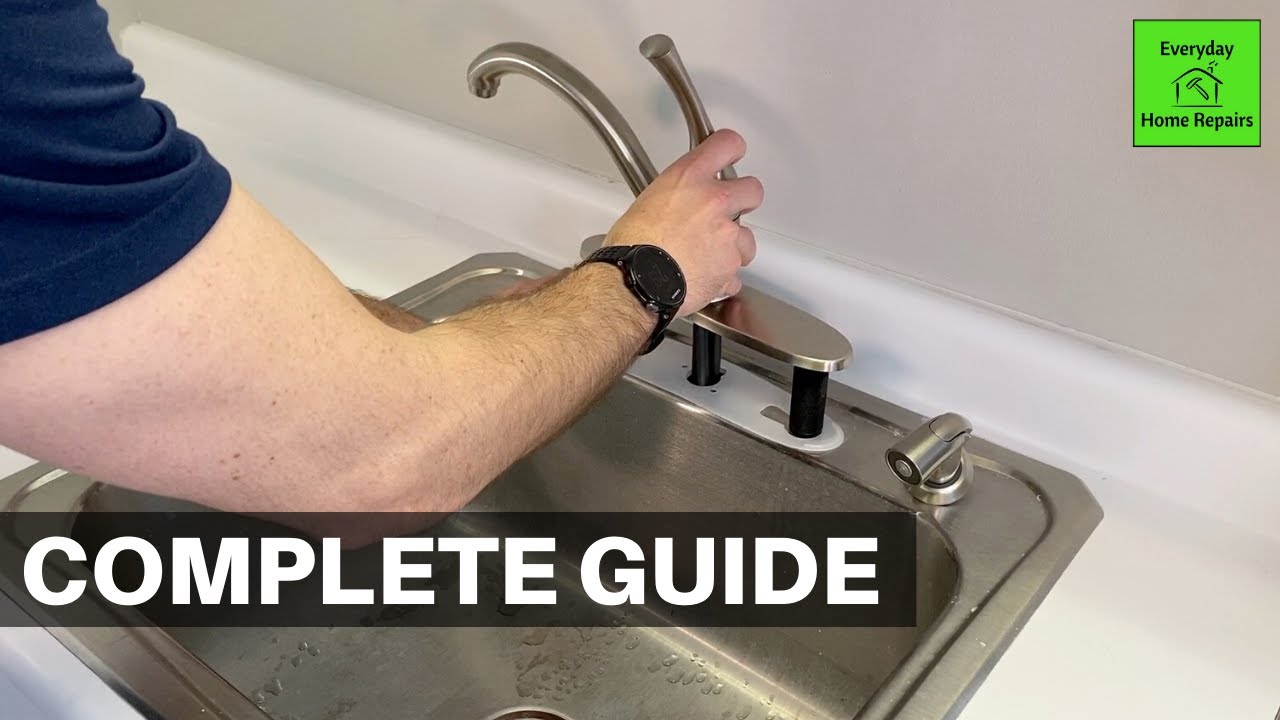
Image Source: i.ytimg.com
Getting Ready: What You Need Before You Start
Before you dive into installing your new faucet, having all your tools and materials ready is key to a smooth process. This is your Delta faucet installation guide, and preparation is half the battle.
Essential Tools for Your DIY Delta Faucet Install
Here’s a list of the tools you’ll likely need to replace kitchen faucet Delta:
- Adjustable Wrench (or Basin Wrench): This is crucial for tightening and loosening nuts in tight spaces under the sink. A basin wrench is specifically designed for this purpose and is highly recommended.
- Plumber’s Putty or Silicone Sealant: Used to create a watertight seal between the faucet base and the sink. Check your Delta faucet parts to see what is recommended by the manufacturer.
- Screwdrivers (Phillips and Flathead): For disassembling the old faucet and assembling the new one.
- Pliers (Slip-Joint or Channel-Lock): Useful for gripping and turning pipes or nuts.
- Bucket or Towels: To catch any residual water that might drain from the pipes.
- Safety Glasses: Protect your eyes from debris or dripping water.
- Work Gloves: For better grip and to protect your hands.
- Utility Knife or Putty Knife: For removing old sealant or plumber’s putty.
- Flashlight or Work Light: Essential for seeing clearly in the often-dark space under your sink.
- Teflon Tape (Pipe Thread Tape): To ensure a watertight seal on threaded connections.
Gathering Your Delta Faucet Parts
Your new Delta faucet will come with most of the parts you need. However, it’s always a good idea to check the box to ensure everything is present. Common Delta kitchen faucet parts include:
- The faucet body itself
- Mounting hardware (nuts, washers, gaskets)
- Supply lines (if not integrated)
- Aerator
- Decorative escutcheon plate (if applicable)
- Installation manual – this is your most important guide!
Make sure you have the correct model and that it’s compatible with your sink configuration (e.g., number of holes).
Step-by-Step: Installing Your New Delta Kitchen Faucet
Now that you’re prepared, let’s get to the main event: the step-by-step Delta faucet installation. Whether you’re doing a Delta single handle kitchen faucet installation or a Delta pull-down faucet installation, these core steps apply.
Step 1: Shutting Off the Water Supply
This is a critical safety step. You absolutely must turn off the hot and cold water supply lines to your faucet.
- Locate the shut-off valves under your sink. There will typically be one for hot water and one for cold water.
- Turn the handles of both valves clockwise until they are snug. Don’t overtighten.
- Turn on your old faucet to drain any remaining water in the lines and to confirm that the water supply is indeed off.
Step 2: Disconnecting the Old Faucet
With the water off, you can now disconnect the old faucet.
- Place your bucket or towels under the supply line connections to catch any drips.
- Use your adjustable wrench to loosen the nuts connecting the supply lines to the shut-off valves.
- Once the supply lines are disconnected from the valves, carefully detach them from the old faucet. There might be retaining nuts or clips holding them in place.
- If your old faucet has a spray hose, disconnect that as well. There’s usually a clip or a threaded connection.
- Loosen the mounting nuts that secure the old faucet to the sink. These are typically located on the underside of the sink, directly beneath the faucet. This is where a basin wrench is incredibly helpful.
- Once all connections are loosened and disconnected, you should be able to lift the old faucet straight up and out of the sink holes.
Step 3: Cleaning the Sink Surface
Before installing the new faucet, it’s important to clean the area where the old faucet was mounted.
- Use a utility knife or putty knife to gently scrape away any old plumber’s putty or sealant.
- Clean the sink surface thoroughly with a mild cleaner and water to remove any residue. A clean surface ensures a good seal for your new faucet.
Step 4: Preparing the New Delta Faucet
Now it’s time to prepare your new Delta faucet for installation. Refer to your specific Delta faucet installation guide for any model-specific instructions.
- If your faucet comes with integrated supply lines: You’re good to go.
- If your faucet requires separate supply lines: Screw the new supply lines into the designated ports on the faucet body. Hand-tighten first, then give them a quarter-turn with an adjustable wrench. Be careful not to overtighten.
- Apply Plumber’s Putty or Sealant: Most Delta faucets will require a gasket or a bead of plumber’s putty or silicone sealant around the base of the faucet where it meets the sink. If your faucet comes with a rubber gasket, place it on the faucet base or sink rim as instructed. If not, roll a rope of plumber’s putty about 1/2 inch thick and press it around the underside of the faucet base.
Step 5: Mounting the New Faucet
This is where the installing a new kitchen faucet Delta process really begins to take shape.
- Carefully feed the faucet’s supply lines and mounting shanks through the corresponding holes in your sink.
- If your faucet has an escutcheon plate, ensure it’s in place first to cover unused holes.
- Once the faucet is positioned correctly, go underneath the sink.
- Slide any provided washers and gaskets onto the mounting shanks.
- Thread the mounting nuts onto the shanks. Hand-tighten them first.
- Using your adjustable wrench or basin wrench, tighten the mounting nuts evenly. Ensure the faucet is straight and secure, but don’t overtighten, as this could damage the sink or faucet.
- If you used plumber’s putty, wipe away any excess that squeezed out around the base of the faucet with a damp cloth.
Step 6: Connecting the Supply Lines
Now, connect the new supply lines to your water shut-off valves.
- Attach the cold water supply line (usually marked blue or to the left) to the cold water shut-off valve.
- Attach the hot water supply line (usually marked red or to the right) to the hot water shut-off valve.
- Hand-tighten the connections first, then use your adjustable wrench to tighten them another quarter to half turn. Ensure a snug fit to prevent leaks.
- If your faucet has a pull-down hose, connect it according to the manufacturer’s instructions. There’s typically a quick-connect fitting or a threaded connection. Don’t forget to attach the counterweight if your model includes one.
Step 7: Turning the Water Back On and Testing for Leaks
This is the moment of truth!
- Slowly turn the hot and cold water shut-off valves back on by turning them counter-clockwise.
- Turn on the new faucet, starting with cold water, then hot water. Let the water run for a minute or two to flush out any debris that may have entered the lines during installation.
- Carefully inspect all connections under the sink for any drips or leaks:
- Check where the supply lines connect to the shut-off valves.
- Check where the supply lines connect to the faucet body.
- Check the spray hose connection and the pull-down hose if applicable.
- If you find any leaks, turn off the water supply and gently tighten the connections. Turn the water back on and re-check.
Step 8: Final Checks and Cleanup
Your DIY Delta faucet install is almost complete!
- Ensure the faucet operates smoothly, turning on and off easily.
- Test the spray function (if applicable) to make sure it works correctly.
- Check the water flow and temperature.
- Wipe down the faucet and the sink area, removing any fingerprints or water spots.
- Dispose of the old faucet and packaging responsibly.
Specific Installation Notes for Delta Faucets
Delta offers a wide range of faucets, and while the general steps are the same, some models have unique features.
Delta Single Handle Kitchen Faucet Installation
These faucets are very popular for their ease of use. When doing a Delta single handle kitchen faucet installation:
- Handle Mechanism: Pay close attention to how the handle connects to the valve cartridge. There’s often a set screw or a retaining clip that secures the handle. Ensure this is properly seated for smooth operation.
- Cartridge: Most Delta single-handle faucets use a proprietary TempAssure® or DIAMOND™ Seal Technology cartridge. These are designed for durability and leak-free performance. Make sure the cartridge is oriented correctly according to the manual.
Delta Pull-Down Faucet Installation
Delta pull-down faucet installation often involves a few extra steps compared to standard faucets.
- Hose Connections: The spray hose connection under the sink is usually a quick-connect system. Simply push the hose end into the designated fitting until it clicks into place.
- Counterweight: Most pull-down faucets require a counterweight to be attached to the spray hose. This weight helps the hose retract smoothly back into the faucet spout. Make sure the weight is attached securely at the correct position on the hose, as indicated in your Delta faucet installation guide.
- Spout Swivel: Ensure the spout can swivel freely before fully tightening the mounting hardware.
Troubleshooting Common Issues
Even with a great guide, you might encounter minor hiccups. Here’s some Delta faucet troubleshooting for common problems:
| Problem | Possible Cause | Solution |
|---|---|---|
| Leaking Faucet | Loose connections | Turn off water, re-tighten supply line nuts and mounting nuts. |
| Damaged O-rings or gaskets | Inspect O-rings and gaskets for wear or damage. Replace if necessary. Your Delta faucet parts might include spare O-rings. | |
| Faulty cartridge | If leaks persist after checking connections, the internal cartridge may be worn. Replace the cartridge according to the manual. | |
| Improperly seated putty/sealant | Re-seat the faucet, ensuring a proper seal with plumber’s putty or sealant. | |
| Low Water Pressure | Clogged aerator | Unscrew the aerator at the tip of the spout. Clean it by soaking it in vinegar and scrubbing with a small brush. |
| Kinked supply lines | Ensure supply lines are not bent or kinked under the sink. | |
| Partially closed shut-off valves | Double-check that the shut-off valves are fully open. | |
| Debris in the valve or cartridge | Flush the lines by removing the supply lines at the faucet and letting water run briefly into a bucket. If the problem persists, the cartridge might need cleaning or replacement. | |
| Leaky Spray Hose | Loose connection at faucet or spray head | Check and tighten the spray hose connection at both the faucet body and the spray head. |
| Damaged hose or O-rings | Inspect the hose for cracks or wear. Replace O-rings at the connection points if they appear damaged. | |
| Handle is Stiff | Mineral buildup on cartridge | Mineral deposits can cause stiffness. Try soaking the cartridge in vinegar or using a descaling solution. If that doesn’t work, replace the cartridge. |
| Improperly installed handle | Ensure the handle is correctly seated and the set screw is tightened. | |
| No Hot or Cold Water | Incorrect supply line connection | Verify that the hot and cold supply lines are connected to the correct shut-off valves. |
| Closed shut-off valve | Ensure both shut-off valves are fully open. | |
| Problem with the specific valve or cartridge | If only one temperature is affected, the issue might be with the corresponding shut-off valve or the faucet’s internal mixing mechanism (cartridge). |
Frequently Asked Questions (FAQ)
Here are some common questions people have when installing a new kitchen faucet Delta.
Q1: Do I need to turn off the power to my garbage disposal if it’s under the sink?
A1: Yes, it’s always a good safety practice to turn off the power to any appliances under the sink before working on the plumbing. You can do this by flipping the circuit breaker that controls the disposal.
Q2: How tight should I make the supply line connections?
A2: Hand-tighten the connections first, then use a wrench for an additional quarter to half turn. Overtightening can strip the threads or damage the fittings. A snug fit that prevents leaks is sufficient.
Q3: My sink has three holes, but my new Delta faucet only uses two. What should I do?
A3: If your new faucet comes with an escutcheon plate (also called a deck plate), you can use it to cover the unused hole. This provides a clean, finished look. Ensure you use plumber’s putty or a sealant under the escutcheon plate for a watertight seal.
Q4: How do I know if I need plumber’s putty or silicone sealant?
A4: Your Delta faucet’s installation manual will specify which sealant to use. Generally, plumber’s putty is used for most sink and faucet installations where the material is non-porous. Silicone sealant is often recommended for porous materials like granite or if the manufacturer specifically advises it.
Q5: Can I reuse my old supply lines?
A5: While you might be able to, it’s highly recommended to replace old supply lines when installing a new faucet. Old lines can become brittle, kinked, or develop internal blockages, leading to leaks or reduced water flow. New lines are inexpensive and ensure a reliable connection.
Q6: What is a “rough-in” measurement for faucets?
A6: The rough-in measurement refers to the distance from the finished wall to the center of the drain pipe. While this is more relevant for shower valves, for kitchen faucets, the important measurements are the hole spacing in your sink or countertop. Ensure your new faucet is compatible with your sink’s existing holes.
Q7: My new faucet seems to wobble slightly after installation.
A7: This usually means the mounting nuts underneath the sink are not tight enough. Get under the sink and carefully tighten them further with your basin wrench or adjustable wrench until the faucet is firmly secured.
By following these detailed steps, you can successfully complete your kitchen sink faucet replacement Delta project. Enjoy your new, functional, and stylish Delta faucet!