DIY Guide: How To Fix Worn Spots On Kitchen Cabinets Easily
Do your kitchen cabinets look tired? Do they have ugly worn spots from fingers, water, or just lots of use? You can fix them! It’s not as hard as you think. You can make your cabinets look good again with simple steps. This guide helps you tackle those worn areas yourself. You don’t need fancy tools or skills.
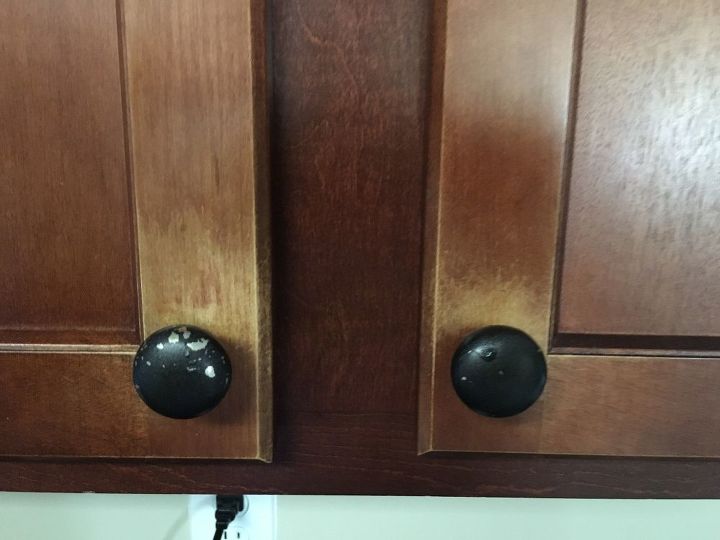
Image Source: cdn-fastly.hometalk.com
Why Spots Show Up On Cabinets
Cabinets in the kitchen work hard. They get opened and closed all the time. Hands touch them near handles and knobs. Water splashes. Cleaning stuff rubs on them. Pots and pans bump them. Even sunlight can make the color fade. All this daily life makes the finish wear away in spots. This can be paint that gets thin or chips off. It can be stain that rubs away.
See What’s Wrong With The Spot
Before you fix a spot, look at it closely. What kind of damage is it?
Scratches and Dings
A scratch is a line on the surface. A ding is a small mark or dent. They can be light or deep. Light scratches might only be in the top clear coat. Deeper ones go into the wood or the color layer. Fixing scratches on wood cabinets is often simple. Sometimes a special pen can hide a light scratch.
Chips in Paint or Finish
A chip means a small piece is missing. This happens a lot on corners or edges. It shows the color under the paint, or even the bare wood. Repairing chipped cabinet paint needs care. You need to put back the missing layer.
Areas Worn Down
This is where the color or clear coat is rubbed away completely. You might see bare wood. This happens near handles, around knobs, or on cabinet edges. Cabinet refinishing worn areas involves cleaning, light sanding, and then adding color and a new top coat.
Color Fading
Sunlight can make the color on some cabinets fade. This is not a worn spot exactly, but the color is lighter. Restoring cabinet color might mean touching up the faded part. Or you might need to work on a larger area to blend it.
Get Your Stuff Ready
You need a few things to fix worn spots. Having everything ready makes the job easier. You might find a cabinet repair kit for worn areas helpful. These kits often have colors, fillers, and small brushes. But you can buy things separately too.
Cleaning Stuff
- Gentle soap (like dish soap)
- Water
- Clean rags or paper towels
Stuff for Smoothing and Filling
- Fine sandpaper (like 220-grit or higher)
- A sanding block (makes sanding flat areas easier)
- Wood filler (if there are holes or deep chips) – You need the best wood filler for cabinets that matches your repair type (stainable or paintable).
Stuff for Color and Finish
- Touch up cabinet paint (if your cabinets are painted) – This needs to match your cabinet color.
- Cabinet stain or stain pen (if your cabinets are stained wood) – You need to try matching cabinet stain color.
- Small artist brushes or foam brushes
- Clear topcoat finish (like polyurethane or lacquer, matching the cabinet’s original finish if possible)
- Paint mixing sticks (if you need to mix colors)
- A small container for mixing (like a plastic cup)
Other Helpful Items
- Painter’s tape (to protect areas you don’t want to touch)
- Drop cloth (to protect the floor)
- Gloves (to keep your hands clean)
- Good light (a work light helps you see clearly)
Here is a simple list of items you might need:
| Item | What it Does | Notes |
|---|---|---|
| Gentle Soap & Water | Cleans dirt off the spot | Use just a little soap |
| Rags/Paper Towels | Cleaning and wiping | Get a few clean ones |
| Fine Sandpaper | Makes the spot smooth | Get 220 grit or finer |
| Wood Filler | Fills holes and deep chips | Get the best wood filler for cabinets |
| Cabinet Paint | Adds color back (for painted cabs) | Needs to match your cabinet color |
| Cabinet Stain | Adds color back (for stained cabs) | Needs matching cabinet stain |
| Small Brushes | Puts paint/stain on small spots | Get tiny ones for fine work |
| Clear Topcoat | Protects the fix | Try to match cabinet finish gloss |
| Painter’s Tape | Keeps other areas clean | Use if you need a clean edge |
| Gloves | Protects your hands | Keeps them clean |
| Light | Helps you see small details | A bright light makes it easier to see spots |
Step By Step To Fix The Spot
Fixing a worn spot takes steps. Go slow and be careful.
Make The Spot Clean
First, clean the worn spot and the area around it. Dirt and grease stop new paint or stain from sticking.
- Mix a little gentle soap with water.
- Dip a clean rag into the soapy water. Squeeze most of the water out.
- Gently wipe the worn spot and the area around it.
- Use a clean, damp rag (just water) to wipe off any soap left.
- Use a dry rag to dry the spot completely. Make sure it is very dry before you do the next step.
Smooth The Spot
The worn spot might have rough edges or tiny bits sticking up. You need to make it smooth. This helps the new finish look natural.
- Take a small piece of fine sandpaper (220-grit or finer).
- Gently rub the worn spot. Use light pressure. Just smooth the edges. If the spot is raised, sand it down to be flat with the surface.
- If the spot has a chip, gently smooth the edges of the chip. Don’t sand the good part around it too much.
- Wipe away all the dust with a clean, dry rag.
Fill Deep Cuts Or Chips
If the spot has a hole or a deep chip, you need to fill it. This makes the surface flat again. Use the best wood filler for cabinets for this. Make sure you pick one that works with paint or stain, based on your cabinets.
- Get your wood filler ready. Some need mixing.
- Use a putty knife or your finger to put a little filler into the hole or chip. Push it in well.
- Make the top of the filler flat with the cabinet surface. Scrape off any extra filler around the spot.
- Let the filler dry completely. The time it takes is on the filler’s package. It might take a few hours.
- Once the filler is dry, it might be a little higher than the cabinet. Use fine sandpaper to gently sand the filler until it is perfectly flat with the surface.
- Wipe away all the dust.
Add Back The Color
This is the most important step for fixing worn spots. You need to add color back to the spot. This means using paint or stain. The goal is to make the new color blend in. This step involves “touch up cabinet paint” or “matching cabinet stain”. This helps “restore cabinet color” and “how to hide worn spots cabinets”.
Option 1: For Painted Cabinets
If your cabinets are painted, you need paint that is the same color.
- Find the right color paint. If you don’t have the exact paint used on the cabinets, take a door or drawer to a paint store. They can match the color. Get a small amount.
- Put a tiny bit of paint on a small artist brush. Take off most of the paint on the brush. You want very little paint.
- Gently touch the worn spot with the brush. Just add a thin layer. Don’t put on too much paint at once.
- For chips, carefully fill the chip with paint using the small brush. You might need a few thin layers. Let each layer dry before adding the next.
- For worn areas, lightly brush or dab the paint onto the bare spot. Try to blend the edges into the old paint around it. This is key to “how to hide worn spots cabinets”.
- Let the paint dry completely. Look at the spot. If it still shows, add another thin layer. Keep adding thin layers until the color looks right.
Option 2: For Stained Cabinets
If your cabinets are stained wood, you need stain that matches the color. “Matching cabinet stain” can be tricky.
- Find the right stain color. This is harder than matching paint. Wood stain looks different on different kinds of wood. The old stain on your cabinets might also look different now.
- The best way is to test the stain. Find a hidden spot on a cabinet (like the back of a door) or use a piece of wood like your cabinet. Put a little stain on and see if it matches when dry. You might need to mix stains to get the right color. A stain pen close to the color can also work for light scratches.
- For worn spots, use a small brush or a cotton swab. Put a little stain on the bare wood.
- Stain soaks into wood. Wipe off the extra stain quickly with a rag. Look at the color. If it’s too light, add more stain and wipe again. If it’s too dark, you can’t easily make it lighter. This is why testing is important.
- For scratches, a stain pen can fill the line with color. Wipe any extra stain off the surface around the scratch right away.
- Let the stain dry completely. Stain takes time to dry. Check the can for how long.
Add A Topcoat
After the color is dry, you need to protect your repair. The clear finish (like varnish, lacquer, or polyurethane) does this. It also makes the spot match the shine (or gloss level) of the rest of the cabinet. “Repair cabinet finish” includes this step.
- Find a clear topcoat that is like the one on your cabinets. They come in different shines: flat, satin, semi-gloss, and gloss. Try to match the shine.
- Use a very small brush or a cotton swab. Put a thin layer of the clear finish over the repaired spot. Cover the new paint or stain completely.
- Try not to go far past the repair.
- Let the topcoat dry completely. You might need a second layer for good protection and to match the shine. Let the first layer dry fully before adding the second.
Let Everything Dry
The most important thing is patience. Paint, stain, filler, and topcoats need time to dry and get hard. If you touch them too soon, you will mess up your fix. Check the drying times on the product cans. Give them plenty of time.
More About Color Matching
Getting the color right is key to making the fix “how to hide worn spots cabinets”.
Matching Paint
- Old Paint Can: The best way is to use the same paint used before. Look for leftover cans in your garage or basement.
- Take a Sample: If no old paint is found, take a cabinet door or drawer front to a paint store. Paint stores have tools to scan the color and make a match.
- Test the Match: Always get a small sample pot first. Paint a little bit on a hidden spot on the cabinet. Let it dry. See if it matches in different lights.
- Gloss Level: Paint also has a shine level (flat, eggshell, satin, semi-gloss, gloss). Your touch-up paint should match this too.
Matching Stain
- Test on Wood: Stain color depends on the kind of wood. Get a small piece of wood like your cabinets (if you can). Try different stain colors on it. See which one looks closest when dry.
- Mix Stains: You might need to mix two or more stain colors to get the right match. Start with a color that’s close. Add tiny amounts of other colors to change it. Write down what you mix.
- Stain Pens: For simple scratches on stained wood, a stain pen can be a quick fix. Find a pen color that is close to your cabinet color.
- Apply and Wipe Fast: Remember stain is different from paint. You put it on and then wipe off the extra. The longer it stays on, the darker it gets. This is important for “matching cabinet stain”.
Tips For Making The Fix Look Good
- Go Slow: Don’t rush. Fixing worn spots takes patience.
- Thin Layers: Put on thin layers of filler, paint, or finish. Letting each layer dry and adding more is better than one thick layer. Thick layers can look bumpy or uneven.
- Blend The Edges: For paint, gently feather the edges of your touch-up into the old paint around it. Use a dry brush or your finger right after applying the paint to soften the edges. For stain, wipe quickly to blend. This is how to “how to hide worn spots cabinets”.
- Use Good Light: Work in bright light so you can really see what you are doing.
- Step Back: Look at your repair from a normal distance. It doesn’t need to be perfect up close. It just needs to blend in when you stand back.
- Practice: If you have a hidden spot, practice your technique there first.
- Cabinet Repair Kit: Sometimes these kits have good instructions and tools for blending small areas. A cabinet repair kit for worn areas can be a good start.
Stopping New Spots From Happening
Once you fix the spots, you want to keep your cabinets looking good.
- Be Gentle: Don’t hang wet towels on cabinet doors. Don’t let water sit on edges or surfaces. Wipe up spills right away.
- Clean Gently: Use a soft cloth and gentle soap or a cleaner made for cabinets. Don’t use harsh cleaners or rough scrub pads. They can wear away the finish faster.
- Fix Hardware: If a knob or handle is loose, tighten it. Loose hardware makes you grab the cabinet itself, causing wear.
- Consider Pulls: If your cabinets only have knobs, think about adding pulls. Pulls stick out more and your fingers are less likely to rub the cabinet face.
When To Get Help From A Pro
Most small worn spots and chips can be fixed using the steps above. But sometimes, the damage is too big.
- Many Big Spots: If there are worn spots all over many cabinets, or if the spots are very large, fixing each one might not look good. The cabinet surface might look uneven with many touch-ups.
- Finish Is Peeling Off: If the finish is peeling or cracking badly over a large area, touching up small spots won’t work. The whole area needs to be redone.
- Major Water Damage: If water has made the wood swell or the finish bubble up over a large area, it’s a bigger job.
- You Don’t Feel Ready: If you don’t feel comfortable doing the repair yourself, or you’re worried about making it worse, it’s okay to call a professional cabinet refinisher or painter. They have the skills and tools to make cabinets look new. Cabinet refinishing worn areas on a large scale is a job for experts.
Wrap Up
Fixing worn spots on your kitchen cabinets is a good way to make them look much better without spending a lot of money. By cleaning, smoothing, and carefully adding color back, you can make those ugly spots disappear. Remember to use the right stuff – “touch up cabinet paint” or “matching cabinet stain”, the “best wood filler for cabinets” if needed, and a good clear finish. Take your time, blend carefully (“how to hide worn spots cabinets”), and let everything dry. Your cabinets will thank you by looking fresh and clean again! This guide gives you the steps to “repair cabinet finish” and “restore cabinet color” on those small worn spots.
Frequently Asked Questions (FAQ)
How long does it take to fix one worn spot?
It depends on the spot. Cleaning and sanding take just a few minutes. Filling a hole takes time for the filler to dry (maybe a few hours). Adding color and topcoat can take 15-30 minutes of work, but then you need to wait for each layer to dry. Total time, including drying, could be half a day or even overnight. The actual work time for a small spot is short.
Is it hard to match the color?
Matching paint is usually easier than matching stain. Paint stores can match paint colors well. Matching stain is harder because wood color and type matter. You might need to try a few stains or mix them. Testing on a hidden spot first is very important for stain.
What is the best wood filler for cabinets?
The best filler depends on if you will paint or stain over it. For painted cabinets, any good quality wood filler will work. For stained cabinets, you must use a stainable wood filler. Look for one that says “stainable” on the package. Some wood fillers take stain better than others.
Can I just use a marker or touch-up pen?
For very light scratches, a furniture touch-up marker or pen close to the color can work well. It adds color to the scratch line. But for worn areas where the finish is gone, or for chips, pens usually don’t build up enough color or protection. You need paint, stain, or filler and a topcoat for bigger problems.
How do I know what kind of clear finish (topcoat) my cabinets have?
This can be hard to tell. Most kitchen cabinets have a durable finish like polyurethane, lacquer, or conversion varnish. Polyurethane is common for DIY. You can test in a hidden spot. Put a tiny drop of nail polish remover on a small area that isn’t seen. If it gets sticky or melts the finish quickly, it might be lacquer or shellac. If nothing happens, it’s likely polyurethane or varnish. For small touch-ups, a clear polyurethane (water or oil-based depending on your cabinet’s finish type – check the can if you have it) often works okay, but matching the original finish type and shine level is best. When in doubt, use a universal clear coat like a water-based polyurethane in the right shine level.
Will the fixed spot be invisible?
If you take your time and match the color and finish well, the repair can be very hard to see. The goal is to make it blend in so it’s not the first thing you notice. Perfect invisibility is hard to reach, but a great improvement is easy to get. The techniques for “how to hide worn spots cabinets” help a lot.