Can you extend a kitchen island? Yes, you absolutely can extend a kitchen island to gain more prep space, dining room, or storage. Extending a kitchen island is a popular kitchen island renovation that can significantly improve your kitchen’s functionality and aesthetics. This guide will walk you through the entire process, from planning and design to the actual extension, helping you achieve a kitchen island lengthening that perfectly suits your needs.
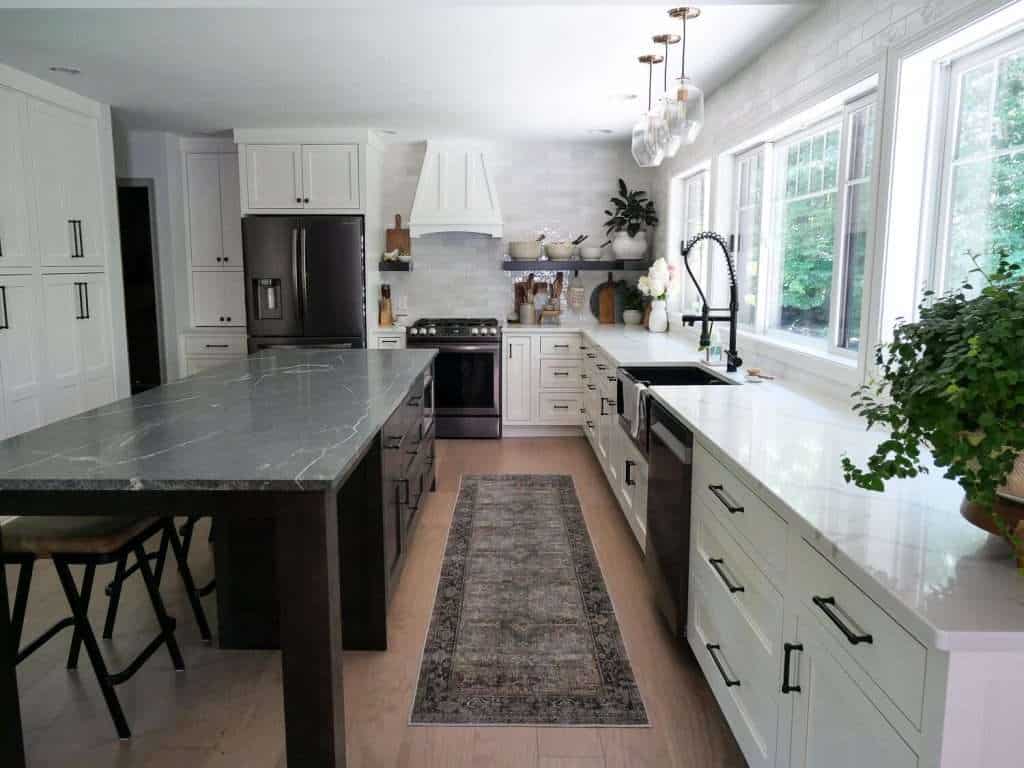
Image Source: graceinmyspace.com
Why Extend Your Kitchen Island?
Many homeowners find themselves outgrowing their existing kitchen island. It might feel cramped during meal prep, lack sufficient seating for family and guests, or simply not offer enough storage. Adding countertop space is a primary motivator for this type of project. A larger island can transform your kitchen into a more efficient and enjoyable hub.
Here are some key benefits of extending your kitchen island:
- Increased Workspace: More counter surface means more room to chop, bake, and prepare meals without feeling overcrowded. This is crucial for those who love to cook or entertain.
- Enhanced Seating: A longer island can accommodate more bar stools, creating a casual dining area or a gathering spot for family and friends.
- Additional Storage: Extending the island often provides an opportunity to add more cabinets, drawers, or open shelving, maximizing your kitchen’s storage capacity.
- Improved Layout: Sometimes, extending an island can help rebalance the kitchen’s layout, making it flow better and feel more open.
- Aesthetic Upgrade: A larger, well-designed island can become a stunning focal point in your kitchen, elevating its overall look.
Planning Your Kitchen Island Extension
Before you grab any tools, thorough planning is essential for a successful DIY kitchen island extension. This phase involves assessing your needs, understanding your current island, and sketching out your vision.
Assessing Your Needs and Goals
What do you hope to achieve by extending your island?
- More Prep Area: Do you consistently run out of counter space when cooking?
- Seating for More People: How many people do you want to seat at the island?
- Additional Storage: What items do you need to store? Consider pots, pans, small appliances, or even cookbooks.
- Appliance Integration: Do you want to add a new appliance like a cooktop or sink to the island?
Evaluating Your Existing Kitchen Island
Take a close look at your current island.
- Dimensions: Measure its current length, width, and height.
- Construction: What is it made of? (e.g., solid wood base, particleboard, granite countertop, laminate countertop). This will influence how you can extend it.
- Plumbing/Electrical: Does your island have a sink, cooktop, or outlets? If so, you’ll need to consider how these will be relocated or if the extension will accommodate them.
- Support: How is the island supported? Is it a freestanding unit, or is it attached to the floor or cabinets?
Determining the New Size and Shape
Based on your needs and kitchen layout, decide on the new dimensions.
- Clearance: Ensure you maintain adequate clearance around the island for comfortable movement. Aim for at least 36 inches (90 cm) of walkway space on all sides, and preferably 42-48 inches (100-120 cm) on sides with appliance or cabinet doors.
- Proportions: Consider how the new size will fit within the overall kitchen. An island that’s too large can make the kitchen feel cramped.
- Shape: Will you extend it in a straight line, add an overhang for seating, or perhaps incorporate a curved end?
Budgeting for the Project
Kitchen island modifications can range in cost depending on materials and whether you DIY or hire professionals.
- Materials: Countertops (granite, quartz, laminate, wood), cabinetry, hardware, fasteners, adhesives.
- Labor (if applicable): Electrician for outlets, plumber for sink relocation, carpenter for custom work.
- Tools: If you don’t have them, you’ll need to factor in tool rental or purchase.
Design and Material Selection
Choosing the right materials is key to both the look and durability of your extended island.
Countertop Options
The countertop is often the most visible part of your island extension. Adding countertop space requires careful consideration of material.
| Material | Pros | Cons | Cost (Approx. per sq ft) |
|---|---|---|---|
| Granite | Durable, heat resistant, wide variety of colors/patterns, adds value. | Can stain if not sealed, requires professional installation for large pieces. | $50 – $150+ |
| Quartz | Non-porous, stain-resistant, very durable, consistent patterns. | Less heat resistant than granite, can be more expensive. | $60 – $200+ |
| Laminate | Affordable, wide range of styles, easy to clean. | Less durable, prone to scratches and heat damage, can look less premium. | $20 – $50 |
| Butcher Block | Warm aesthetic, good for food prep, can be refinished. | Requires regular sealing, prone to scratches and water damage. | $30 – $75 |
| Marble | Beautiful, luxurious, unique veining. | Porous, stains easily, scratches, etching from acids. | $75 – $250+ |
- Countertop Extension for Island: If you’re only extending the countertop, you’ll need to match your existing material or choose a complementary one. Consider how seams will be managed if joining two pieces.
Cabinetry and Base
The base of your island provides support and storage.
- Matching Existing Cabinets: For a seamless look, try to find cabinets that match your existing ones. This can be challenging, especially for older kitchens.
- Modular Kitchen Island Expansion: Consider using pre-made modular cabinets or island kits. These can be easily assembled and customized, offering a simpler solution for expanding kitchen island size.
- Custom Built Base: If you’re looking for specific dimensions or features, building a custom base might be necessary. This allows for greater design flexibility.
Hardware and Finishes
Don’t forget the details!
- Handles and Knobs: Choose hardware that complements your kitchen style.
- Paint/Stain: If you’re painting or staining the base, select colors that enhance your kitchen’s overall palette.
DIY Kitchen Island Extension: Step-by-Step Guide
This guide assumes a basic DIY skill level. If you’re dealing with electrical or plumbing, it’s always best to consult or hire a professional.
Step 1: Demolition and Preparation
- Clear the Island: Remove everything from the island surface and any items stored inside.
- Turn Off Utilities: If your island has electrical outlets or a sink, turn off the corresponding circuit breaker and shut off the water supply before proceeding.
- Remove Existing Countertop: Carefully pry off the old countertop. If it’s glued down, you may need a pry bar and a putty knife. Be cautious not to damage the base cabinets.
- Assess Base Structure: Examine the existing island base. You may need to reinforce it to support the extended countertop and any new weight.
Step 2: Building the New Base Structure
This is where the kitchen island lengthening truly begins.
- Measure and Cut: Based on your design, measure and cut wood (e.g., plywood, 2x4s) for the new frame.
- Assemble the Frame: Construct a sturdy frame using screws and wood glue. If you’re attaching to an existing cabinet, ensure the new frame is securely fastened to it.
- Add Support for Countertop: If your new countertop will have an overhang, you’ll need to add supporting brackets or a reinforced frame structure to prevent sagging. For granite or quartz, these supports are crucial and often require specialized steel supports.
- Integrate New Cabinetry (Optional): If you’re adding new cabinets, measure, assemble, and install them according to the manufacturer’s instructions, ensuring they are level and securely attached to the base frame.
Step 3: Installing the New Countertop
This is a critical step that requires precision.
- Measure and Template: Accurately measure the extended area for your new countertop. For stone countertops, the fabricator will typically create a template to ensure a perfect fit.
- Prepare the Base: Ensure the base is perfectly level and clean. Any imperfections will be visible through the countertop.
- Position the Countertop: Carefully lift and position the new countertop onto the base. If it’s a large or heavy piece, enlist help.
- Secure the Countertop: Secure the countertop to the base using appropriate adhesive or fasteners as recommended by the countertop manufacturer. For stone, this usually involves silicone adhesive.
- Seams (if applicable): If your extension involves joining two countertop pieces, ensure the seam is clean, tight, and properly filled with matching adhesive or epoxy.
Step 4: Finishing Touches and Utilities
- Reconnect Utilities: If you disconnected electricity or water, now is the time to reconnect them. This is where an electrician or plumber might be necessary. Ensure all connections are safe and up to code.
- Install Edge Treatments: If your countertop has an unfinished edge, apply any necessary edging or trim.
- Install Hardware: Attach any new cabinet hardware.
- Clean Up: Thoroughly clean the new island and the surrounding area.
Expanding Your Kitchen Island: Common Scenarios and Solutions
Let’s explore some specific approaches to extending kitchen island size.
Scenario 1: Adding a Simple Countertop Extension for Seating
- Goal: Add a breakfast bar or seating area to one end of the island.
- Approach:
- Remove any existing end panels on your island.
- Build a sturdy support frame extending from the island’s existing structure. This frame should be designed to cantilever the countertop safely.
- Install a countertop piece that extends beyond the base, creating an overhang for seating. Ensure the overhang is properly supported to prevent tipping.
- Key Considerations: Overhang depth (typically 10-12 inches for comfortable seating), support structure, matching or contrasting countertop material.
Scenario 2: Extending the Island’s Length for More Workspace
- Goal: Increase the linear prep surface area.
- Approach:
- This often involves extending the base cabinets or creating a new cabinet structure.
- You might need to move or relocate existing features like outlets or sinks.
- A new, longer countertop is then installed.
- Key Considerations: Maintaining walkway clearances, integrating new cabinetry that matches or complements the existing, ensuring structural integrity of the extended base. This might involve a kitchen island renovation rather than a simple extension.
Scenario 3: Incorporating a New Feature (e.g., Sink, Cooktop)
- Goal: Add functionality like a secondary sink or a cooktop.
- Approach:
- This is a more complex kitchen island modification.
- You’ll need to plan for plumbing and electrical work.
- The base will need to be constructed to accommodate the appliance, including necessary cutouts and ventilation.
- A countertop material that can accommodate the appliance (e.g., quartz or granite for a cooktop) will be essential.
- Key Considerations: Professional consultation for plumbing and electrical, proper ventilation for cooktops, countertop material suitability, structural support for the appliance.
Scenario 4: Using a Modular Kitchen Island Expansion
- Goal: A simpler, often more budget-friendly way to add space.
- Approach:
- Purchase modular island units or extensions designed to connect to existing islands.
- These often come with pre-fabricated cabinet bases and sometimes even countertops.
- Assembly is usually straightforward, like building blocks.
- Key Considerations: Ensuring compatibility with your existing island, the flexibility of modular designs to match your specific needs, the final aesthetic.
Tips for a Successful Kitchen Island Extension
- Measure Twice, Cut Once: This old adage is especially true for kitchen renovations. Precision is paramount.
- Prioritize Support: Especially for stone countertops and overhangs, ensure robust support to prevent cracking or failure.
- Consider Workflow: Think about how you use your kitchen. Will the extension improve or hinder your daily routines?
- Don’t Neglect Clearance: Too little space around the island can make your kitchen feel cramped and unsafe.
- Match or Complement: Aim for a cohesive look with your existing kitchen cabinets and countertops.
- Seek Professional Help When Needed: Don’t hesitate to call in an electrician, plumber, or experienced carpenter for tasks beyond your skill set.
Frequently Asked Questions About Extending Kitchen Islands
Q: How much clearance do I need around a kitchen island?
A: It’s generally recommended to have at least 36 inches (90 cm) of clear walkway space around the island. For areas with appliance doors or heavy traffic, 42-48 inches (100-120 cm) is ideal.
Q: Can I extend my existing countertop with a different material?
A: Yes, you can. However, consider the aesthetic. Matching the material usually provides a more integrated look. If you choose a different material, ensure it complements your existing countertop.
Q: What is the best material for a kitchen island countertop extension?
A: The “best” material depends on your budget, usage, and aesthetic preferences. Quartz and granite are popular for their durability and beauty. Butcher block is excellent for prep areas but requires more maintenance. Laminate is a budget-friendly option.
Q: Do I need a permit to extend my kitchen island?
A: This depends on your local building codes. If you are not altering structural walls or making significant electrical or plumbing changes that require inspections, a permit might not be necessary. However, it’s always best to check with your local building department.
Q: How do I support a countertop overhang for seating?
A: Overhangs need adequate support to prevent them from cracking or becoming unstable. This is typically achieved with a reinforced base structure, cantilevered supports, or specialized steel brackets installed beneath the countertop. The depth of the overhang will dictate the type and extent of support needed.
Q: What if my island has electrical outlets?
A: If you are extending the island, you will likely need to have an electrician re-route or add outlets to the new section of the island to comply with electrical codes and maintain functionality.
Extending a kitchen island is a rewarding project that can significantly enhance your kitchen’s usability and appeal. By carefully planning, selecting appropriate materials, and executing the steps with precision, you can successfully lengthen your kitchen island, adding valuable space and functionality.