What is the best way to clean a kitchen floor? The best way depends on your floor type, but generally involves sweeping or vacuuming first, followed by mopping with an appropriate cleaner. This guide will offer fast, easy, and smart tips to make your kitchen floor sparkle, covering everything from basic cleaning to deep cleaning and restoring shine.
Your kitchen floor takes a beating. Spills, dropped food, and daily foot traffic can leave it looking dull and grimy. But getting it sparkling clean doesn’t have to be a chore. With the right approach, you can achieve a spotless and shiny kitchen floor quickly and efficiently. Let’s dive into the best kitchen floor cleaning tips for a dazzling result.
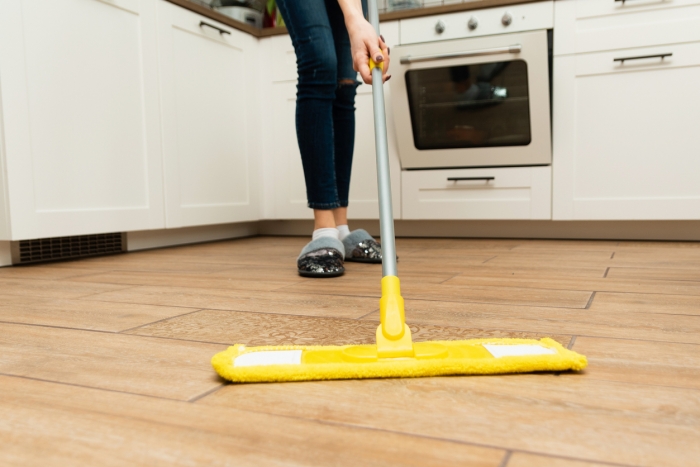
Image Source: www.ovenclean.com
Making Your Kitchen Floor Shine: The Foundation of Cleanliness
Before you even think about mopping, a crucial first step is to prepare your kitchen floor. This ensures that your cleaning efforts are focused on actual dirt and grime, not just loose debris.
Sweeping: Clearing the Debris
Sweeping is the initial defense against dirt. It removes crumbs, dust, hair, and other loose particles that can scratch your floor during mopping or get ground into the surface.
- Choose the Right Broom: A good quality broom with stiff but not overly abrasive bristles is ideal. For most surfaces, a multi-surface broom works well. If you have delicate flooring, opt for softer bristles.
- The Technique: Start at the farthest corner of the kitchen and sweep towards the door or a designated collection point. Use steady, overlapping strokes. For stubborn debris, you might need to apply a little more pressure.
- Don’t Forget Edges and Corners: Pay special attention to the areas around cabinets, appliances, and baseboards. A smaller dustpan or an angled broom can help you reach these spots.
Vacuuming: The Deeper Clean
While sweeping removes surface debris, vacuuming goes a step further, capturing finer dust and allergens.
- Bagged vs. Bagless: Both have their pros and cons. Bagged vacuums can offer better filtration for allergies, while bagless models are often more convenient.
- Floor Settings: Ensure your vacuum is set to the appropriate height for your flooring. For hard floors, using a vacuum with a hard floor attachment or a setting that lifts the brush roll is essential to prevent scratches.
- Frequency: Regular vacuuming, at least once or twice a week, makes a significant difference in maintaining a clean kitchen floor.
Mastering the Mop: How to Mop Kitchen Floor Effectively
Mopping is where the real sparkle happens. Choosing the right method and cleaner for your floor type is key to achieving a beautiful, streak-free finish.
The Best Way to Clean Kitchen Floor: General Mopping Principles
Regardless of your floor material, some principles apply to all successful mopping endeavors.
- Declutter First: Remove any chairs, rugs, or small appliances from the floor to ensure unobstructed access.
- Two-Bucket Method: This is a game-changer for truly clean floors. One bucket contains your cleaning solution, and the other contains clean rinse water. Dip your mop in the cleaning solution, mop a section of the floor, then rinse the dirty mop thoroughly in the clean water bucket before dipping it back into the cleaning solution. This prevents you from spreading dirty water back onto your floor.
- Work in Sections: Start from the farthest corner of the room and work your way towards the exit. This prevents you from walking on wet, freshly mopped areas.
- Wring Out Thoroughly: A mop that is too wet can leave streaks and take too long to dry, potentially damaging some floor types. Wring it out until it’s just damp.
- Allow to Dry: Let the floor air dry completely before walking on it.
How to Clean Kitchen Tile Floors: Tackling Grout and Shine
Kitchen tile floors are popular for their durability and aesthetic appeal, but grout lines can be a challenge.
Routine Cleaning for Tile Floors
For everyday cleaning of kitchen tile floors:
- Sweep or Vacuum: As always, remove loose debris first.
- Warm Water and Mild Cleaner: A solution of warm water and a pH-neutral floor cleaner is usually sufficient. Avoid harsh chemicals or acidic cleaners, which can damage grout.
- Mop with a Microfiber Mop: Microfiber mops are excellent for tile as they trap dirt effectively and leave fewer streaks.
- Rinse if Necessary: If you used a cleaner that leaves residue, a quick rinse with clean water might be needed.
Deep Cleaning Kitchen Floor Tile & Grout
For a more thorough clean, especially for grout:
- Grout Cleaner: For stubborn grout stains, a dedicated grout cleaner can be used. Test it in an inconspicuous area first.
- Baking Soda Paste: A paste of baking soda and water can be applied to grout lines. Let it sit for 10-15 minutes, then scrub gently with a grout brush or an old toothbrush.
- Steam Mop: A steam mop can be very effective for sanitizing and cleaning tile and grout without chemicals. Ensure your tile is suitable for steam cleaning before using one.
- Grout Sealing: After deep cleaning, consider sealing your grout. This makes it more resistant to stains and easier to clean in the future.
Kitchen Vinyl Floor Cleaning: Maintaining Durability and Shine
Vinyl flooring is resilient and relatively easy to maintain, making it a great choice for kitchens.
Everyday Care for Vinyl Floors
- Sweep or Vacuum Regularly: This is essential to prevent grit from scratching the surface.
- Damp Mop with Mild Solution: Use warm water with a small amount of mild dish soap or a specially formulated vinyl floor cleaner.
- Avoid Harsh Chemicals: Ammonia, bleach, and abrasive cleaners can damage the finish of your vinyl floor.
- Wipe Up Spills Immediately: Vinyl is water-resistant, but prolonged exposure to liquids can seep into seams and cause damage.
Restoring Kitchen Floor Shine on Vinyl
Over time, vinyl floors can lose their luster.
- Vinegar Solution: A dilute solution of white vinegar and water (about 1 cup of vinegar to 1 gallon of water) can help restore shine and remove buildup. Mop with this solution and then rinse with clean water.
- Commercial Vinyl Floor Polish: For a deeper shine, a commercial vinyl floor polish can be applied. Follow the manufacturer’s instructions carefully.
- Buffing: After polishing, buffing the floor with a soft cloth or a floor buffer can enhance the shine.
How to Clean Linoleum Kitchen Floor: Gentle Care for a Classic Surface
Linoleum is a natural product and requires a slightly gentler approach than synthetic vinyl.
Routine Cleaning for Linoleum
- Sweep or Vacuum: Remove all loose debris.
- Damp Mop with pH-Neutral Cleaner: Use warm water and a pH-neutral cleaner. Avoid using too much water, as linoleum can be sensitive to prolonged moisture.
- Mild Soap is Okay: A very mild dish soap can be used sparingly, but ensure you rinse well to prevent residue buildup.
- Avoid: Harsh chemicals, steam mops, and abrasive scrubbers are a big no-no for linoleum.
Deep Cleaning and Restoring Linoleum
- Baking Soda Paste for Stains: For stubborn spots, a paste of baking soda and water can be applied and gently rubbed with a soft cloth.
- Linseed Oil Treatment (Occasional): For older linoleum, a light application of linseed oil, buffed well, can help restore its natural luster and flexibility. Do this sparingly and only when the floor is thoroughly clean and dry.
- Avoid Wax: Do not use wax-based cleaners on linoleum, as they can create a slippery surface and dull the finish.
Natural Kitchen Floor Cleaner: Eco-Friendly Solutions for a Sparkle
Many effective and eco-friendly options are available for cleaning your kitchen floors without harsh chemicals.
Simple & Effective Natural Cleaners
- White Vinegar: Diluted with water (1:1 ratio), vinegar is a fantastic all-purpose cleaner. It disinfects, cuts through grease, and removes mineral deposits.
- Baking Soda: This gentle abrasive is great for scrubbing tough spots and neutralizing odors.
- Lemon Juice: The citric acid in lemon juice can help cut through grease and leave a fresh scent.
- Essential Oils: A few drops of tea tree, lemon, or lavender oil can add antimicrobial properties and a pleasant aroma to your cleaning solution.
DIY Natural Floor Cleaner Recipes
Here are a few recipes for natural kitchen floor cleaner:
All-Purpose Natural Floor Cleaner:
* 1 cup white vinegar
* 1 gallon warm water
* Optional: 5-10 drops of essential oil (lemon, tea tree, lavender)
Grease-Cutting Natural Cleaner:
* 1 gallon warm water
* 1 tablespoon mild dish soap (e.g., Dr. Bronner’s)
* 1/2 cup baking soda
Spot Cleaner:
* Baking soda
* Water
* Mix to form a paste.
Kitchen Floor Scrubbing: Tackling Tough Grime
Sometimes, regular mopping isn’t enough. For those stubborn marks and ground-in dirt, a little more effort is needed.
When to Scrub
- Sticky Residue: Syrups, honey, or sugary spills can become incredibly sticky.
- Grease Splatters: Especially around the stove area.
- Muddy Footprints: If tracked in from outside.
- Scuff Marks: From shoes or furniture.
Tools for Kitchen Floor Scrubbing
- Stiff-Bristled Brush: For tile and grout, a stiff-bristled brush or a grout brush is invaluable.
- Microfiber Cloths: For general spot scrubbing and wiping away residue.
- Old Toothbrush: Perfect for cleaning grout lines and tight corners.
- Sponge: A non-abrasive sponge can be used for many types of stains.
- Magic Eraser (Use with Caution): Melamine foam sponges can be very effective on scuff marks, but test them in an inconspicuous area first, as they can sometimes dull finishes on certain floor types.
Scrubbing Techniques
- Apply Cleaner: Apply your chosen cleaner (natural or commercial) directly to the stain or the area needing scrubbing.
- Let it Sit: Allow the cleaner to penetrate the grime for a few minutes.
- Scrub: Use the appropriate tool and scrub in a circular motion or back and forth, depending on the stain and floor type.
- Wipe Clean: Wipe the area with a damp cloth or mop to remove the loosened dirt and cleaner.
- Rinse and Dry: Rinse the area with clean water and dry thoroughly.
Deep Cleaning Kitchen Floor: The Ultimate Refresh
A deep clean goes beyond the weekly mop. It’s about addressing accumulated grime, sanitizing, and truly making your kitchen floor look its best.
Preparing for a Deep Clean
- Empty the Kitchen: Remove as much from the floor as possible.
- Sweep and Vacuum Thoroughly: Get into every nook and cranny.
- Pre-treat Stains: Address any obvious stains before the main cleaning process.
The Deep Cleaning Process
- Choose Your Cleaner: Select a cleaner appropriate for your floor type. For a thorough clean, a slightly stronger solution or a dedicated deep cleaning product might be considered. Natural options like a diluted vinegar solution or a baking soda paste can also be effective.
- Mop Systematically: Using the two-bucket method is highly recommended for deep cleaning to avoid spreading dirt.
- Focus on High-Traffic Areas: Pay extra attention to the areas where dirt tends to accumulate most, like in front of the sink, stove, and refrigerator.
- Don’t Forget Edges: Use a brush or cloth to clean along baseboards and around cabinet bases.
- Rinse Thoroughly: A good rinse with clean water is crucial to remove any leftover cleaning solution residue, which can attract dirt and create dullness.
- Dry Completely: Ensure the floor is completely dry before allowing foot traffic. Open windows or use fans to speed up the drying process.
Special Considerations for Deep Cleaning
- Floor Type: Always tailor your deep cleaning methods to your specific floor material (tile, vinyl, linoleum, wood, etc.).
- Grout Cleaning: If you have tile, this is the time to really tackle those grout lines.
- Appliance Check: While you’re at it, pull out appliances like the refrigerator or oven if possible to clean underneath and behind them – often hidden dirt accumulates there.
Restoring Kitchen Floor Shine: That Extra Sparkle
Achieving a sparkling floor is about more than just removing dirt; it’s about bringing back that beautiful sheen.
Factors Affecting Floor Shine
- Residue Buildup: Using too much cleaner or not rinsing properly can leave a dull film.
- Harsh Cleaners: Some cleaners can strip away the floor’s protective finish.
- Scratches and Wear: Over time, normal wear and tear can reduce shine.
Techniques for Restoring Shine
- Vinegar Rinse: As mentioned, a diluted vinegar rinse is excellent for removing residue and restoring shine on many surfaces.
- Commercial Floor Polish/Restorer: For vinyl, laminate, or even some sealed wood floors, a polish or restorer can work wonders. Always choose a product specifically designed for your floor type and follow instructions precisely.
- Buffing: After applying a polish or even after a thorough cleaning, buffing the floor with a soft, dry cloth or a floor buffer can bring out a brilliant shine.
- Gentle Scrubbing with the Right Cleaner: Sometimes, a very gentle scrub with a cleaner formulated to enhance shine can lift away dulling residue without damaging the surface.
Preventing Shine Loss
- Regular Cleaning: Frequent, proper cleaning prevents the buildup of dirt and grime that dulls shine.
- Use Mats: Place doormats at all entrances to trap dirt before it enters the kitchen. Use rugs or mats in high-traffic areas.
- Wipe Spills Immediately: Don’t let spills sit, as they can etch or stain some surfaces, dulling the shine.
- Choose the Right Cleaners: Stick to pH-neutral or manufacturer-recommended cleaners.
Common Kitchen Floor Cleaning Questions Answered
Here are answers to some frequently asked questions about keeping your kitchen floor sparkling.
Frequently Asked Questions
Q1: Can I use a steam mop on my kitchen floor?
A1: It depends on your floor type. Steam mops are generally safe for ceramic and porcelain tiles, but they can damage grout, laminate, hardwood, and some types of vinyl or linoleum. Always check your flooring manufacturer’s recommendations before using a steam mop.
Q2: How often should I mop my kitchen floor?
A2: For most kitchens, mopping once a week is sufficient for routine cleaning. However, if you have a very high-traffic kitchen or frequent spills, you might need to mop more often. A quick spot clean of spills as they happen is always recommended.
Q3: My kitchen floor looks dull. What’s the best way to fix it?
A3: Dullness is often caused by residue buildup or damage to the finish. Try a thorough cleaning with a pH-neutral cleaner and a good rinse. A diluted vinegar solution can also help remove residue. If the dullness persists, consider a floor restorer or polish specifically designed for your floor type.
Q4: Is it okay to mix cleaning products?
A4: No, it’s generally not safe to mix cleaning products. Mixing different chemicals can create toxic fumes or render the cleaning solutions ineffective. Always use products as directed on their labels.
Q5: How do I get rid of scuff marks on my kitchen floor?
A5: For most floor types, a damp microfiber cloth can remove light scuff marks. For tougher marks, you can try a paste of baking soda and water and gently scrub, or use a product like a Magic Eraser (testing in an inconspicuous spot first).
By following these fast, easy, and smart tips, you can transform your kitchen floor from drab to dazzling, ensuring a clean, hygienic, and beautiful space for your home. Remember to always consider your specific floor type and adjust your cleaning methods accordingly for the best results and to maintain the longevity of your beautiful kitchen floors.