Building your own kitchen hood is a project many do-it-yourself enthusiasts take on. Yes, you can build a kitchen hood yourself if you have basic woodworking, electrical, and mechanical skills. It saves money, lets you create a custom look, and helps clear smoke, grease, and smells from your cooking area. This guide helps you through the steps to build a hood that works well and looks good in your kitchen.
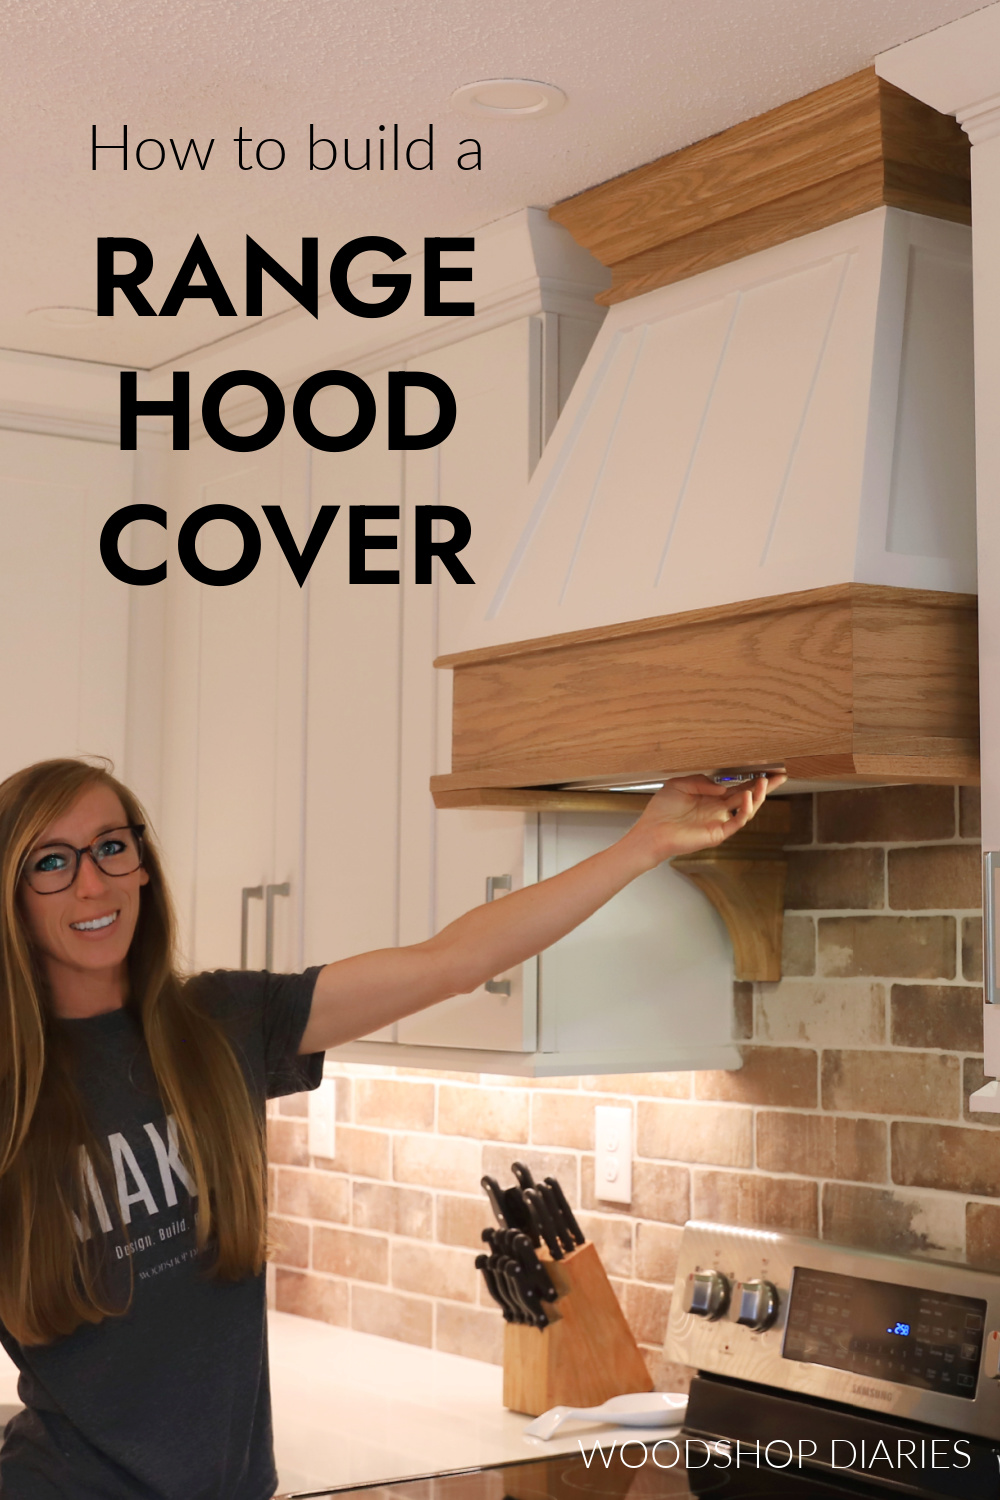
Image Source: www.woodshopdiaries.com
Why Make Your Own Kitchen Hood?
People build their own kitchen hoods for many good reasons.
It can cost less than buying a ready-made one, especially if you want a special design.
You can make a custom range hood cover that fits your kitchen perfectly. You can pick the wood, the paint color, and the style.
It gives you a sense of pride to build something useful for your home.
A good kitchen ventilation system is important. It helps keep your kitchen clean and your air fresh.
Fathoming the Need for a Kitchen Hood
Why do kitchens need a hood? Cooking makes smoke, steam, grease particles, and smells. Without a way to remove these things, they spread through your home. Grease can settle on cabinets and walls, making them sticky. Smoke alarms can go off often.
A kitchen exhaust fan pulls this bad air up and out. This is the main job of a range hood. It cleans the air right where you cook.
Interpreting Your Project: Planning is Key
Every great project starts with good planning. Building a kitchen hood is no different. You need to think about many things before you start cutting wood or drilling holes.
Choosing Your Hood Style
There are different types of kitchen hoods.
* Wall Mount Hoods: These attach to the wall above the stove. They are common.
* Island Hoods: These hang from the ceiling over a stove on a kitchen island. They need more complex support.
* Under Cabinet Range Hoods: These fit right under kitchen cabinets. If you build a custom hood, you are often building a cover around a basic hood insert or building a structure that acts like an under cabinet range hood but is bigger or styled differently.
Most DIY projects involve building a custom range hood cover around a purchased metal range hood insert. This gives you the look you want with the needed function.
Picking How Air Will Leave
Your kitchen ventilation system can work in two main ways:
* Ducted: This is the best way. The kitchen exhaust fan pushes the dirty air through pipes (range hood ducting) to the outside of your house. This removes all the bad stuff.
* Ductless (Recirculating): This type filters the air and sends it back into the kitchen. It uses charcoal filters to catch grease and smells. It does not remove heat or moisture as well as a ducted system. If you can vent outside, do it. This guide focuses mainly on ducted systems because they work better.
Selecting the Right Range Hood Insert
The range hood insert is the working part of your hood. It has the fan, lights, and filters. Choosing the right insert is very important for your DIY kitchen hood build.
* Size: The insert should be at least as wide as your cooktop. Wider is better for capturing smoke and grease.
* Power (CFM): CFM stands for Cubic Feet per Minute. It tells you how much air the fan moves. For a gas stove, you need at least 100 CFM for every 10,000 BTUs your stove produces. For electric stoves, calculate 100 CFM for every 10 inches of stove width. More power is often better, but too much can be noisy and pull heated or cooled air out of your house too fast.
* Noise Level (Sones): Sones measure noise. Lower Sones mean a quieter fan.
* Type: Some inserts are designed for cabinets, others for custom hoods. Make sure the insert fits the kind of structure you plan to build.
* Duct Size: Check the size of the duct connection on the insert (e.g., 6-inch round, 3.25×10 inch rectangle). Your range hood ducting must match this size.
Here is a simple table for choosing insert size and power:
| Cooktop Width | Minimum Insert Width | Minimum CFM (Electric) | Minimum CFM (Gas) |
|---|---|---|---|
| 24 inches | 24 inches | 250 CFM | Calculate by BTU |
| 30 inches | 30 inches | 300 CFM | Calculate by BTU |
| 36 inches | 36 inches | 350 CFM | Calculate by BTU |
| 42 inches | 42 inches | 400 CFM | Calculate by BTU |
Note: Check your stove’s BTU rating for gas stoves to get the right CFM.
Grasping Kitchen Hood Dimensions and Placement
The size and location of your custom range hood cover matter a lot.
* Width: The hood should be at least as wide as your cooktop. Many people make it 3-6 inches wider on each side for better capture.
* Depth: The front of the hood should stick out enough to cover the front burners. A depth of 20-24 inches is common.
* Height Above Cooktop: This is very important for safety and performance. Most codes say the bottom of the hood must be between 24 and 36 inches above the cooking surface. Check your insert’s instructions and local building codes. Too low can be a fire danger; too high makes it less effective.
* Overall Height and Depth: These depend on your ceiling height, how high the hood is mounted, and how big you want the custom range hood cover to look. Sketch it out. Think about how it fits with cabinets.
Choosing Building Materials
For building a wood hood or a custom cover, wood is a common choice.
* Frame: Use sturdy wood like 2x2s or 2x4s to build the basic frame.
* Covering (Skin): Plywood, MDF (medium-density fiberboard), or even drywall can be used to cover the frame and create the hood’s shape. Plywood is strong. MDF is good for smooth painted finishes. Drywall is used if the hood will be taped and painted like a wall.
* Fire Safety: The inside surfaces right above the stove need to be non-combustible. Use sheet metal or cement board inside the lower part of the hood frame around the insert to meet fire codes.
Gathering Tools and Supplies
Before you start, make sure you have the right tools.
* Measuring tape and pencil
* Safety glasses and work gloves
* Circular saw or miter saw for cutting wood
* Jigsaw for cutting holes
* Drill/driver
* Stud finder
* Level
* Screws and wood glue
* Nail gun (optional)
* Duct tape (metal foil type) and sealant for ducting
* Wire strippers and electrical connectors (if doing electrical yourself)
* Drywall knife and mud (if using drywall)
* Sandpaper
* Paint or stain and brushes/rollers
* Sheet metal or cement board for interior fire protection
* Your chosen range hood insert
* Ducting materials (duct pipes, elbows, wall/roof cap)
Safety Must Come First
Building a kitchen hood involves working with power tools, electricity, and possibly heights.
* Always turn off the power to the stove area at the main breaker box before doing any electrical work. Test the wires to be sure they are off.
* Wear safety glasses when cutting wood or working overhead.
* Use sharp tools carefully. Keep your hands away from blades.
* If working high up, use a stable ladder. Have someone help you lift heavy parts.
* If you are not comfortable with electrical wiring, hire a qualified electrician to connect the range hood insert. Electrical fires are dangerous.
* Check local building codes. There may be rules about materials, clearances, and venting. You might need a permit.
Constructing the Hood Structure (Building a Wood Hood)
This is where you build the custom range hood cover. This structure will house the range hood insert and ducting.
Designing the Frame Layout
Draw your hood design first. Sketch it from the front, side, and bottom. Write down the exact kitchen hood dimensions you need for each part.
* The frame gives the hood its shape and strength.
* It needs to be big enough inside to hold the range hood insert and leave space for ducting and wiring.
* The bottom opening of the frame must match the size of the insert’s faceplate or slightly larger to allow the insert to fit up inside.
* Plan how the frame will attach to the wall or ceiling. You will need to find wall studs or ceiling joists for strong support.
Cutting the Frame Pieces
Based on your drawings, measure and mark the wood pieces for the frame.
* Use your saw to make clean, straight cuts.
* Cut the main vertical supports and horizontal pieces that will form the box or angled shape of your hood.
* Cut extra pieces to reinforce corners and points where the frame will attach to the wall.
* Label the pieces as you cut them so you know what goes where.
Putting the Frame Together
Now, assemble the wooden skeleton of the hood.
* Use wood glue on the ends of the pieces before joining them. This makes the joints stronger.
* Use screws or nails to fasten the pieces together. Drill pilot holes first, especially near the ends of the wood, to prevent splitting.
* Use a level often to make sure the frame is square and straight.
* Build the main box or shape first, then add support pieces for mounting.
* If building an angled hood, assemble the main parts on a flat surface if possible.
Creating the Outer Skin (Custom Range Hood Cover)
Once the frame is solid, cover it with your chosen material (plywood, MDF, drywall).
* Measure each section of the frame that needs covering.
* Transfer these measurements to your plywood, MDF, or drywall sheets.
* Use a circular saw for straight cuts and a jigsaw for any curved parts or cutouts (like where it fits against a wall).
* Attach the covering material to the frame using screws or nails. Countersink the fasteners so they are below the surface if you plan to fill and paint.
* If using drywall, attach it with drywall screws. You will tape and mud the seams later like a wall.
* Cut the opening for the range hood insert in the bottom of the covering material. The insert usually comes with a template for this opening size. Cut carefully! The insert trim ring will cover the edge, but a clean cut looks better.
Adding Interior Fire Protection
Before putting the insert in, add a non-combustible layer inside the hood structure where it will be close to the heat.
* Cut pieces of sheet metal or cement board to fit the inside surfaces of the lower part of the hood, right above where the cooktop will be.
* Attach these materials to the inside of the wood frame and covering. Use screws for metal or appropriate fasteners for cement board.
* This step is critical for safety and likely required by building codes.
Finishing the Structure
Make your custom range hood cover look nice.
* If using wood or MDF, fill screw holes and seams with wood filler. Let it dry, then sand smooth.
* Sand all surfaces that will be seen or painted. Start with medium grit sandpaper and finish with fine grit for a smooth feel.
* Wipe away all dust.
* Prime the surface. This helps the paint stick evenly.
* Paint or stain your hood the color you want. You might need two coats.
If using drywall, tape and mud the seams and screw holes. Let it dry, sand smooth, prime, and paint.
Installing the Range Hood Insert
The insert goes inside the custom wood hood structure you just built.
Preparing for the Insert
Check the instructions that came with your specific range hood insert.
* Make sure the opening you cut in the bottom of the hood structure is the correct size.
* Check that the frame inside the hood provides a way to secure the insert. Many inserts screw directly into the wooden frame from the inside. You might need to add extra wood blocks inside the frame for the insert to screw into.
Mounting the Insert Inside
Carefully lift the insert into the opening from below (or lower it from above, depending on your design).
* Align the insert so its edges are even with the opening in the hood’s bottom.
* Secure the insert to the internal wood frame using screws. There are usually mounting holes on the sides or top of the insert body. Use screws long enough to get a good bite into the wood.
* Make sure the insert is held firmly in place. It should not wobble or move.
Range Hood Installation: Hanging Your Hood
Now it’s time to put the finished hood structure with the insert in place above your stove. This step requires careful measuring and often a helper.
Finding Strong Support
You must attach the hood frame directly to the structural parts of your house wall or ceiling.
* Use a stud finder to locate the wall studs or ceiling joists where the top of your hood will attach.
* Mark the center of these studs or joists clearly.
* Your hood frame design should have horizontal pieces or blocking that line up with these studs/joists.
Lifting and Securing the Hood
This is the hardest part. The hood might be heavy.
* Measure from the ceiling or a fixed point down to where the bottom of your hood needs to be (remember that 24-36 inch rule above the cooktop). Mark a level line on the wall.
* It’s helpful to have a temporary support jig built from wood to hold the hood up while you attach it. Or have at least one strong helper.
* Carefully lift the hood structure into place. Rest it on your temporary support or have helpers hold it.
* Push the hood structure against the wall, making sure the marks on your frame line up with the stud locations you marked on the wall.
* Use long, strong screws (like 3-inch or longer wood screws) to drive through your hood’s frame and into the center of the wall studs or ceiling joists.
* Use a level as you put in the first couple of screws to make sure the hood is straight.
* Add enough screws to hold the hood securely. It should not move or feel loose at all.
If your design wraps around existing cabinets, you can also screw the hood frame into the sides of the cabinets for added support, but the main support must come from the wall studs or ceiling joists.
Adding Range Hood Ducting
If you are installing a ducted kitchen ventilation system, this step is essential. The ducting carries the air from the range hood insert to the outside.
Planning the Duct Path
The best range hood ducting path is short and straight.
* Bends (elbows) and long runs of ducting make the fan work harder and reduce its power (CFM).
* Plan the path from the insert’s duct connector through cabinets, walls, ceiling, attic, or floor joists to the nearest outside wall or roof.
* Use the correct size ducting that matches your insert’s connector (e.g., 6-inch round, 8-inch round, 3.25×10 inch rectangle). Do not use smaller ducting, as it greatly reduces performance and can be a fire hazard with grease buildup.
Cutting Holes for the Duct
You will need to make holes for the duct to pass through.
* Measure carefully to find where the hole needs to go through walls, ceilings, or cabinets.
* Use a hole saw (for round ducts) or a jigsaw (for rectangular ducts) to cut the holes. Cut from both sides of a wall or ceiling to get a cleaner cut.
* Make the holes just slightly larger than the duct size.
Connecting the Ductwork
Use the correct type of ducting material.
* Rigid metal ducting (like galvanized steel or aluminum) is strongly recommended. It is smooth inside, which helps air flow and is less likely to collect grease than flexible ducting.
* Flexible metal ducting can be used for short, straight connections but should be stretched tight and used as little as possible. Avoid flexible vinyl ducting completely, as it is a fire hazard and traps grease.
* Connect duct sections together. If using round pipe, one end is slightly smaller to fit into the next piece. The crimped end should point down or away from the fan so grease does not leak out of joints.
* Seal all duct joints with metal foil tape (not cloth duct tape) or duct mastic. This prevents air leaks and ensures the system works efficiently.
* Connect the ducting to the range hood insert’s collar. Secure it with screws and seal the joint.
Installing the Vent Cap
The duct must end outside the house with a proper vent cap.
* Wall Cap: Used when venting through an exterior wall. It has a flap that opens when the fan is on and closes when it’s off to keep insects, rodents, and cold air out.
* Roof Cap: Used when venting through the roof. It has a cap design to keep rain and snow out and a screen to keep pests out.
* Install the cap securely to the outside of your house. Seal around the edges with caulk to prevent water leaks. Connect the ductwork inside to the cap.
Making the Electrical Connection
The range hood insert needs power to run the fan and lights. Turn off the power at the breaker box before starting this step. Double-check the power is off with a voltage tester.
- Your range hood insert will have a junction box for electrical connection.
- You will need to run a power cable (like 14-2 or 12-2 non-metallic sheathed cable, depending on the circuit breaker size and local codes) from the nearest power source (like a dedicated circuit in your kitchen, or an existing junction box) to the hood location.
- If you are not adding a new circuit, make sure the existing circuit can handle the hood’s power needs without being overloaded.
- Run the cable into the junction box on the range hood insert.
- Connect the wires: Black wire (hot) from the cable to the black wire on the insert. White wire (neutral) from the cable to the white wire on the insert. Bare copper or green wire (ground) from the cable to the green or bare wire/screw on the insert’s junction box.
- Secure the cable where it enters the box with a cable clamp.
- Close the junction box cover.
Again, if you are not comfortable with electrical work, please hire a qualified electrician. It is safer and ensures the work meets code.
Adding the Final Touches
Almost done!
Installing Filters and Lights
Your range hood insert comes with metal grease filters and often lights.
* Slide the filters into their slots on the bottom of the insert.
* Install the light bulbs (if not already in place).
Testing the System
With all connections made and power off, double-check all wiring connections and ducting seals.
* Turn the power back on at the breaker box.
* Turn on the range hood fan at its lowest setting. Check that air is flowing out the vent cap outside. Increase the speed.
* Turn on the lights to make sure they work.
* Listen for unusual noises.
Sealing Gaps
Use paintable caulk to seal any small gaps where the hood structure meets the wall or ceiling. This makes for a clean, finished look and prevents air leaks around the edges of the hood.
Caring for Your DIY Kitchen Hood
Regular cleaning keeps your kitchen ventilation system working well.
* Clean the metal grease filters often (every month or two, depending on cooking habits). Most metal filters can go in the dishwasher. Dirty filters block airflow.
* Wipe down the surfaces of your custom range hood cover to keep it clean.
* If you used a ductless insert, replace the charcoal filters regularly (follow manufacturer instructions, usually every 3-6 months).
* Check the outside vent cap occasionally to make sure it is not blocked by leaves, snow, or bird nests.
Troubleshooting Common Problems
- Fan is noisy but moves little air: Check if filters are clogged. Check if ducting is blocked or kinked. Make sure duct joints are sealed. Check that the vent cap outside is opening.
- Fan does not turn on: Check power connection. Check breaker switch. Check wiring in the hood’s junction box (with power off!).
- Poor light: Check bulbs. Check wiring connection to the lights.
FAQ Section
How high should a range hood be mounted?
Most range hood inserts should be mounted between 24 and 36 inches above the cooktop. Check your insert’s instructions and local codes for the exact requirement.
What size range hood insert do I need?
The insert should be at least as wide as your cooktop. For power (CFM), calculate based on your stove type: at least 100 CFM per 10,000 BTU for gas stoves, or 100 CFM per 10 inches of width for electric stoves.
Can I build a ductless DIY kitchen hood?
Yes, you can build a custom range hood cover and install a ductless range hood insert inside. A ductless insert filters the air and sends it back out into the kitchen instead of venting outside. However, ducted hoods offer better performance for removing heat, moisture, and all contaminants.
What kind of ducting should I use for a range hood?
Use smooth, rigid metal ducting (galvanized steel or aluminum) that matches the size of your insert’s duct collar. Avoid flexible ducting, especially vinyl, as it restricts airflow and can be a fire hazard.
Do I need a professional to wire the range hood?
If you are not comfortable working with household electrical wiring, it is safest to hire a qualified electrician to make the final power connection to the range hood insert.
How do I clean the inside of my custom range hood cover?
If you lined the inside with metal or cement board, these surfaces can be wiped clean. The filters will catch most grease. The inside structure should stay relatively clean if the insert and ducting are installed and sealed correctly.
Building your own kitchen hood is a big project, but it is very rewarding. With careful planning, the right tools, and a focus on safety, you can build a functional and beautiful custom range hood cover that improves your kitchen ventilation system for years to come.