How much does it cost to install a kitchen backsplash? On average, homeowners in 2024 might spend between $750 and $1,700 for a standard kitchen backsplash installation. However, your total cost can vary greatly. It depends on the size of your kitchen walls, the type of material you choose, and whether you hire a professional or do it yourself. The cost of backsplash materials and the labor cost to install backsplash are the two biggest parts of the total expense.
Let’s look closer at what affects the price and help you figure out your likely kitchen backsplash installation cost.
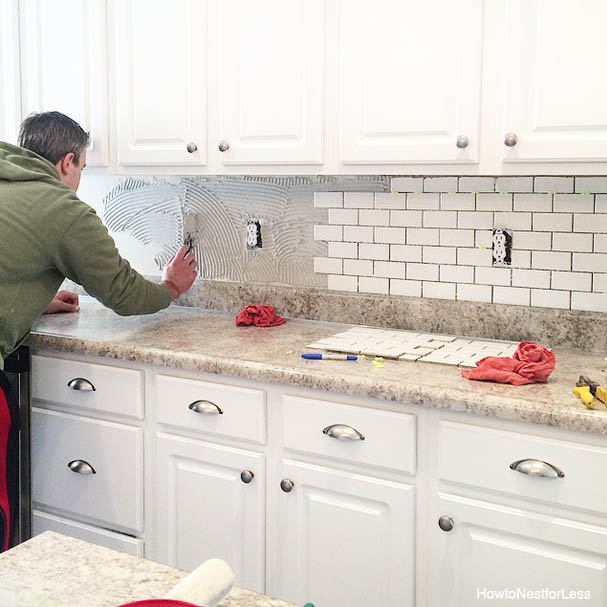
Image Source: howtonestforless.com
Deciphering Backsplash Costs
Knowing the different parts of the cost helps you plan your budget. The overall price is a mix of materials and labor.
Cost of Backsplash Materials
The material you pick for your backsplash is a key part of the cost. Some materials cost much less than others.
- Ceramic or Porcelain Tile: These are very popular and often the most budget-friendly. Prices per square foot can range from $2 to $20 or more, depending on the style, pattern, and brand. Subway tile backsplash cost is usually on the lower end of this range, making it a common choice for saving money.
- Natural Stone Tile: Materials like marble, granite, or travertine are more expensive. They look beautiful but cost more per square foot, often between $10 and $50, sometimes even higher for unique types.
- Glass Tile: Glass tiles give a modern look. They can cost anywhere from $15 to $50 per square foot, depending on the color, finish, and design.
- Metal Tile: Copper, stainless steel, or other metal tiles offer a unique style. Prices can range from $20 to $40 per square foot.
- Peel-and-Stick Backsplash: This is a DIY-friendly and cheap option. It’s often made of vinyl or gel. Prices are usually $5 to $15 per square foot. It’s great for a quick update but may not last as long as tile.
- Slab Backsplash: Using a solid slab of granite, quartz, or marble is a high-end choice. This matches your countertop for a clean look. It’s much more expensive, often calculated by the project rather than per square foot, and can cost thousands of dollars just for the material.
Here is a simple table showing typical material costs:
| Material Type | Typical Material Cost Per Square Foot |
|---|---|
| Ceramic/Porcelain Tile | $2 – $20 |
| Natural Stone Tile | $10 – $50+ |
| Glass Tile | $15 – $50 |
| Metal Tile | $20 – $40 |
| Peel-and-Stick | $5 – $15 |
| Slab (Stone/Quartz) | Higher, often project-based |
Remember, these are just material costs. You also need things like adhesive, grout, and sealant, which add a bit more to the total cost of backsplash materials.
Labor Cost to Install Backsplash
Hiring someone to put in your backsplash is a major part of the cost. Professional installers charge for their time and skill.
Installers usually charge in two ways:
- Per Square Foot: This is very common for tile work. The cost per square foot for labor can range from $10 to $30, or even more for complex patterns, small tiles, or difficult installations. This price covers preparing the surface, cutting and setting the tiles, grouting, and cleanup.
- Hourly Rate: Some installers might charge by the hour. Rates vary a lot based on location and the pro’s experience, but expect to pay between $40 and $100 per hour. This method might be used for smaller jobs or repair work.
Let’s look at the backsplash installation cost per square foot more closely.
Backsplash Installation Cost Per Square Foot (Labor Only)
The labor rate per square foot changes based on several things:
- Tile Type: Smaller tiles (like mosaics) or oddly shaped tiles take more time to cut and set than larger, simple tiles like subway tiles. So, labor for mosaics is often higher per square foot than subway tile backsplash cost for labor.
- Pattern Complexity: A basic grid pattern is fastest. Diagonal patterns, herringbone, or intricate designs take much longer and cost more for labor.
- Surface Condition: If your wall isn’t flat, has old backsplash to remove, or needs repairs, the labor cost will go up. Surface preparation adds time.
- Location: Labor rates are higher in big cities and areas with a higher cost of living.
- Installer’s Skill: A highly experienced pro who does excellent work might charge more than someone less experienced.
A simple ceramic or subway tile job might have a labor cost per square foot around $10 to $15. A complex mosaic or natural stone pattern could push the labor cost per square foot to $20, $30, or even $40 in some cases.
Average Cost to Install Backsplash
Combining material and labor costs gives you the average cost to install backsplash. For most homeowners doing a standard kitchen backsplash, the total cost per square foot (materials + labor) falls between $25 and $50.
- Budget-Friendly (e.g., simple ceramic subway tile): $15 – $25 per square foot total.
- Mid-Range (e.g., glass or mid-priced porcelain tile): $25 – $50 per square foot total.
- High-End (e.g., natural stone, complex patterns, slab): $50 – $100+ per square foot total.
So, for a typical kitchen with about 30-50 square feet of backsplash area, the average cost to install backsplash looks like this:
| Project Size (Sq Ft) | Budget-Friendly Total Cost | Mid-Range Total Cost | High-End Total Cost |
|---|---|---|---|
| 30 | $450 – $750 | $750 – $1,500 | $1,500 – $3,000+ |
| 40 | $600 – $1,000 | $1,000 – $2,000 | $2,000 – $4,000+ |
| 50 | $750 – $1,250 | $1,250 – $2,500 | $2,500 – $5,000+ |
These are estimates. Your actual kitchen backsplash installation cost can be different based on the factors below.
Factors Affecting Backsplash Cost
Many things influence the final price you pay to put in a kitchen backsplash. Looking at these factors helps you understand why costs vary so much.
Size of the Area
This is simple: more wall area means more materials and more labor time. A small section behind a sink costs less than covering a large wall behind a range and wrapping around corners. To figure out your area, measure the length of the walls where you want backsplash and the height you want the backsplash to go (from counter to cabinet bottom is typical). Multiply these numbers to get square feet.
Backsplash Material Choice
As discussed earlier, the material itself has a huge impact. A basic ceramic tile is much cheaper than a custom-cut stone slab or intricate glass mosaic. The cost of backsplash materials can be the largest variable in your budget.
Complexity of the Design
- Pattern: A straight lay or brick pattern is easiest and cheapest for labor. Diagonal, herringbone, chevron, or mixed-size tile patterns take much more skill and time to cut and fit.
- Layout: Walls with many outlets, windows, or corners require more cuts and careful fitting, increasing labor time and cost.
- Tile Size: Very small tiles (like 1×1 mosaics) or very large tiles (like 12×24) can sometimes be harder or slower to install than standard sizes (like 3×6 subway tile or 4×4 tiles).
Condition of the Walls
If the wall surface is uneven, damaged, or needs old backsplash removed, this adds to the labor time and cost. Proper surface preparation is key for a good installation. Removing old tile can be messy and time-consuming.
Your Location
Costs for both materials and labor are higher in certain parts of the country, particularly in major metropolitan areas. Local demand for contractors also plays a role.
Additional Work Needed
- Outlet Cuts: Cutting around electrical outlets adds complexity. Installers need to carefully measure and cut tiles to fit neatly around boxes. You might also need outlet extenders.
- Edge Finishing: How the edges of your backsplash finish can add cost. Using trim pieces (like schluter strips) or bullnose tiles adds material cost and labor time compared to simply stopping the tile.
- Sealing: Natural stone tiles and some grout types need sealing. This is an added step that might be included in the labor cost or charged separately.
All these factors combine to give you your total kitchen backsplash installation cost.
DIY vs Professional Backsplash Cost
Should you hire a pro or do it yourself? This is a big question when figuring out your budget. There are pros and cons to both, especially regarding the DIY vs professional backsplash cost.
Doing It Yourself (DIY)
Pros:
- Lower Cost: The biggest saving is on labor cost to install backsplash. You only pay for materials and tools.
- Flexibility: You work on your own schedule.
- Sense of Accomplishment: Finishing the job yourself can feel great.
Cons:
- Takes Time: Tiling is a skill that takes practice. It will likely take you much longer than a professional.
- Need Tools: You might need to buy or rent tools like a wet saw for cutting tile, trowels, grout floats, and sponges.
- Potential for Mistakes: If you don’t do it right, tiles can be uneven, grout lines messy, or the backsplash might not stick properly. Fixing mistakes costs time and money.
- Quality: A professional often produces a cleaner, more polished result.
The DIY cost is mainly the cost of backsplash materials plus tools. For a small project with simple tile, this could be just a few hundred dollars.
Hiring a Professional
Pros:
- Skill and Experience: Pros know how to handle different materials, complex cuts, and tricky wall conditions.
- Quality Finish: They can create a smooth, even, and professional-looking backsplash.
- Saves Time: They can usually complete the job in a day or two, depending on size.
- Less Stress: They handle the hard work, mess, and technical challenges.
- Warranty: Many professionals offer a warranty on their work.
Cons:
- Higher Cost: You pay for their expertise and time (the labor cost to install backsplash). This is the main part of the DIY vs professional backsplash cost difference.
- Scheduling: You need to work around their availability.
The professional cost includes both materials (sometimes marked up slightly by the pro) and the labor cost.
When DIY Makes Sense:
- You have experience with tiling or similar home projects.
- The area is small and simple (e.g., a straight section with few cuts).
- You are using easy materials like peel-and-stick or large-format simple tiles.
- You have the time and patience to learn and work carefully.
When Hiring a Pro Makes Sense:
- The project is large or has many corners and outlets.
- You are using expensive or difficult-to-cut materials (like glass, natural stone, or small mosaics).
- You want a perfect, high-quality finish.
- You don’t have the time, tools, or confidence to do it yourself.
- You need the job done quickly.
For many people, the peace of mind and quality finish from hiring a professional justifies the higher cost. The average cost to install backsplash by a pro covers their skill and efficiency.
Tile Backsplash Installation Cost
Let’s dive deeper into the costs for tile, as it’s the most common backsplash type. The tile backsplash installation cost is made up of the tile price itself, other materials needed (adhesive, grout, sealant, trim), and the labor to put it in.
Subway Tile Backsplash Cost
Subway tile is incredibly popular because it’s classic, clean, and often very affordable. The typical subway tile backsplash cost per square foot for materials is very low, often just $2 to $5 for basic ceramic white tiles.
- Material Cost (Subway Tile): $2 – $5 per square foot.
- Other Materials (Adhesive, Grout, etc.): Add roughly $1 – $2 per square foot for these supplies.
- Labor Cost (Subway Tile): Since subway tile is relatively easy to install in a simple pattern, labor might be on the lower end, perhaps $10 – $20 per square foot.
So, the total subway tile backsplash cost for materials and labor usually falls between $13 and $27 per square foot. This is why it’s a go-to for budget-friendly renovations. Even with moderately priced subway tile and typical labor, the total cost per square foot is usually below $30.
Other Tile Types
- Larger Format Tiles: Tiles like 4×12 or 12×24 can be quicker to install on a flat wall, potentially lowering labor cost per square foot slightly, but they might be harder to work with in tight spots or around outlets.
- Mosaic Tiles: These small tiles come on mesh sheets. While faster to lay onto the wall, they require very careful setting to ensure straight grout lines and often require more precise cutting around edges and outlets. The labor cost per square foot for mosaics is typically higher than for subway tile, perhaps $15 – $30+. The material cost also varies greatly ($5 – $50+ per square foot).
- Natural Stone Tiles: These tiles are often thicker and require special cutting blades and sealants. Labor is usually higher ($15 – $30+ per square foot) due to these factors. Material costs range widely.
- Glass Tiles: Cutting glass tile needs a special blade and technique to prevent chipping. This can increase the labor cost ($15 – $30+ per square foot). Material costs are also usually higher than ceramic.
Getting a Backsplash Installation Estimate
To get a clear idea of your kitchen backsplash installation cost, you need an estimate. Here’s how to get one:
- Measure Your Area: Figure out the total square footage you want to cover. Measure the length of each section of wall and the height you want the backsplash to be. Multiply length by height for each section and add them up. Add 10-15% extra for cuts and waste.
- Choose Your Material: Decide on the type of tile or material you want. This helps the contractor give you an accurate quote. Have a specific tile in mind, or ask the contractor for suggestions and pricing for different types.
- Contact Contractors: Get quotes from at least three different installers or tiling companies. Make sure they are licensed and insured.
- Show Them the Space: A good estimate requires the contractor to see your kitchen. They need to check the wall condition, count outlets, and note any tricky areas.
- Ask for a Detailed Estimate: The estimate should break down costs:
- Material cost (or specify if you are buying materials separately).
- Labor cost (per square foot or a total project price).
- Cost for additional materials (adhesive, grout, caulk, trim, sealant).
- Cost for surface preparation (removing old backsplash, repairing walls).
- Any potential extra costs (like needing outlet extenders).
- Compare Quotes: Don’t just go with the lowest price. Look at what each estimate includes, read reviews of the contractors, and check references.
A detailed backsplash installation estimate helps you avoid surprises and compare offers properly. Make sure everything you discussed is in writing.
Comprehending the Project Scope
When planning for your kitchen backsplash installation cost, think about the full project scope. This includes more than just laying tile.
Preparation Work
Before any tile goes up, the walls must be ready.
- Removing Old Backsplash: If you have old tile, laminate, or another material, it needs to come off. This takes time and labor. It might also damage the drywall, needing repairs.
- Wall Repair: Holes, bumps, or unevenness in the wall need fixing for a flat surface.
- Cleaning: The wall must be clean and free of grease.
- Protecting Surfaces: Countertops, cabinets, and floors need covering to protect them from adhesive, grout, and dust.
These prep steps are crucial and add to the overall labor cost.
Materials Beyond Tile
Don’t forget the setting materials and finishes:
- Adhesive: This is what sticks the tile to the wall. The type needed depends on the tile material and the wall surface.
- Grout: This fills the gaps between tiles. Grout comes in many colors. Some need sealing.
- Sealer: Natural stone tile and some grout types need sealing to protect against stains and moisture. This requires applying one or more coats after grouting.
- Caulk: Used where the backsplash meets the countertop and at inside corners. This flexible seal prevents water from getting behind the tile.
- Trim Pieces: Edge pieces (like bullnose tiles or metal strips) are often used for a clean finish, especially where the backsplash ends without meeting a cabinet or wall. These add material cost and labor for cutting and fitting.
These extra materials add to the total cost of backsplash materials by typically $1 to $3 per square foot.
Project Timeline
How long will the installation take?
- Simple Project (small area, easy tile, basic pattern): 1 day.
- Medium Project (average kitchen, standard tile, some cuts): 1-2 days.
- Complex Project (large area, difficult tile, intricate pattern, lots of cuts, prep work): 2-4 days or more.
This timeline affects labor cost, especially if paying hourly. It also affects when your kitchen is usable again.
Delving into Specific Costs
Let’s break down the potential costs for different types of projects based on common materials and size. These are ranges for total kitchen backsplash installation cost (materials and labor).
Basic Ceramic Tile (like Subway Tile)
- Project Size: 30 sq ft
- Material Cost (Tile + Supplies): $3 – $7 per sq ft = $90 – $210
- Labor Cost: $10 – $20 per sq ft = $300 – $600
- Estimated Total Cost: $390 – $810
Mid-Range Glass or Porcelain Tile
- Project Size: 40 sq ft
- Material Cost (Tile + Supplies): $17 – $52 per sq ft = $680 – $2,080
- Labor Cost: $15 – $25 per sq ft = $600 – $1,000
- Estimated Total Cost: $1,280 – $3,080
Natural Stone Tile (e.g., Travertine, Marble)
- Project Size: 50 sq ft
- Material Cost (Tile + Supplies including sealer): $12 – $55 per sq ft = $600 – $2,750
- Labor Cost: $15 – $30 per sq ft = $750 – $1,500
- Estimated Total Cost: $1,350 – $4,250
These examples show how much the material choice and project size impact the total cost. They also illustrate the range you might see in a backsplash installation estimate.
Boosting Readability and Clarity
Making sure cost information is easy to read is important. We use simple words and short sentences.
- Instead of “The confluence of multiple external factors and internal variables culminates in an intricate process requiring meticulous analysis and evaluation,” we say, “Many things affect the process, so we must think and check carefully.”
- Instead of “The fundamental conceptualization of this hypothesis necessitates comprehensive scrutiny and intellectual discernment,” we say, “We need to think carefully about this idea.”
- Instead of “Utilizing an intricate methodology enhances the precision and reliability of the experimental results,” we say, “Using a simple method makes results more accurate.”
- Instead of “The utilization of appropriate instruments facilitates an efficacious completion of designated objectives,” we say, “Using the right tools helps get the job done.”
- Instead of “It is imperative that we systematically evaluate the components before proceeding,” we say, “We must check everything before moving forward.”
By using simple words, short sentences, and active voice, the information about kitchen backsplash installation cost becomes clear for everyone. We avoid jargon like “culminates,” “necessitates,” “scrutiny,” “discernment,” “utilizing,” “intricate methodology,” “precision,” “reliability,” “efficacious completion,” “designated objectives,” “imperative,” “systematically evaluate,” and “components.” This focus on clear language helps readers grasp the average cost to install backsplash and the reasons behind the prices.
Saving Money on Your Backsplash
If the estimated kitchen backsplash installation cost seems high, here are ways to potentially save money:
- Choose Affordable Materials: Ceramic or porcelain tiles, especially basic styles like white subway tile, are the most budget-friendly materials. Look for sales or clearance items.
- Keep the Design Simple: A basic straight or brick pattern uses less labor than complex patterns like herringbone or intricate mosaics.
- Limit the Area: Do you need backsplash all the way around the kitchen? Or just behind the sink and range? Covering less wall area saves on both material and labor costs.
- Do Some Prep Yourself (if comfortable): If you’re handy, you might save money by removing old backsplash or prepping the wall yourself. However, be careful not to damage the wall, as repairs could cost more.
- Shop Around for Materials: Compare prices for tiles and setting materials at different stores (local tile shops, home improvement centers, online retailers).
- Get Multiple Quotes for Labor: Different contractors will have different rates for the labor cost to install backsplash. Getting several backsplash installation estimates helps you find a fair price.
- Consider Peel-and-Stick (for a temporary fix): If you’re on a very tight budget or renting, peel-and-stick backsplashes are much cheaper than tile and easy to put up yourself. Just be aware they may not look as high-quality or last as long.
Even with a smaller budget, you can find ways to add a fresh look to your kitchen with a new backsplash.
Wrapping Up Your Backsplash Budget
Getting a new kitchen backsplash is a great way to update your kitchen’s look. The total kitchen backsplash installation cost depends mostly on the size of the area, the cost of backsplash materials you pick, and whether you pay for professional labor.
You can expect the average cost to install backsplash by a pro to be between $750 and $1,700 for a typical kitchen project, but costs per square foot usually range from $25 to $50. Simple jobs with cheap materials like subway tile backsplash cost much less per square foot than complex designs or expensive natural stone.
Planning your project, picking materials that fit your budget, measuring accurately, and getting detailed backsplash installation estimates from qualified professionals are key steps to figuring out your likely cost in 2024. Whether you choose DIY to save on labor cost to install backsplash or hire a pro for a perfect finish, a new backsplash can truly transform your kitchen.
Frequently Asked Questions (FAQ)
h4: How long does it take to install a kitchen backsplash?
h5: Most kitchen backsplashes can be installed by a professional in 1 to 3 days, depending on the size, material, and complexity. This includes setting the tile and grouting.
h4: Can I install a backsplash over old tile?
h5: Yes, sometimes you can install new tile over old tile if the old tile is firmly attached, clean, and the surface is prepared properly. However, it adds thickness, which might affect outlets and edges. Removing the old tile first usually gives a better result.
h4: Is grouting difficult for a DIYer?
h5: Grouting is less technical than setting tile but requires speed and neatness. It can be messy. Practicing on a scrap piece first helps.
h4: Do I need to seal my backsplash?
h5: It depends on the material. Natural stone tiles (like marble, travertine, granite) and sometimes certain types of grout require sealing to protect them from stains and moisture. Ceramic and porcelain tiles usually do not need sealing, but the grout might.
h4: What is the best height for a kitchen backsplash?
h5: The most common height is 18 inches, from the countertop to the bottom of the upper cabinets. However, some people choose to go higher, even all the way to the ceiling behind the range or around the whole kitchen, depending on the desired look and budget. This choice significantly affects the total area and therefore the kitchen backsplash installation cost.
h4: How much extra tile should I buy?
h5: It’s recommended to buy 10-15% more tile than your measured square footage. This accounts for cuts, waste, and potential future repairs if a tile gets damaged.
h4: What tools do I need for DIY backsplash installation?
h5: Key tools include a tape measure, level, tile cutter (wet saw for most tile types), notched trowel (size depends on tile), grout float, sponges, buckets, safety glasses, and gloves.
h4: How much does it cost to remove an old backsplash?
h5: Removing an old backsplash adds to the labor cost. Professionals might charge an extra $3 to $7 per square foot for removal, plus potential costs for wall repair if needed.
h4: Does the type of grout affect the cost?
h5: Most standard cement-based grouts have similar costs. Epoxy grout is more expensive but is highly stain-resistant and durable, sometimes used in backsplashes. This might add slightly to the material and potentially labor cost.
h4: How can I get an accurate backsplash installation estimate?
h5: Measure your area, choose your material, and get detailed quotes from at least three qualified professionals after showing them the job site. Make sure the estimate lists material costs, labor cost to install backsplash, and any potential extra charges.