Determining the right number of recessed lights for your kitchen depends on the size of the room, ceiling height, and the desired lighting effect. A common starting point is to place lights on 4-6 foot centers, ensuring even coverage for both general illumination and specific task areas.
Lighting a kitchen effectively is more than just screwing in a few bulbs. It’s about creating a functional, inviting, and safe space. Recessed lighting, often called can lights or downlights, is a popular choice for kitchens because it offers a clean, modern look and provides excellent general illumination. But how do you figure out the number of lights for a kitchen and where to put them? This guide will walk you through everything you need to know about kitchen lighting layout and recessed lighting spacing.
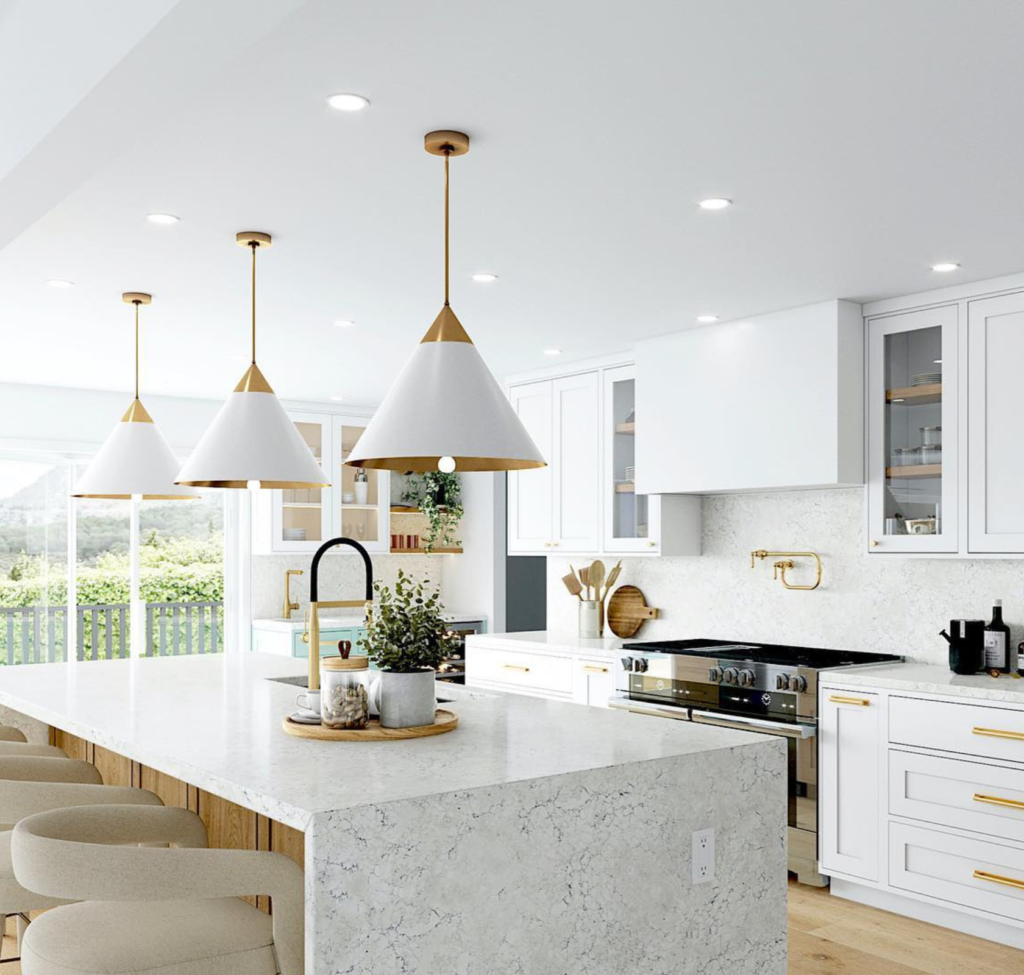
Image Source: blog.1800lighting.com
Fathoming Your Kitchen’s Lighting Needs
Before we dive into numbers and spacing, let’s consider what makes a good kitchen lighting plan. A well-lit kitchen typically has layers of light:
- Ambient Lighting: This is the general, overall light that illuminates the entire room. Recessed lights are excellent for this purpose.
- Task Lighting: This is focused light for specific work areas like countertops, the sink, and the stovetop. Under-cabinet lighting is a common form of task lighting, but recessed lights can also be positioned to provide task lighting.
- Accent Lighting: This is used to highlight features like artwork or architectural details. While less common in kitchens, it can add a decorative touch.
For the purpose of this guide, we’ll focus primarily on ambient and task lighting using recessed kitchen ceiling lights.
Deciphering Recessed Lighting Spacing: The Rules of Thumb
Figuring out recessed lighting spacing can seem tricky, but there are helpful guidelines. These aren’t rigid rules, but rather starting points that can be adjusted based on your specific kitchen.
The 4-6 Foot Rule
A widely used rule of thumb for general ambient lighting is to space recessed lights on 4-foot to 6-foot centers. This means measuring from the center of one light fixture to the center of the next.
- For 4-foot spacing: This generally provides brighter, more even light, ideal for smaller kitchens or areas where more light is needed.
- For 6-foot spacing: This can be sufficient for larger kitchens or when combined with other light sources, offering a softer overall glow.
How to apply it:
Measure the length and width of your kitchen. Divide these measurements by your chosen spacing (e.g., 4 feet). This will give you an approximate number of lights needed along each wall.
Example:
For a kitchen that is 10 feet wide and 15 feet long:
- Along the 10-foot width: 10 feet / 4 feet = 2.5. Round up to 3 lights.
- Along the 15-foot length: 15 feet / 4 feet = 3.75. Round up to 4 lights.
Total lights would be roughly 3 lights x 4 lights = 12 lights. If using 6-foot spacing:
- Along the 10-foot width: 10 feet / 6 feet = 1.67. Round up to 2 lights.
- Along the 15-foot length: 15 feet / 6 feet = 2.5. Round up to 3 lights.
Total lights would be roughly 2 lights x 3 lights = 6 lights.
The Ceiling Height Factor
Ceiling height plays a crucial role in how far apart you can space your lights. The higher the ceiling, the further apart the lights can be to provide adequate coverage.
- 8-foot ceilings: Lights are typically spaced 4-5 feet apart.
- 9-foot ceilings: Lights can be spaced 5-6 feet apart.
- 10-foot ceilings or higher: Lights can be spaced 6-8 feet apart.
Why does this matter? Light spread decreases with distance. If lights are too far apart on a high ceiling, you’ll end up with dark spots and uneven lighting.
The Diameter of the Beam Spread
Recessed lights have different beam spreads, usually indicated by an angle (e.g., 60°, 90°). A wider beam spread covers a larger area but may be less intense in the center.
- Narrow beam (e.g., 30-45°): Better for accent lighting or highlighting specific areas.
- Medium beam (e.g., 60°): A good all-around choice for general illumination.
- Wide beam (e.g., 90°): Ideal for covering large areas and reducing the number of fixtures needed for ambient lighting.
A practical approach:
Consider the diameter of the light’s coverage at your ceiling height. If your light fixture has a 60° beam spread and a 10-foot ceiling, the light might effectively cover a circle of about 8-10 feet in diameter on the floor. You want these circles to overlap slightly to ensure seamless illumination.
A helpful formula for spacing:
To determine spacing based on beam spread and ceiling height, you can use this:
Spacing = (Ceiling Height x Beam Spread Factor)
The “Beam Spread Factor” is an approximation. For a 60° beam spread, the factor is often around 1.0-1.2. For a 90° beam spread, it might be 1.5-1.8.
Example:
* Ceiling Height: 8 feet
* Beam Spread: 60° (Factor of 1.1)
* Spacing = 8 feet x 1.1 = 8.8 feet. This suggests you could space them further apart, but we also need to consider edge spacing.
This formula is a bit more technical. A simpler way to think about it is that the light circles should overlap by about 10-20%.
Creating a Balanced Kitchen Lighting Layout
A great kitchen lighting layout is about more than just placing lights in a grid. It involves considering the kitchen’s layout, including cabinets, islands, and work zones.
Lighting Over Work Areas
This is where task lighting comes in. You don’t want to cast shadows on your countertops while you’re chopping vegetables.
- Countertops: Place recessed lights 18-24 inches away from the wall and cabinets. This positions them in front of the task area, preventing shadows from your body.
- Measure the length of your counter runs.
- Divide the length by your chosen spacing (often 3-4 feet for task lighting).
- Ensure the lights are positioned to avoid shadowing.
- Kitchen Island: Pendant lights are often the go-to for islands, but recessed lights can work beautifully as well, especially if you want a cleaner, more integrated look.
- Center the lights over the island.
- Space them evenly along the length of the island.
- Consider the size of the island; larger islands will need more lights.
- Aim for lights that are spaced approximately 2-3 feet apart over the island, depending on their beam spread.
- Sink and Stovetop: These are critical task areas. Ensure there is ample light directly above them. If under-cabinet lighting is also used, recessed lights can provide the ambient layer.
Perimeter Lighting vs. Grid Layout
- Perimeter Lighting: Placing lights around the outer edges of the room (along the walls) is a great way to provide ambient light and make the room feel larger.
- Space lights 2-3 feet from the walls.
- Then, continue with your chosen spacing (e.g., 4-6 feet) for the inner part of the room.
- This approach often requires more fixtures but results in a very even, shadow-free illumination.
- Grid Layout: A simple grid, as discussed with the 4-6 foot rule, is effective for uniform lighting. This is often the easiest to plan.
Considerations for Cabinets and Ceilings
- Wall Cabinets: As mentioned, 18-24 inches from the wall is ideal for counter task lighting.
- Tall Cabinets/Pantries: Consider placing a light directly in front of tall cabinets to illuminate the vertical surfaces.
- Obstructions: Be mindful of ceiling beams, HVAC ducts, or existing light fixtures that might affect your placement.
Calculating the Number of Lights: Putting it All Together
Let’s refine the process for determining the number of lights for a kitchen using a more structured approach.
Step 1: Measure Your Kitchen
Get accurate dimensions of your kitchen, including length, width, and ceiling height.
Step 2: Determine Your Lighting Goal
Are you aiming for bright, crisp light, or a softer, more atmospheric glow? This will influence your spacing.
Step 3: Choose Your Spacing Method
-
Grid Method:
- Divide the room’s length by your desired spacing (e.g., 4 feet).
- Divide the room’s width by your desired spacing (e.g., 4 feet).
- Round up to the nearest whole number for each dimension.
- Multiply the two numbers to get the total number of lights.
* Example: 12 ft x 14 ft room, 5 ft spacing.- Length: 14 ft / 5 ft = 2.8 -> 3 lights
- Width: 12 ft / 5 ft = 2.4 -> 3 lights
- Total: 3 x 3 = 9 lights.
-
Perimeter Method:
- Place lights 2-3 feet from each wall, evenly spaced along each wall.
- For the interior, use your chosen spacing (e.g., 5-6 feet) in rows or a grid pattern.
* Example: 12 ft x 14 ft room.- Perimeter lights along 14 ft walls (2 lights each side, 3 ft from corner): 2 lights x 2 sides = 4 lights.
- Perimeter lights along 12 ft walls (1 light each side, 3 ft from corner): 1 light x 2 sides = 2 lights.
- Total perimeter lights = 6.
- Now, consider the interior. If the room is 12 ft wide, after placing lights 3 ft from each wall, you have 6 ft remaining in the middle. A single row of lights spaced 5 ft apart would be 6 ft / 5 ft = 1.2 -> 2 lights.
- Total lights = 6 (perimeter) + 2 (interior) = 8 lights.
Step 4: Factor in Special Areas
- Island: Add lights specifically for the island, spacing them evenly.
- Task Areas: If you’re relying on recessed lights for task lighting, ensure you have enough over countertops and the sink, potentially using tighter spacing here.
Using a Recessed Lighting Calculator
Many online retailers and lighting design websites offer a recessed lighting calculator. These tools can be very helpful. You input your room dimensions, ceiling height, and desired illumination level, and they provide a recommended number of fixtures and spacing.
How calculators typically work:
They often use a lumen-per-square-foot calculation. For a kitchen, you generally want 50-75 lumens per square foot for ambient lighting.
- Lumens: A measure of the total amount of visible light emitted by a source.
- Watts: A measure of power consumption.
Example Calculation:
* Kitchen size: 12 ft x 14 ft = 168 sq ft
* Desired lumens per sq ft: 60
* Total lumens needed: 168 sq ft x 60 lumens/sq ft = 10,080 lumens
* If you’re using 600-lumen LED bulbs (typical for a 6-inch recessed can), then:
* Number of lights = 10,080 lumens / 600 lumens/light = 16.8 lights. Round up to 17 lights.
This lumen-based approach is often more precise than spacing rules alone, especially when you’re aiming for a specific brightness.
Choosing the Best Recessed Lighting for Your Kitchen
The best recessed lighting for kitchen applications involves more than just the quantity and placement. Consider the type of fixture, bulb, and features.
Types of Recessed Fixtures (Cans)
- New Construction Cans: Installed before drywall, offering a secure, flush mount.
- Remodel Cans: Designed for existing ceilings, with clips to attach to joists or furring strips.
- IC (Insulation Contact) Rated Cans: Can be installed directly against insulation, which is common in many homes.
- Non-IC Rated Cans: Require a clearance from insulation to prevent fire hazards. Always check local building codes.
Trim Types
The trim is the visible part of the fixture.
- Baffle Trim: Has grooves that reduce glare. Available in white, black, or bronze. Great for general ambient lighting.
- Reflector Trim: Has a shiny surface to reflect light. Often comes in white, mirrored, or metallic finishes. Can be brighter.
- Gimbal Trim: Allows you to tilt and aim the light source, useful for highlighting specific areas or artwork.
- Adjustable Trim: Similar to gimbal but often with a wider range of motion.
- Wall Wash Trim: Designed to direct light down the wall, excellent for accentuating wall texture or artwork.
Bulb Choices (The Heart of Your Kitchen Illumination)
This is where you fine-tune your kitchen illumination.
- LEDs: The undisputed champions for kitchen lighting.
- Energy Efficiency: Use significantly less energy than incandescent or halogen bulbs.
- Longevity: Last for tens of thousands of hours, reducing replacement hassle.
- Color Temperature (Kelvin – K):
- Warm White (2700K-3000K): Similar to incandescent light, creating a cozy atmosphere. Good for dining areas within a kitchen.
- Cool White (3500K-4000K): A more neutral light, good for general kitchen use and countertops.
- Daylight (5000K-6500K): A bright, crisp light that mimics natural daylight. Excellent for task areas where clarity is paramount, but can feel stark for general ambiance.
- Color Rendering Index (CRI): Measures how accurately a light source reveals the true colors of objects. For kitchens, aim for a CRI of 90 or higher to ensure food looks appetizing and colors are true.
- Wattage/Brightness (Lumens): As discussed, choose bulbs that provide enough lumens for your space. For 6-inch recessed lights, 600-800 lumens is a common range for general lighting. For task lighting, you might opt for higher lumen output or narrower beam angles.
Dimmable Recessed Lights
This is a crucial feature for modern kitchens. Dimmable recessed lights allow you to adjust the brightness, creating different moods and catering to various activities.
- Dimmer Switches: Ensure your dimmer switch is compatible with your LED bulbs. Not all LED bulbs are dimmable, and not all dimmers work with all dimmable LEDs. Look for LED-specific dimmers.
- Benefits:
- Versatility: Bright light for cooking, low light for dining or entertaining.
- Energy Saving: Further reduce energy consumption when dimmed.
- Comfort: Reduces eye strain in the evenings.
Choosing the Right Fixture Size
Recessed lights come in various sizes, commonly 4-inch, 5-inch, and 6-inch diameters.
- 6-inch: The most common size for general kitchen lighting. Offers a wider beam spread and higher lumen output, often requiring fewer fixtures.
- 4-inch and 5-inch: Can be used for more accent-focused lighting, or in kitchens with lower ceilings or smaller spaces where a more subtle look is desired. They can also be used in a cluster for a more decorative effect.
Advanced Kitchen Lighting Layout Techniques
Beyond the basic grid, consider these strategies for superior kitchen illumination:
Combining Recessed Lighting with Other Fixtures
A layered lighting approach is always best.
- Under-Cabinet Lighting: Essential for eliminating shadows on countertops. LEDs are ideal here.
- Pendant Lights: Great over islands or peninsulas for decorative and focused light.
- Ceiling Fan Lights: Can contribute to ambient light but are usually not sufficient on their own.
Creating Zones
Divide your kitchen into functional zones (e.g., cooking zone, prep zone, dining zone) and tailor the lighting to each.
Edge Lighting for Ambiance
Placing lights closer to the walls (e.g., 2-3 feet) creates a coved effect, washing the walls with light and making the room appear larger and more inviting. This is part of the perimeter lighting strategy.
Frequently Asked Questions (FAQ)
Here are some common questions about how many recessed lights for a kitchen:
- Q: Do I need a recessed lighting calculator for my kitchen?
- A: While not strictly necessary, a recessed lighting calculator can be a very helpful tool to ensure you have adequate lumens and proper spacing, especially if you’re new to lighting design.
- Q: Can I use fewer lights if I choose brighter bulbs?
- A: Yes, to some extent. If you opt for higher lumen bulbs with a wider beam spread, you might be able to use fewer fixtures while still achieving the desired overall brightness. However, spacing is also important for even light distribution to avoid hot spots and dark areas.
- Q: How far apart should recessed lights be over my kitchen island?
- A: For kitchen islands, it’s common to space recessed lights approximately 2-3 feet apart, centered over the island. The exact spacing depends on the size of the island and the beam spread of your chosen lights.
- Q: Should all my kitchen recessed lights be on the same switch?
- A: It’s highly recommended to put your recessed lights on dimmer switches and potentially split them onto different switches for different zones. For example, you might have one switch for perimeter lights and another for lights directly over task areas. This provides greater control over the ambient lighting kitchen and task lighting.
- Q: What is the best type of bulb for kitchen recessed lighting?
- A: LED bulbs are the best choice for kitchen recessed lighting due to their energy efficiency, long lifespan, and variety of color temperatures and brightness levels. Aim for bulbs with a high CRI (90+) for accurate color rendering.
- Q: How close to the wall should I place recessed lights for task lighting?
- A: For task lighting over countertops, place recessed lights about 18-24 inches away from the wall. This ensures the light falls in front of you when you’re working, preventing shadows.
Final Thoughts on Your Kitchen Illumination
Achieving perfect kitchen illumination with recessed lighting is a blend of art and science. By following these guidelines for kitchen lighting layout and recessed lighting spacing, and by carefully selecting your fixtures and bulbs, you can transform your kitchen into a bright, functional, and beautiful space. Remember to consider your personal preferences, the specifics of your kitchen’s design, and the benefits of features like dimmable recessed lights to create the ideal lighting environment.