Image Source: graceinmyspace.com
Steps: How To Paint Kitchen Cabinets That Are Already Painted
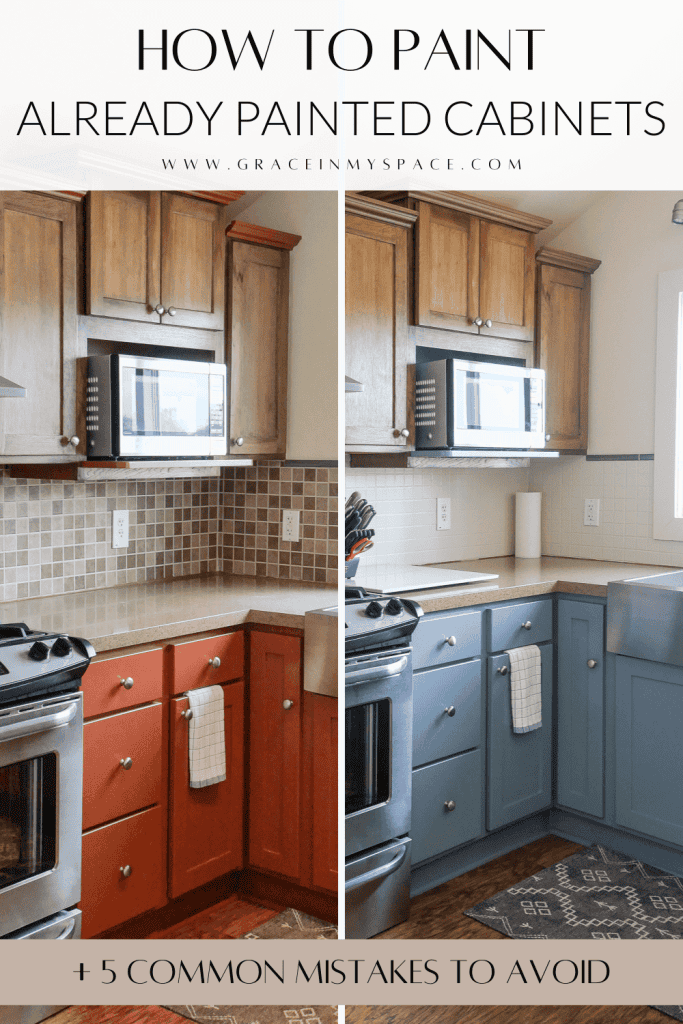
Painting kitchen cabinets that already have paint on them is a great way to update your kitchen’s look without the cost of replacing them. Can you paint over existing paint? Yes, you absolutely can, but it requires careful preparation and the right materials to ensure a durable, smooth finish. This guide walks you through the necessary steps, from assessing the current finish to applying the final coat, covering how to repaint previously painted cabinets for a professional result.
Why Repaint Your Cabinets?
A new coat of paint can totally change your kitchen. It’s a low-cost way to make an old kitchen feel new and bright. Painting is also a good option if your cabinets are structurally sound but the current paint is worn, scratched, or just an outdated color. This process is different from refinishing, which usually means stripping cabinets back to bare wood. Repainting means adding a fresh layer right over the old paint, after the right steps.
Getting Ready: Planning and Preparation
Good results start with good planning. Before you even open a paint can, you need to prepare yourself and your space. This part takes the most time but is the most important. It sets the stage for a great paint job that lasts.
Checking Your Cabinets Now
First, look closely at the current paint.
* Is it peeling or chipping?
* Does it feel greasy?
* Is it smooth, or can you see brush strokes from a past paint job?
Knowing the state of the old paint helps you plan the prep work. Cabinets with lots of damage need more repair. Greasy cabinets need extra cleaning.
Choosing Your Supplies
Picking the right paint and tools is key. You need paint that can handle kitchen use. This means paint that is tough, easy to clean, and resists moisture.
- Primer: This is vital for getting paint to stick to smooth or glossy surfaces. It also helps block stains.
- Paint: There are different types. You need one made for cabinets or trim.
- Finish (Sheen): This is how shiny the paint is. Different finishes work better in kitchens.
- Brushes, Rollers, or Sprayer: How you put the paint on affects the final look.
We will talk more about these choices later.
Tools and Materials List
Get everything ready before you start. Nothing slows you down like having to stop and run to the store.
- Safety Glasses or Goggles
- Dust Mask or Respirator
- Gloves
- Drop Cloths or Plastic Sheeting
- Painter’s Tape
- Screwdriver (manual or electric)
- Labels and Small Bags (for hardware)
- Degreaser Cleaner (like TSP substitute or a dedicated cabinet cleaner)
- Rags or Sponges
- Bucket(s)
- Fine-grit Sandpaper (150-220 grit)
- Medium-grit Sandpaper (100-120 grit) – maybe needed for repairs
- Sanding Sponge or Sanding Block
- Wood Filler or Spackle (for repairs)
- Putty Knife
- Vacuum with brush attachment
- Tack Cloths
- Painter’s Primer (check for types good for painted surfaces)
- Cabinet or Trim Paint
- Brushes (high-quality synthetic for water-based, natural for oil-based)
- Small Foam Rollers or Microfiber Rollers (for smooth finish)
- Paint Trays
- Small container or cup for paint
- Optional: Orbital Sander (speeds up sanding), Paint Sprayer (for smoothest finish)
Getting the Area Ready
Protect your kitchen from dust and paint.
* Empty the cabinets and drawers completely.
* Cover countertops, floors, appliances, and walls with drop cloths or plastic sheeting.
* Use painter’s tape to protect areas you don’t want to paint, like inside the cabinet frames or walls next to the frames.
* Open windows or use fans to keep the air moving. Good air flow is important for drying and safety.
Taking Off Doors and Hardware
This step makes painting much easier.
* Use a screwdriver to remove doors from the cabinet frames. Keep hinges attached to the doors if possible, or label them carefully.
* Remove all hardware from the doors and drawer fronts (handles, knobs, pulls).
* Label each door and drawer front and its hardware with a number or letter. A piece of tape on the back works well. Make a simple diagram of your kitchen layout and write the matching number on it. This helps you know where everything goes back.
* Put screws and hardware for each piece into labeled bags or containers. This stops you from losing parts.
Keeping track of everything is vital for putting your kitchen back together easily later.
The Essential First Step: Cleaning
You must have a clean surface for paint to stick. This is especially true for kitchen cabinets that are already painted. Kitchen cabinets collect grease, dirt, and grime over time. Paint will not stick well to greasy or dirty surfaces.
You need to degrease cabinets before painting over old paint. This is not a step you can skip. Even if your cabinets don’t look dirty, they likely have a thin layer of grease from cooking.
- Use a strong degreaser cleaner made for cabinets or a TSP substitute. Read the product directions carefully.
- Mix the cleaner with water in a bucket as directed.
- Dip a clean rag or sponge into the cleaning solution. Wring out most of the liquid so it’s damp, not dripping.
- Wipe down all cabinet surfaces: door fronts, backs, edges, drawer fronts, and the cabinet frames attached to the wall.
- Pay extra attention to areas around the stove and oven, as these usually have the most grease.
- Use a scrub brush on tough spots if needed.
- After cleaning with degreaser, use a separate bucket of clean water and a clean rag to wipe down all surfaces again. This rinses away the cleaner and any leftover grime.
- Dry all surfaces completely with a clean, dry cloth. Any moisture can cause problems later.
Make sure the cabinets are completely dry before moving on to the next step. This cleaning and rinsing step is critical for good paint adhesion.
Fixing Problems: Repairs
Now is the time to fix any damage on the cabinets. This includes repairing chipped or peeling paint on cabinets. Ignoring these issues will show through the new paint.
- Peeling Paint: Scrape away all loose or peeling paint using a putty knife or paint scraper. Don’t leave any loose edges.
- Chips, Dents, Holes: Fill any chips, dents, or holes (like old hardware holes you won’t reuse) with wood filler or spackle meant for wood.
- Push the filler into the spot using a putty knife. Make it a little higher than the surface.
- Let the filler dry completely. Drying time depends on the product and how deep the fill is. Check the product instructions.
- Once dry, sand the filled area smooth and flat with the surrounding surface. Start with a medium-grit sandpaper (like 100 or 120) if there’s a lot of filler, then finish with fine-grit (150 or 220).
Repairing the surface now makes a big difference in the final look.
Making the Surface Ready: Sanding
After cleaning and repairs, the next big step is to prep painted cabinets for painting by sanding. You are not trying to sand off all the old paint. The main goal of sanding previously painted cabinets is to make the surface dull and create a little texture, called “tooth.” This gives the new primer and paint something to grip onto.
- Use fine-grit sandpaper, like 150-grit or 220-grit.
- Wear a dust mask or respirator and safety glasses.
- Lightly sand all painted surfaces you plan to repaint: doors, drawer fronts, edges, and frames.
- Use a sanding block or sponge for flat areas. Wrap sandpaper around a small block for edges.
- Sand just enough to remove any gloss and make the surface feel slightly rough, not smooth and slippery. You’ll see the paint turn dull.
- Pay extra attention to areas where you made repairs to ensure they are smooth.
- Do not sand down to bare wood unless the old paint was heavily damaged in that spot and you scraped it away.
This light sanding step is often called “deglossing.” It’s a vital part of getting paint to stick well over existing paint.
Getting Rid of Dust
Sanding creates a lot of dust. You must remove all of it before priming. Dust will make your new paint job feel rough and look bad.
* Use a vacuum cleaner with a brush attachment to vacuum dust from all surfaces. Get into corners and edges.
* Wipe down all surfaces with a tack cloth. A tack cloth is a sticky cloth made to pick up fine dust. Use a light touch.
* You might also use a slightly damp cloth followed by a dry cloth, but tack cloths are very effective for the last bit of dust.
* Check again before you prime. Run your hand over the surface. If you feel dust, clean it again.
A dust-free surface is essential for a smooth paint finish.
The Stick-to-It Layer: Priming
Priming is absolutely necessary when painting cabinets that are already painted, especially if the old paint is glossy or if you made repairs. Primer does a few key jobs:
- Adhesion: It helps the new paint stick firmly to the old paint or patched areas.
- Blocking: It can block stains from bleeding through the new paint.
- Uniform Surface: It makes the surface one color and texture, so the topcoat looks even.
Choosing the best primer for already painted cabinets depends on the type of old paint and the condition of the cabinets.
- Shellac-based primers: These are excellent at blocking stains (like water stains or knots) and sticking to many surfaces, including glossy ones, without much sanding. They dry fast. They have strong fumes and clean up with alcohol.
- Oil-based primers: These also offer great adhesion and stain blocking. They are very durable. They have strong fumes and clean up with mineral spirits. They are a good choice for glossy surfaces or if you’re not sure what type of paint is currently on the cabinets.
- Water-based bonding primers (Acrylic): Some newer water-based primers are designed for excellent adhesion to difficult surfaces. They are easier to clean up (with water) and have fewer fumes. Look for ones specifically labeled as “bonding primer” or “high-adhesion primer.”
For most already-painted kitchen cabinets, a shellac-based or a high-quality oil-based primer is often recommended for their strong grip. If the old paint is not glossy and is in good condition, a good water-based bonding primer might work.
Always test a small, hidden area if you’re unsure.
Applying the Primer
- Stir the primer well. Do not shake it, as this can create bubbles.
- Apply a thin, even coat of primer to all surfaces you plan to paint (doors, drawers, frames).
- Use a high-quality synthetic brush for water-based primer or a natural bristle brush for oil/shellac primer. Use a small foam or microfiber roller for flat areas to get a smooth finish.
- Work in sections, keeping a wet edge to avoid lines.
- Let the primer dry completely. Drying time depends on the product and humidity. Check the can for recommended times. Many primers can be recoated in 1-2 hours, but some need longer.
- Once dry, lightly sand the primed surfaces with very fine-grit sandpaper (like 220 or 320 grit). This makes the surface even smoother and helps the paint stick better. Do this gently – you’re just smoothing out any bumps or brush strokes.
- Clean off all dust again using a vacuum and tack cloth.
You might need two coats of primer, especially if you’re covering a dark color or if the original surface was very uneven. Let the first coat dry and lightly sand before applying the second.
Adding Color: Painting
Now for the fun part – adding the color! Choosing the right paint is important for how long your new finish lasts and how it looks. Let’s look at the types of paint for repainting cabinets.
Common types of paint for cabinets:
- Latex/Acrylic Paints: These are water-based. They are easy to use, clean up with water, dry quickly, and have low fumes. They are less durable than oil-based paints until they fully cure. Look for high-quality acrylic enamel or acrylic-urethane enamel paints specifically designed for cabinets, doors, and trim. These harden more than regular wall paint.
- Alkyd Paints (Oil-based): These are very durable and create a hard, smooth finish that levels nicely (brush strokes tend to disappear). They take longer to dry, have strong fumes, and require mineral spirits for cleanup. They are very resistant to dings and scratches once fully cured.
- Hybrid Alkyd Paints: These combine the ease of water-based paint (water cleanup, lower fumes) with some of the hardness and durability of oil-based paint. They level well and are a popular choice for cabinets.
For most kitchens, a satin or semi-gloss finish is best.
- Satin: Has a slight sheen, is more durable than flat or eggshell, and easy to clean. Hides minor flaws better than semi-gloss.
- Semi-Gloss: Has a noticeable shine, is very durable and easy to clean. Shows surface imperfections more easily. Gives a brighter, more modern look.
The sheen you choose for choosing finish for repainted cabinets affects both look and durability.
How to Repaint Previously Painted Cabinets: Applying the Paint
Applying the paint requires thin, even coats. Thick coats can drip, run, or take too long to dry and cure.
Here are the basic steps to repaint kitchen cabinets with the color coat:
- Prepare the Paint: Stir the paint gently but thoroughly. Don’t shake. If using a paint sprayer, you might need to thin the paint according to the sprayer’s directions.
- Apply the First Coat:
- Start with the backs of the cabinet doors first, then the edges, and finally the front. Paint frames last.
- Use a high-quality brush for cutting in edges and details. Use a small foam roller or microfiber roller for flat areas. Rollers leave a smoother finish with fewer brush marks.
- Apply paint in thin, even layers. Don’t try to get full coverage in one coat.
- Work in small sections.
- If using a roller, ‘backbrush’ or ‘backroll’ lightly over the just-rolled area with a brush to smooth it out if needed, or choose a roller that provides a finish you like.
- Let Dry: Allow the first coat to dry completely according to the paint can instructions. Do not rush this step. Proper drying between coats is vital for adhesion and a smooth finish. Drying times can range from 2-4 hours for water-based paints but can be longer for oil-based.
- Light Sanding (Optional but Recommended): Once the first coat is dry, you can very lightly sand the surface with extra-fine grit sandpaper (like 320 or 400 grit). This removes any tiny bumps or imperfections and makes the next coat stick better. This step is more critical if you are aiming for a very smooth, professional finish.
- Clean Dust: Clean off all sanding dust thoroughly with a vacuum and tack cloth before the next coat.
- Apply Second Coat: Apply a second thin, even coat following the same process. Most cabinets will need at least two coats for full, even coverage.
- Additional Coats: Depending on the color you’re covering and the new color, you might need a third coat. Always apply thin coats and let them dry fully between layers. Lightly sand and clean dust between coats if desired for maximum smoothness.
Painting cabinets takes patience. It’s better to apply several thin coats than one thick one.
Putting It Back Together: Finishing Touches
Once the final coat of paint is dry to the touch, you can start thinking about putting the hardware and doors back on. However, the paint isn’t fully hardened yet.
Reattaching Hardware and Doors
- Wait until the paint is dry enough to handle without leaving fingerprints. Check the paint can for “handle time” or “recoat time.”
- Carefully reattach the hardware (hinges, knobs, pulls) to the doors and drawer fronts. Use the labels you made earlier to match hardware to the correct piece.
- It’s best to wait longer before reattaching the doors to the cabinet frames, perhaps 24 hours, to avoid scratching the fresh paint on the frames or doors as you work.
- Use your diagram and labels to hang each door and reattach each drawer front in its correct place.
Curing Time
This is a very important concept often overlooked. Paint dries in two stages:
1. Drying: The water or solvent evaporates, and the paint feels dry to the touch.
2. Curing: The paint hardens fully and reaches its maximum durability. This process can take several days or even weeks (especially for oil-based paints).
During the curing period, the paint is still soft and can be easily scratched, dinged, or stuck to things.
* Be gentle with your cabinets for the first week or two.
* Avoid washing them or letting liquids sit on the surface during this time.
* Put bumpers on the inside corners of doors and drawers where they meet the frame to stop them from sticking or damaging the paint.
Full curing is essential for a long-lasting, tough finish.
Learning About Refinishing Versus Repainting
It’s good to know the difference between refinishing versus repainting cabinets.
- Repainting: This is what this guide is about. You clean, prep, prime, and paint over the existing finish (whether it was paint, stain, or varnish), without removing the original coating completely. It’s faster and less messy than refinishing. It works best when the original finish is mostly intact and smooth.
- Refinishing: This usually means stripping the cabinets down to the bare wood. This is needed if the original finish is in very bad shape (lots of deep scratches, widespread peeling, or heavily damaged). Once stripped, the wood is sanded smooth, and then you can apply stain and varnish, or prime and paint. It is a much more labor-intensive and dusty process but can fix more severe surface problems and allows you to change from a painted look to a stained wood look.
Choose repainting if your cabinets are already painted and the finish is reasonably sound. Choose refinishing if the current finish is badly damaged or you want to go back to a natural wood look.
Tips for a Great, Lasting Finish
- Work in Good Light: Make sure you can see what you’re doing to spot drips, runs, or missed spots.
- Maintain a Wet Edge: When brushing or rolling, try to always work into the paint you just applied. This helps prevent lap marks (visible lines where wet paint met dry paint).
- Use High-Quality Products: Good paint, primer, brushes, and rollers make a big difference in how easy the job is and how good the final result looks.
- Read Product Labels: Always follow the instructions on the paint and primer cans for drying times, recoat times, and cleanup.
- Temperature and Humidity Matter: Painting in extreme heat, cold, or high humidity can affect how paint dries and cures. Try to paint when temperatures are moderate and humidity isn’t too high.
Facing Issues: Troubleshooting
Even with careful work, sometimes issues pop up.
- Brush Marks/Roller Texture: Using self-leveling paint, a good quality roller (like a foam or fine microfiber), applying thin coats, and sometimes lightly sanding between coats can help. Paint sprayers give the smoothest finish but require practice.
- Peeling/Chipping Later: This is often caused by poor preparation – usually not cleaning or sanding enough, or using the wrong primer. Make sure surfaces are spotless and dull before priming.
- Paint Not Sticking: Again, usually a prep issue. The surface might still be glossy, dirty, or the wrong primer was used for the surface type.
- Bubbles: Can be caused by shaking the paint instead of stirring, applying paint too thickly, or painting in direct sunlight or heat.
Fixing problems often means going back a step, like sanding and re-priming or repainting the problem area.
FAQ: Common Questions About Repainting Painted Cabinets
Q: Do I have to sand previously painted cabinets?
A: Yes, you should lightly sand them. You don’t need to remove all the old paint, but you must degloss the surface to create a rough texture (called “tooth”) so the new primer and paint have something to stick to. Skipping sanding can lead to the new paint peeling later.
Q: What is the best primer for already painted cabinets?
A: A shellac-based or a high-quality oil-based primer is often recommended because they stick well to many surfaces, including glossy ones, and help block stains. Some water-based bonding primers also work well if they are specifically made for tough surfaces. The best choice depends on the condition and type of the old paint.
Q: Can I paint over glossy paint?
A: Yes, but it needs good preparation. You must thoroughly clean and degrease the glossy surface, then sand it well to make it dull. Using a high-adhesion primer (like shellac or oil-based) designed for glossy surfaces is also very important.
Q: How many coats of paint do I need?
A: Most cabinets will need at least two thin coats of paint for full, even coverage. If you are making a big color change (like going from dark to light), you might need three coats. Always apply thin coats and let them dry fully between layers.
Q: How long does it take to repaint kitchen cabinets?
A: It’s a multi-day project. Prep work (cleaning, sanding, repairs) can take 1-2 days depending on kitchen size and cabinet condition. Priming adds another day (including drying time). Painting can take 1-3 days depending on the number of coats and drying times. Reassembly adds more time. Plus, you need to allow several days or weeks for the paint to fully cure before heavy use. Plan for at least a long weekend, but more likely a full week, being very careful for the next few weeks.
Q: What is the difference between refinishing and repainting?
A: Repainting means applying new paint over the existing finish after proper preparation. Refinishing usually means stripping the cabinets down to the bare wood before applying a new finish (like stain and varnish, or primer and paint). Repainting is generally easier and less messy if the existing finish is in decent shape.
Q: What type of paint finish is best for cabinets?
A: Satin or semi-gloss finishes are most common and recommended for kitchen cabinets. They are durable, easy to clean, and resist moisture better than flat or eggshell finishes. Semi-gloss is shinier and very durable, while satin has less sheen and hides minor flaws better.
Conclusion
Painting kitchen cabinets that are already painted is a rewarding project that can give your kitchen a fresh look without breaking the bank. The key to success lies in thorough preparation: cleaning, degreasing cabinets before painting over old paint, making necessary repairs like repairing chipped or peeling paint on cabinets, and proper sanding previously painted cabinets. Using the best primer for already painted cabinets and choosing the right types of paint for repainting cabinets are also vital steps. By following these steps to repaint kitchen cabinets carefully, applying thin coats, and allowing proper drying and curing time, you can achieve a durable, professional-looking finish you’ll enjoy for years. Remember the difference between refinishing versus repainting cabinets and choose the right path for your project.