Yes, absolutely! You can put a new splashback into an old kitchen. It is one of the simplest and most effective ways to update the look of a tired kitchen without doing a full renovation. Installing a new backsplash in old kitchen spaces is a popular project. It can cover old tiles or other wall surfaces. It adds colour, pattern, and style. This change often makes the whole kitchen feel new and fresh.
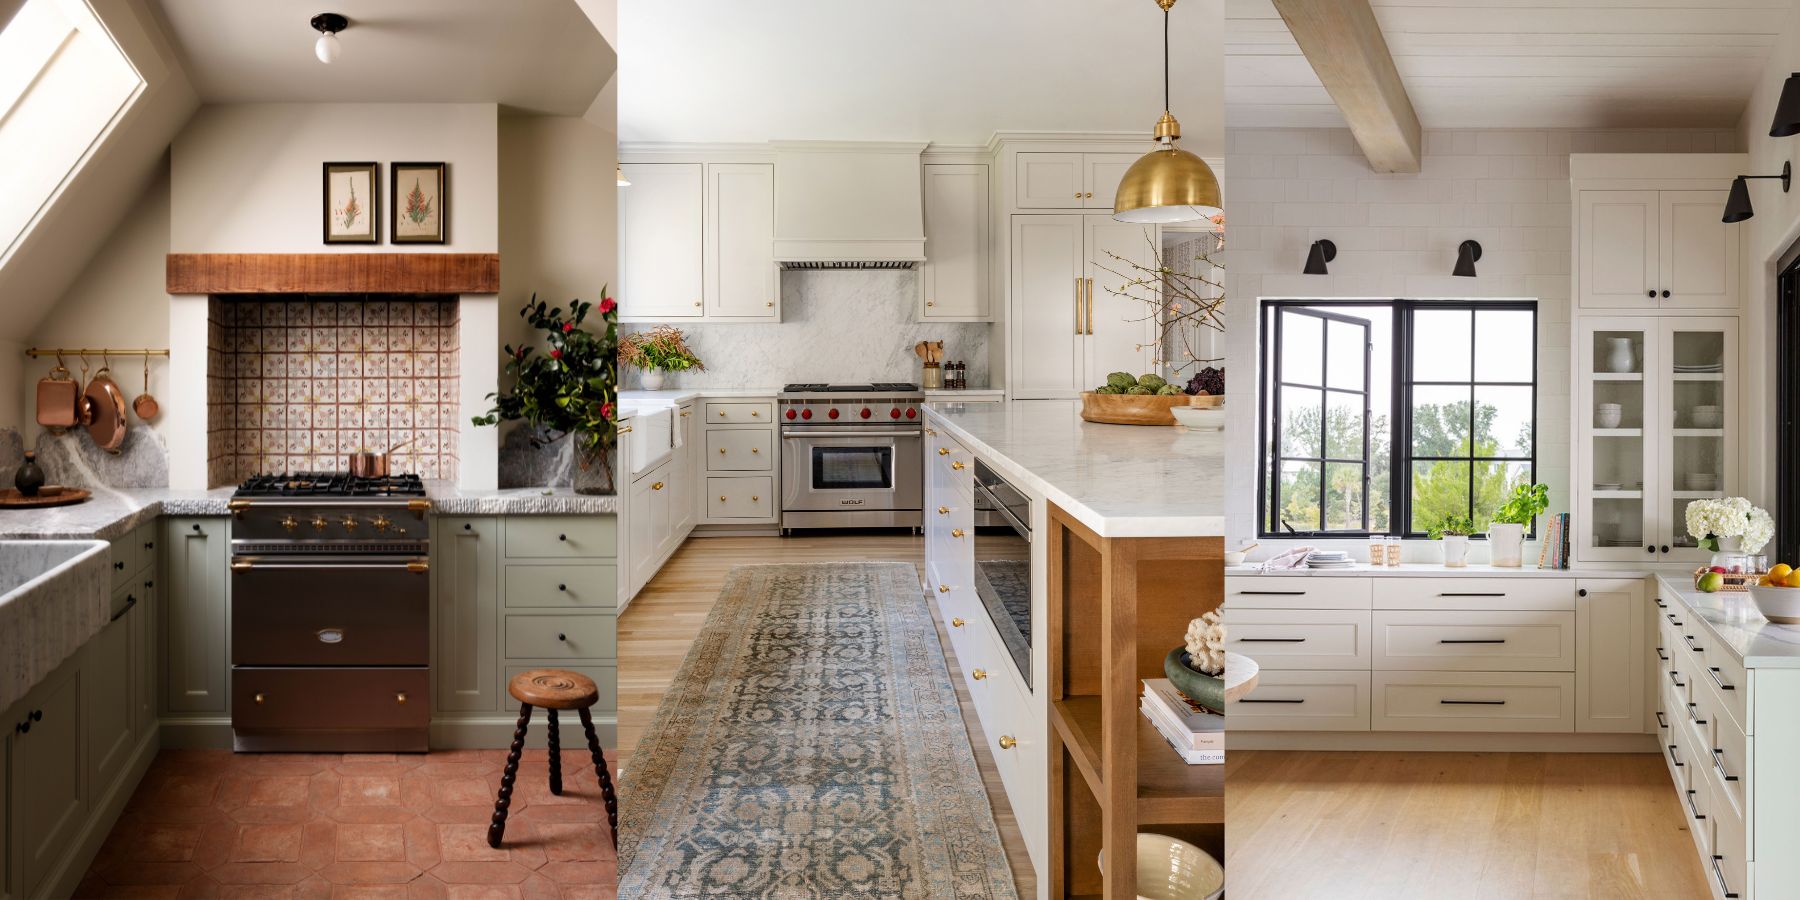
Image Source: cdn.mos.cms.futurecdn.net
Why Change Your Kitchen Splashback?
Many reasons exist to change your kitchen splashback. Maybe your old one looks dated. Maybe it is damaged or stained. A new splashback can fix these problems. It gives your kitchen a whole new feel.
Easy Style Upgrade
An old kitchen might feel dark or boring. A new splashback can brighten it up. You can pick bold colours or interesting patterns. A new splashback replacement is a quick way to add personality. It can match new trends. Or it can just make the space look cleaner.
Cover Damage or Stains
Kitchen walls behind the hob and sink get messy. Grease splashes. Water stains happen. Old tiles might crack. Grout can get dirty and hard to clean. Putting a new splashback over these old problems hides them. It gives you a fresh start.
A Quick Budget Fix
Full kitchen renovations cost a lot of money. They take a lot of time. Changing the splashback is much cheaper. It is faster, too. It gives a big visual impact for a small cost. This makes it a good choice for a kitchen renovation on a budget.
Replacing Old Tiles or Covering Them?
When you want a new splashback, you have a choice. You can take the old one off. Or you can put the new one right over it. Both ways work. The best choice depends on your old splashback and your new one.
Taking Out Old Tiles
You can replace old kitchen tiles completely. This is more work. You need to chip off the old tiles. This can damage the wall. You might need to fix the wall surface. Then you can put on your new splashback. This gives you a perfectly flat base. It is good if the old tiles are very uneven or loose.
Covering Existing Tiles with Splashback
This is often easier. Many new splashback materials can go right over old tiles. You need to make sure the old tiles are clean. They must be stuck firmly to the wall. If any are loose, fix them first. You might need to fill in the grout lines. This makes the surface smooth. Then the new splashback can stick well. This saves time and effort. It is less messy than taking tiles off.
Picking Your New Kitchen Backsplash Materials
Many types of kitchen backsplash materials exist. Each has its own look and feel. Some are easier to install than others. Some cost more. Here are some popular options:
Tile: Always a Classic
Tile is a very common choice. Ceramic and porcelain tiles are strong. They are easy to clean. You can find them in many colours, sizes, and shapes. Subway tiles are popular. Mosaic tiles add lots of detail.
* Pros: Durable, water-resistant, lots of styles.
* Cons: Needs grouting, can be harder to install than solid panels, old tiles need to be removed or prepped well.
* Installation: Usually requires tile adhesive and grout. Can go over old tiles if they are sound and level.
Glass Splashbacks
Glass gives a modern, clean look. It is very smooth. This makes it super easy to clean. You can get plain colours. Or you can get glass with pictures or patterns on the back.
* Pros: Very easy to clean, looks sleek, waterproof.
* Cons: Can be expensive, needs careful handling, can show marks easily.
* Installation: Often cut to size. Glued to the wall. Needs a very flat surface. Can go over tiles if the surface is made flat first.
Acrylic Splashbacks
Acrylic is a type of plastic. It looks a bit like glass but costs less. It is lighter than glass. It is also easier to cut. You can find it in many colours.
* Pros: Lighter and cheaper than glass, easy to cut, good colour range.
* Cons: Can scratch more easily than glass or tile, not as heat resistant as glass or tile.
* Installation: Glued or screwed to the wall. Can often go over old tiles if the surface is smooth.
Laminate Splashbacks
Laminate is layers of material pressed together. It comes in large sheets. It can look like wood, stone, or tile. It is very budget-friendly.
* Pros: Low cost, easy to clean, simple to install, wide range of styles.
* Cons: Not as heat resistant as other materials (need special care behind a hob), can be damaged by sharp things.
* Installation: Usually glued to the wall. Can often go over existing surfaces.
Metal Splashbacks
Metal splashbacks are usually stainless steel or aluminium. They give a modern, industrial feel. Stainless steel is great behind a hob because it handles high heat. Aluminium is lighter and comes in colours.
* Pros: Very heat resistant (stainless steel), durable, modern look.
* Cons: Can show fingerprints easily, can dent, styles are limited compared to tile.
* Installation: Glued or screwed to the wall.
Stick-On Splashbacks
These are easy to use for a DIY kitchen splashback update. They are tiles or panels with sticky backs. You just peel and stick them onto the wall. They are often made of vinyl, gel, or thin metal layers.
* Pros: Very easy and fast to install, good for beginners, low cost.
* Cons: May not look as high-quality as real materials, might not last as long, heat resistance can vary.
* Installation: Peel and stick onto a clean, flat surface. Can go over old tiles if they are smooth and clean.
Planning Your DIY Kitchen Splashback Update
Doing the work yourself can save money. A DIY kitchen splashback update is possible for many materials. But it needs careful planning.
Getting Ready
The first step is to prepare the wall. Clean the area well. Remove any grease or dirt. If you are covering existing tiles with splashback, check they are all secure. Fill any holes or cracks. If the old surface is uneven, you might need to put up a thin board first. This gives you a flat surface. Sand down any bumps. Wipe away dust. A clean, smooth, dry wall is key for the new splashback to stick well.
Measuring Right
Measure the space for the splashback. Measure the width and height. Measure around plug sockets and windows. Draw a plan of the area. Mark where cuts are needed. Measure twice to be sure! It is better to buy a little extra material than not enough.
What Tools You Need
The tools depend on the material.
* For tile: Tile cutter, trowel for adhesive, grout float, sponge, spirit level.
* For panels (glass, acrylic, laminate, metal): Strong adhesive (check it works for the material), silicone sealant, a way to cut the panel (check what works for the material – can be tricky for glass!), spirit level, maybe screws.
* For stick-on: Stanley knife or scissors, spirit level.
No matter the material, you will need:
* Tape measure
* Pencil
* Safety glasses
* Gloves
* Cleaning cloths
* Maybe masking tape
How to Install a Splashback: Step-by-Step Guide
The way you install depends on the material. Here are basic steps for two common types: adhesive panels and tiles.
For Adhesive Splashbacks (Glass, Acrylic, Laminate, Metal)
- Prepare the Wall: Make sure the wall is clean, dry, and flat. Fill any gaps or grout lines if putting over tiles. Let fillers dry.
- Measure and Cut: Carefully measure and mark the splashback panel. Cut it to size. Be very careful with glass; it is best to get it cut professionally. Acrylic and laminate can often be cut with a fine-tooth saw. Metal might need a special blade. Cut holes for sockets if needed.
- Test Fit: Hold the cut panel in place. Check it fits around sockets and edges. Make any small adjustments needed.
- Apply Adhesive: Put the right adhesive on the back of the panel. Or put it on the wall. Follow the instructions on the adhesive tube or tub. Use enough glue but not too much. Spread it out evenly.
- Fix the Panel: Lift the panel carefully. Place it onto the wall. Press it firmly into the glue. Use a spirit level to make sure it is straight. You might need props or tape to hold it while the glue dries.
- Seal Edges: Once the glue is dry (check drying time on the packet), seal the edges. Use a silicone sealant made for kitchens. Seal where the splashback meets the worktop. Seal around sockets and at the top edge. This stops water getting behind it.
For Tile Splashbacks
- Prepare the Wall: Clean the wall. If putting tiles over old tiles, make sure they are stuck fast and the surface is flat. It is often better to remove old tiles for a new tiled splashback. If you remove old tiles, fix the wall surface first.
- Plan Your Layout: Decide where your first tile will go. Often, you start in the centre or from a key point like behind the hob. Use a spirit level and pencil to draw guide lines on the wall.
- Mix Adhesive: Mix the tile adhesive according to the instructions. Do not mix too much at once; it dries fast.
- Apply Adhesive: Use a notched trowel. Hold it at an angle. Spread the adhesive onto a small area of the wall. Do not cover too much space at once.
- Place Tiles: Press the first tile into the adhesive. Twist it slightly to make sure it gets a good grip. Place tile spacers between tiles. This keeps the gaps (grout lines) even.
- Cut Tiles: You will need to cut tiles to fit edges and around sockets. Use a tile cutter for straight cuts. Use tile nippers or a wet saw for tricky cuts. Be careful!
- Keep Going: Add tiles, working in sections. Use your guide lines and the spirit level to keep rows straight.
- Clean Up: Wipe off any excess adhesive from the tile faces with a damp sponge before it dries.
- Let Adhesive Dry: Wait for the adhesive to dry completely. This can take 24 hours or more. Check the instructions.
- Grout: Mix the grout. Use a grout float to push the grout into the gaps between the tiles. Work it in well.
- Clean Grout: Wipe away excess grout from the tile faces with a damp sponge. Rinse your sponge often in clean water. Do this a few times as the grout starts to dry on the tiles.
- Final Polish: When the grout is dry (it will look lighter), polish the tiles with a clean, dry cloth to remove any haze.
- Seal Edges: Seal the gap between the splashback and the worktop with kitchen silicone sealant.
Ease of Installing New Splashback: What to Expect
How easy the install new splashback project is depends on a few things:
* Material: Stick-on splashbacks are the easiest. Laminate and acrylic panels are also quite easy. Tiles take more time and skill. Glass can be tricky to cut and handle.
* Your Skill Level: If you are good at DIY, it will be easier. If you are new to it, maybe start with stick-on or small tile areas.
* The Wall Condition: A flat, clean wall is easy. A bumpy, damaged wall needs more prep work. This makes the job harder.
* Tools: Having the right tools makes a big difference. Trying to cut tiles without a proper cutter is very hard.
For many people, covering existing tiles with splashback using a panel material (like acrylic or laminate) offers a good balance of ease and effect. It avoids the mess of removing old tiles.
Kitchen Renovation on a Budget: Splashback Impact
Replacing your kitchen splashback is a smart move for a kitchen renovation on a budget. Here is why:
* Low Material Cost: Compared to new cabinets or worktops, splashback materials are much cheaper per square metre.
* DIY Potential: Many splashback types are suitable for DIY. This saves you money on hiring a professional installer.
* Big Visual Change: A new splashback is right at eye level. It covers a large area. Changing it has a huge impact on how the kitchen looks and feels. It can make old cabinets look better. It can make the whole room feel modern.
* Faster Project: A splashback update can often be done in a weekend. A full renovation takes weeks or months.
Think of your splashback as kitchen jewellery. It is a finishing touch that stands out. Picking a bold colour or texture can be a focal point. It distracts from older parts of the kitchen you have not changed.
Making Your Choice: Style Tips
When picking your new splashback, think about your old kitchen’s style.
* Match the Kitchen: Does your kitchen have a country style? Or is it modern? Choose a splashback that fits. Classic tiles work in many kitchens. Glass or metal are best for modern looks.
* Consider Cabinet Colour: The splashback should look good with your cabinets and worktops. You can choose a colour that matches. Or pick a colour that stands out but still looks nice together.
* Think About Light: Lighter colours or reflective materials (like glass or glossy tiles) can make a small kitchen feel bigger and brighter.
* Practicality: How easy is it to clean? Smooth surfaces like glass or large format tiles are easy to wipe. Textured tiles or lots of grout lines take more cleaning. If you cook a lot, easy cleaning is important.
* Get Samples: Before buying, get small pieces of the materials you like. Take them home. See how they look in your kitchen light. Put them against your cabinets and worktop. This helps you see if the colours and textures work.
Summary: A New Splashback Can Change Everything
Can you put a new splashback into an old kitchen? Yes, you definitely can! It is one of the best ways to give your kitchen a fresh look without spending a lot. Kitchen splashback replacement is a popular project for homeowners. You can install new backsplash in old kitchen spaces using many different materials. You can choose to replace old kitchen tiles completely or save time by covering existing tiles with splashback.
Whether you choose a DIY kitchen splashback update or get help, there are options for every budget. Look at the different types of kitchen splashbacks like tile, glass, acrylic, laminate, metal, or stick-on. Think about the ease of installing new splashback for each material. Planning carefully how to install a splashback is important for a good result. With careful choices and a little effort, a new splashback can make your old kitchen feel like a brand new room. It is a smart part of a kitchen renovation on a budget.
Questions People Ask
How long does it take to install a kitchen splashback?
It depends on the size of the area and the material. A simple stick-on splashback might take a few hours. Tiling a splashback area can take a weekend, including drying and grouting time. Putting up large panels might take a day.
Can I put a new splashback over painted walls?
Yes, most splashback materials can be put over painted walls. Make sure the paint is clean and firmly on the wall. If the paint is peeling, you need to scrape it off first. The wall needs to be smooth and dry.
Do I need special tools to cut splashback panels?
Yes, you often need specific tools. Glass needs special cutters or professional cutting. Acrylic and laminate can often be cut with a standard saw with the right blade. Metal might need a metal cutting blade. Stick-on tiles can usually be cut with a knife or scissors.
How do I clean different types of splashbacks?
Most smooth splashbacks (glass, acrylic, laminate, metal) can be cleaned with warm, soapy water and a soft cloth. Avoid harsh cleaners or scourers as they can scratch. Tiled splashbacks can be cleaned with tile cleaner, but grout might need special cleaning if it gets stained. Check the material maker’s instructions for the best way to clean.
Is it much cheaper to do the splashback myself?
Yes, doing a DIY kitchen splashback update is usually much cheaper than hiring someone. You save money on labour costs. You only pay for the materials and any tools you need to buy or rent.
What is the most heat-resistant splashback material?
Tile and stainless steel are the most heat-resistant. They are best used behind a hob where heat is high. Acrylic and laminate are less heat-resistant and might need a special metal plate behind the hob for protection.