Image Source: i.ytimg.com
Complete Guide: How To Remove Delta Kitchen Faucet
Do you need to take out your old kitchen faucet? Maybe it is broken. Maybe you want a new look. Or perhaps you need to fix something under the sink. You can detach a kitchen faucet by first turning off the water, then taking off the water pipes underneath, and finally undoing the nuts that hold the faucet to the sink or counter. This guide will show you how to do it step by step. It covers how to remove a Delta kitchen faucet, including common types like the Delta single handle faucet and Delta pull down faucet models. We will talk about the tools you need and make sure you can do this job easily.
Removing an old Delta kitchen faucet can seem hard. But with the right steps and tools, it is a job most people can do. This guide helps you get it right.
Getting Ready for the Job
Before you start pulling things apart, you need to get ready. Taking time now saves trouble later.
Clearing Your Work Area
The first step is to empty the cabinet under your sink. Take out everything. You need a lot of room to work. It can be dark under there. You might need a light. A flashlight or a work light helps a lot. Make sure you can easily sit or kneel under the sink.
Shutting Off the Water
This step is very important. You must turn off the water supply to the faucet. Look under the sink. You will see two pipes coming out of the wall or floor. One pipe is for hot water. The other is for cold water. Each pipe should have a small valve. These valves are usually round handles or straight handles.
Turn both handles all the way off. Turn them clockwise. Do not force them too much if they are stuck. Old valves can break. If the valves look old or do not turn, you might need to turn off the main water supply for your whole house. You can usually find the main valve in your basement, garage, or outside your house. Turning off the main supply is safer if you are not sure about the valves under the sink.
After you turn off the valves under the sink (or the main valve), open the kitchen faucet on top of the sink. Let any water drain out. This helps release pressure in the lines. It also shows you if the water is really off. If water keeps running, the valves are not fully closed or you need to find the main shut-off.
Protecting the Sink and Cabinet
Put some towels or a bucket under the faucet pipes. When you disconnect kitchen faucet supply lines, some water will drip out. Towels will catch small drips. A bucket is good for more water.
You can also put a piece of cardboard or an old blanket in the bottom of the cabinet. This makes kneeling or lying down more comfortable. It also protects the cabinet floor from water or dropped tools.
Tools You Will Need
Having the right tools makes the job much easier. Here is a list of common tools you might need to remove a kitchen faucet.
List of Tools
| Tool Name | Picture (Implied) | Why You Need It | Notes |
|---|---|---|---|
| Adjustable Wrench | To loosen nuts on supply lines and mounting hardware. | Good for different sizes. | |
| Basin Wrench | To reach nuts in tight spots high under the sink. | A must-have for many faucet removals. | |
| Pliers (various sizes) | For gripping pipes, nuts, or pulling things. | Channel lock pliers are very useful. | |
| Screwdrivers (Phillips, Flathead) | For screws on mounting brackets or handles. | Have a few sizes handy. | |
| Small Bucket | To catch dripping water. | Place it under the pipes. | |
| Towels or Rags | To wipe up water and protect surfaces. | Have plenty ready. | |
| Safety Glasses | To protect your eyes from drips or falling debris. | Always a good idea. | |
| Flashlight or Work Light | To see clearly in the dark cabinet. | Headlamp leaves your hands free. | |
| Utility Knife | To cut old caulk or sealant around the faucet base. | Be careful not to scratch the sink or counter. | |
| Penetrating Oil | To loosen old, stuck nuts and bolts. | Like WD-40 or PB Blaster. Apply before you start. | |
| Wire Brush or Sandpaper | To clean threads if needed. | For stubborn mineral buildup. |
Importance of a Basin Wrench
Many faucet mounting nuts are high up under the sink deck. They are hard to reach with a regular wrench. A basin wrench is designed for this job. It has a long handle and a swiveling jaw. This lets you reach up and grab the nut. Using a basin wrench faucet removal becomes possible in tight spaces. If you don’t have one, you will find it very hard to loosen some nuts.
Disconnecting the Water Lines
Now that the water is off and you have your tools, it is time to disconnect kitchen faucet supply lines. These are the flexible pipes that connect the faucet to the shut-off valves under the sink.
Finding the Supply Lines
Look under the sink again. You will see the two supply lines coming down from the faucet stem or base. They connect to the shut-off valves you closed earlier. One is usually marked or feels hot if the hot water was on recently. The other is for cold water.
Unscrewing the Lines
Place your bucket or towels under the connections. Use your adjustable wrench or pliers to unscrew water supply lines under sink. The connections can be brass, plastic, or chrome. Be gentle at first. Hold the valve steady with one hand so you don’t twist and break it. Turn the nut connecting the supply line to the valve counter-clockwise.
Water will drip out when you break the seal. Let it drip into the bucket. Once the nuts are loose, you can usually finish unscrewing them by hand.
Repeat this for both the hot and cold water lines. Let the ends of the supply lines drain into the bucket.
Dealing with Stuck Connections
Sometimes, the nuts on old supply lines are very hard to turn. Mineral buildup or rust can seize them. This is where penetrating oil helps. Spray the nuts. Let the oil soak in for a few minutes (or even longer for very old faucets). Then try again with your wrench or pliers.
Be firm but careful. Do not twist so hard that you bend the pipes or break the valves. If a nut is extremely stubborn, you might need to cut the supply line. Use a small pipe cutter or a hacksaw. Be very careful not to cut the copper pipe coming from the wall if your valves are connected to copper. Cut only the flexible supply line.
Once the supply lines are disconnected from the valves, you might need to unscrew them from the faucet base itself. Some supply lines are part of the faucet and threaded in. Others have a different connection type. Look closely at how yours are attached to the faucet under the sink. Use the right tool to loosen them if needed.
Removing the Faucet Body
With the water lines free, you can now focus on how to detach kitchen faucet from the sink or countertop. The faucet is held in place by nuts, washers, and sometimes a mounting bracket under the sink.
Finding the Mounting Hardware
Look up under the sink, directly beneath the faucet handles and spout. You will see a large nut, nuts, or a metal plate held by screws or nuts. This is the mounting hardware. It pulls the faucet down tight against the sink or counter.
Old Delta kitchen faucet removal might involve different types of nuts or brackets than newer models. Some might have just one large plastic or metal nut. Others might have a metal bracket with two or three screws or nuts.
Loosening the Mounting Nut(s)
This is often the hardest part, especially with old faucets or limited space. This is where the basin wrench is very useful.
If there is one large nut:
* Position your basin wrench jaws around the nut.
* Make sure you have a good grip.
* Turn the wrench counter-clockwise.
* If the nut is stuck, apply penetrating oil to the threads above it. Let it soak.
* Gently tap the nut with a hammer and screwdriver (using the screwdriver tip on the nut edge) can sometimes help break it free after applying oil. Be careful not to hit the sink or counter from below.
If there is a mounting bracket with screws or nuts:
* Identify if they are screws (need a screwdriver) or nuts (need a wrench or socket).
* Use the correct tool to loosen them.
* A basin wrench or socket set with an extension might be needed to reach nuts on a bracket.
* Loosen all the screws or nuts evenly, not one side completely first.
Loosen Delta faucet mounting nut can take time and effort, especially if it is corroded. Keep applying penetrating oil and try again. If it is a plastic nut, be careful not to strip it. If it is a metal nut that won’t budge, you might need to cut it off. A hacksaw blade (used by hand, wrapped in tape at one end for grip) can sometimes be slid in to cut plastic nuts or metal bolts, but this is difficult and slow in tight spaces.
Dealing with Different Faucet Types
Delta Single Handle Faucet Removal
Many Delta single handle faucets are mounted using a single large nut or a bracket with two screws/nuts underneath. The handle mechanism is usually part of the main faucet body that you are removing.
- First, disconnect the supply lines as described.
- Then, find the mounting nut or bracket under the sink.
- Use a basin wrench or socket wrench to loosen and remove the mounting nut(s).
- Once the nut(s) are off, the faucet should be loose on top of the sink.
- Lift the faucet up and off the sink.
Sometimes, there is old caulk or sealant around the base of the faucet on top of the sink. This can make the faucet stick even after the nuts are off. Use a utility knife to carefully cut the caulk around the edge of the faucet base. Be careful not to scratch your sink or countertop. Once the caulk is cut, the faucet should lift freely.
Delta Pull Down Faucet Removal Guide
Delta pull down faucets have the added feature of a spray head that pulls out. This type has a few extra parts under the sink compared to a standard faucet.
- Disconnect the hot and cold supply lines (same as above).
- You will also have a spray hose connected to the faucet body. This hose usually has a quick-connect fitting or is threaded on. Find where the spray hose connects under the sink.
- Disconnect the spray hose. There might be a release button or collar on a quick-connect fitting that you squeeze or push. For threaded connections, use a wrench to unscrew it.
- There is also often a weight attached to the spray hose line under the sink. This weight helps the hose pull back into the spout. You might need to remove this weight to pull the hose freely through the faucet body later, although it’s not always necessary just for removal. It might just get in the way. Slide it off the hose if possible.
- Find the mounting hardware holding the main faucet body. This is usually a nut or bracket like on a single-handle faucet.
- Use a basin wrench or other tool to loosen and remove the mounting nut(s) or bracket.
- With the mounting hardware off, the faucet body will be loose.
- Lift the faucet up from the top of the sink. You will need to feed the spray hose (and any other lines attached, like a soap dispenser line) down through the sink hole as you lift the faucet up.
Remember the spray hose is long! Make sure it is fully free under the sink before lifting the faucet all the way out.
Old Delta Kitchen Faucet Removal
Older Delta faucets might have slightly different mounting styles. They could have a large metal washer and nut, or a bracket with multiple bolts. Mineral buildup is more likely to be an issue.
- Follow the steps for disconnecting water lines. Penetrating oil is often a must for old faucets.
- Identify the specific mounting hardware used. It might be a large brass nut, steel nuts and bolts, or a plate.
- Use the appropriate tool – likely an adjustable wrench, socket set, or basin wrench – to try and loosen the nuts or bolts.
- If nuts are completely stuck, carefully cutting them might be the only option. Hacksaw blades, oscillating tools with metal cutting blades, or specialized nut splitters can sometimes work, but be very cautious not to damage the sink or countertop area.
- Be patient. Old parts can be stubborn. Applying oil, waiting, and trying again is often more effective than brute force.
- Check for caulk or sealant on top of the sink as well. Old sealant can be very hard.
Lifting the Faucet Free
Once the mounting nuts or bracket are fully removed and the caulk is cut, the faucet assembly should lift straight up off the sink or counter. Be prepared to guide any hoses or lines down through the hole as you lift.
Place the old faucet aside. You might want to keep the old parts until the new faucet is installed, just in case you need to compare connections or figure something out.
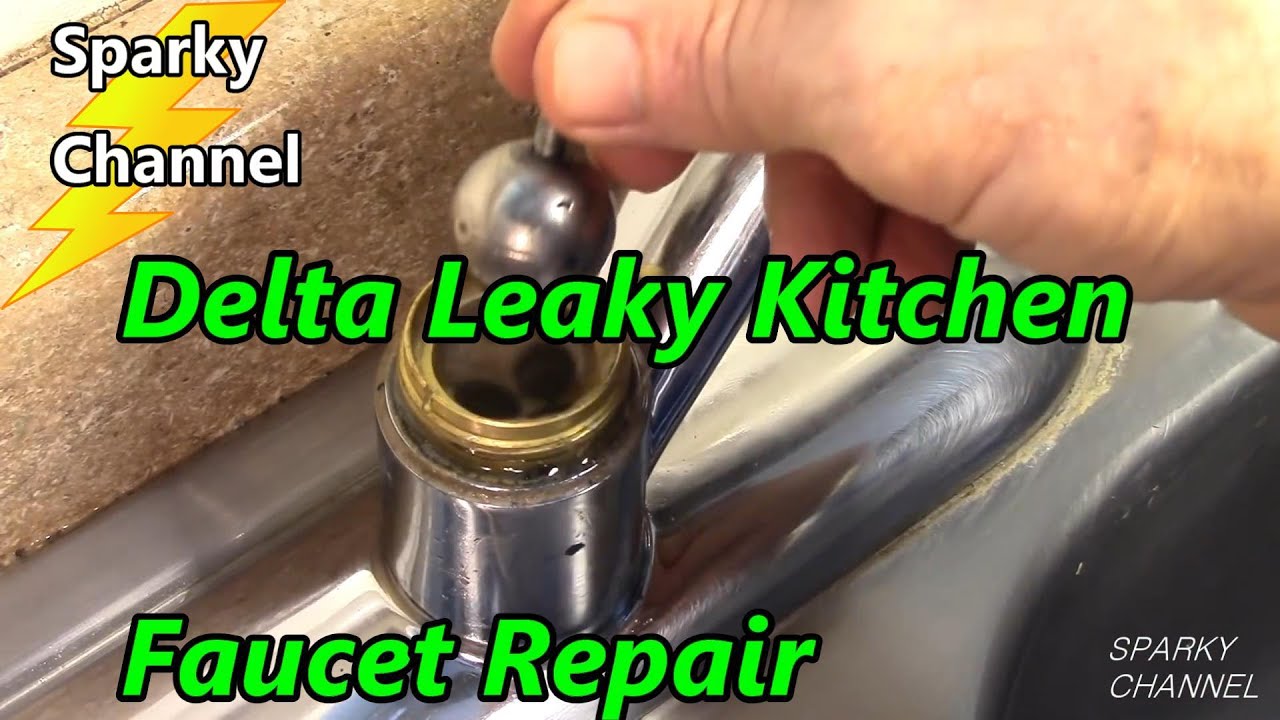
Optional Step: Removing the Cartridge
Sometimes, you might want to remove Delta faucet cartridge even before removing the whole faucet, perhaps if you were just trying to fix a leak and decided to replace the whole unit instead. The cartridge is the part inside the faucet body that controls water flow and temperature.
- First, remove the faucet handle. This usually involves finding a small set screw on the handle base or under a decorative cap (pop the cap off with a thin screwdriver). Use an Allen wrench (hex key) or small screwdriver to loosen and remove the set screw.
- Pull the handle straight off.
- Under the handle, you will see a cap or dome piece. Unscrew or lift this off. Pliers might be needed for a stubborn cap.
- Now you will see the cartridge. It might be held in place by a retaining clip or a nut.
- Remove the clip (often a small wire or plastic piece you can pry out with a screwdriver) or unscrew the nut holding the cartridge.
- Grip the cartridge stem with pliers and pull it straight out. It might be stuck. You might need a special cartridge puller tool for some Delta models if it won’t come out easily.
If you are removing the whole faucet, you do not necessarily need to remove the cartridge first. But knowing how to access it is useful for repairs or if you are curious how faucets work.
Troubleshooting Common Issues
Removing an old faucet rarely goes perfectly smoothly. Here are some common problems and how to deal with them simply.
Stuck or Corroded Nuts
- Problem: Nuts under the sink are rusted or covered in mineral buildup and won’t turn.
- Simple Fix: Use penetrating oil. Spray it generously on the threads of the nut. Let it sit for at least 15-30 minutes, or even longer for very old faucets. Tap the nut gently with a hammer to help the oil get in. Try loosening it again with a basin wrench or wrench.
- Harder Fix: If oil doesn’t work, you might need to cut the nut off. This requires care not to damage the sink or supply pipes.
Stripped Screw Heads or Nuts
- Problem: The tool slips on the screw or nut head, rounding it off.
- Simple Fix: For screws, use a screw extractor tool. For nuts, try vice grips to get a strong hold on the outside of the nut.
- Harder Fix: Cutting the part off might be the only option if you cannot get a grip or extract the screw.
Faucet Stuck to Sink Top
- Problem: All nuts are off underneath, but the faucet won’t lift off the sink.
- Simple Fix: Old caulk or sealant is holding it. Use a sharp utility knife to cut carefully around the entire base of the faucet on top of the sink. Push the knife blade under the edge of the faucet base where it meets the sink.
- Harder Fix: Very hard sealant might need multiple cuts. You might need to gently pry up the faucet base with a stiff putty knife after cutting, being very careful not to damage the sink surface.
Limited Space Under Sink
- Problem: It is too cramped to work under the sink.
- Simple Fix: Remove everything from the cabinet. Use a bright light. Position your body so you can reach.
- Tool Solution: A basin wrench is made for this. It helps you reach nuts that are high up and far back. Ratcheting wrenches or socket sets with long extensions can also help.
Leaking After Shut Off
- Problem: Water keeps dripping from the pipes even after closing the valves.
- Simple Fix: The shut-off valves might be old or faulty and not closing completely.
- Important: If the water won’t stop, you must turn off the main water supply to the house before you disconnect the pipes.
Cleaning Up
Once the old faucet is out, take time to clean the area.
- Wipe up any water that dripped.
- Clean away old caulk or putty from around the sink hole using a putty knife or scraper. Get the surface smooth for the new faucet.
- Wipe down the cabinet interior if it got wet or dirty.
- Gather all the old faucet parts and your tools.
Conclusion
Removing a Delta kitchen faucet, whether it’s a single-handle, pull-down, or old Delta kitchen faucet model, involves several steps. These include preparing the work area, gathering the right tools (especially a basin wrench), safely disconnecting the water lines by unscrewing water supply lines under sink, and finally, loosening Delta faucet mounting nut or bracket to detach kitchen faucet from the counter or sink. While challenges like stuck nuts or old sealant can arise, using simple techniques, patience, and the right tools like penetrating oil can help you overcome them. By following this guide, you can successfully remove your old faucet and be ready to install a new one. Remember to always turn off the water first!
Frequently Asked Questions (FAQ)
H4 How long does it take to remove a kitchen faucet?
It usually takes 1 to 3 hours. If the faucet is very old or parts are seized, it can take longer. Having the right tools ready helps a lot.
H4 Can I remove a kitchen faucet without a basin wrench?
It is very difficult, especially for faucets with nuts high up under the sink deck. A basin wrench is specially made to reach these spots. While sometimes possible with other tools in certain setups, a basin wrench makes the job much easier and is highly recommended.
H4 What if the shut-off valves under the sink don’t work?
If the valves don’t turn the water off completely or look like they might break, turn off the main water supply to your house before you start disconnecting any pipes. You might need to replace the old shut-off valves later.
H4 How do I remove old caulk or sealant?
Use a utility knife or scraper. Carefully cut under the edge of the old faucet base. Then scrape away any residue on the sink surface. Mineral spirits can help clean off stubborn sealant residue, but check if it is safe for your sink material first.
H4 I loosened the nut, but the faucet is still stuck. Why?
Likely old caulk or plumber’s putty on top of the sink is holding it. Use a utility knife to cut around the base of the faucet where it meets the sink.
H4 What should I do with the old faucet?
You can dispose of it, or some metal parts might be recyclable. If the faucet was only slightly damaged, sometimes parts like handles or escutcheons might be usable for another project, but typically old faucets are discarded.