Image Source: contentgrid.homedepot-static.com
Sink Damage? Can I Wash Paint Brush In Kitchen Sink?
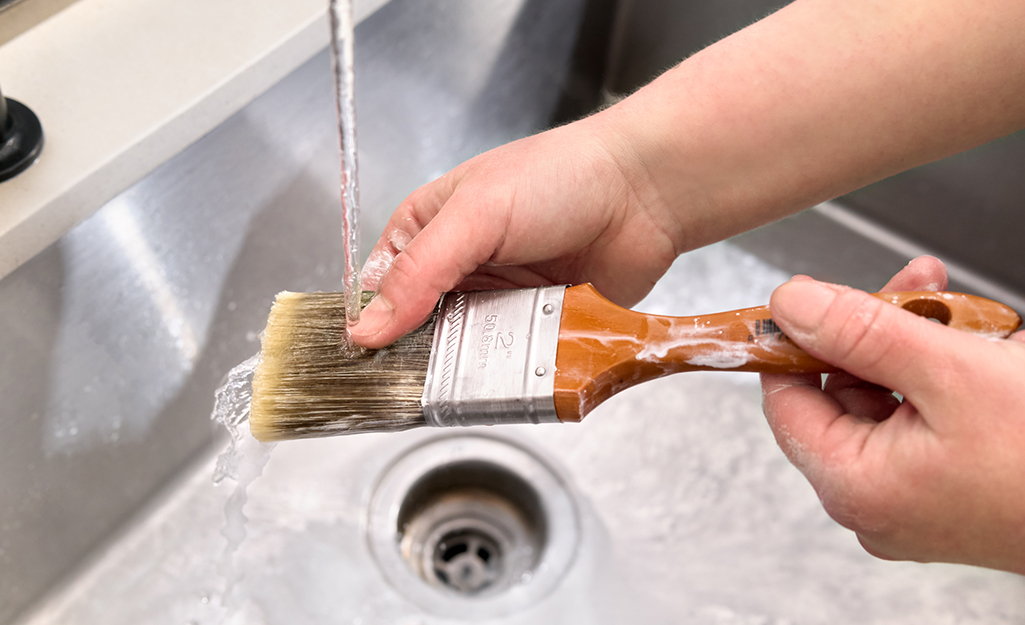
So, you just finished painting and your brushes are covered in paint. You look at the kitchen sink – it’s right there, easy access. The big question pops into your head: Can I wash paint brush in kitchen sink? The short answer is no, you really should not wash paint brushes in your kitchen sink. Doing so can cause serious plumbing damage, environmental harm, and make cleanup much harder in the long run. There are safer and better ways to handle paint brush cleaning methods that protect your pipes and the planet.
Grasping Why Sinks Are a Bad Idea
Using your kitchen sink for paint brush cleanup might seem quick, but it brings big problems. Paint, even water-based paint, is not meant to go down the drain. It can stick to pipes, build up over time, and cause clogs. This is especially true for paint containing solid pigments or thickeners.
Plumbing Damage from Paint Explained
Paint going down the drain acts like glue inside your pipes. It doesn’t just flow away like water. Pigments, binders, and other paint parts settle and harden.
- Sticky Buildup: Wet paint is sticky. It clings to the inside walls of your pipes.
- Hardening: As water passes through, the paint dries and hardens. It becomes a layer inside the pipe.
- Narrowing Pipes: This layer gets thicker each time paint goes down. It makes the pipe opening smaller.
- Trapping Other Things: Hair, grease, food scraps, and other things that might go down the drain now stick easily to the rough paint layer.
- Full Clogs: Eventually, the pipe opening gets so small or completely blocked that water cannot flow through. This is a drain clog.
Fixing these clogs can be hard and costly. Plumbers often need special tools or chemicals to break down hardened paint. Sometimes, pipes might even need to be replaced if the blockage is severe or causes corrosion. Preventing drain clogs paint is much easier and cheaper than fixing them.
Environmental Costs of Sink Washing
Washing paint brushes environmentally is important. Pouring paint water down the sink drain doesn’t make the paint disappear.
- Water Treatment Issues: The water goes to a treatment plant. These plants are built to clean sewage and natural waste. They are not designed to filter out tiny paint particles or chemicals.
- Harmful Chemicals: Paints, especially oil-based ones or older paints, can have chemicals and heavy metals. These can pass through treatment plants and end up in rivers, lakes, or groundwater.
- Aquatic Life Harm: These chemicals and particles can hurt fish, plants, and other life in water bodies.
- Polluting Local Water: Even small amounts from one household can add up when many people do it. This pollutes local water sources.
Proper paint water disposal and paint disposal guidelines are vital for protecting our water and environment.
Deciphering Paint Types: Latex Versus Oil-Based
Not all paints are the same, and how you clean brushes depends on the paint type. The risks to your sink and the environment also change.
Latex Paint
Latex paint is water-based. This means the main liquid carrying the color is water. Cleaning latex paint brushes is easier than cleaning oil paint brushes. You primarily use water and soap. However, even latex paint has solid parts (pigments, binders). When washed down a drain, these solids can settle and cause blockages, just like with oil paint, although perhaps slower. The liquid part washes away, but the solids stay behind.
Oil-Based Paint
Oil-based paint uses solvents like mineral spirits or paint thinner as the carrier liquid. Cleaning oil-based paint brushes is more complex and requires these strong solvents. Washing these brushes in a kitchen sink is much riskier.
- Stronger Solvents: Solvents are harsh chemicals. They can damage certain types of pipes or seals over time.
- Higher Solid Content: Oil paints often have a higher concentration of solid pigments and binders that can settle quickly.
- Flammability: Solvents used for cleaning are often flammable. Pouring them into a drain connected to a sewer system can create risks.
- Environmental Toxicity: Solvents are toxic. They are much harder for water treatment plants to handle and are very harmful to water ecosystems.
Cleaning oil-based paint brushes absolutely requires using solvents and must be done away from household drains, followed by proper hazardous waste disposal.
Safe Paint Brush Cleaning Methods
Since the kitchen sink is out, what are the right ways to clean your paint brushes? The goal is to remove paint effectively while protecting your plumbing and the environment. These are the recommended paint brush cleaning methods.
Method 1: Cleaning Latex Paint Brushes Properly
Cleaning latex paint brushes is relatively simple, but it needs to be done in a way that handles the paint solids correctly.
Step 1: Remove Excess Paint
Do this right away, don’t let the paint dry. Use the edge of your paint can or a scrap piece of cardboard or newspaper to scrape as much paint as possible off the brush bristles. Work the paint out from the base of the bristles towards the tip. This is the most important step to reduce the amount of paint you need to wash away.
Step 2: Use Dedicated Buckets
Get two buckets (old paint buckets work well, or any plastic buckets you don’t mind getting messy).
* Bucket 1: First Rinse: Fill the first bucket with a small amount of water. Swish the brush around in this bucket. Work the bristles against the bottom or side of the bucket to release paint. You will see the water become cloudy or colored with paint.
* Bucket 2: Second Rinse (and Optional Soap): Fill the second bucket with clean water. You can add a little bit of liquid soap (like dish soap). Swish the brush in this bucket to get out more paint and clean the bristles thoroughly.
Step 3: Squeeze and Repeat if Needed
Squeeze the water out of the brush bristles into the bucket. You might need to repeat the process with fresh water in the second bucket until the water stays mostly clear when you swish the brush. The goal is to get almost all the paint out in the buckets, not down a drain.
Step 4: Final Rinse (Optional and Minimal)
* Once the brush is nearly clean and the water in your last bucket rinse is quite clear, you can do a very quick final rinse under a faucet away from the kitchen sink. A utility sink in a garage or basement is better.
* However, it’s even better to do this final rinse over one of your buckets to catch any last bits of paint solids. The less paint water that goes down any drain, the better.
Step 5: Handle the Paint Water Disposal
This is key to washing paint brushes environmentally. The buckets of cloudy or colored water contain paint solids. You cannot pour this down the drain.
* Let Solids Settle: Let the buckets of paint water sit undisturbed for several hours, or even overnight. The solid paint pigments and binders will sink to the bottom.
* Pour Off Clean Water: Carefully pour off the relatively clear water from the top of the bucket into a sink (now it’s mostly just water, as the solids are left behind).
* Dispose of Solids: The sludge at the bottom of the bucket is hardened paint. Let the remaining water evaporate completely from the sludge. This can take several days or longer, depending on the amount. Once it’s completely dry and hard, scoop out the dried paint waste. You can usually dispose of this dried paint solid in your regular household trash. Check your local paint disposal guidelines to be sure.
Step 6: Shape and Dry the Brush
After cleaning, gently squeeze out excess water. Shape the bristles back to their original form. Hang the brush up or lay it flat to dry completely. Avoid letting it dry resting on its bristles, as this can bend them.
Method 2: Cleaning Oil-Based Paint Brushes Safely
Cleaning oil-based paint brushes is different because it requires solvents. This must be done with care due to the flammability and toxicity of solvents.
Step 1: Remove Excess Paint
Scrape as much paint off the brush as possible using the paint can edge or newspaper. This minimizes the amount of solvent needed and the amount of hazardous waste.
Step 2: Use a Dedicated Container for Solvent
You need a glass or metal container (not plastic, as some solvents can damage plastic) for the solvent. Pour a small amount of mineral spirits, paint thinner, or the solvent recommended on the paint can label into the container.
Step 3: Swish and Work the Solvent
Dip the brush into the solvent. Swish it around. Use an old stick or a brush comb to work the solvent through the bristles. Work the paint out from the base to the tip. You will see the solvent become colored with paint.
Step 4: Repeat with Clean Solvent (if needed)
You might need a second container with fresh solvent for a final rinse to get the brush completely clean. Swish the brush in the clean solvent.
Step 5: Remove Excess Solvent
Carefully squeeze the excess solvent out of the brush bristles back into the solvent container.
Step 6: Final Wash with Soap and Water (Optional but Recommended)
After using solvent, you can often wash the brush with warm water and soap (like dish soap) to remove the last traces of paint and solvent smell. Do this wash in a utility sink or over a bucket, not the kitchen sink. This step helps condition the bristles.
Step 7: Handle Solvent and Sludge Disposal
This is critical for washing paint brushes environmentally when using oil paint. Solvents used for cleaning are hazardous waste.
* Let Solids Settle: Seal the container(s) with the used solvent. Let the paint solids settle to the bottom. This can take 24 hours or longer.
* Pour Off Reusable Solvent: You can often carefully pour the relatively clean solvent from the top into a separate, labeled container. This “recycled” solvent can be used for the first rinse of dirty brushes next time, saving money and reducing waste.
* Dispose of Sludge: The thick sludge at the bottom of the container is hazardous waste. Do not pour it down any drain or put it in regular trash. You need to take it to a local hazardous waste collection site. Check your local government’s paint disposal guidelines for locations and rules.
* Dispose of Used Rags/Paper: Rags or paper towels used to wipe oil paint or solvent are also hazardous waste. They can also be a fire risk as solvent evaporates. Lay them flat to dry in a safe outdoor area away from anything flammable before disposal. Once dry, they usually still need to go to a hazardous waste site.
Step 8: Shape and Dry the Brush
Shape the bristles and hang or lay the brush flat to dry.
Preventing Drain Clogs Paint and Plumbing Damage
The best way to prevent plumbing damage from paint and avoid drain clogs paint is to keep paint out of your pipes entirely.
- Use the Bucket Method: Always do the main washing and rinsing in buckets or dedicated wash tubs. This captures the paint solids.
- Scrape First: Removing excess paint before washing is crucial. Less paint means less potential clog material.
- Let Water Settle: For latex paint water, allowing the solids to settle and pouring off only the clear water is essential.
- Dispose of Solids Properly: The settled sludge from both latex and oil paint cleaning must be disposed of correctly (trash for dried latex, hazardous waste for oil-based).
- Avoid “Just a Little Bit”: Even rinsing “just a little” paint off a brush under the faucet regularly adds up and can cause clogs over time.
- Use a Screen: If you must do a final rinse under a faucet, place a fine mesh screen over the drain to catch any particles. Clean the screen and dispose of the captured residue properly.
Washing Paint Brushes Alternatives
Besides the bucket method, are there other washing paint brushes alternatives to using a sink? Yes! Thinking outside the sink can save you headaches and plumbing bills.
- Dedicated Utility Sink: If you have a utility sink in a garage, basement, or laundry room, it might seem like a better option. However, the same rules apply! Paint solids can clog any drain. If you use a utility sink, you must still use the bucket method first to capture the majority of paint solids before any water goes down that drain.
- Brush Cleaning Stations: You can buy specific brush cleaning tools or containers. Some systems allow you to clean brushes with less water or solvent and are designed to contain the paint waste.
- Brush Spinners: These tools help remove water or solvent quickly after cleaning, reducing drying time and helping shape the brush.
- Wiping and Drying (Latex): For latex paint, if a brush is heavily loaded and not a favorite, sometimes it’s better to scrape off excess paint, wipe the rest into newspaper, and let the remaining paint dry hard on the brush before throwing the entire dried brush in the trash (check local rules). This completely avoids putting any paint water down a drain.
- Storing Brushes Temporarily: If you need to pause painting and plan to resume the next day, you can often store latex brushes by wrapping them tightly in plastic wrap or putting them in a plastic bag to keep the paint wet. Oil brushes can be stored in solvent or special brush storage containers. This saves cleaning until the job is fully done.
Paint Disposal Guidelines
Let’s look closer at paint disposal guidelines. Proper disposal is a key part of safe paint brush cleaning.
- Liquid Paint: Never pour liquid paint down any drain (sink, toilet, storm drain). Small amounts of latex paint can be air-dried in their cans (lid off) or on cardboard/newspaper until solid. Once solid, dried latex paint is generally considered non-hazardous and can go in regular trash. Large amounts of liquid latex paint or any amount of liquid oil-based paint must go to a hazardous waste collection site.
- Paint Water (Latex): As discussed, let the solids settle, pour off clear water, and dispose of dried solids in the trash.
- Used Solvents (Oil-Based): Store used solvents in labeled, sealed containers. Allow solids to settle. Decant reusable solvent. The remaining sludge and unusable solvent must go to a hazardous waste collection site.
- Paint Rags/Materials: Rags, drop cloths, or paper towels with oil paint or solvents are often considered hazardous waste and a fire risk. Dry them flat outdoors away from anything flammable before taking them to a hazardous waste site. Rags with only dried latex paint can usually go in the trash.
- Empty Paint Cans: Once empty and completely dry (no liquid paint left), metal paint cans are often recyclable. Check with your local recycling program. Cans with liquid paint must be handled as hazardous waste.
Always check with your local waste management or public works department for specific paint disposal guidelines in your area, as rules can vary.
Interpreting Readability: Making Sense of Simple Words
The goal is for this information to be easy for everyone to read and understand. That means using short sentences and simple words. Think of it like talking to a friend who’s new to painting. You wouldn’t use complicated terms.
- Short Sentences: Instead of saying, “The accumulation of particulate matter within the pipe’s internal structure can lead to significant impedance of fluid flow,” you say, “Paint bits stick in pipes. This stops water from moving.”
- Simple Words: Use “get” instead of “obtain,” “use” instead of “utilize,” “harm” instead of “detriment.”
- Active Voice: Say “You wash the brush” instead of “The brush is washed by you.” This makes it clearer who is doing the action.
- Direct Points: Get straight to the point. “Don’t wash paint in the sink.” Then explain why simply.
This way, important information about safe paint brush cleaning and preventing drain clogs paint is clear and easy to follow, so everyone can protect their home and the environment.
Seeing the Benefits of Proper Cleaning
Following safe paint brush cleaning practices has many benefits:
| Benefit | How it’s Achieved |
|---|---|
| Saves Money | Avoids costly plumbing repairs from clogs. |
| Protects Plumbing | Keeps pipes clear and free from hardened paint buildup. |
| Better for Environment | Prevents paint chemicals from entering water systems. |
| Cleaner Water | Reduces pollution in rivers, lakes, and groundwater. |
| Maintains Brushes | Proper cleaning helps brushes last longer. |
| Safer Home | Reduces risk of fire (from solvents) and chemical fumes. |
By choosing washing paint brushes alternatives to the kitchen sink and following paint disposal guidelines, you make painting projects easier and safer for everyone and everything around you.
FAQ
Here are some common questions about cleaning paint brushes.
h4 Is it ever okay to wash just a little bit of paint off a brush in the kitchen sink?
No, even a little bit is risky. Regular small amounts add up over time. The solids can still settle and start a clog. It’s always best to use a bucket or dedicated area.
h4 My drain is slow after I rinsed a brush. What should I do?
Stop using that sink for paint cleanup immediately. Do not pour chemical drain cleaners down, especially if you used solvents, as this can create dangerous reactions. Try simple methods like boiling water (for minor, fresh latex clogs) or a plunger. If the clog is stubborn or you suspect hardened paint, you will likely need to call a plumber who knows how to handle paint-related blockages.
h4 Can I pour paint water outside on the ground?
No. Pouring paint water (even from latex paint) outside can harm soil, plants, and groundwater. The chemicals and pigments are not natural and should not be released into the environment. Follow proper paint water disposal by letting solids settle and disposing of them correctly.
h4 How do I clean paint out of the sink drain if I already did it?
If the paint is still wet and minimal, run a lot of hot water immediately. If it has started to dry or is a significant amount, you likely have a blockage forming. Avoid using the sink and consult a plumber. Do not use solvents in your drain to try and dissolve paint unless advised by a professional, as this is a safety hazard.
h4 What’s the easiest way to clean latex brushes?
The bucket method is simplest and safest. Scrape well first, then rinse in two buckets of water (maybe with a little soap in the second). Let the paint water settle, pour off clear water, and trash the dried sludge.
h4 Can I reuse the solvent after cleaning oil brushes?
Yes, you can often reuse the cleaner solvent. Let the used solvent sit in a sealed container until the paint solids sink. Carefully pour the cleaner solvent from the top into a new, labeled container for later use as a first-rinse solvent. The settled sludge must be disposed of as hazardous waste.
h4 How long does it take for paint water solids to settle?
For latex paint water, settling can take several hours or overnight. For solvent from oil paint, it can also take 24 hours or more for solids to fully settle. Patience is key for proper paint water disposal.
h4 Where can I find local paint disposal guidelines?
Check your city or county’s waste management department website. They will have information on hazardous waste collection sites and specific rules for disposing of paint, solvents, and related materials in your area.
h4 Should I use special brush soap?
Regular dish soap works fine for cleaning latex paint brushes after the main paint is removed. There are also specific brush cleaners available that can help condition the bristles, especially for more expensive brushes or after using solvents.
h4 My brush bristles are stiff after drying, did I clean it right?
If bristles are stiff with paint, you didn’t get all the paint out, likely from the base of the bristles. Soak the brush again (in water/soap for latex, solvent for oil) and work the paint out thoroughly. If bristles are stiff but feel clean, they might need conditioning; brush soap or even a small amount of fabric softener can help.
By following these steps and guidelines, you can keep your paint brushes clean, protect your home’s plumbing, and do your part for the environment, all without relying on the kitchen sink.