Can you convert fluorescent kitchen lights to LED easily? Yes, you absolutely can! Changing your old fluorescent kitchen lights to new LED lights is a job many homeowners can do themselves. It is a great way to make your kitchen brighter, save energy, and give the room a fresh look. This guide will show you how to do it step by step.
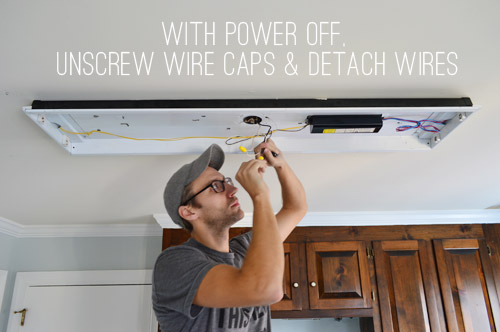
Image Source: images.younghouselove.com
Why Change Your Kitchen Lights?
Old fluorescent lights are common in many kitchens. They work, but they have some problems. They can hum, flicker, take time to warm up, and the light color is not always the best. They also use more energy than newer lights.
Making your lights better is a smart move. It is an important energy efficient kitchen lighting upgrade. Here is why you might want to do it:
- Save Money: LED lights use much less power. This means lower electricity bills.
- Better Light: LEDs give instant, bright light. You can pick the light color you like, from warm white to cool white.
- Last Longer: LED lights last a very long time. You won’t need to change tubes or bulbs often.
- Look Better: New lights can make your kitchen look more modern. You can find many modern kitchen lighting options today.
- No Flicker or Hum: LEDs turn on right away with no noise.
Changing your kitchen lights can really improve how your kitchen looks and works. It is a popular home upgrade kitchen lighting fixture project.
Seeing Your Choices for Updating Fluorescent Lights
You have a few main ways to update your fluorescent kitchen lights to LED. The best choice for you depends on how handy you are, your budget, and how much you want to change the look of your kitchen.
Here are your main choices:
- Use LED Tubes: Keep your old light fixture but swap the fluorescent tubes for LED ones. This is often the quickest way.
- Use an LED Conversion Kit: Take out the old parts inside your fluorescent fixture and put in a new LED light system. This keeps the look of the fixture but puts new tech inside.
- Replace the Whole Fixture: Take down the old fluorescent light completely and put up a new LED fixture. This lets you change the style totally.
Each choice has its good points. Let’s look at each one closely.
Option 1: Using LED Tube Replacement
This is often the easiest and fastest way to convert fluorescent kitchen lights to LED. You use the light fixture you already have. You just swap the old tubes for new ones.
What Are LED Replacement Tubes?
LED tubes look much like fluorescent tubes. But they use LED technology inside. They fit into the same pins as your old tubes.
There are two main kinds of LED replacement tubes for fluorescent kitchen lights:
- Ballast-Compatible (Plug-and-Play): These tubes work with the old part in your fixture called a ballast. You just take out the old tube and put in the new LED one. Simple!
- Ballast-Bypass (Direct Wire): These tubes do not use the ballast. You need to change the wiring in the fixture to send power straight to the tube’s pins. This means you often do a kitchen fluorescent ballast replacement by taking it out or disconnecting it.
Good Points of LED Tube Replacement
- Easy Start: Plug-and-play is super simple to install.
- Lower Cost Up Front: Tubes are often cheaper than a whole new fixture.
- Keeps Old Look: If you like your current fixture style, you keep it.
Things to Think About
- Ballast Life: If you use ballast-compatible tubes, your old ballast can still fail. When it does, the LED tube won’t work.
- Energy Use: Ballast-compatible tubes still use some power from the ballast, so they are not always as energy efficient as bypass tubes or new fixtures.
- Ballast Work (for Bypass): Ballast-bypass needs a bit more wiring work. You need to deal with the old ballast.
Let’s look closer at how to do the simple tube swap and the bypass method.
Option 1A: Simple Tube Swap (Ballast-Compatible)
This is the simplest way to upgrade kitchen lighting fixture without much work.
What You Need:
- New ballast-compatible LED tubes (make sure they are the right size and type for your old fluorescent tubes, like T8 or T12).
- A stable ladder or step stool.
- Gloves (optional, keeps tubes clean).
- Safety glasses.
Steps:
- Turn Off Power: This is super important. Go to your home’s breaker box. Find the breaker that controls your kitchen lights. Flip it to the “Off” position. Make sure the light is off before you touch anything. You can test it by trying to turn on the light switch.
- Open the Fixture: Your fluorescent fixture likely has a plastic cover (diffuser). Find out how to take it off. It usually clips on or slides out. Put the cover somewhere safe.
- Remove Old Tubes: Carefully grab an old fluorescent tube. Turn it a little to line up the pins at the ends with the slots in the holders. Gently pull the tube out. Be careful! Fluorescent tubes can break easily. If one breaks, it can have glass and a little bit of mercury inside (handle carefully and look up local rules for cleanup). Put the old tubes away safely for disposal later.
- Put In New LED Tubes: Take a new ballast-compatible LED tube. Line up the pins on the ends with the slots in the holders in the fixture. Push the tube gently into the holders. Turn it a little until it locks into place. Make sure the tube is seated firmly.
- Put Cover Back: Carefully put the plastic cover back onto the fixture. Make sure it is secure.
- Turn Power On: Go back to your breaker box. Flip the breaker for the kitchen light back to the “On” position.
- Test the Lights: Go back to the kitchen and turn on the light switch. The new LED tubes should light up right away.
That is it for the simple swap! Easy, right?
Option 1B: Ballast Bypass LED Tube Installation
This method makes your light fixture more energy efficient. It also means you won’t have to worry about the old ballast failing later. But, it needs a bit more work inside the fixture. You will do a kitchen fluorescent ballast replacement or just disconnect it.
Note: You need to be okay with basic electrical wiring for this. If you are not, think about hiring help.
What You Need:
- New ballast-bypass LED tubes (check that they are the right size and type, and made for bypass wiring). Some bypass tubes get power on one end (single-ended), others on both ends (double-ended). Know which type you have.
- A stable ladder or step stool.
- Safety glasses.
- Wire strippers.
- Wire nuts (new ones if the old ones look bad).
- Screwdriver.
- Needle-nose pliers.
- Voltage tester (a must for safety!).
- Gloves (optional).
Steps:
- Turn Off Power: Go to your breaker box and turn off the power to the light fixture. Test the wires at the fixture with your voltage tester to be sure the power is off. This is very important!
- Open the Fixture: Take off the plastic cover.
- Remove Old Tubes: Take out the old fluorescent tubes carefully.
- Get to the Wiring: You need to get to the wires inside the fixture. This might mean taking out a metal plate or cover inside. You will see the ballast – it looks like a box or rectangle with many wires coming out.
- Look at the Wiring Diagram: Your ballast or fixture might have a sticker showing how the wires are connected. Ballast-bypass tubes will have their own wiring diagram showing how to connect them directly to the incoming power wires (hot and neutral).
- Disconnect the Ballast: This is the kitchen fluorescent ballast replacement part (or removal). The ballast has wires going to the lamp holders (tombstones) at each end of the fixture and wires connected to the power coming into the fixture.
- Identify the wires coming from the power source (usually black and white). These are the main power wires for the fixture.
- Disconnect the wires going from the ballast to the lamp holders. You can cut them near the ballast or undo connections.
- Disconnect the wires connecting the ballast to the incoming power wires. Undo the wire nuts or connections.
- You can remove the ballast completely by unscrewing it. Or, you can just leave it in place but make sure all its wires are disconnected and safely capped off. Removing it saves a little weight and space.
- Rewire the Lamp Holders: Now you need to wire the lamp holders directly to the main power wires. This step depends on your LED tube type (single-ended or double-ended).
- For single-ended tubes: Only one end of the fixture needs to be wired to power. One pin holder gets the ‘hot’ wire, the other pin holder on the same end gets the ‘neutral’ wire. The holders on the other end of the fixture are not wired to anything.
- For double-ended tubes: One end of the fixture’s holders gets the ‘hot’ wire, and the holders on the other end get the ‘neutral’ wire. You might need to run new wires inside the fixture housing.
- Use wire strippers to strip a little insulation off the wires. Use wire nuts to make the connections neat and safe. Follow the diagram for your specific LED tube.
- Neaten Up Wires: Tuck the new wiring neatly inside the fixture housing. Make sure no bare wires are showing outside of wire nuts. If you left the old ballast in, make sure its disconnected wires are safely capped with wire nuts.
- Put Metal Cover Back: If you removed a metal cover to get to the wires, screw it back in place.
- Put In New LED Tubes: Put your ballast-bypass LED tubes into the holders. Make sure they are seated correctly based on the tube’s design (especially for single-ended tubes, make sure the powered end is in the correct holder).
- Put Plastic Cover Back: Secure the plastic diffuser cover.
- Turn Power On: Go back to the breaker box and turn the power back on.
- Test the Lights: Turn on the light switch. Your new LED tubes should work!
This method takes more effort but gives you better long-term energy savings and gets rid of the old ballast.
Option 2: Using an LED Conversion Kit
An LED conversion kit fluorescent fixture is another way to keep your old fixture housing but put totally new LED parts inside. This is good if your old fixture looks nice but you want a complete LED system without the old wiring mess or ballast.
What is an LED Conversion Kit?
A kit usually includes a new LED board or strip lights, an LED driver (like a ballast for LEDs), and wiring. You take out almost everything old inside the fixture (ballast, tombstone holders, sometimes even the wiring). Then you install the new LED parts.
Good Points of an LED Conversion Kit
- Complete Upgrade: Replaces all the old electrical parts.
- Very Energy Efficient: Uses an LED driver made just for the new lights.
- Often Brighter: Can give a lot of light.
- Keeps Fixture Style: You keep the look of your current fixture.
Things to Think About
- More Involved: This takes more work than just swapping tubes.
- Needs Wiring Skills: You need to be comfortable connecting wires.
- Kit Matches Fixture: You need to make sure the kit fits the size and shape of your old fixture.
Steps for Using an LED Conversion Kit:
- Turn Off Power: Go to the breaker box and turn off the power to the light. Use your voltage tester to be sure the power is off at the fixture.
- Open the Fixture: Remove the plastic cover and the old fluorescent tubes.
- Take Out Old Parts: You need to remove the ballast, the lamp holders (tombstones), and all the wires connected to them. Unscrew the ballast. Disconnect wires using wire nuts or by cutting them carefully. You might need to drill out rivets or unscrew things to get the lamp holders out. The goal is to empty out the inside of the fixture housing except for the main power wire coming in.
- Install the LED Kit: Follow the specific directions that come with your kit.
- Mount the new LED board or strips inside the fixture housing. Kits often have magnets or screws for this.
- Mount the LED driver inside the fixture.
- Connect the wires from the LED driver to the main power wires coming into the fixture (usually black to hot, white to neutral, and green or bare wire to ground). Use wire nuts for safe connections.
- Connect the wires from the LED driver to the new LED board/strips. These connections are usually simpler, maybe just plugging into a port.
- Neaten Up Wires: Tuck all wires inside the fixture housing. Make sure connections are secure and safe.
- Put Cover Back: Put the plastic diffuser cover back onto the fixture.
- Turn Power On: Go back to the breaker box and turn the power on.
- Test the Lights: Turn on the light switch. The new LED lights should turn on instantly.
Using a conversion kit is a good middle ground. It is more work than a simple tube swap but less work than replacing the whole fixture. It updates all the electrical guts for best performance.
Option 3: Replacing the Whole Fixture
Sometimes, you don’t just want better light; you want a whole new look. If your old fluorescent fixture is ugly, damaged, or doesn’t fit your kitchen style, replacing the whole fixture is the way to go. This gives you the most freedom in choosing modern kitchen lighting options. This is how to install new kitchen light fixture after taking down the old one.
What You Need:
- A new LED light fixture (choose one that fits your kitchen size and style).
- A stable ladder or step stool.
- Safety glasses.
- Wire strippers.
- Wire nuts (new ones).
- Screwdriver (flathead and Phillips might be needed).
- Needle-nose pliers.
- Voltage tester (a must!).
- Gloves (optional).
- Maybe a helper!
Good Points of Replacing the Whole Fixture
- New Look: Totally changes the style of your lighting.
- Latest Tech: You get a brand new fixture with current LED technology.
- Best Performance: Designed from the ground up as an LED light.
- Wide Choice: Many types of kitchen ceiling lights are available now.
Things to Think About
- More Work: This is the most involved option. You take down the old light and put up a new one.
- Higher Cost: A new fixture costs more than just tubes or a conversion kit.
- Box Needs to Fit: The electrical box in your ceiling needs to be right for the new fixture.
Types of Kitchen Ceiling Lights You Could Choose:
- Flush Mount: These sit right against the ceiling. Good for low ceilings. Many styles available with LED.
- Semi-Flush Mount: Hang down a little bit from the ceiling. Add a bit more style than flush mount.
- Pendant Lights: Hang down on a cord or rod. Great for over islands, sinks, or tables. Can add a modern touch.
- Track Lighting: A fixture with multiple adjustable heads on a track. Good for directing light where you need it.
- Recessed Lights: Installed up inside the ceiling. Give a clean, modern look. (Replacing a large fluorescent with multiple recessed lights is possible but more complex, needing drywall work).
- Under Cabinet Lights: Lights added under your cabinets to light up your work surfaces. A great addition for tasks.
For replacing a main ceiling fixture, flush or semi-flush mounts are common easy swaps.
Steps for How To Install New Kitchen Light Fixture:
- Turn Off Power: Go to the breaker box and turn off the power to the light. Use your voltage tester at the fixture to make sure no power is there. Check both the wires connected to the fixture and inside the electrical box it connects to.
- Take Down the Old Fixture:
- Remove the plastic cover and tubes.
- Look for screws or nuts holding the fixture to the ceiling or to the electrical box. Unscrew them.
- Carefully lower the fixture a little. It will still be connected by wires.
- Find the wire connections inside the electrical box (usually held by wire nuts). Disconnect the wires (black, white, and ground). You might need to untwist wire nuts.
- Once wires are free, take the old fixture all the way down. It might be heavy.
- Prepare the New Fixture: Read the instructions that came with your new LED fixture. It will show you how to put it together and how to attach the mounting bracket. The mounting bracket is the part that screws onto the electrical box in the ceiling first.
- Install the Mounting Bracket: Screw the new mounting bracket to the electrical box in the ceiling. Make sure it is secure.
- Wire the New Fixture: This is the step where you connect the new fixture’s wires to the wires coming from the ceiling electrical box.
- You will see wires coming from the ceiling: usually black (hot), white (neutral), and green or bare copper (ground).
- Your new fixture will also have wires: black, white, and ground.
- Connect black wire to black wire using a wire nut.
- Connect white wire to white wire using a wire nut.
- Connect ground wire (green or bare) to the ground wire in the box. The electrical box itself might also have a ground screw you connect to. Ground is very important for safety!
- Make sure connections are tight and wire nuts are secure.
- Attach the New Fixture: Carefully lift the new fixture and connect it to the mounting bracket. This might involve lining up screws, twisting, or using a special connector. Follow the instructions for your specific fixture.
- Tuck Wires: Gently push the connected wires up into the electrical box as you attach the fixture. Make sure no wires are pinched.
- Secure the Fixture: Finish attaching the fixture firmly to the mounting bracket.
- Put On Covers/Shades: Add any glass shades, covers, or decorative parts that came with the fixture. Install any bulbs if needed (many LED fixtures have the LEDs built-in).
- Turn Power On: Go back to the breaker box and turn the power back on.
- Test the Lights: Turn on the light switch. Your new fixture should light up the kitchen!
Replacing the whole fixture updates both the light quality and the style of your kitchen. It is a good choice if you want a fresh look.
Comparing the Options Side-by-Side
Here is a quick look at the three ways to update your fluorescent kitchen lighting:
| Feature | LED Tube Swap (Ballast-Compatible) | LED Tube Swap (Ballast-Bypass) | LED Conversion Kit | Replacing Whole Fixture |
|---|---|---|---|---|
| Effort Level | Very Easy | Medium | Medium/Hard | Hard |
| Wiring Needed | None | Some | Yes | Yes |
| Deals with Ballast | Uses it | Removes/Bypasses | Removes | Not present in new fixture |
| Keeps Fixture Look | Yes | Yes | Yes | No (Changes look completely) |
| Energy Savings | Good (less than bypass) | Better | Best | Best |
| Upfront Cost (approx) | Low | Low to Medium | Medium | Medium to High |
| Long-Term Cost | Might need ballast fix later | Very Low | Very Low | Very Low |
| Skill Level | Beginner | Basic Electrical | Basic Electrical | Electrical/DIY |
This table can help you quickly see which method might be best for you based on what you want and what you are comfortable doing.
Choosing the Right Option for You
Think about these things when deciding how to update your kitchen light:
- How Handy Are You? If you are new to DIY, the simple tube swap is a great start. If you are okay with basic wiring, the bypass tubes or conversion kit are good. If you are comfortable with home wiring, replacing the whole fixture is doable. When in doubt, get help from a pro.
- What is Your Budget? Tubes are the cheapest upfront. Conversion kits are in the middle. New fixtures cost the most. But remember the long-term savings from LEDs!
- Do You Like Your Fixture? If you like your current fixture style, use tubes or a conversion kit. If you hate it or it looks old, replace the whole thing for modern kitchen lighting options.
- How Much Light Do You Need? Different options and fixtures offer different levels of brightness (measured in lumens) and light color (color temperature). Think about what works best for cooking and seeing clearly in your kitchen.
No matter which option you choose, moving to LED is a smart move. It saves energy, lasts longer, and gives you better light.
Getting Ready: Safety and Tools
Before you start any work, gather your tools and put safety first.
Always Do This First:
- Turn Off the Power! Find the right breaker for your kitchen lights. Turn it OFF. Put a piece of tape over it or a note saying “Working on lights – Do Not Touch!” so nobody turns it back on by mistake.
- Test the Wires: Use a voltage tester to double-check that the power is completely off at the fixture. Touch the tester to the wires you plan to work on. No beep or light means no power.
- Use a Safe Ladder: Make sure your ladder is stable and on a flat surface. Have someone hold it if you can. Don’t reach too far. It is better to move the ladder.
- Wear Safety Glasses: Protect your eyes from dust, debris, or bits of old material.
- Be Gentle: Especially when handling old fluorescent tubes.
Common Tools You Might Need:
- Ladder
- Safety glasses
- Voltage tester
- Screwdriver (flathead and Phillips)
- Wire strippers (if doing wiring)
- Wire nuts (new ones are always good)
- Needle-nose pliers
- Gloves (optional)
- Flashlight or headlamp (to see while the power is off)
Having your tools ready before you start makes the job go smoother and safer.
Detailed Steps: Review and Practice
We’ve touched on the steps for each option. Let’s look at them again, thinking about the small things that make a difference.
For Simple Tube Swap (Ballast-Compatible):
- Double check that your new tubes say “Ballast Compatible” or “Plug-and-Play”.
- Make sure the tube size (like T8 or T12) and length (like 4 feet or 2 feet) match your old tubes.
- When twisting out old tubes, give a quarter turn and pull straight out.
- When putting in new tubes, push pins into slots, then twist a quarter turn until they click or feel firm.
For Ballast Bypass Tube Swap (Direct Wire):
- Know if your tubes are single-ended or double-ended. This is key for wiring. Single-ended usually means wiring only one end of the fixture to power. Double-ended means wiring power to one end and neutral to the other.
- The wiring diagram for your specific tube is your map. Follow it exactly.
- Take pictures of the old wiring before you disconnect it. This can help you understand how things were connected, even if you are changing it.
- When disconnecting the ballast, make sure you cut or disconnect wires coming from the ballast. Identify the main power wires coming into the fixture from the ceiling box – you will reuse these.
- Use the correct size wire nuts for the wires you are connecting. Strip just enough insulation (usually about half an inch). Twist wires together before putting on the wire nut for a strong connection. Twist the wire nut on tightly.
For LED Conversion Kit:
- Choose a kit that fits your fixture size.
- The kit will have its own LED driver. This replaces the fluorescent ballast.
- You will likely remove all the old fluorescent lamp holders (tombstones).
- The new LED light source (board or strips) will mount flat inside the fixture housing.
- Wiring is usually connecting the incoming power wires (from the ceiling) to the new LED driver, and then connecting the driver to the new LED board/strips. Follow the kit’s diagram.
- Some kits might have magnetic strips to hold parts in place, making it easier.
For Replacing the Whole Fixture:
- Pick a new fixture suitable for a kitchen (often rated for damp locations, easy to clean).
- Check the weight of the new fixture. Can the electrical box in your ceiling hold it? Most standard ceiling boxes hold up to 50 lbs, but check if you are using something very large or heavy.
- Have a helper if the new fixture is big or heavy.
- When disconnecting the old fixture wires, pay attention to which color wire from the fixture connects to which color wire in the ceiling box. You will do the same color-to-color match with the new fixture.
- Make sure the mounting bracket for the new fixture is screwed tightly to the ceiling electrical box.
- Use the ground wire! Connect green/bare wire from the fixture to the ground wire/screw in the box.
Taking your time and being careful at each step is important, especially with wiring.
Finishing Up and Testing
Once you have installed the new tubes, kit, or fixture, and the cover is back on:
- Clean up your work area. Put away tools.
- Dispose of old fluorescent tubes safely. Many hardware stores or local waste centers have places to recycle them. Don’t just throw them in the trash.
- Go back to your breaker box.
- Double-check that everything is secure and all tools are out of the way.
- Flip the breaker back to the “On” position.
- Go to the kitchen and turn on the light switch.
Your new LED lights should come on right away! Enjoy the new light.
Keeping Your New LED Lights Working
One of the best things about LED lights is they need very little care.
- You won’t need to change bulbs or tubes for many years.
- Keep the fixture clean. Dust can dim the light a little. Wipe down the cover or fixture gently when needed (make sure the light is off first!).
- That is pretty much it! LEDs are known for being low-maintenance.
Thinking About Other Things
- Dimming: Do you want to dim your kitchen lights? Not all LED tubes or fixtures can be dimmed. If you want dimming, make sure the LED product says it is “dimmable” and you might need to change your wall light switch to an LED-compatible dimmer switch.
- Color Temperature: LED lights come in different “colors” of white light, measured in Kelvins (K).
- 2700K-3000K is warm white, like old incandescent bulbs. Good for a cozy feel.
- 3500K-4000K is neutral or cool white. Good for task lighting, feels brighter. This is often used in kitchens.
- 5000K or higher is daylight. Very bright white, can feel a bit blue.
Choose a color temperature you like for your kitchen.
- Smart Lighting: You can get smart LED lights that connect to your phone or smart home system. You can control them with an app or voice commands. This is part of modern kitchen lighting options.
Conclusion: Light Up Your Kitchen!
Updating your fluorescent kitchen lighting to LED is a great home project. It saves energy, gives you better light, and can make your kitchen look nicer. Whether you do a simple LED tube replacement for fluorescent kitchen lights, use an LED conversion kit fluorescent fixture, or replace fluorescent kitchen fixture entirely with a new LED light, you will see and feel the difference.
It is a smart energy efficient kitchen lighting upgrade that pays for itself over time. So, gather your tools, follow these steps, and get ready to enjoy your bright, new kitchen lights!
Frequently Asked Questions (FAQ)
Q: Can I just put LED tubes into my old fixture without changing anything?
A: Maybe. It depends on the LED tubes. Some are made to work with old ballasts (plug-and-play). Others need the ballast removed or bypassed (direct wire). Check the tube packaging carefully!
Q: What is a ballast and why do I need to worry about it?
A: A ballast is an electrical part in fluorescent fixtures that helps the tubes start and controls the power. It is old technology. LED lights don’t need a fluorescent ballast. If you use ballast-compatible LED tubes, the ballast must work for the tube to light up. If you use ballast-bypass tubes or a conversion kit, you disconnect or remove the ballast.
Q: Is it safe to update the light myself?
A: Yes, if you are careful and follow safety rules. Always turn off the power at the breaker box and test to be sure it is off before you touch any wires. If you are not comfortable with wiring, especially for ballast bypass, conversion kits, or new fixtures, it is best to hire an electrician.
Q: How long do LED lights last?
A: Much longer than fluorescent tubes. LED lights can last 25,000 to 50,000 hours or even more. Fluorescent tubes might last 7,000 to 15,000 hours. This means you might not need to change LED lights for 10 years or longer in a kitchen.
Q: Will LED lights save me money?
A: Yes. LED lights use much less electricity than fluorescent lights to make the same amount of light. This lowers your power bill. They also last longer, so you save money by not buying replacement tubes as often. Over time, the savings add up.
Q: My kitchen fixture is old. Should I just replace the whole thing?
A: If your fixture is very old, yellowed, or you just don’t like how it looks, replacing the whole fixture is a good idea. It is more work and costs more upfront, but you get a completely new, modern light designed for LEDs and can choose from many types of kitchen ceiling lights.