Thinking about adding a new kitchen backsplash? You might wonder, “How much for kitchen backsplash?” The cost for a kitchen backsplash usually falls between \$600 and \$1,800 for an average-sized kitchen (around 30 square feet of backsplash area) if you hire a pro. This price includes both the materials and the labor. Of course, the exact price changes a lot based on the materials you pick, how big your kitchen is, and if you do the work yourself or pay someone else. If you’re curious about the Average cost kitchen backsplash, this range is a good starting point, but let’s dig deeper into what makes up that price.
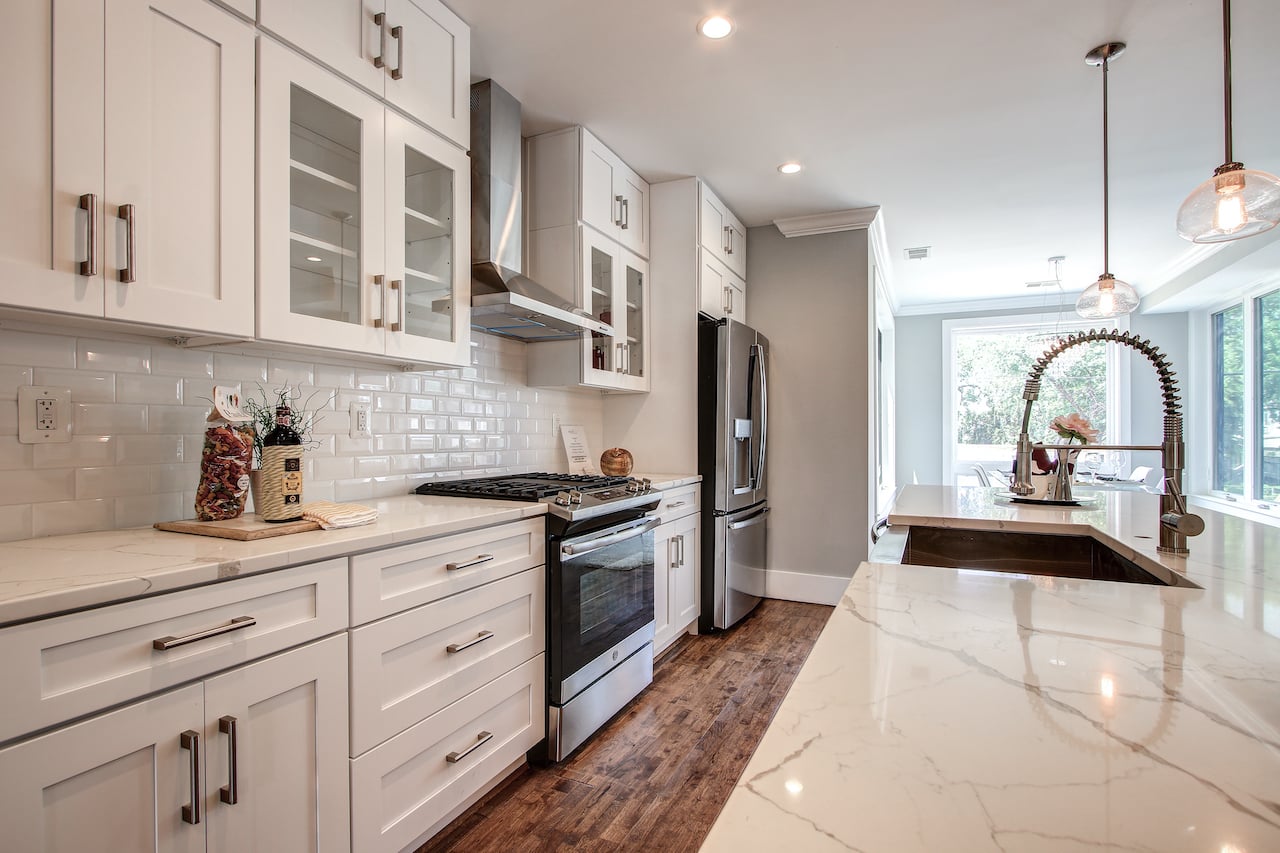
Image Source: kitchenandbathshop.com
What Makes Up the Backsplash Price?
The total Backsplash installation cost is not just one number. It’s a mix of several things. Think of it like baking a cake; you need different ingredients. For a backsplash, the main ingredients are:
- The stuff you use (Materials): This is the tile, stone, glass, or whatever you choose for the backsplash itself.
- The bits that hold it (Supplies): This includes glue (mastic or thin-set), grout, caulk, and other things needed to put it up.
- The work needed (Labor): This is the cost if you pay a professional to measure, cut, and install the backsplash.
- Other small costs: Things like removing the old backsplash or fixing the wall if needed.
Let’s look at each part more closely.
Figuring Out Backsplash Material Costs
The Kitchen backsplash material prices vary a lot. Some materials are very cheap, while others cost quite a bit. The material you pick is often the biggest part of the total cost. Here are some common Types of kitchen backsplash materials and their typical costs per square foot. Remember, these are just for the material itself, not counting the glue or labor.
Cost Per Square Foot Backsplash Materials
The Cost per square foot backsplash is how much the material costs for every square foot of wall space you want to cover. This is a key number when planning your budget.
- Ceramic or Porcelain Tile: This is a very popular choice. It’s strong, easy to clean, and comes in tons of colors and shapes.
- Price: Usually \$2 to \$15 per square foot. Basic subway tiles are on the lower end. Fancy patterns or larger tiles can cost more.
- Glass Tile: Glass tiles look sleek and modern. They bounce light well and are easy to wipe clean.
- Price: Often \$7 to \$30 per square foot. Small mosaic glass tiles can be more expensive.
- Natural Stone Tile (Marble, Travertine, Slate): Stone offers a high-end, unique look. Each piece is a bit different. However, stone often needs more care and sealing.
- Price: Can range from \$10 to \$50+ per square foot. Marble is often more costly than travertine or slate.
- Metal Tile: Metal tiles, like stainless steel or copper, give a industrial or modern feel.
- Price: Varies widely, from \$10 to \$40+ per square foot.
- Peel and Stick Backsplash: These are stickers or panels that you simply stick to the wall. They are great for renters or quick updates.
- Price: Often \$1 to \$7 per square foot. This is one of the cheapest options.
- Wood: Reclaimed wood or new wood planks can make a warm, rustic look. Wood needs sealing to protect it from water and spills.
- Price: Varies greatly depending on the type of wood, from \$5 to \$30+ per square foot.
- Wallpaper: Special washable or vinyl wallpapers can be used as a backsplash. They are very budget-friendly.
- Price: Typically \$1 to \$4 per square foot.
- Paint: Just painting the wall with a durable, washable paint is the cheapest option.
- Price: Very low, maybe \$0.10 to \$0.50 per square foot for paint and supplies.
Table: Material Costs Per Square Foot
Here’s a quick look at how different materials compare in price:
| Material Type | Typical Cost Per Square Foot (Material Only) |
|---|---|
| Paint | \$0.10 – \$0.50 |
| Wallpaper (Washable) | \$1 – \$4 |
| Peel and Stick | \$1 – \$7 |
| Ceramic/Porcelain Tile | \$2 – \$15 |
| Wood | \$5 – \$30 |
| Glass Tile | \$7 – \$30 |
| Metal Tile | \$10 – \$40+ |
| Natural Stone Tile | \$10 – \$50+ |
Keep in mind that these are just average costs. Prices can be higher or lower based on the brand, quality, and where you buy them.
Diving Into Specific Tile Costs
Since tile is very popular, let’s look at the Kitchen backsplash tile cost in more detail for a few common types.
Subway Tile Backsplash Cost
Subway tile backsplash cost is often on the lower side for tiled backsplashes. Subway tiles are classic rectangular tiles (often 3×6 inches) that look like the tiles in old subway stations.
- Material Cost: Basic ceramic subway tiles can cost as little as \$2 per square foot. More fancy ceramic, glass, or natural stone subway tiles will cost more, maybe up to \$20 or \$30 per square foot for higher-end options.
- Overall Cost: For a standard kitchen area (30 sq ft), the tile material alone might cost \$60 to \$900+. When you add supplies (thin-set, grout, etc., maybe another \$50-\$100) and labor (if hiring), the total
Subway tile backsplash costcan range from \$400 to \$1,200 or more, depending heavily on labor rates and tile choice.
Peel and Stick Backsplash Cost
As mentioned, Peel and stick backsplash cost is usually the lowest for materials that look like traditional backsplashes.
- Material Cost: These can range from \$1 to \$7 per square foot. They are typically sold in small sheets or rolls.
- Overall Cost: For a 30 sq ft area, the material might cost just \$30 to \$210. There are almost no extra supply costs (maybe a utility knife). Labor is zero if you do it yourself, which is the main point of this type. The total
Peel and stick backsplash costis often just the material cost, making it a very budget-friendly choice, potentially \$50 to \$250 for a small to medium kitchen area.
Labor Cost to Install Backsplash
One of the biggest parts of the Backsplash installation cost is the labor if you hire a professional. Tiling is skilled work. It involves careful measuring, cutting tiles (especially around outlets and windows), applying adhesive, grouting, and sealing.
How Pros Charge
Pros usually charge in one of two ways:
- Per Square Foot: They charge a set amount for each square foot of backsplash they install.
- Typical
Labor cost to install backsplashper square foot: \$10 to \$40+. This range depends on the type of material (small glass mosaics are harder to install than large ceramic tiles), the complexity of the job (lots of cuts, uneven walls), and where you live (labor costs are higher in some areas).
- Typical
- Hourly Rate: They charge a fixed amount for every hour they work.
- Typical Hourly Rate: \$30 to \$80+ per hour. A standard backsplash job might take a pro anywhere from 4 hours to 16 hours or more, depending on the size and complexity.
Total Labor Cost Example
For that standard 30 square foot kitchen backsplash area:
- Using a per-square-foot rate of \$15: Labor would be 30 sq ft * \$15/sq ft = \$450.
- Using an hourly rate, assuming a job takes 8 hours at \$50/hour: Labor would be 8 hours * \$50/hour = \$400.
So, the Labor cost to install backsplash can easily add \$300 to \$1,200 or more to your total project price, depending on the factors mentioned.
DIY Kitchen Backsplash Cost
What if you want to save money? Doing the work yourself is a great way to cut down the Backsplash installation cost. The DIY kitchen backsplash cost will primarily be the price of the materials and the necessary tools and supplies.
What You’ll Need (Beyond Materials)
If you install a tile backsplash yourself, you’ll need more than just the tiles.
- Adhesive: Thin-set mortar (for heavier tiles) or mastic (for lighter tiles).
- Grout: The stuff that fills the gaps between tiles.
- Grout Float: Tool to push grout into the gaps.
- Spacers: Small plastic pieces to keep tile gaps even.
- Wet Saw or Tile Cutter: Needed to cut tiles to fit edges and around outlets. A wet saw is better for complex cuts. You might be able to rent one.
- Notched Trowel: Tool to spread adhesive evenly.
- Caulk: To seal edges (where the backsplash meets the countertop or cabinets).
- Buckets, Sponges, Rags: For mixing grout and cleaning up.
- Safety Glasses and Gloves.
- Optional: Angle grinder (for tricky cuts), level, tape measure, pencil.
DIY Cost Breakdown
The DIY kitchen backsplash cost is mainly:
- Materials: Your chosen tile, stone, glass, peel-and-stick, etc. (e.g., \$60 to \$1,500+ for 30 sq ft, depending on material).
- Supplies: Adhesive, grout, caulk, spacers (e.g., \$50 to \$150).
- Tools: If you don’t own them, buying or renting tools (a basic tile cutter might be \$30, a wet saw rental might be \$50/day). If you need to buy everything, this adds a bit.
Total DIY kitchen backsplash cost for a 30 sq ft area might range from \$150 to \$1,800 or more, again, mostly based on the material cost. Peel and stick DIY would be at the very low end, while natural stone DIY would be higher.
Important Note: DIY saves money on labor but requires time, effort, and some skill. Mistakes can be costly to fix. If you’re not comfortable with home projects, hiring a pro might be worth the extra cost for a better result.
Other Things That Change the Cost
Many things can impact the final Backsplash installation cost. It’s not just about the material and labor rate.
The Size of Your Backsplash Area
This is a big one. The more square feet you cover, the more material you need and the longer labor will take. A small area behind just the sink and stove costs less than a backsplash that wraps around the whole kitchen.
The Material’s Difficulty
Some materials are harder to work with.
* Small mosaic tiles require careful placement and lots of grouting.
* Glass tiles can chip easily when cut.
* Natural stone needs special blades for cutting and might need sealing before and after grouting.
These tricky materials usually increase the Labor cost to install backsplash because they take more time and skill.
The Kitchen’s Layout
Kitchens with many windows, doors, or awkward corners require more cuts and careful fitting, which adds to labor time and potentially material waste. Lots of electrical outlets in the backsplash area also mean more cuts.
Removing the Old Backsplash
If you have an old backsplash to take down, this adds time and cost. Pros might charge extra for demolition and wall prep (like fixing drywall damage).
Preparing the Wall
The wall needs to be clean, smooth, and flat for the new backsplash to stick well. If there’s old glue, paint issues, or damaged drywall, this prep work adds to the labor cost.
Where You Live
Costs for both materials and labor can be higher in big cities or areas with a high cost of living compared to smaller towns.
The Pro You Hire
Different contractors will have different rates based on their experience, reputation, and demand. Getting a few quotes is always a good idea.
Average Cost Kitchen Backsplash: Putting It Together
Let’s try to give some typical total cost ranges for a standard kitchen (around 30 square feet) using different materials, including both materials and professional labor. Remember, these are just examples, and your actual cost may differ.
| Material Type | Typical Material Cost (30 sq ft) | Typical Labor Cost (30 sq ft) | Estimated Total Cost Range |
|---|---|---|---|
| Peel and Stick | \$30 – \$210 | \$0 (DIY focus) | \$50 – \$250 (mostly DIY) |
| Ceramic/Porcelain Tile | \$60 – \$450 | \$300 – \$900+ | \$400 – \$1,500+ |
| Glass Tile | \$210 – \$900 | \$450 – \$1,200+ | \$700 – \$2,100+ |
| Natural Stone Tile | \$300 – \$1,500+ | \$600 – \$1,500+ | \$900 – \$3,000+ |
Based on these numbers, the Average cost kitchen backsplash for a professionally installed tiled backsplash often falls in the \$600 to \$1,800 range, as mentioned earlier. Cheaper materials like ceramic and some peel-and-stick options lower the average, while expensive stone or glass raise it.
Ways to Save Money
Want to keep your Backsplash installation cost down? Here are some ideas:
- Pick cheaper materials: Ceramic tile, especially basic
Subway tile backsplash costless than glass or stone.Peel and stick backsplash costis the lowest. - Do it yourself (DIY): This is the biggest way to save, cutting out the
Labor cost to install backsplash. Just make sure you are comfortable with the work or willing to learn. - Shop around for materials: Check prices at different stores (tile shops, home improvement centers, online retailers). Look for sales or clearance items.
- Reduce the area covered: Maybe you only need a backsplash behind the stove and sink, not the entire wall space.
- Simplify the design: A simple straight pattern is easier (and cheaper for labor) than complex patterns or mosaics.
- Get multiple quotes: If hiring a pro, get at least three different bids to compare prices and find a fair rate.
- Do the prep work yourself: If you’re hiring a pro, maybe you can remove the old backsplash or clean the wall yourself to save them time.
Understanding Your Backsplash Project
Before you start, take some key steps to plan well and avoid surprises in your Kitchen backsplash tile cost or overall budget.
Measure the Area
First, figure out how much backsplash material you need. Measure the height and width of all the areas you want to cover. Multiply height by width for each section to get the square footage. Add all the sections together for your total square footage.
- Example: If you have two sections, one is 3 feet tall by 5 feet wide (15 sq ft), and the other is 3 feet tall by 8 feet wide (24 sq ft), your total area is 15 + 24 = 39 sq ft.
Always buy extra material (about 10-15%) to account for cuts, mistakes, or future repairs.
Set a Budget
Based on the Types of kitchen backsplash materials you like and whether you’ll DIY or hire a pro, set a realistic budget. Look at the Cost per square foot backsplash for materials and estimate labor. Decide what you are comfortable spending before you fall in love with a super expensive tile.
Get Quotes (If Hiring)
Contact several local tile installers or handymen. Show them the area you want to cover and the material you’re thinking of using. Ask for a written quote that includes both material installation cost (labor) and possibly the cost of extra supplies they will use. Make sure they include things like wall prep or old backsplash removal in the quote if needed.
Consider the Timeline
How quickly do you need the job done? Hiring a pro might be faster than doing it yourself, especially if you’re new to tiling. Pros are also used to working around kitchen cabinets and countertops efficiently.
The Installation Process (Simply Explained)
Whether you DIY or hire help, the steps are generally the same. Knowing the process helps you understand the Backsplash installation cost.
- Prepare the Area: Clear countertops, turn off power to nearby outlets (remove covers), and protect counters and floors with drop cloths. Make sure the wall is clean and smooth.
- Plan and Layout: Figure out where your tiles will start and end. Use a level to draw a straight line to guide you. This is important for getting things straight, especially for
Subway tile backsplash costwhere straight lines matter visually. - Apply Adhesive: Use a notched trowel to spread thin-set or mastic onto a small section of the wall.
- Set the Tiles: Press tiles firmly into the adhesive using spacers to keep the gaps (grout lines) even. Cut tiles as needed to fit around edges, outlets, and corners.
- Let Adhesive Dry: Wait the time recommended on the adhesive packaging, usually 24 hours.
- Grout: Mix grout and use a grout float to push it into all the spaces between the tiles. Wipe off excess grout from the tile faces with a damp sponge.
- Clean and Seal: Once the grout is dry (check package for time), clean the tiles again. If using natural stone or some types of grout, you may need to apply a sealer.
- Caulk Edges: Apply caulk where the backsplash meets the countertop and cabinets for a clean, waterproof seal.
Popular Choices and Their Impact on Cost
Let’s revisit some popular materials and how they influence the Kitchen backsplash tile cost.
- Ceramic Tile: The budget hero. Widely available, easy to work with, comes in countless designs. Low material cost, reasonable labor cost. Great for keeping the
Average cost kitchen backsplashdown. - Porcelain Tile: Similar to ceramic but more durable and water-resistant. Slightly higher material cost than ceramic, but labor is similar.
- Glass Tile: Adds sparkle and depth. Material cost is moderate to high. Labor cost can be higher because small mosaic pieces take time, and glass can be tricky to cut cleanly.
- Natural Stone (Marble, etc.): The luxury choice. High material cost. Labor cost is also usually higher due to weight, cutting difficulty, and need for sealing. Significantly increases the total
Backsplash installation cost. - Peel and Stick: The DIY dream. Super low material cost. No labor cost if you do it yourself. Very quick project. Keep in mind these might not look exactly like real tile up close, and durability might vary. Impact on
Peel and stick backsplash costis almost entirely the material.
Understanding the Kitchen backsplash material prices is key to predicting your total Backsplash installation cost.
Conclusion: Planning Your Backsplash Project
Finding the right Cost per square foot backsplash for your budget is totally possible. Whether you choose budget-friendly Peel and stick backsplash cost, classic Subway tile backsplash cost, or luxurious natural stone, knowing what goes into the total price helps you make smart choices.
The Average cost kitchen backsplash for professional installation is typically between \$600 and \$1,800, but remember this changes based on size, material, and location. DIY kitchen backsplash cost is much lower, mainly just materials and supplies, but requires your time and effort.
Think about your style, your budget, your comfort level with DIY, and get a few quotes if you plan to hire someone. With careful planning, you can add a beautiful and functional backsplash to your kitchen without breaking the bank.
Frequently Asked Questions (FAQ)
h4: How long does it take to install a kitchen backsplash?
For an average kitchen, a professional might take one to two days. If you do it yourself, it could take longer, maybe a weekend or even a few weekends depending on your skill level and free time.
h4: Do I need to seal my backsplash?
It depends on the material and grout. Natural stone tiles (like marble or travertine) and some types of grout need sealing to protect them from stains and moisture. Ceramic and porcelain tiles themselves don’t usually need sealing, but the grout might. Check the instructions for your specific materials.
h4: Can I put a new backsplash over an old one?
Sometimes, yes, but it’s usually not the best idea. The old backsplash and the wall need to be very flat and sturdy. Putting new tile over old can make the backsplash stick out too far or not adhere properly. Removing the old backsplash first generally gives you a better, longer-lasting result, even if it adds to the Backsplash installation cost.
h4: Is peel and stick backsplash durable?
Peel and stick backsplashes are generally less durable than traditional tile. They can be affected by heat (especially behind a stove) and might not be as easy to clean or as long-lasting. They are best for temporary updates or areas not exposed to high heat or lots of water.
h4: What’s the difference between thin-set and mastic?
Thin-set is a cement-based adhesive mixed with water or a special liquid. It’s very strong and good for heavy tiles, wet areas (like showers, though backsplashes aren’t usually that wet), and floors. Mastic is a pre-mixed organic glue. It’s easier to work with and great for vertical surfaces and lighter tiles like ceramic or glass mosaics in dry areas like a backsplash. Mastic is generally recommended for most kitchen backsplash DIY projects unless you’re using very heavy stone tile.
h4: How much material should I buy extra?
It’s wise to buy about 10% to 15% more material than your measured square footage. This extra is for cuts needed to fit around edges, outlets, and corners. It also covers any tiles that might break or if you need to replace one later.