Yes, you absolutely can spray paint kitchen cabinets! It’s a very popular way to give old, tired cabinets a fresh, smooth new look without the high cost of replacing them. Spraying often gives a smoother, more factory-like finish than brushing or rolling, making it a great choice for updating your kitchen on a budget. However, getting a beautiful, long-lasting result needs careful planning and execution.
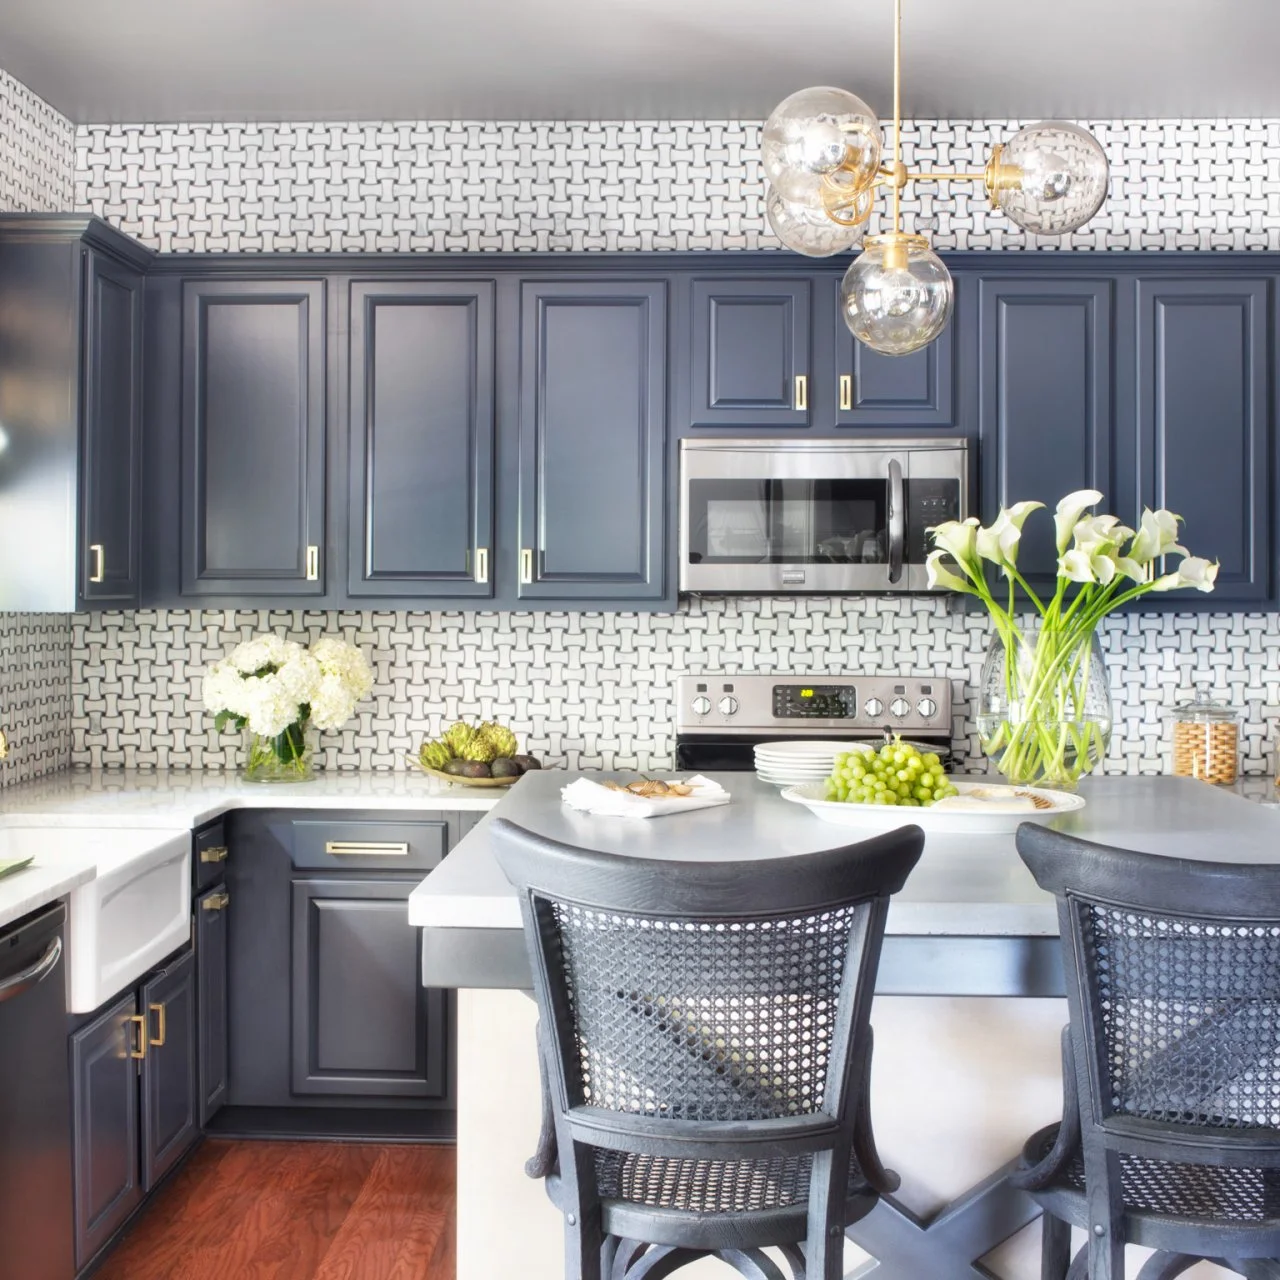
Image Source: hgtvhome.sndimg.com
Why Spray Painting Works Well
Painting kitchen cabinets makes a big difference. It changes the whole feel of your kitchen. Spray painting has a special benefit: it can give you a very smooth surface. When you brush paint on, you can sometimes see brush marks. Rolling can leave a slight texture. Spraying, done right, leaves no marks. It flows out into a flat, even layer. This smooth finish looks more professional, like new cabinets.
This method is good for many types of cabinets, from wood to laminate. It lets you update your kitchen with a modern color or just refresh the old one. It saves money compared to buying new cabinets. It’s a DIY project many people can do, but it does take work and patience.
Is Spraying the Right Choice for You?
Painting cabinets is a big job. Spraying can make it faster in some ways, but it needs more setup. Think about these things before you start your DIY spray painting cabinets project:
- Time: This project takes several days, maybe a week or more. You need time for prep, spraying multiple thin coats, and long drying times.
- Cost: You need tools like a sprayer (or cans), good quality paint, primer, sandpaper, cleaning supplies, and lots of drop cloths and tape. It’s cheaper than new cabinets, but not free.
- Skill: Spraying paint well takes practice. You need to learn how to move the sprayer evenly to avoid drips or thin spots.
- Space: You need a place to spray that is well-aired and protected from dust. A garage is good, or you can build a spray booth setup in your kitchen.
If you have the time, patience, and space, spraying can give you the best paint finish for cabinets.
How to Get Ready to Spray
Doing a great job of spraying cabinets starts with getting everything ready. How to prepare cabinets for spraying is the most important step. Skipping steps here means you won’t like the final result.
Taking Cabinets Apart
First, empty all cabinets and drawers. Take off all the doors and drawer fronts. It helps to label them as you take them off so you know where they go back. Use numbers or letters inside a hinge hole or on the back. Also, take off all hinges, handles, and knobs. Keep them safe in bags.
Cleaning Everything Well
Kitchen cabinets get grease and dirt on them. This must come off completely. If not, the paint won’t stick. Use a strong cleaner made for cabinets, like a degreaser. Wash everything well. Rinse with clean water. Let everything dry fully before moving on.
Fixing Imperfections
Look closely at your doors, drawers, and cabinet frames. Fill any holes (from old hardware) or dents with wood filler. Let the filler dry hard. Then, sand it smooth so it’s flat with the wood around it.
Sanding for Better Grip
Sanding cabinets before painting is very important. Even if your cabinets have a finish already, you need to sand. Sanding roughs up the surface just a little. This gives the primer something to grip onto tightly.
- If cabinets are painted or sealed: Use medium-grit sandpaper (like 150-grit) to dull the shiny surface. You don’t need to sand down to bare wood, just make the surface rough.
- If cabinets are bare wood: Start with medium-grit sandpaper (like 120 or 150) and finish with fine-grit (like 220) for a smooth feel.
- If cabinets are laminate or slick: You still need to sand lightly to rough up the surface. Use a fine-grit paper (like 220).
After sanding, clean up all the dust. Use a vacuum with a brush tool first. Then use a damp cloth or a tack cloth. Dust is the enemy of a smooth paint finish. Make sure all surfaces are dust-free.
Making Your Space Ready to Spray
Spray paint goes everywhere. You must protect everything you don’t want painted. This means covering floors, walls, appliances, and countertops completely.
Covering Surfaces
Use plastic sheeting or old sheets to cover floors and walls. Use painter’s tape to hold the plastic tight along edges. Mask off appliances like your stove and fridge completely. Cover countertops with paper or plastic. Tape it down well. Make sure no part of your kitchen is open to the spray mist.
Setting Up a Spray Area
You need a well-aired place to spray the doors and drawers. This could be outside if the weather is good, or in a garage or basement. Set up sawhorses or build a simple frame to place the doors on so you can spray all edges easily. Cover the walls and floor of your spray area too. Good air flow is a must to stay safe and help the paint dry. Use fans to pull air away from you and out a window or door. Wear a good mask made for paint fumes.
Putting Primer On
Priming kitchen cabinets is a step you should not skip. Primer does several important jobs:
- Blocking Stains: It stops stains, like grease or wood knots, from showing through the new paint color.
- Helping Paint Stick: It gives the paint a surface to bond to. This is extra important if you sanded down to bare wood or if your cabinets are laminate.
- Making Color Solid: It helps the final paint color look true and even. This is very helpful if you are going from dark cabinets to light cabinets.
Choosing the Right Primer
Not all primers are the same. For cabinets, you want a primer that sticks well and seals the surface.
- Shellac-based primers: These are very good at blocking stains and odors. They dry fast. They work well on wood, including knotty wood. They need alcohol to clean up.
- Oil-based primers: These stick very well and seal surfaces nicely. They block stains and are very durable. They need mineral spirits to clean up. They can have strong smells.
- Water-based (latex or acrylic) primers: Some are made to stick well to tough surfaces (“bonding primers”). They are easier to clean up with water. They dry faster and have less smell. Make sure to get one made for cabinets or tough jobs.
Choose a primer that works with the type of paint you plan to use. Most primers work with different types of paint, but check the label.
Spraying Primer
Just like the paint, spray the primer in thin, even coats. Follow the primer maker’s directions for how to spray it (how much to thin, if needed) and how long to let it dry. You might need two coats of primer, especially if you’re covering a dark color or if the wood is very different in places (like sanded wood and filler). Sand lightly between primer coats with fine-grit sandpaper (like 320-grit) for a super smooth base. Clean off all dust before the next coat.
Picking the Best Paint
The type of paint you use makes a big difference in how your cabinets look and how long they last. You need a durable paint that can handle being cleaned often and stand up to bumps and scuffs.
Types of Paint for Cabinets
- Alkyd (Oil-based) Paints: These are very durable and level out nicely, meaning brush or spray marks disappear for a smooth finish. They take longer to dry, have strong smells, and need mineral spirits for clean-up. They can also turn yellowish over time, especially in colors other than white.
- Acrylic Latex Paints: These are water-based, clean up with water, dry faster, and have less smell. They are easier to use for DIYers. Modern acrylic paints are much more durable than older latex paints. Look for high-quality acrylic enamels or cabinet-specific paints. They are flexible and resist cracking.
- Waterborne Alkyds: These combine features of oil and water-based paints. They clean up with water but level out like oil paint for a smooth finish. They are quite durable and a popular choice for cabinets now.
- Lacquers: These are fast-drying, very hard finishes often used on new cabinets. They give a very smooth, professional finish. However, they have strong fumes and need special spray equipment and safety gear. They are often best left to pros.
For most DIY spray painting cabinets projects, a good quality acrylic enamel or a waterborne alkyd is a great choice.
Cabinet Paint Finish Options
The finish (or sheen) affects the look and how easy it is to clean.
* Flat or Matte: No shine. Hides flaws but is hard to clean and not durable enough for cabinets. Avoid.
* Eggshell or Satin: A little bit of shine. Easier to clean than flat. Good for walls but might not be durable enough for cabinets.
* Semi-Gloss: Has a noticeable shine. Very durable and easy to clean. This is a very common finish for cabinets and trim.
* High-Gloss: Very shiny. Most durable and easiest to clean. Shows every flaw in the surface. Needs perfect preparation.
Most people choose satin or semi-gloss for cabinet paint finish because they offer a good balance of look and durability.
Choosing Your Spray Tool
You have a few ways to spray paint cabinets. The right tool depends on your budget, the size of the job, and the finish you want.
Aerosol Cans
Aerosol spray paint cabinets is an option for small projects or touch-ups. It’s easy because the paint and sprayer are in one can. However:
* It’s expensive for a whole kitchen.
* The spray pattern is often not very fine, making it harder to get a smooth, even coat without drips.
* The paint options are limited.
* You create a lot of waste (empty cans).
For a full set of kitchen cabinets, aerosol cans are usually not the best choice for getting a smooth, durable finish.
Paint Sprayers
For the best results on a full kitchen, a dedicated paint sprayer is the way to go. There are two main types for home use:
- HVLP Sprayers (High Volume, Low Pressure): These are often considered the Best paint sprayer for cabinets for DIYers.
- They use a high volume of air but push the paint out at low pressure.
- This gives you more control over the spray.
- It creates less “overspray” (paint mist floating in the air), which means less wasted paint and less mess outside your spray area.
- They give a very fine finish, close to a factory look.
- They work well with thinner paints and finishes like lacquers, but many can spray thicker latex paints too (though you might need to thin the paint).
- They can be guns connected to a turbine or a compressor. Turbine models are common for cabinet painting.
- Airless Sprayers: These push paint out at very high pressure without using air.
- They spray paint quickly and cover large areas fast.
- They create more overspray than HVLP.
- They are great for walls, fences, and decks.
- While you can spray cabinets with them, it’s harder to get the fine, controlled finish of an HVLP. You need special tips for fine finish work.
For cabinet painting, an HVLP sprayer is generally recommended for its ability to give a smooth, fine finish with less mess. Look for models specifically designed for fine finishing work.
Spraying the Paint
Now for the fun part – spraying! This is where practice pays off. If you can, practice on some scrap wood or cardboard first to get the feel of your sprayer and the paint.
Setting Up Your Sprayer
Follow the sprayer’s instructions. You may need to thin your paint slightly. This helps it flow better through the sprayer and atomize into a fine mist. Use the recommended thinning agent for your type of paint (water for latex/waterborne, mineral spirits for oil). Test the spray on scrap material to check the pattern and flow. Adjust settings on the sprayer until you get a nice, even oval shape spray pattern without drips or spitting.
Spraying Technique
Spray in thin, even coats. It is much better to spray two or three thin coats than one thick coat. A thick coat will sag and drip.
- Keep the spray gun a set distance from the surface (check your sprayer’s manual, often 6-10 inches).
- Move the gun smoothly across the surface.
- Overlap each pass by about half the width of the spray pattern.
- Keep the gun moving while you spray. Don’t stop over the surface. Start spraying just before you hit the edge of the piece and stop spraying just after you leave the edge.
- Keep your wrist straight and move your whole arm. Don’t just flick your wrist, as this will make the spray pattern uneven.
- Spray edges first, then the flat surfaces.
Spraying Kitchen Cabinet Doors
Spraying kitchen cabinet doors is key to getting a smooth look. Set up your doors so you can spray one side evenly. Let it dry enough to flip (usually “tacky” but not wet) if needed, or wait for full dry time before doing the other side. Many people spray one side, let it dry completely, then spray the other side. Make sure you can access all edges. A simple way is to screw points (like cabinet door drying racks or just long screws into the top and bottom edges) into the back of the doors so they rest on sawhorses or a drying rack. This lifts them up and lets you spray the edges cleanly.
Multiple Coats
Apply the first coat thinly. Let it dry according to the paint maker’s directions. This might take a few hours or longer. Once dry, you can lightly sand any small bumps or imperfections with very fine sandpaper (like 320 or 400-grit). Clean off all dust. Then apply the second thin coat. You will likely need at least two coats of paint, maybe three, for full color coverage and durability.
Letting Paint Dry and Harden
Drying and curing are different.
* Drying: The paint feels dry to the touch. You can handle it carefully.
* Curing: The paint hardens fully. It reaches its maximum durability. This takes much longer than drying, often several days or even weeks depending on the paint type, humidity, and temperature.
Follow the paint label for drying times between coats. Wait the full recommended curing time before putting the doors and drawers back and putting items inside cabinets. Putting things back too soon can damage the new paint finish. Durability of spray painted cabinets depends a lot on letting the paint cure fully.
Putting Cabinets Back
Once the paint is fully cured, you can put the hardware back on. Reattach hinges, knobs, and pulls. Then, carefully re-hang the doors and put the drawers back in. Use your labels to make sure everything goes in the right place. Adjust hinges so doors hang straight.
How Durable are Spray Painted Cabinets?
The Durability of spray painted cabinets depends on several factors:
- Preparation: If you cleaned, sanded, and primed well, the paint will stick better and last longer. Poor prep is the main reason for paint failure.
- Materials: Using good quality primer and paint made for cabinets makes a big difference. Cheap paint won’t hold up.
- Spraying Technique: Applying thin, even coats that build up properly creates a stronger film than one thick coat.
- Curing Time: Allowing the paint to cure fully before using the cabinets is crucial for hardness and resistance to scratches and dents.
- Usage: How you use and clean your cabinets also matters. Be gentle when cleaning, avoid harsh chemicals, and try not to bang things against them.
With proper preparation, good materials, and correct application and curing, spray painted cabinets can be very durable and last for many years. They should stand up to regular kitchen use and cleaning.
Comparing Paint Methods
| Method | Finish Look | Speed (Painting) | Prep/Setup | Skill Needed | Durability | Cost (Tool) |
|---|---|---|---|---|---|---|
| Brushing/Rolling | Can show texture | Slow | Less | Low | Good | Low |
| Aerosol Spray | Variable (often less smooth) | Medium | Medium | Low | Varies | Low (Can) |
| HVLP Sprayer | Very Smooth | Fast | High | Medium | Excellent* | Medium-High |
| Airless Sprayer | Smooth (with fine tip) | Very Fast | High | Medium-High | Excellent* | High |
*Durability also depends heavily on paint quality and preparation.
Spray painting, especially with an HVLP sprayer, offers the best chance for a smooth, factory-like cabinet paint finish. While it takes more setup and a little practice, many people feel the results are worth the extra effort compared to brushing or rolling.
More Tips for a Great Job
- Ventilation: Always work in a place with good air flow. Wear a mask or respirator made for paint fumes. Spray paint is not good to breathe.
- Temperature & Humidity: Spraying and drying conditions matter. Follow paint instructions. Avoid spraying in very hot, cold, or humid conditions.
- Cleanliness: Keep your work area clean and free of dust, bugs, or pet hair. These will stick to wet paint.
- Lighting: Use good lighting when spraying. This helps you see where the paint is going and spot drips or thin areas.
- Thinning: If you thin your paint, follow the paint or sprayer maker’s guides exactly. Thinning too much makes the paint too thin and weak. Not thinning enough can clog the sprayer or make the finish rough.
- Clean Sprayer: Clean your paint sprayer right after you finish spraying. Paint drying inside a sprayer can ruin it. Follow the maker’s cleaning steps carefully.
FAQ: Questions People Ask
Q: Can I spray paint over already painted cabinets?
A: Yes, you can. But you still need to clean them very well, lightly sand the old paint to rough it up, and prime them before you spray the new paint.
Q: Do I have to take the cabinet doors off to spray paint them?
A: Yes, taking the doors off makes the job much easier and gives you a much better result. You can lay them flat or hang them to spray all sides and edges evenly without drips or missing spots. Spraying kitchen cabinet doors while they are still on is very hard and messy.
Q: What is the Best paint sprayer for cabinets for a homeowner?
A: An HVLP (High Volume, Low Pressure) sprayer is usually recommended for DIYers painting cabinets. It gives a smooth finish and has less overspray than an airless sprayer.
Q: How long does spray painted cabinets last?
A: If prepared and painted correctly with good quality materials and allowed to cure fully, spray painted cabinets can last 5-10 years or even longer, depending on how much wear and tear they get. Proper prep and using durable types of paint for cabinets are key.
Q: Can I use aerosol spray paint cabinets?
A: You can for small touch-ups or maybe a very small cabinet, but for a whole kitchen, it’s expensive, creates a lot of waste, and it’s much harder to get a smooth, even finish compared to using a dedicated paint sprayer.
Q: Is Priming kitchen cabinets really necessary?
A: Yes, priming is almost always necessary for kitchen cabinets. It helps the paint stick, blocks stains, and makes the final color look better. It’s a critical part of how to prepare cabinets for spraying for a long-lasting finish.
Q: How important is Sanding cabinets before painting?
A: Sanding is very important. It creates a surface that the primer and paint can grip onto. Without sanding (even just lightly), the new paint might not stick well and could peel or scratch off easily.
Q: What kind of Cabinet paint finish should I use?
A: Satin or semi-gloss are the most common choices for cabinets. They offer good durability and are easy to clean. Semi-gloss is a bit shinier and usually considered more durable.
Finishing Up
Spray painting your kitchen cabinets is a great way to update your kitchen. It takes effort, especially getting everything clean and ready. How to prepare cabinets for spraying is the most important part. Sanding cabinets before painting, Priming kitchen cabinets well, choosing the right Types of paint for cabinets, and using the Best paint sprayer for cabinets will help you get a beautiful, smooth Cabinet paint finish. Spraying kitchen cabinet doors correctly and letting the paint cure fully are key to getting good Durability of spray painted cabinets. While it’s a big DIY spray painting cabinets project, the result of fresh, smooth cabinets can be very rewarding. Take your time, do the prep right, and you can have cabinets that look brand new.