Can you change kitchen countertops without replacing them? Yes, you absolutely can change kitchen countertops without replacing them. You do not need to tear out your old counters to give your kitchen a fresh, new look. There are many easy ways to update them. These methods save you money and time compared to putting in new ones. You can use special paints, coatings, or thin new layers to cover the old surface. This is great for a DIY countertop update. It is a smart way to get a cheap countertop makeover.
Instead of buying new counters, you can refresh the ones you have. This is much easier. It costs less money too. It is perfect if your counters work fine but look old or scratched. Let’s look at how you can make your kitchen look new without big, costly work.
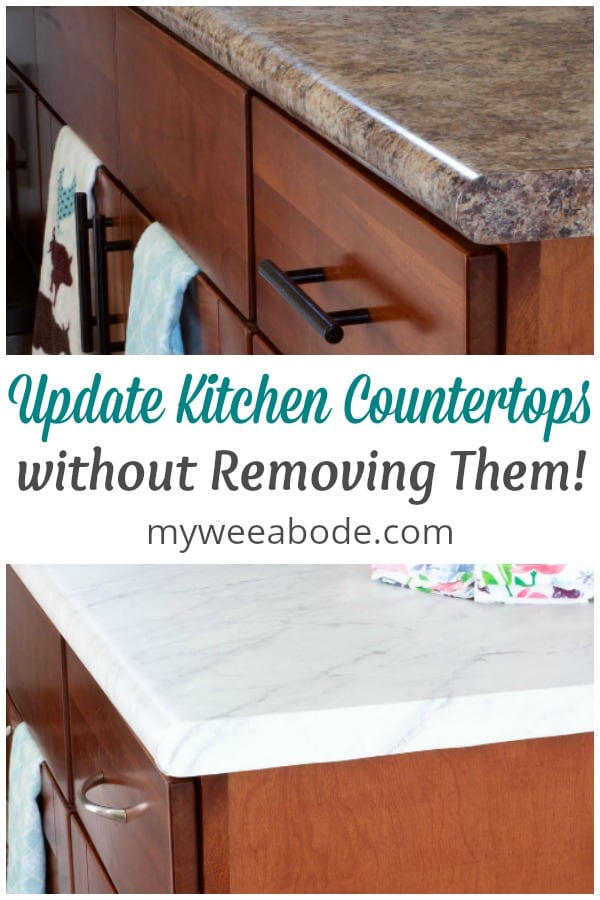
Image Source: myweeabode.com
Different Ways to Update Your Counters
You have a few good choices to update your counters without taking them out. Each way gives your counters a new surface or color. They all cost less than new counters.
- Refinishing or Resurfacing: You fix the top layer. You might sand it smooth. Then you put on a new strong finish. This can make the old counter look like new again.
- Painting: You use special paints to change the color. You can even make them look like stone. This is a popular DIY countertop update.
- Overlays: You put a new, thin layer on top of the old counter. This new layer becomes the new surface.
Let’s talk more about each choice.
Refinishing and Resurfacing Counters
What does it mean to refinish or resurface? These words are often used together. They mean giving your old counter a fresh start on its top layer. Refinishing kitchen countertops usually means cleaning, repairing small spots, and applying a new clear or colored coating. Resurfacing kitchen countertops can sometimes mean adding a slightly thicker new layer. Both make the counter look better and protect it.
This works well if your counters have small scratches or look dull. It can make laminate, tile, or even cultured marble counters look nice again.
How You Refinish Your Counters
Doing this takes careful steps.
- Step 1: Get Ready. Clear everything off the counters. Clean them very well. Use a strong cleaner to remove all dirt and grease. If there are holes or deep scratches, fill them. Use a special filler for this.
- Step 2: Make the Surface Rough. Lightly sand the counter surface. This helps the new finish stick well. Do not sand too hard. Just rough up the top shine. Wipe away all the dust.
- Step 3: Tape Off Areas. Use painter’s tape. Cover the walls, sink, and stove edges next to the counter. You do not want the finish to get on them. Put down drop cloths on the floor.
- Step 4: Put on the Primer. A primer helps the new finish stick better. Paint a thin coat of primer on the counter. Let it dry fully. Follow the can’s directions for drying time.
- Step 5: Apply the New Finish. Use a special countertop refinishing kit. Follow the kit’s steps exactly. You might use a roller or brush. Put on thin, even coats. You might need two or three coats. Let each coat dry before adding the next.
- Step 6: Let it Dry and Harden. This is very important. The finish needs time to get hard and strong. This can take several days. Do not use the counter at all during this time. Do not put anything on it.
- Step 7: Take Off Tape. Once the counter is fully dry and hard, carefully remove the painter’s tape.
Refinishing makes the counter look new. It fixes small problems. It is much cheaper than buying new counters. But, the new finish might not be as tough as the original counter material. It could scratch or chip over time if not careful.
Painting Your Kitchen Counters
Painting is one of the most popular ways for a DIY countertop update. It is a very cheap countertop makeover. You can use special paint kits designed for counters. You can change the color completely. You can even make them look like stone! This is called faux granite countertop paint.
Painting works best on laminate or tile counters. Stone counters like granite or quartz are usually not painted. The paint needs a surface it can stick to well.
Making Counters Look Like Stone with Paint
You can get kits that help you make your old counters look like granite or other stone. This uses a special painting method.
- Step 1: Prepare the Counter. Clean the counter very, very well. Fill any holes or cracks. Lightly sand the surface to help paint stick. Clean off all dust. Tape off everything you do not want painted.
- Step 2: Put on the Base Coat. This is the main color. It might be white, black, or another color. Paint a thin, even coat. Let it dry. You might need a second coat.
- Step 3: Add Stone Colors. This is the fun part. The kit comes with different colors of paint. You use sponges or special tools to dab or roll these colors onto the base coat. You build up layers of color. This creates the stone look. Look at pictures of real stone to help you.
- Step 4: Put on the Top Coat. This is a clear, strong finish. It protects the paint and makes the counter tough. It also gives it a smooth feel. Apply several thin coats of this clear top coat. Let each coat dry fully. This top coat makes it durable for kitchen use.
- Step 5: Cure Time. The painted surface needs time to get very hard. This can take a week or even longer. Do not use the counter until the paint and top coat are fully cured.
Painting kitchen countertops is affordable. It lets you pick almost any color or style. The downside is that paint might not be as durable as stone or laminate. It can chip or scratch, especially around sink edges or corners. But with care, it can last a few years.
Overlay Options for Counters
An overlay is like putting a thin, new countertop right on top of your old one. This gives you a completely new surface and look. Countertop overlay options are a bit more work than just painting, but they give a very durable result.
Two common overlay types for DIY are epoxy and thin concrete.
Using Epoxy for a New Look
An Epoxy countertop kit lets you pour a thick, strong coating over your old counter. Epoxy is a type of plastic that becomes very hard when it dries. You can add colors or glitter to make it look like stone, marble, or a solid shiny color.
This works on almost any counter material: laminate, tile, wood, concrete. It covers the old surface completely.
How to Use an Epoxy Kit
Using epoxy needs care and good mixing.
- Step 1: Prepare the Area. Clear the counter completely. Clean it very well. Fill any large gaps or damage. Sand the surface lightly. Tape off cabinets, the floor, and anything nearby. Epoxy drips are hard to clean. Use plastic sheeting to protect everything. Make sure the counter is perfectly level.
- Step 2: Mix the Epoxy. Epoxy comes in two parts. You must mix them together exactly as the kit says. Use a drill with a mixer tool. Mix for the right amount of time. Do not mix too fast, or you will get bubbles.
- Step 3: Pour the Epoxy. Start pouring the mixed epoxy onto the counter. It will spread out. Use a tool (like a notched trowel or spreader) to help move it to the edges. Make sure the edges get covered too. Some kits have special methods for edges.
- Step 4: Create the Look. If you want a design (like marble swirls or stone veins), add colors or metallic powders to the epoxy now. Use a stick or brush to swirl them into the wet epoxy. Be quick, epoxy starts to thicken.
- Step 5: Remove Bubbles. Use a small torch or heat gun waved quickly over the surface. This makes bubbles pop. Keep doing this for a while as bubbles rise. Do not hold the heat in one place too long.
- Step 6: Let it Cure. Epoxy needs several days, sometimes a week or more, to become fully hard and strong. Read the kit’s directions for cure time. Do not touch or use the counter until it is fully cured.
An epoxy overlay gives a very smooth, shiny, and durable surface. It is strong against heat and scratches. It can look amazing. But, it needs careful mixing and handling. If you make a mistake, it is hard to fix. It also has strong fumes, so you need good airflow.
Putting on a Concrete Overlay
A Concrete countertop overlay lets you put a thin layer of special concrete mix over your old counter. This gives a modern, industrial look. It can be colored and sealed.
This works well on laminate, tile, or even old concrete counters. It gives a thick, real surface feel.
How to Apply a Concrete Overlay
Using concrete requires mixing and spreading skills.
- Step 1: Get Ready. Clean the counter very well. Fill any holes or cracks. You might need to add a mesh on top of tile to give the concrete something to stick to. Build a small edge or dam around the counter if you want square edges. Tape and cover nearby areas.
- Step 2: Mix the Concrete. Use a special concrete mix for counters. Follow the instructions exactly. Mix it until it is like thick mud or peanut butter. Do not make it too watery.
- Step 3: Spread the Concrete. Scoop the mixed concrete onto the counter. Use a trowel to spread it out evenly. Push it down to make it stick well. Make sure it is the thickness you want, usually 1/4 to 1/2 inch.
- Step 4: Smooth the Surface. Use a smooth trowel to make the top flat and smooth. You can make it very smooth or leave some texture. This takes practice. Do the edges too.
- Step 5: Let it Dry (Cure). Concrete needs time to dry and get hard. This is called curing. It can take several days. Keep it slightly damp during the first day by covering it lightly with plastic. This helps it cure stronger.
- Step 6: Sand and Finish. Once dry, sand the surface smooth. You might use different grits of sandpaper. Clean off all dust.
- Step 7: Seal the Concrete. Concrete is porous (it has tiny holes). You must seal it well to stop stains. Use a food-safe concrete sealer. Apply several thin coats. Let each coat dry.
A Concrete countertop overlay gives a solid, durable surface. It looks very modern. It can be stained different colors. The process takes practice to get smooth. Concrete can chip on edges if hit hard. It needs sealing often to prevent stains.
Updating Specific Countertop Types
Some methods work better for certain counters.
Updating Laminate Counters
Laminate is a common counter material. It is made of layers of plastic bonded to particleboard. Over time, laminate can get scratches, chips, or the edges might lift. It can also look old-fashioned.
All the methods we talked about work well to update laminate countertops:
- Painting: This is the easiest and cheapest way. Special kits for laminate exist. You can paint it a solid color or use faux granite countertop paint.
- Refinishing: You can put a new clear coat or colored finish over the laminate. This repairs minor surface issues.
- Epoxy Overlay: Pouring epoxy is a great way to get a totally new, hard, and shiny surface over laminate. It covers the old laminate completely.
- Concrete Overlay: A thin concrete layer can stick well to prepared laminate. It gives a heavy, stone-like feel.
Choosing the best way depends on how much work you want to do. It also depends on the final look you want. Painting is simple. An epoxy or concrete overlay gives a much different, more permanent feel.
Comprehending the Costs
How much do these updates cost? They are all much less than buying and installing new counters.
- Painting: This is usually the cheapest. Kits cost maybe $50 to $200 for a typical kitchen.
- Refinishing: Similar to painting kits, maybe $100 to $300.
- Epoxy Overlay: Kits can cost $200 to $600 or more. The price depends on the size of your kitchen and the quality of the epoxy.
- Concrete Overlay: The concrete mix and sealer might cost $100 to $300.
Compare this to new laminate counters ($800 – $2,000+). Compare it to new stone counters ($2,000 – $5,000+). These updates are a true cheap countertop makeover.
Here is a simple look at the costs:
| Method | Estimated Cost (for a small to average kitchen) | Difficulty (DIY) | Durability (Compared to New) |
|---|---|---|---|
| Painting | $50 – $200 | Easy | Fair (Can chip) |
| Refinishing | $100 – $300 | Easy to Medium | Good (Can scratch) |
| Epoxy Overlay | $200 – $600+ | Medium to Hard | Very Good (Hard, Heat OK) |
| Concrete Overlay | $100 – $300 | Medium to Hard | Good (Needs Sealing, Can Chip) |
Note: These are just rough cost estimates. Prices vary by brand, store, and kitchen size.
These DIY methods save a lot on labor costs. Paying someone to install new counters adds a lot to the price. Doing it yourself makes it a very cheap countertop makeover.
Choosing the Right Method
Which method is best for you? Think about these things:
- Your Skill Level: Are you good at DIY projects? Painting is easier for beginners. Epoxy and concrete need more careful work and practice.
- Your Budget: Painting is the least expensive. Overlays cost more for materials but are still cheaper than new counters.
- How Long You Want It to Last: Epoxy and concrete overlays are usually more durable than paint or a simple refinish.
- The Look You Want: Do you want a new color? A stone look? A modern concrete look? Each method offers different styles.
- Your Current Countertop Material: Some methods work better or are easier on certain surfaces like update laminate countertops.
If you want a quick, affordable change, painting kitchen countertops or a simple refinish might be best. If you want a very different look and more durable surface, consider an Epoxy countertop kit or a Concrete countertop overlay.
Tips for a Successful Countertop Update
No matter which method you choose, some tips help you get a good result.
- Prepare Well: This is the most important step. Clean the counter perfectly. Fill all holes. Sand the surface lightly if needed. Tape off everything carefully. Take your time with prep.
- Read the Kit Directions: Follow the steps in the kit exactly. Do not skip steps. Pay attention to mix times and drying times.
- Work in a Clean Area: Dust and hair can get in paint or epoxy. Clean the room before you start.
- Ensure Good Airflow: Use fans and open windows. Paints and epoxies can have strong smells. Wear a mask if needed.
- Use Thin Coats: It is better to apply several thin coats than one thick coat. Thin coats dry better and are stronger.
- Be Patient with Drying/Curing: Do not rush this part. The counter is not ready to use until it is fully dry and hard. Using it too soon will ruin your work.
- Wear Gloves: This protects your hands.
- Have the Right Tools: Make sure you have everything you need before you start. Brushes, rollers, trays, sander, tape, drop cloths.
Following these tips will help your DIY countertop update look good and last longer.
Caring for Your Updated Counters
Once your counters are done and fully cured, you need to care for them.
- Clean Gently: Use mild soap and water. Avoid harsh cleaners or abrasive scrubbers. These can damage the new surface.
- Use Cutting Boards: Never cut directly on the counter. Always use a cutting board. Knives will scratch paint, refinishes, epoxy, and even sealed concrete.
- Use Trivets for Hot Pans: Hot pots and pans can damage many surfaces, including these updates. Always use a hot pad or trivet. Epoxy is heat-resistant, but it is still a good idea to be careful.
- Wipe Up Spills: Wipe up spills quickly, especially colorful liquids like juice or wine. Some finishes and concrete can stain if spills sit too long.
Good care will help your cheap countertop makeover stay looking great for as long as possible.
Bringing It All Together
You do not need to spend a lot of money to change your kitchen counters. Refinishing kitchen countertops, Resurfacing kitchen countertops, Painting kitchen countertops, and using Countertop overlay options are all great ways. You can do a DIY countertop update with an Epoxy countertop kit or by applying a Concrete countertop overlay. These work well to update laminate countertops or other surfaces.
Whether you use faux granite countertop paint or put down a whole new layer, you can give your kitchen a fresh, modern look. These affordable tips make it possible to transform your kitchen without the mess and cost of full replacement. It just takes some preparation, the right materials, and patience. Your cheap countertop makeover can make a big difference!
Frequently Asked Questions (FAQ)
Q: How long do these updated countertops last?
A: How long they last depends on the method used, how well it was applied, and how you care for them. Paint or refinishing might last 2-5 years. Epoxy or concrete overlays can last 5-10 years or even longer with good care. New counters might last 20+ years, so these updates are a temporary fix, but a good one.
Q: Can I put hot pots on my painted or epoxy counter?
A: You should always use a hot pad or trivet. While epoxy is quite heat resistant, direct high heat can still harm it over time. Painted or refinished surfaces are much more sensitive to heat and can melt or blister easily. Concrete is very heat resistant but the sealer might not be. Always protect your surfaces from heat.
Q: Are these methods food-safe?
A: Most countertop refinishing, painting, and epoxy kits are designed for kitchen use once fully cured. The top coat or sealer is made to be safe. Always check the specific product you buy to make sure it is marked as food-safe for counters after it is completely dry and hardened. Concrete needs a food-safe sealer.
Q: Can I do this myself if I have never done DIY before?
A: Painting or a simple refinish are good projects for beginners. Epoxy and concrete overlays are harder and require more steps and precision. If you are new to DIY, start with a smaller project or choose paint. Watch many videos and read all instructions before starting.
Q: What if I make a mistake?
A: Mistakes can be hard to fix, especially with epoxy or concrete. If you are painting or refinishing, you might be able to sand and repaint a small area. For overlays, a mistake might mean you have to sand the whole thing down and start over. This is why preparation and following steps carefully are so important.
Q: Will these updates cover deep scratches or burns?
A: Small scratches and minor damage can be filled before updating. Deep scratches, burns, or chips might still show through paint or a thin refinish. An epoxy or concrete overlay is better at covering more serious damage because they create a thicker new surface. Fill any damage first no matter what method you choose.
Q: Can I use regular wall paint on my counters?
A: No. You must use special paints and finishes made for countertops. These products are much tougher. They resist scratches, heat, and moisture better than wall paint. Using the wrong paint will not last in a kitchen setting.
Q: How long does the whole process take?
A: The actual work time for painting or applying an overlay might only be one or two days. But, the preparation takes time, and the drying or curing time is long. You might need to wait several days or even a week or two before you can use your counters normally. Plan for your kitchen to be partly unusable during this time.