Can you paint kitchen cabinets without sanding? Yes, you often can paint kitchen cabinets without sanding. It needs the right steps and the right products. Sanding helps paint stick, but new paints and primers can do the same job. So, you don’t always need to sand anymore.
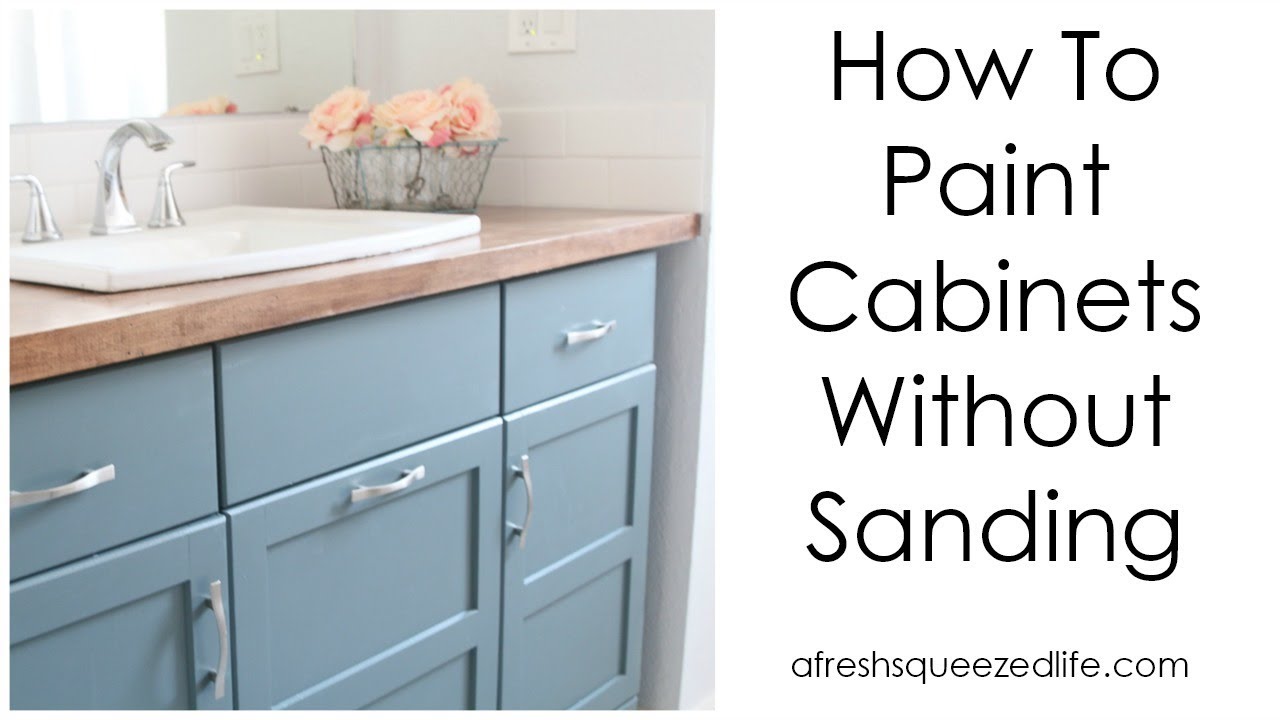
Image Source: i.ytimg.com
Why People Used to Sand Cabinets
Think about painting something smooth, like glass. Paint slides right off. Sanding makes a surface rough. It makes tiny scratches. These scratches give the paint something to grab onto. This helps the paint stick. It makes the finish last longer.
Old paints needed this rough surface. If you did not sand, the paint would peel or chip easily. Sanding was a must for a good paint job that would last.
Why You Might Skip Sanding Now
Sanding is hard work. It makes a big mess. There is dust everywhere. You need to cover everything. It takes a lot of time.
Lucky for us, paint has gotten better. There are new kinds of paints and primers. These new products can stick to smooth surfaces much better. They do not always need those tiny scratches from sanding.
Using these new products means you can paint cabinets without sanding. It saves time. It saves effort. It cuts down on dust.
The Steps to Paint Cabinets Without Sanding
Painting without sanding is not just about grabbing any paint. It needs careful steps. You must clean the cabinets very well. You must use a special primer. The primer helps the paint stick.
Here are the main steps:
- Take the doors off.
- Take off the handles and hinges.
- Clean the cabinets really well.
- Use a special primer that sticks well.
- Paint with good paint.
- Put everything back together.
We will look at each step closely.
Taking Apart Your Cabinets
This is the first step. It makes painting much easier.
Remove Doors and Drawers
You need to take the doors off the cabinet frames. You also need to take the drawer fronts off the drawer boxes.
- Open a door.
- Use a screwdriver to take off the screws on the hinges.
- Hold the door so it does not fall.
- Put the screws in a small bag. Write on the bag where the screws came from. This helps you put them back right.
- Do this for all doors.
- For drawers, find how the front attaches. It might be screws from the inside. Take off the front piece.
- Keep screws and parts for each drawer front separate.
Take Off Hardware
Handles, knobs, pulls, and hinges must come off.
- Use a screwdriver.
- Take off all hardware from doors, drawers, and frames.
- Put the hardware in bags. Write notes about where they go. You can keep the hardware or get new ones.
Taking cabinets apart lets you paint them flat. Painting flat helps stop drips. It makes the paint job smoother. It also lets you paint the cabinet frames easier.
Very Important Cleaning
Cleaning is key when you paint cabinets without sanding. It is the most important step. If cabinets are not clean, the paint will not stick. It will peel fast.
Kitchen cabinets get greasy. They get dirty from food and hands. This grease and dirt must go away.
Using a Good Degreaser
You need a strong cleaner. This cleaner is called a degreaser for cabinet painting. It cuts through grease and grime.
- Get a good
degreaser for cabinet painting. There are many kinds at the store. Read the label. Make sure it is safe for your cabinets. - Mix the degreaser if the bottle says so.
- Wear rubber gloves to protect your hands.
- Use a clean rag or sponge.
- Wipe down every part of the cabinets. Wipe the doors, the drawer fronts, and the cabinet frames.
- Work in small areas.
- Scrub areas that are very dirty or greasy. Pay extra attention to spots near the stove or sink.
- The goal is to get all grease and dirt off.
Rinsing the Cabinets
After using the degreaser for cabinet painting, you must rinse well.
- Get a new, clean rag.
- Make the rag damp with clean water.
- Wipe down all the surfaces you just cleaned. This removes the cleaner.
- Change the water often so it stays clean.
- Wipe with a dry rag after rinsing. Or let the cabinets air dry completely.
Make sure the cabinets are totally dry before the next step. Any cleaner left can stop the primer from sticking. Any water left can cause problems later.
Why Cleaning Matters So Much
Think about trying to put a sticker on an oily plate. It will not stick well, right? Paint is like that. If there is grease, dirt, or old food on the cabinet, the primer and paint cannot stick to the wood or laminate.
So, cleaning is not just wiping things down. It is removing everything that can stop paint from sticking. This is the most vital part of how to prep cabinets for painting without sanding. It sets up the whole project for success.
Using a Bonding Primer
After cleaning and drying, the next key step is using a primer. When you do not sand, you need a special type of primer. This is called a bonding primer for cabinets.
What is a Bonding Primer?
A bonding primer for cabinets is made to stick to smooth surfaces. It sticks to slick old finishes. It sticks to laminate or other hard-to-paint things. It makes a surface that paint can hold onto.
It creates a sticky layer between the cabinet material and your new paint. This sticky layer is much better at holding paint than the original cabinet surface might be.
Why You Need This Primer
If you just put paint on a smooth cabinet surface (without sanding or the right primer), the paint will likely scratch off. It will chip easily. It will not last long.
A bonding primer for cabinets locks onto the surface. Then, your chosen paint locks onto the primer. It is like a strong handshake between the cabinet, the primer, and the paint. This makes a tough finish. This is why finding the best primer for cabinets no sanding is so important.
Picking the Best Primer
Look for a primer that says “bonding” or “high-adhesion.” Read the label. It should say it works on slick surfaces, old finishes, or things like laminate.
- Water-based bonding primers: These are easy to use and clean up. They dry fast. Many good ones work well on cabinets.
- Oil-based bonding primers: These often stick very well, especially to very slick or old finishes. They can have strong smells. They take longer to dry. You need mineral spirits to clean brushes.
- Shellac-based primers: These stick extremely well. They also block stains and smells. They dry very fast. They have strong fumes. You need alcohol to clean brushes.
For painting laminate cabinets no sanding, a shellac or a good oil-based bonding primer is often a great choice. A high-quality water-based bonding primer can also work. Always check the product label.
The best primer for cabinets no sanding depends on your cabinets and what you are comfortable using. But it must be a bonding primer.
How to Prime
Apply the primer evenly.
- Use a good brush for corners and edges.
- Use a small foam roller for flat parts. This helps make the surface smooth.
- Apply thin coats. Thick coats can drip or take too long to dry.
- Cover the doors, drawer fronts, and cabinet frames.
- Let the primer dry fully. Check the product label for drying time. It might need a few hours or even overnight.
- Some projects might need a second coat of primer. This is extra protection. It makes the base color more solid. Let the first coat dry before putting on the second.
Once the primer is dry, you have a surface ready for paint. The how to prep cabinets for painting without sanding process is almost done.
Using a “Liquid Sander”
Some people talk about using a liquid sander for cabinets. What is this?
A liquid sander for cabinets is a chemical product. It usually contains solvents. When you wipe it on a surface, it slightly softens or etches the old finish. This makes the surface a little bit sticky or rough. It helps paint stick.
Is it Needed?
If you use a high-quality bonding primer for cabinets, a liquid sander for cabinets is often not needed. The bonding primer does the job of sticking to the smooth surface.
Some people use liquid sander for cabinets instead of primer. This is risky. A liquid sander for cabinets does not create a solid layer like a primer. It does not block stains or provide a uniform base color. It only changes the top layer of the old finish a little.
The most reliable way to paint cabinets without sanding is using a good cleaner followed by a strong bonding primer for cabinets. Using a liquid sander for cabinets alone is usually not enough for a lasting cabinet finish.
It is better to use a bonding primer for cabinets after cleaning. This is the safer bet for a strong paint job.
Choosing the Right Paint
After priming, you can paint. The type of paint matters for durability. Kitchen cabinets need a tough finish. They get used a lot. They get bumped. They get wet sometimes.
Types of No Sand Cabinet Paint
Not all paints are good for cabinets. Look for paints made for cabinets, trim, or furniture. These paints are harder and more durable when dry.
- Acrylic Enamel or Urethane Modified Acrylic: These are water-based. They dry hard. They are easy to clean. They do not yellow over time like some oil paints. Many modern
no sand cabinet paintproducts are this type. They are easy to use. Clean up is with water. - Alkyd (Oil-based): These are very durable. They dry to a hard finish. But they take longer to dry. They smell strong. They can yellow over time. Clean up needs mineral spirits.
- Hybrid Paints: These are newer. They are water-based but have some oil properties. They offer good hardness and durability. They clean up with water. They are a popular choice for
no sand cabinet paint. - Chalk Paint: You can use
chalk paint cabinets no sanding. Chalk paint sticks to almost anything with very little prep, sometimes just cleaning. It gives a matte finish. You must seal it with a wax or a strong topcoat to protect it in a kitchen. Chalk paint is easier to apply but needs that extra sealing step for kitchen use. It gives a specific look, often slightly rustic.
For most people wanting a smooth, modern finish, an acrylic enamel or a hybrid paint designed for cabinets is a great choice for no sand cabinet paint. If you like the look of chalk paint and want simple prep, chalk paint cabinets no sanding is an option, but remember the topcoat is needed.
Picking the Finish (Sheen)
The finish is how shiny the paint is.
- Matte/Flat: No shine. Hides flaws well. Harder to clean. Not best for busy cabinets.
- Eggshell/Satin: A little shine. More durable than flat. Easier to clean. A good choice for cabinets.
- Semi-Gloss: Shiny. Very durable. Easy to clean. Shows flaws more. A common choice for cabinets and trim.
- Gloss: Very shiny. Most durable and easiest to clean. Shows all flaws. Can look very modern or intense.
Satin or Semi-Gloss are usually the best choices for no sand cabinet paint. They balance looks, durability, and cleanability.
Painting Your Cabinets
You have prepped and primed. Now it is time to paint.
Set Up a Painting Area
Find a clean, dust-free place to paint the doors and drawer fronts. Lay down drop cloths or plastic. Use sawhorses or blocks to raise the doors so you can paint the edges easily.
Apply Thin Coats
Thin coats of paint are better than one thick coat. Thick coats can drip. They take too long to dry. They might not cure (harden) right.
- Use a good quality brush for details and edges.
- Use a small foam roller or a paint sprayer for flat areas. A roller or sprayer helps get a smooth finish.
- Apply paint in smooth, even strokes.
- Paint the back of the doors/drawer fronts first. Let them dry completely. Then paint the fronts.
- Paint the cabinet frames that are still on the wall. Use a brush and roller.
- Let the first coat dry fully. Check the paint can for dry times. This is often several hours.
- Apply a second coat. Most cabinets need two coats of paint for full color and durability.
- Some dark colors over light primer might need three coats.
Letting Paint Cure
Paint dries to the touch quickly. But it takes much longer to cure. Curing is when the paint gets its full hardness and durability. For cabinets, this can take several days or even a few weeks.
- Let the doors and frames dry until they are not sticky at all before putting them back. This might take 24-72 hours depending on the paint and humidity.
- Be gentle with your newly painted cabinets for the first few weeks. The paint is still getting hard. Avoid scraping or hitting them hard.
Following these steps is key to paint cabinet doors without sanding and the frames for a good finish.
Special Case: Painting Laminate Cabinets
Painting laminate cabinets no sanding is possible. Laminate is a very smooth, plastic-like surface. Paint does not stick to it easily.
This is where cleaning and the right primer are super important.
Prep for Laminate
- Clean the laminate surfaces very, very well. Use a strong degreaser. Rinse completely. Let dry fully. This removes any oils or dirt the laminate has picked up.
- You must use a primer made for slick surfaces like laminate. Shellac-based primers or certain oil-based or water-based bonding primers are best. Read the primer can carefully! It should say it works on laminate or similar smooth surfaces. Using the
best primer for cabinets no sandingthat works on laminate is critical. - Apply one or two thin coats of the bonding primer. Let it dry and cure as the can says. This primer coat is what the paint will stick to.
- Once the primer is ready, you can paint using a durable cabinet paint (like acrylic enamel or hybrid). Apply thin coats.
Painting laminate cabinets no sanding relies 100% on the bonding primer doing its job. Do not skip or rush the cleaning or priming steps on laminate.
Pros and Cons of Skipping Sanding
There are good and bad points to painting cabinets without sanding.
Pros (Good Points):
- Saves Time: Not sanding cuts hours off the project.
- Less Mess: No sanding means no fine dust everywhere. Clean up is easier.
- Easier Work: Sanding is hard physical work. Skipping it makes the job easier.
- Less Gear: You do not need sandpaper, a sander, or heavy dust masks for sanding.
Cons (Bad Points):
- Relies on Prep: If you do not clean perfectly or use the wrong primer, the paint will fail. The prep must be perfect.
How to prep cabinets for painting without sandingis harder to get right than just sanding. - Hides Fewer Flaws: Sanding can help smooth out small bumps or runs in the old finish. Skipping sanding means the new paint might show these old flaws more.
- Might Not Be as Durable: Even with good primers, a perfectly sanded surface might still hold paint slightly better in some cases. However, modern products make the difference very small if prep is good.
For many home painters, the time and mess saved make painting without sanding worth it. You just need to be very careful with cleaning and priming.
Summary of How to Prep Cabinets for Painting Without Sanding
Let’s put the key prep steps together:
- Remove everything: Doors, drawers, hardware. Label and store parts safely.
- Deep Clean: Use a strong
degreaser for cabinet painting. Clean every surface inside and out. - Rinse Well: Wipe down all cleaned areas with clean water to remove all cleaner residue.
- Dry Completely: Ensure cabinets are bone dry before moving on.
- Apply Bonding Primer: Use a high-quality
bonding primer for cabinets. Apply 1-2 thin coats. Let dry fully between coats and before painting. Make sure it is thebest primer for cabinets no sandingfor your specific cabinet material (wood, laminate, etc.).
These steps replace the sanding part. Doing them right is vital for success. This is the true how to prep cabinets for painting without sanding.
Using No Sand Cabinet Paint Options
Once the primer is dry, you are ready for your chosen no sand cabinet paint.
- Acrylic Enamel/Hybrid: These are popular because they are tough and clean up with water. Apply thin coats with a roller or sprayer for smoothness.
- Chalk Paint: If using
chalk paint cabinets no sanding, apply it usually in 1-2 coats. It dries fast. You then must add a protective topcoat (wax or polycrylic/polyurethane) suitable for kitchen use. Wax needs redoing sometimes. A clear polycrylic is often more durable for a kitchen work surface.
Tips for a Great Finish
- Work in a clean area: Dust is the enemy of a smooth paint finish. Clean the room or area first.
- Use quality tools: Good brushes and rollers make a difference. Foam rollers help avoid brush marks.
- Read Product Labels: Every paint and primer is different. Read the instructions on the cans for drying times and how to apply.
- Ventilation: Make sure you have fresh air, especially with oil-based or shellac primers.
- Take Your Time: Do not rush cleaning, drying, or curing times. Patience pays off.
- Store Safely: Keep painted doors and drawers safe while they cure. Do not lean them against things that can scratch them.
Can You Paint Just Paint Cabinet Doors Without Sanding?
Yes, you can choose to only paint the doors and drawer fronts without sanding, while maybe treating the frames differently. However, the process for the doors and frames is the same if you are skipping sanding on both. You would still clean, prime with a bonding primer, and paint the doors and drawer fronts just as described. The phrase paint cabinet doors without sanding refers to this specific process for the removable parts. It is the same prep and paint method as for the fixed frames.
Bringing It All Together
Painting kitchen cabinets can give your kitchen a fresh new look without the high cost of new cabinets. Painting without sanding makes this project easier for many people.
It is not magic, though. You trade the hard work of sanding for the careful work of cleaning and priming.
Using the right products – a strong degreaser for cabinet painting, a good bonding primer for cabinets (the best primer for cabinets no sanding you can find for your surface), and a durable no sand cabinet paint (like acrylic enamel or hybrid, or chalk paint cabinets no sanding with a topcoat) – is key.
Following the steps for how to prep cabinets for painting without sanding exactly will help you get a result that looks great and lasts. Clean cabinets before painting no sanding is the critical first barrier to success. The primer is the second.
It takes time and care, but painting your cabinets without sanding is a real and doable way to update your kitchen yourself.
Frequently Asked Questions
Q: How long does the whole process take without sanding?
A: It still takes time. Taking things apart, cleaning (which takes a while if done right), waiting for the degreaser to work, rinsing, drying, priming (plus drying time, maybe two coats), painting (two thin coats, plus drying time), and letting the paint cure enough to put things back. It could take 3-7 days from start to finish depending on how fast products dry and how long you let the paint cure before reassembly.
Q: What happens if I skip cleaning?
A: The paint will not stick well. It will chip, peel, or scratch off easily, especially in a kitchen. The grease and dirt stop the primer and paint from bonding to the cabinet surface. Cleaning is a step you absolutely cannot skip.
Q: Can I just use paint with primer built-in?
A: Paints that say “paint and primer in one” are usually not strong enough to stick to very smooth, un-sanded surfaces like cabinets. You really need a dedicated bonding primer when you skip sanding. Use a separate, high-quality bonding primer for cabinets.
Q: Do I need a topcoat over the paint?
A: If you use an acrylic enamel, hybrid, or alkyd paint designed for cabinets, you usually do not need a separate topcoat for protection. The paint itself is durable. If you use chalk paint cabinets no sanding, you must use a protective topcoat like wax or polycrylic because chalk paint alone is not durable enough for a kitchen.
Q: How can I get a smooth finish without sanding?
A: Good cleaning and priming create a smooth base. Use a high-quality foam roller designed for smooth surfaces. Apply thin coats of paint. For the smoothest finish, some people use a paint sprayer, but this needs practice and special equipment. Letting each coat dry completely before applying the next also helps.