Knowing just how long to knead bread dough in a KitchenAid mixer is a common question for bakers. Generally, most bread dough needs between 8 and 12 minutes of kneading on a low speed in a KitchenAid mixer. However, this time can change a lot depending on the type of dough and other factors. This guide will help you find the sweet spot for perfect dough every time you use your mixer.
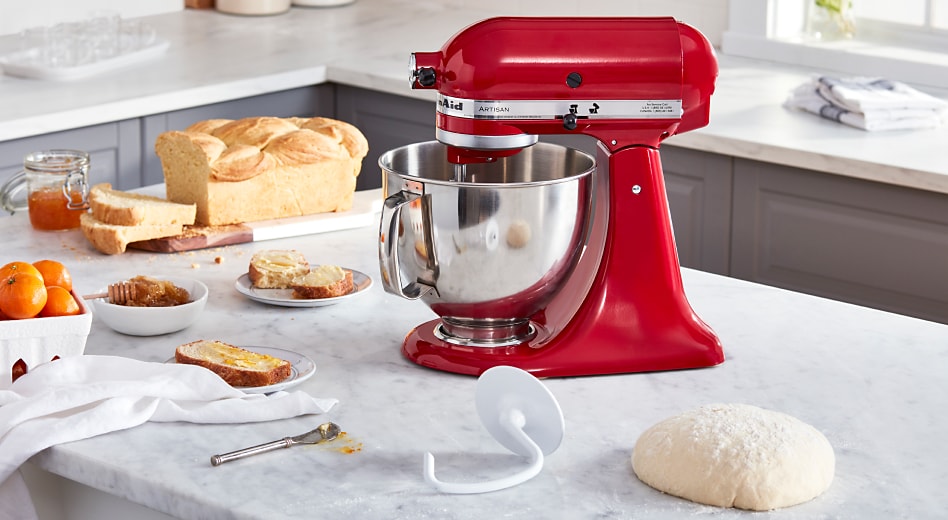
Image Source: www.kitchenaid.com
The Core Job of Kneading Dough
Why do we knead dough anyway? Kneading dough does a key job: it builds gluten. Flour has two main proteins, gliadin and glutenin. When you add water and mix, these proteins link up. Kneading makes these links stronger and more flexible. Think of gluten like tiny elastic bands. As you knead, these bands form a network. This network traps the gas made by yeast. This trapped gas makes the bread rise and gives it a good texture. Without enough kneading, the dough won’t stretch well. The bread will be flat and dense.
Your KitchenAid Mixer’s Helping Hand
Using a KitchenAid mixer with the right tool makes kneading easier. The metal attachment with a hook shape is called the KitchenAid dough hook. This hook pulls, stretches, and folds the dough. It mimics the action of kneading by hand. Using the dough hook takes the hard work out of kneading large or sticky doughs. It also provides steady movement, which helps build gluten well.
Finding the Right Kneading Time
Pinpointing the exact KitchenAid dough hook kneading time isn’t a one-size-fits-all answer. It depends on many things. But we can give you a general idea.
- Lean Doughs (like crusty bread): These are simple doughs with flour, water, yeast, and salt. They usually need about 8-10 minutes in the mixer.
- Enriched Doughs (like brioche or challah): These doughs have added fat like butter, eggs, or milk. These extra ingredients can slow down gluten building. Kneading time enriched dough KitchenAid can be longer. It might take 10-12 minutes or even more.
- Whole Wheat or Rye Doughs: These flours have less gluten or bits that cut the gluten strands. They often need less kneading time. Over-kneading them can make them tough. Maybe 6-8 minutes is enough.
- Sourdough Doughs: These doughs use a sourdough starter instead of commercial yeast. The starter’s acid can affect gluten. Kneading time sourdough KitchenAid is often shorter than commercial yeast doughs. Maybe 5-8 minutes is plenty, often with stretches and folds done later by hand.
These times are starting points. You must watch the dough, not just the clock.
Grasping What Affects Kneading Time
Several things change how long your dough needs to knead in the mixer.
- Flour Type: Different flours have different protein levels. More protein means more gluten can form. Bread flour has high protein. All-purpose flour has less. Whole wheat has outer layers that can hinder gluten. Stronger flour might need a little more kneading time.
- Hydration Level: This is how much water is in the dough compared to the flour. Wetter doughs are sticky. They build gluten faster but can be harder to tell when done. Dry doughs take longer to knead.
- Mixer Model and Bowl Size: Bigger mixers can handle larger batches. The mixer’s power matters. A strong motor keeps a steady speed even with stiff dough.
- Room Temperature: Warm dough kneads faster than cold dough. The friction from the mixer also warms the dough.
How to Tell If Dough Is Kneaded Enough
Looking at the dough is the best way to know when it’s done. Don’t rely only on time. There are key signs to look for.
Signs the Dough is Ready
- Smoothness: Under-kneaded dough looks rough and bumpy. Properly kneaded dough looks smooth on the surface.
- Elasticity: If you gently poke the dough, the indent should spring back slowly. If it stays poked, it needs more kneading (under kneading dough KitchenAid).
- Pulling Away from the Bowl: As the gluten development KitchenAid mixer happens, the dough will often gather around the dough hook. It should pull away from the sides and bottom of the mixing bowl. Some sticky doughs might not clean the bowl fully, but most will pull away well.
- The Windowpane Test: This is a classic way to check for enough gluten.
Deciphering the Windowpane Test
The windowpane test bread dough KitchenAid is simple. It shows if the gluten network is strong enough.
- Take a small piece of dough, about the size of a golf ball.
- Gently stretch it with your fingers. Start from the center and work outwards.
- Stretch it thinly.
- If the dough stretches very thin without tearing, forming a sort of see-through ‘windowpane’, it is likely kneaded enough. You should be able to see light through it.
- If it tears easily before becoming thin, the gluten is not strong enough. It needs more kneading.
- Note: Some doughs, like whole wheat or very wet doughs, might not pass the windowpane test perfectly. Use it with the other signs.
Choosing the Best Speed
What is the best speed to knead dough KitchenAid? KitchenAid recommends using Speed 2 for kneading bread dough. This is a slow speed. It gives the dough hook time to work the dough well. It also prevents overheating the motor and the dough.
- Using a higher speed might seem faster, but it can actually harm the dough. High speed creates too much friction. This makes the dough hot. It can also overwork the gluten too quickly.
- Using Speed 1 is usually too slow. It doesn’t provide enough action to develop gluten well.
So, for most bread dough, stick to KitchenAid mixer speed for bread dough at Speed 2.
What Happens If Dough Is Not Kneaded Right
Kneading is a balance. Too little or too much can ruin your bread.
Issue 1: Under Kneading
Under kneading dough KitchenAid happens when you stop too soon.
- Signs: The dough looks rough and shaggy. It feels dense and heavy. It tears easily when you try to stretch it. It doesn’t pass the windowpane test.
- Result in Bread: The bread will be dense and have a tight, uneven crumb (the inside texture). It won’t rise well because the gluten network isn’t strong enough to hold the gas.
Issue 2: Over Kneading
Can you knead dough too much in a KitchenAid mixer? Yes, you can get over kneading dough in KitchenAid mixer. Mixers are powerful. They can overwork dough faster than kneading by hand.
- Signs: The dough becomes very sticky and slack (limp). It might even start to look wet or greasy. It resists stretching; if you try to stretch it, it just breaks apart instead of pulling into a windowpane. The gluten network breaks down. The dough may feel warm.
- Result in Bread: Over-kneaded dough can result in bread that is tough and lacks good structure. The gluten network is damaged. It can’t trap gas well or hold its shape. The bread might shrink back during baking.
Finding the sweet spot is key!
Kneading Different Dough Types in the Mixer
Let’s look closer at specific dough types and their mixer needs.
Interpreting Lean Dough Kneading
Simple lean doughs (flour, water, yeast, salt) are a good place to start.
- Process: Add ingredients to the bowl. Mix on Speed 1 until a rough dough forms (about 30 seconds to 1 minute). Scrape down the sides if needed. Increase speed to 2.
- Time: Knead on Speed 2 for about 8-10 minutes.
- Check: Watch the dough. It should pull away from the sides. It should look smooth. Test a piece for elasticity and try the windowpane test. If it stretches thin and doesn’t tear, it’s likely ready.
Deciphering Enriched Dough Kneading
These doughs have butter, eggs, sugar, or milk. These additions make the dough rich and soft.
- Process: Often, you mix the main wet and dry parts first. Then, you might add softened butter piece by piece while mixing. This takes time for the butter to mix in fully.
- Time: Kneading time enriched dough KitchenAid is typically longer. Expect 10-15 minutes or even 20 minutes for very rich doughs. The fat needs time to work into the gluten structure.
- Check: The dough will be soft and smooth. It might still be a bit sticky because of the fat and sugar. It should pass the windowpane test, although it might be softer and more delicate than lean dough. It should pull away from the sides of the bowl, often slapping the sides as it mixes.
Deciphering Sourdough Kneading
Sourdough doughs use a live starter. The acidity affects gluten.
- Process: Combine ingredients. Mix on Speed 1 briefly. Switch to Speed 2.
- Time: Kneading time sourdough KitchenAid is usually shorter. Aim for 5-8 minutes. The long fermentation period common in sourdough baking does a lot of gluten development on its own (autolyse and bulk fermentation with folds).
- Check: The dough might not look as perfectly smooth as commercial yeast dough after mixing. It should still pull away from the bowl and feel more elastic. You might get a partial windowpane test. Many sourdough bakers rely more on ‘stretch and folds’ during the bulk fermentation phase to finish building gluten.
Interpreting Whole Wheat and Other Grain Doughs
Whole wheat, rye, or doughs with lots of seeds act differently.
- Process: Mix ingredients on Speed 1, then Speed 2.
- Time: These doughs need less kneading in the mixer. 5-8 minutes is often enough. The bran in whole wheat can cut gluten strands. Rye flour has less gluten-forming proteins.
- Check: Don’t expect a perfect windowpane test. The dough will feel less elastic. Watch that it comes together and feels somewhat cohesive. Stop before it looks like it’s breaking down or getting too soft/sticky (signs of over-kneading these types).
Getting the Most from Your Mixer
Using your KitchenAid effectively for kneading involves a few tips.
- Don’t Overload: Check your mixer’s manual for the maximum amount of flour it can handle. Overloading the mixer strains the motor and won’t knead the dough well. For most standard tilt-head KitchenAids (4.5 or 5 quart), this is about 4-6 cups of flour. Larger bowl-lift models can handle more.
- Start Slow: Always start the mixer on Speed 1 to bring the ingredients together. This prevents flour from flying out and helps the dough hook grab everything.
- Watch the Dough: Don’t just set a timer and walk away. Stay near the mixer. Watch how the dough behaves. Does it pull away from the sides? Does it look smoother? This is more important than the clock.
- Check Temperature: If the dough gets too warm while kneading, it can affect the yeast and gluten. If your mixer gets very hot or the dough feels very warm, you might be kneading too fast or too long. Using cool water can help.
- Listen to Your Mixer: If the mixer sounds like it’s struggling or straining, especially with a stiff dough, it might be overloaded or the dough is too stiff.
Potential Problems and Fixes
Sometimes kneading in the mixer doesn’t go as planned.
- Dough Rides Up the Hook: The dough might climb the dough hook and go into the mixer head. This often means the dough is too stiff or you have too much dough in the bowl. Add a tiny bit more water if it’s too stiff. Reduce the batch size next time. Stop the mixer and push the dough back down.
- Dough Sticks to the Bowl: If the dough is very wet, it might stick to the bottom or sides of the bowl even after kneading. This is normal for high-hydration doughs. You might need to finish with a few hand stretches and folds on a lightly wet surface. Don’t add too much flour to fix sticky dough, or your bread will be dry.
- Mixer Shakes A Lot: This can happen with stiff doughs, especially in tilt-head models. It usually means the dough is very firm or the batch is large. Make sure the mixer head is locked down securely. It’s often best to stick to the recommended maximum flour amounts to avoid straining the mixer.
A Look at Gluten Building
Let’s look again at gluten development KitchenAid mixer. As the KitchenAid mixer speed for bread dough (Speed 2) works the dough with the dough hook, it helps those gliadin and glutenin proteins find each other. The pulling and stretching motion lines them up. They form strong, stretchy links. This creates the 3D network needed for good bread.
Think of it like building with LEGOs. The proteins are the bricks. Water helps them stick. Kneading helps you put them together into a solid, flexible structure.
Summary of Kneading Time Guidance
While watching the dough is key, here’s a table with starting points for kneading time in a KitchenAid mixer using the dough hook on Speed 2.
| Dough Type | Typical Kneading Time (Speed 2) | What to Look For | Windowpane Test |
|---|---|---|---|
| Lean (White Bread) | 8-10 minutes | Smooth, elastic, pulls away from sides | Should pass easily |
| Enriched (Brioche) | 10-15 minutes (or more) | Very smooth, soft, pulls away from sides, may slap bowl | Should pass (softly) |
| Whole Wheat/Grain | 5-8 minutes | Less smooth, may not pull away completely, feels cohesive, not sticky or stiff | May not pass fully |
| Sourdough | 5-8 minutes | Comes together, feels more elastic, may finish gluten later with folds | May pass partially |
| Very Wet Doughs (>75%) | 5-10 minutes | Very sticky, may not pull away fully, elastic but slack | Might be hard to test |
Remember these are just guides. Always check the dough itself.
Making it Simple: The Feel of Done Dough
Forget the clock for a second. What does properly kneaded dough feel like?
- It should feel smooth and soft.
- It should feel alive and elastic. If you press it, it should slowly spring back.
- It shouldn’t feel sticky or wet (unless it’s a high-hydration dough).
- It shouldn’t feel stiff or hard to move.
- It shouldn’t feel limp or lifeless (over-kneaded).
Trust your hands and eyes more than the timer. The timer just gets you close.
The Next Step: Resting
Once your dough is perfectly kneaded, the work isn’t done. It needs to rest. This first rest is called bulk fermentation or the first rise. During this time, the yeast makes gas, and the gluten relaxes. The dough will grow in size. This rest is just as important as the kneading.
Wrapping It Up
Kneading bread dough in a KitchenAid mixer saves time and effort. The key is knowing how long to let the KitchenAid dough hook kneading time go on. Don’t just follow a recipe’s time exactly. Use the time as a starting point. Pay close attention to how the dough looks and feels. Look for smoothness, elasticity, and how it pulls away from the bowl. Learn to use the windowpane test bread dough KitchenAid.
Watch out for the signs of over kneading dough in KitchenAid mixer (sticky, breaks apart) and under kneading dough KitchenAid (rough, tears easily). Stick to KitchenAid mixer speed for bread dough, which is usually Speed 2. Remember that different doughs like sourdough (kneading time sourdough KitchenAid) or enriched dough (kneading time enriched dough KitchenAid) have different needs. By paying attention, you’ll get perfectly kneaded dough. This leads to light, airy, and delicious homemade bread every time.
Frequently Asked Questions
h4: Can I use my KitchenAid mixer for all types of bread dough?
Yes, your KitchenAid mixer with the dough hook can knead most bread doughs. This includes simple white bread, whole wheat, enriched doughs like brioche, and even pizza dough or bagel dough. Just be sure not to make a batch too large for your mixer’s capacity.
h4: My dough climbs up the dough hook. What does that mean?
If the dough keeps crawling up the hook and into the mixer head, the dough might be too stiff (needs a little more water) or you might have too much dough in the bowl. Stop the mixer, push the dough down, and check the consistency. Add a tiny bit more water if needed, or reduce the batch size next time.
h4: My dough is very sticky even after kneading for a long time. Is it over-kneaded?
Maybe. Very sticky dough can be a sign of over-kneading, especially if it also feels limp and breaks when you try to stretch it. However, some doughs (high hydration ones with a lot of water) are naturally very sticky even when perfectly kneaded. For sticky dough, rely more on the dough’s elasticity and how it pulls away from the bowl (even if it doesn’t clean it totally) rather than expecting it to be non-sticky.
h4: How do I know if my dough is under-kneaded?
Signs of under-kneaded dough include a rough, shaggy surface. It feels dense and heavy. When you try to stretch a piece, it tears very easily without forming a thin window.
h4: Is it better to knead by hand or in a KitchenAid mixer?
A KitchenAid mixer with a dough hook is much faster and easier than hand kneading, especially for larger or stickier doughs. It provides consistent movement for developing gluten (gluten development KitchenAid mixer). Hand kneading gives you a better feel for the dough, but takes more effort and time to reach the same level of gluten development. Both methods can give great results. The mixer is usually more convenient.
h4: Can I double a bread recipe in my KitchenAid mixer?
Check your mixer’s manual first. Most standard tilt-head KitchenAid mixers can handle dough made with up to 4-6 cups of flour. Larger bowl-lift models can handle more (e.g., 8-14 cups of flour depending on the model). Do not exceed the recommended maximum flour weight or total dough weight for your specific mixer model. Too much dough can strain the motor and not knead the dough well.