Image Source: i.ytimg.com
How To Paint Kitchen Cabinets With A Sprayer – Guide
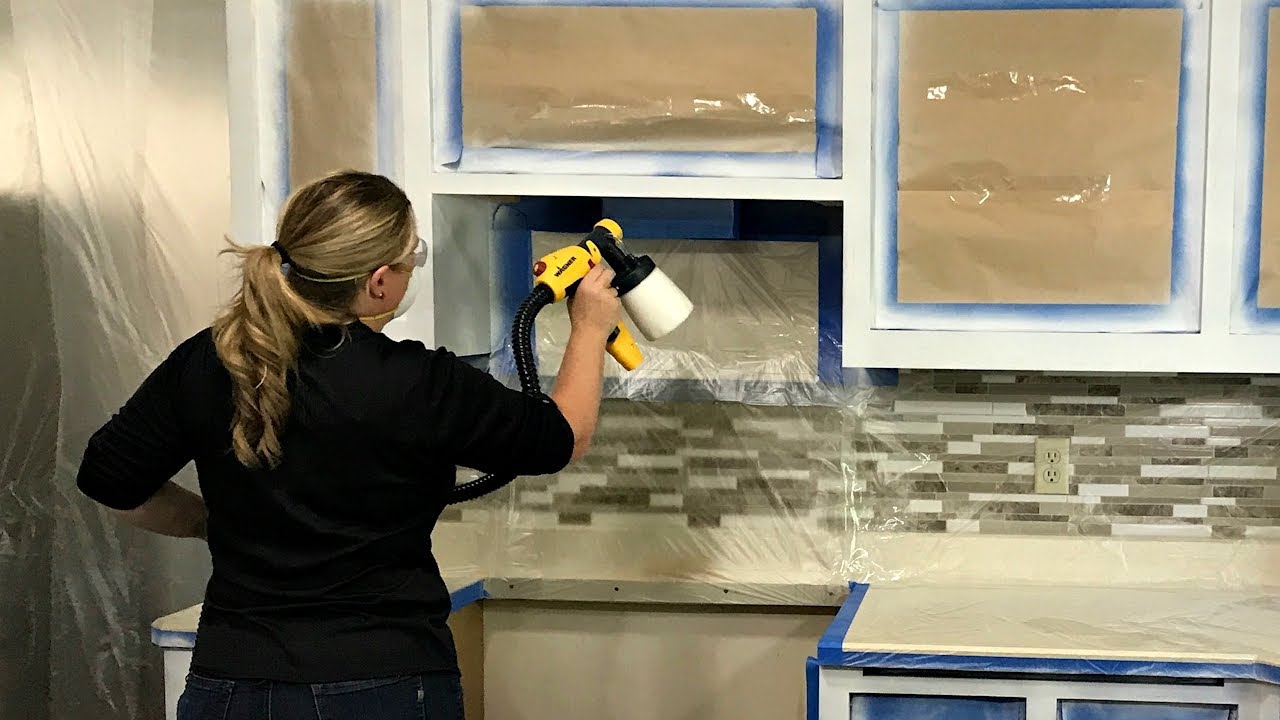
Painting kitchen cabinets is a big job. Many people want a smooth, factory-like finish. Using a paint sprayer is a great way to get that smooth look. It gives a much nicer finish than brushes or rollers. People often ask, “how to remove cabinet doors for painting?” You must take off all cabinet doors and drawer fronts first. This lets you paint all parts separately and get into corners easily. Taking them off is the first step in preparing cabinets for spraying.
Why Use a Sprayer for Cabinets?
Using a sprayer has big benefits for cabinet painting. It helps you get a very smooth finish. Brushes and rollers can leave lines or texture. A sprayer puts the paint on evenly. This gives a pro look. It can also be faster once you learn how to use it. Getting achieving a smooth cabinet finish is much easier with a sprayer.
Picking the Right Sprayer
There are different kinds of paint sprayers. For cabinets, an HVLP sprayer is often best. HVLP stands for High Volume, Low Pressure. This type of sprayer uses a lot of air at low pressure. This makes less overspray. Less overspray means less mess. It also means more paint goes on the cabinet. This makes HVLP cabinet painting popular for fine work like cabinets. Other sprayers, like airless, can be too powerful for cabinets unless you use a fine finish tip. For the smoothest finish with less hassle, many pros choose HVLP.
Materials and Tools You Will Need
Painting cabinets needs more than just paint and a sprayer. You need supplies for every step.
* For Taking Apart: Screwdriver (manual or power), markers, small bags or containers.
* For Cleaning: Degreaser cleaner, rags or sponges, bucket of water.
* For Sanding: Sandpaper (different grits like 120, 180, 220), sanding sponges, possibly an orbital sander.
* For Repairing: Wood filler or putty, scraper or putty knife.
* For Covering Up (Masking): Painter’s tape (different widths), plastic sheeting or drop cloths, masking paper.
* For Spraying Prep: Respirator mask (very important!), safety glasses, gloves, spray shelter or setup area, saw horses or stands for drying.
* For Priming and Painting: Cabinet primer before spraying (shellac, oil-based, or water-based bonding), best paint for spray painting cabinets (acrylic, alkyd enamel, or hybrid), stirring sticks, paint strainer bags, thinner (if needed, check paint can), cleaning supplies for sprayer (check sprayer manual).
* For Cleanup: Rags, cleaning solution for paint (water for latex, mineral spirits for oil, specific cleaner for shellac).
Step-by-Step Guide to Spray Painting Your Cabinets
Here is a full spray painting cabinets tutorial. Follow these steps carefully for the best results.
Step 1: Get Ready – Empty the Cabinets
First, take everything out of your cabinets. All dishes, food, pots, pans, etc. Make sure cabinets are completely empty. This makes it easier to work.
Step 2: Take Doors and Drawers Off
This is a key part of preparing cabinets for spraying. You must remove all doors and drawer fronts. Use a screwdriver to take off hinges from the cabinet frame. Keep hinges and screws safe. Put them in bags. Label the bags. You can use numbers or letters. For example, “Upper Left Door 1” or “UL1”. Write the same number or letter inside the door frame where the hinge was attached and on the cabinet box opening. This makes putting them back much easier. Also, remove all knobs, pulls, and hardware from doors and drawers. Put these in labeled bags too. Knowing how to remove cabinet doors for painting properly saves huge headaches later.
Step 3: Clean Everything Well
Kitchen cabinets get greasy and dirty. Paint will not stick to grease or grime. Clean all surfaces you plan to paint. This includes the cabinet frames (the boxes fixed to the wall), doors, and drawer fronts. Use a strong degreaser cleaner. Mix it with water following the product steps. Wash every part. Use rags or sponges. Get into corners and edges. Rinse with clean water. Let everything dry fully. A clean surface is a must for paint to stick.
Step 4: Repair and Fill
Look for any holes, dents, or cracks. Fill small holes (like old hardware holes you won’t reuse) with wood filler. For bigger dents, you might need more filler. Let the filler dry. It needs to be completely hard. This is often hours. Check the product steps for drying time.
Step 5: Sanding Time
Sanding is super important. It helps the primer and paint stick. It also makes the surface smooth. You must do sanding kitchen cabinets before painting. If your cabinets have a shiny finish, sand enough to make the surface dull. This is called scuff sanding. It helps paint grip the old finish.
If there are repairs, sand the dried filler until it is smooth and level with the wood around it.
Start with sandpaper around 120 or 150 grit for rougher spots or if you need to remove more finish. Then sand everything with a finer grit, like 180 or 220. You want the surface smooth to the touch. Don’t sand through the wood or veneer. Just make the surface dull and smooth.
Sand all parts: cabinet frames, doors, and drawer fronts. After sanding, remove all dust. Use a vacuum with a brush attachment. Then wipe everything down with a tack cloth. Tack cloths pick up fine dust bits. Make sure there is zero dust left. Dust will cause bumps in your paint finish.
Step 6: Cover and Protect (Masking)
Spray painting creates paint mist (overspray). It goes everywhere if you don’t cover things. Protect everything you don’t want painted. Use painter’s tape to cover edges that meet walls, ceilings, or floors. Cover inside of cabinets if you are only painting the outside. Cover appliances, countertops, backsplashes, and floors with plastic sheeting or drop cloths. Tape the plastic or paper down well with painter’s tape. Seal all edges. Cover windows. Cover lights. Cover vents. Make a paint booth area if possible, maybe in a garage or spare room. This keeps dust away and controls overspray. Good masking is key to an easy cleanup. This is part of preparing cabinets for spraying well.
Step 7: Set Up Your Spray Area and Gear
You need a place to spray and a place for doors and drawers to dry flat. Sawhorses or special drying racks work well. Make sure the area is well-lit and has good airflow. But avoid windy spots that blow dust around. Put down drop cloths. Set up your sprayer. Read the sprayer manual.
Wear your safety gear. A good respirator mask is vital to avoid breathing paint fumes and mist. Wear safety glasses to protect your eyes. Wear gloves to keep paint off your skin.
Step 8: Prime Everything
Applying a good primer is a critical step. It helps the paint stick, covers the old color, and blocks stains. Using a cabinet primer before spraying is highly recommended. Don’t skip primer!
- Choosing Primer:
- Shellac-based primers: These dry fast and block stains (like knot bleed) very well. They stick to almost anything. You clean your sprayer with denatured alcohol. They smell strong.
- Oil-based primers: These also stick well and block stains. They dry slower than shellac but faster than some water-based types. You clean your sprayer with mineral spirits. They also smell strong.
- Water-based bonding primers: These are easier to use and clean up with water. They have less smell. Choose one made to stick to glossy surfaces or old finishes. They might not block stains as well as shellac or oil.
Pick a primer that works with your chosen paint type. Read the paint and primer labels.
- Applying Primer:
- Mix the primer well.
- If the primer is too thick for your sprayer, you might need to thin it. Check the primer can for thinning directions. Use the right thinner (water, mineral spirits, etc.). Strain the primer into the sprayer cup or paint pot.
- Adjust your paint sprayer settings for cabinets. Start with a medium flow rate. Test your spray pattern on a piece of cardboard. You want an even oval shape. No drips, no dry edges. Adjust the flow and fan pattern until you get a good spray.
- Hold the sprayer about 6-10 inches from the surface. Keep the sprayer moving at a steady speed. Overlap each pass by about half. Start spraying off the edge of the piece, move across, and stop spraying off the other edge. This avoids heavy spots at the start and end.
- Spray a thin, even coat on all surfaces: front and back of doors and drawers, and the cabinet frames.
- Let the primer dry completely. Check the can for cabinet paint drying time for the primer. This can be from 30 minutes to several hours.
Step 9: Sand the Primer
Yes, sand again! Primers often dry a little rough. Lightly sand the dried primer with very fine sandpaper, like 220 or 320 grit. The goal is just to smooth out any bumps or texture. Don’t sand through the primer. Just make it smooth to the touch. This step is key for achieving a smooth cabinet finish. After sanding, remove all dust again with a vacuum and tack cloth.
Step 10: Paint the First Color Coat
Now for the paint! Choosing the best paint for spray painting cabinets matters.
* Types of Paint:
* Acrylic Enamels (Water-based): These are easy to clean up, have less smell, and dry quickly. Look for high-quality cabinet or trim enamel. They are durable.
* Alkyd Enamels (Oil-based): These are very durable and give a hard, smooth finish. They level out nicely (brush strokes disappear). They have a strong smell and need mineral spirits for cleanup.
* Hybrid Enamels (Alkyd-modified Acrylic): These try to offer the best of both worlds – durability of oil-based with easier cleanup of water-based. Many people like these for cabinets.
Choose a paint made for cabinets or trim. These paints are harder and more durable than wall paint.
- Applying Paint:
- Mix the paint well.
- Check if the paint needs thinning for your sprayer. Cabinet paints are often thick. You will likely need to thin it following the paint can or sprayer manual. Strain the paint after thinning.
- Adjust your paint sprayer settings for cabinets again if needed. The paint might spray differently than the primer. Test on cardboard.
- Apply the first coat of paint using the same technique as the primer. Hold the sprayer steady. Overlap passes. Keep moving. Spray doors and drawers flat. Spray cabinet frames vertically.
- Spray thin, even coats. Don’t try to get full coverage in one coat. Thick coats can drip or sag.
- Let the paint dry fully. Check the can for cabinet paint drying time between coats. This is often several hours. It must be dry enough to handle without marking before the next coat.
Step 11: Apply Second Coat (and maybe Third)
Once the first coat is dry, check for any spots you missed or light areas. You will almost always need a second coat. For some colors or if you want extra durability, a third coat might be good.
- Applying More Coats:
- Lightly sand again with 220 or 320 grit if there are any dust bumps or rough spots. This is optional but helps achieve a smoother finish.
- Clean off all dust with a tack cloth.
- Apply the second coat using the same spray technique. Keep it thin and even.
- Let the second coat dry fully. Pay close attention to the cabinet paint drying time on the can. Drying times can be affected by temperature and humidity.
Step 12: Let Paint Cure (Important!)
Paint feels dry to the touch fairly quickly. But it takes much longer to become hard and durable. This is called curing. The cabinet paint drying time for curing is much longer than just drying between coats. It can take several days, even a week or more, for paint to fully cure. Read your paint can for the full cure time.
Wait as long as you can before putting doors and drawers back on. If you put them back too soon, the paint can scratch or stick. Let them cure flat if possible, for at least a few days.
Step 13: Put Everything Back
Once the paint is fully cured or very close to it, it’s time to put your kitchen back together. Use the labels you made earlier to match doors and drawers to their correct spots. Reattach hinges to the doors first. Then attach the doors back onto the cabinet frames. Put knobs and pulls back on. Be gentle! Don’t overtighten screws, especially if you used a power driver. Touch up any tiny nicks carefully with a small brush if needed.
Achieving a Smooth Cabinet Finish – Tips
Getting that perfect smooth finish takes practice and care.
* Prep is King: Don’t rush cleaning, repairing, and sanding. These steps are the base for a good finish.
* Thin Paint Right: Paint too thick will splatter and leave texture. Paint too thin will run and drip. Test on scrap wood or cardboard first.
* Sprayer Settings: Learn your sprayer. Adjust the fan pattern and flow rate. A wider fan is good for flat doors. A smaller fan is good for edges or cabinet frames. Use enough flow to get a wet edge, but not so much that it runs.
* Steady Hand: Keep the sprayer moving at a constant speed. Start and stop off the piece.
* Overlap: Overlap each spray pass by about half. This avoids stripes.
* Thin Coats: Multiple thin coats are always better than one thick coat.
* Watch for Drips: Keep an eye on edges and details where paint can pool and drip.
* Control the Air: Spray in a dust-free area. Control airflow so it doesn’t blow dust onto wet paint.
HVLP Cabinet Painting Specifics
Using an HVLP sprayer is ideal for cabinets.
* Less Overspray: This saves paint and makes cleanup easier.
* Fine Finish: The low pressure helps the paint lay down smoothly.
* Need Proper Setup: You need a good air compressor (if it’s an air-powered HVLP) or a good turbine (if it’s a turbine HVLP). Make sure the compressor can provide enough consistent air pressure and volume (CFM) for the sprayer. Turbines are often simpler and designed for this kind of work.
* Thinning is Key: HVLP sprayers often need paint thinned more than airless sprayers. Always test and adjust.
* Cleanliness: HVLP sprayers have smaller parts. Cleaning them thoroughly after each use is vital.
Cabinet Paint Drying Time Considerations
Understanding drying time is important.
* Dry to Touch: Paint feels dry. You can lightly touch it.
* Dry to Recoat: You can apply another coat. This is often a few hours.
* Dry to Handle: You can move the pieces carefully. This might be 24 hours or more.
* Cure Time: Paint is fully hardened and durable. This can be 7-30 days.
Humidity and temperature affect drying times. Cooler, humid air slows drying. Warmer, dry air speeds it up. Follow the paint can’s directions but know that times can change based on conditions. Waiting longer is usually safer than rushing.
Preparing Cabinets for Spraying – A Recap
Preparation is half the battle.
1. Empty cabinets.
2. Remove and label doors, drawers, and hardware (how to remove cabinet doors for painting).
3. Clean everything very well (degrease).
4. Repair dents/holes.
5. Sand properly to make surface dull and smooth (sanding kitchen cabinets before painting). Remove all dust.
6. Mask off all areas you don’t want painted. Create a spray area.
7. Gather all tools and supplies.
8. Put on safety gear.
These steps make sure the paint sticks well and looks great.
Common Problems and Fixes
- Drips or Sags: Paint is too thick, applied too heavily, or sprayer was held too close/moved too slowly.
- Fix: Let dry. Lightly sand smooth. Re-spray thin coat. Adjust paint thinning and spray technique.
- Rough, Bumpy Finish (Orange Peel): Paint too thick, not enough air pressure (HVLP) or wrong tip (airless), spraying too far away, not enough overlap.
- Fix: Let dry fully. Sand smooth. Re-spray with properly thinned paint and adjusted sprayer settings. Check paint sprayer settings for cabinets.
- Dust in Finish: Spray area not clean, poor masking, dust not removed after sanding.
- Fix: Let dry. Lightly sand out dust bumps. Clean all dust again. Re-spray in a cleaner area. Improve masking.
- Paint Not Sticking (Peeling/Chipping): Poor cleaning (grease left), no sanding (shiny surface), wrong primer for surface, cheap paint.
- Fix: This is harder. You might need to strip the paint back and start over with proper prep, primer before spraying, and paint.
Frequently Asked Questions (FAQ)
Q: How much does it cost to paint kitchen cabinets with a sprayer?
A: The cost varies. It depends on the size of your kitchen, the quality of paint and primer you buy, and if you need to buy a sprayer. Paint and primer can cost $100-$300 or more for a typical kitchen. A good HVLP sprayer can cost from $150 to $500+. If you don’t own a sprayer, buying or renting one adds to the cost. Doing it yourself is much cheaper than hiring a pro.
Q: Can I paint laminate cabinets with a sprayer?
A: Yes, but you need a special primer made for laminate or tricky surfaces. Sand the laminate lightly to give the primer something to grab onto. Use a high-quality bonding primer before spraying. Then paint with a durable cabinet paint.
Q: Do I need to remove all the old paint or finish?
A: Not usually. If the old finish is in good shape (not peeling or cracked), you just need to clean and sand it well to make it dull. If the old finish is bad, you should strip it or sand down to the bare wood in those areas.
Q: What is the best temperature to spray paint cabinets?
A: Most paints and primers work best between 65°F and 80°F (18°C to 27°C). Also, keep humidity low (below 50% if possible). Extreme temperatures or high humidity can cause drying problems and affect the finish.
Q: How long does the whole process take?
A: Painting kitchen cabinets takes several days, even with a sprayer.
* Taking apart and cleaning: 1 day.
* Sanding and repairs: 1-2 days.
* Masking: 1 day.
* Priming (including drying): 1 day (or more if using slower drying primer).
* Painting (2-3 coats, including drying time between coats): 2-3 days.
* Initial drying before handling: 1-2 days.
* Cure time before heavy use: 7-30 days.
Plan for at least a full week where your kitchen is not usable.
Wrapping Up
Painting your kitchen cabinets with a sprayer can give you a beautiful, smooth, and durable finish. It’s a big project that needs careful work at each step. Preparing cabinets for spraying is arguably the most important part. Sanding kitchen cabinets before painting and using the right cabinet primer before spraying are key steps for paint to stick. Choosing the best paint for spray painting cabinets and mastering paint sprayer settings for cabinets helps achieve a smooth finish. Pay attention to cabinet paint drying time. While it takes time and effort, doing HVLP cabinet painting yourself can save money and give you a kitchen you love. With good planning and careful work, you can achieve a result that looks professional.