Image Source: i.ytimg.com
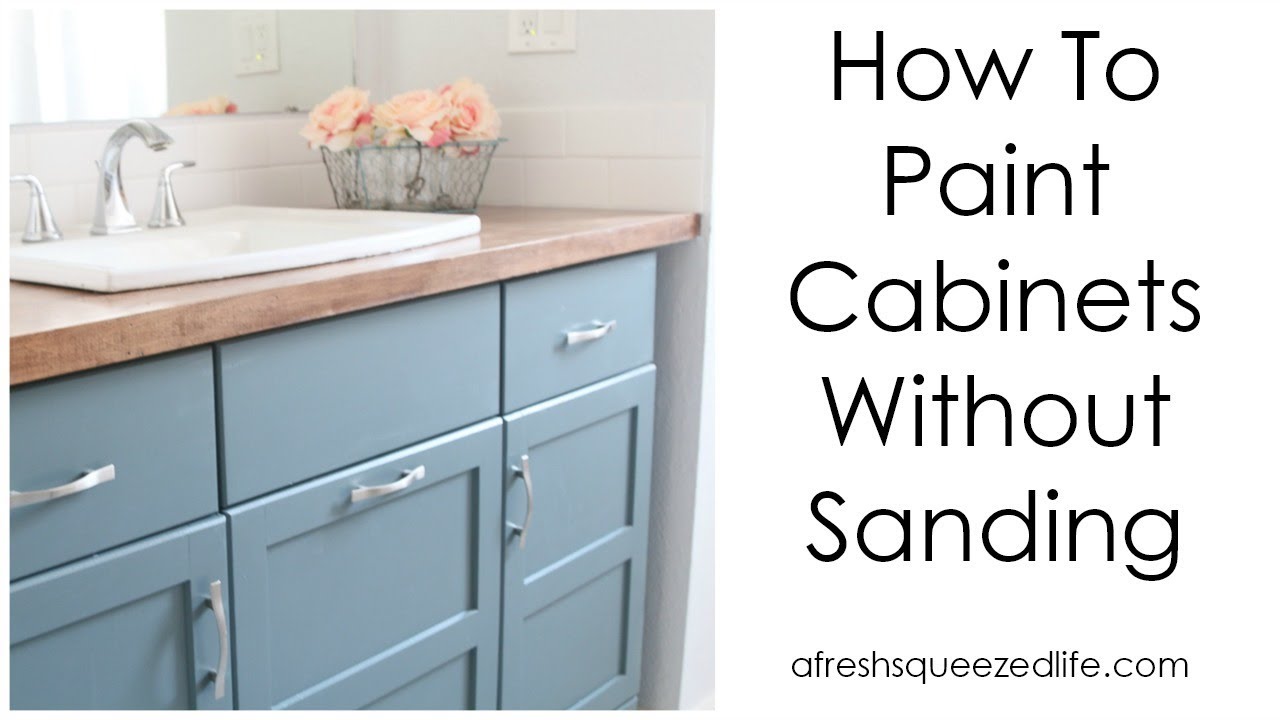
Can I Paint Kitchen Cabinets Without Sanding? Yes!
Yes, you can paint kitchen cabinets without sanding. Skipping the sanding step is possible with the right approach. The secret is using specific products and following a careful process. This method saves time and mess compared to traditional cabinet painting.
Why Skip the Sanding?
Painting cabinets often means lots of sanding. Sanding takes time. It makes a big mess with dust getting everywhere. It can be hard work. Many people want to refresh their kitchen look but feel worried about the dust and effort of sanding. Good news! You can get a great finish without all that hard work and mess.
The Key to No-Sand Painting
Painting cabinets usually needs the surface to be rough. Sanding makes the surface rough. Paint sticks better to a rough surface than a smooth one. When you don’t sand, you need other ways to help the paint stick. This is where special cleaning and special primers come in. They prepare the surface so paint can grip it tightly. Think of it like using double-sided tape instead of glue. The tape (primer) sticks to the smooth surface and the paint sticks to the tape.
Getting Ready: The All-Important Prep
Skipping sanding does not mean skipping work. In fact, cleaning and getting the surface ready is even more important when you don’t sand. If your cabinets are dirty, greasy, or shiny, paint will not stick well. It might peel or chip quickly.
Removing Hardware and Doors
First, take off all cabinet doors and drawer fronts. Remove all knobs, pulls, and hinges. Keep hardware together for each door or drawer. Label everything! Use numbers on a piece of tape stuck inside the cabinet box and on the back of the door/drawer. This makes putting them back easy. This step is important so you can paint all surfaces evenly.
Deep Cleaning is a Must
Kitchen cabinets collect grease and dirt. This is especially true near the stove. Paint will not stick to grease. You need to clean the cabinets really well. This is not a quick wipe-down. You need to scrub them clean.
Choosing the Right Cleaner
You need a strong cleaner to cut through grease and grime. A regular household cleaner might not be enough. Look for a cleaner made to remove grease. This is your degreaser for cabinets before painting. Simple Green, Fantastik, or cleaners made for cabinets work well. Some people use TSP (Trisodium Phosphate) or a TSP substitute. TSP is very strong but needs careful handling and good rinsing. A good degreaser removes all oily stuff that stops paint from sticking.
How to Clean Cabinets Well
- Mix your cleaner with water following the product directions.
- Use a sponge or cloth. Scrub all surfaces: doors, drawer fronts, cabinet frames, and side panels. Pay extra attention to areas around handles and near cooking zones.
- Clean the backs of doors and drawers too.
- After scrubbing with the cleaner, you must rinse the surface very well with clean water. Cleaner left on the surface can also stop paint from sticking. Use a damp cloth to wipe down everything. Rinse your cloth often in clean water.
- Wipe the cabinets dry with a clean towel. Or let them air dry completely. Make sure there is no cleaner residue left. The surface should feel clean and not at all sticky or greasy.
This deep cleaning step is critical for prep cabinets for painting without sanding. Do not rush this part. If the surface is not perfectly clean, your paint job will fail, no matter how good the primer or paint is.
Step Two: Dull the Shine (Without Sanding)
After cleaning, some cabinets, especially old painted ones or laminate, might still be very shiny. A shiny surface is hard for paint to stick to. Sanding dulls this shine. But since we are not sanding, we need another way.
Using Liquid Deglosser
This is where liquid deglosser cabinet painting comes in handy. Liquid deglosser is a chemical product. It works by slightly softening and dulling the top layer of the old finish. It’s often called “liquid sandpaper” but it doesn’t scratch the surface like sandpaper does. It just removes the shine. This gives the primer a better surface to grip onto.
How to Use Liquid Deglosser
- Make sure the cabinets are completely dry from cleaning.
- Wear rubber gloves and work in a place with good air flow. Liquid deglosser has strong fumes.
- Dip a clean rag into the deglosser. Don’t soak it.
- Wipe the deglosser over the cabinet surface in one direction. Do small areas at a time.
- Let the deglosser work for the time the product says (usually just a few minutes).
- Wipe off the residue with a clean rag before it dries completely. Some deglossers might say to just apply and let dry – always read the product instructions carefully.
- Use clean rags often.
- The surface should now look dull instead of shiny.
Liquid deglosser is a great tool for painting previously painted cabinets no sanding or how to paint laminate cabinets without sanding because it helps create a dull surface without the dust.
Step Three: The Magic of Primer
You cannot just paint straight onto a clean, shiny (or dull from deglosser) surface without sanding. You need a special primer. This is the most important product when you want to paint cabinets without sanding. The right primer acts like glue between the cabinet surface and the new paint.
Picking the Right Primer: Bonding Primer
You need a primer made to stick to tricky surfaces. This is called a bonding primer for cabinets no sanding. A regular primer won’t work well here. A good bonding primer is designed to grip smooth or non-porous surfaces like old varnish, laminate, or previously painted surfaces without needing to sand them first.
Types of Bonding Primers
Bonding primers come in different types:
- Shellac-Based Primers: These stick incredibly well to almost anything, including glossy surfaces and even metal or glass. They dry fast and block stains very well. They have strong fumes and clean up with alcohol. Kilz Original or B-I-N are common shellac primers.
- Oil-Based Primers: These also stick very well and block stains. They are durable. They take longer to dry than shellac and clean up with mineral spirits. Kilz Adhesion or Zinsser Cover Stain are examples.
- Water-Based Bonding Primers: Newer technology has made some water-based primers that bond very well. They have fewer fumes and clean up with water. Look for products specifically labeled as “bonding primer” or designed for “difficult surfaces.” Zinsser B-I-N Advanced or Kilz 3 are often mentioned, but always check the label to ensure they recommend use without sanding on your specific surface type.
For painting cabinets without sanding primer is the bridge. It is the single most important layer for success. Do not try to use cheap or basic primer. Invest in a high-quality bonding primer designed for this purpose. This ensures your paint will stick and last.
Applying Bonding Primer
- Stir the primer well.
- Use a good quality brush for edges and details. Use a small foam roller or a fine-finish roller for flat areas like door panels. This gives a smoother finish.
- Apply a thin, even coat of primer. Avoid thick coats or drips.
- Let the first coat dry completely. Check the product label for drying times. It might feel dry to the touch quickly, but needs more time to cure and bond fully. Waiting longer is better than rushing.
- Many bonding primers recommend two coats for best results, especially if your cabinets are dark and you are painting them a light color.
- Lightly sand (scuff sand) between primer coats if the primer manufacturer suggests it to smooth any bumps. This is a very light sanding, just to knock down imperfections in the primer, not to sand the cabinet surface. Check the primer can instructions. However, many bonding primers are designed so you don’t need to sand between coats either. Follow the can!
Picking the Right Paint
After the primer is dry and ready, you can paint. Just like with primer, not all paints are right for cabinets. Cabinets get a lot of use. They need a durable paint.
What is the Best Paint for Cabinets No Sanding?
You need a paint that is tough and can handle being wiped clean often. It should also flow smoothly to leave a nice finish.
- Acrylic Enamels: These are water-based paints that dry to a hard, durable finish. Many are designed specifically for trim and cabinets. They are easy to clean up with water.
- Alkyd Enamels (Oil-Based): These are very durable and give a smooth finish. They take longer to dry and clean up with mineral spirits. Some oil paints can yellow over time, especially in low light.
- Hybrid Enamels: These paints mix the good points of both acrylic and alkyd paints. They are water-based for easy cleanup but dry hard like oil paint. This is often considered the best paint for cabinets no sanding if you want maximum durability and a smooth finish without the mess and smell of oil paint. Look for terms like “urethane alkyd,” “waterborne alkyd,” or “cabinet enamel.”
Brands like Benjamin Moore Advance, Sherwin-Williams Emerald Urethane Trim Enamel, or Behr Urethane Alkyd Enamel are popular choices for cabinet painting.
Look for paint labeled specifically for cabinets, trim, or furniture. These paints are made to be tough and level out nicely, reducing brush marks. This is your no sand cabinet paint.
Applying the Paint
- Make sure the primer is fully dry and cured.
- Stir the paint well.
- Use a good quality brush and a smooth roller (like a foam roller or a fine-finish roller) made for painting cabinets or smooth surfaces.
- Apply thin, even coats of paint. Two thin coats are always better than one thick coat. Thick coats take longer to dry and are more likely to drip or show brush marks.
- Paint with the grain of the wood if painting wood cabinets.
- Allow each coat to dry completely according to the paint can instructions. Drying times can vary greatly depending on humidity and temperature. Waiting is key! Rushing will lead to a poor finish.
- Most cabinets will need at least two coats of paint. Darker original colors might need three coats of a lighter color.
Painting Different Cabinet Materials Without Sanding
The “no-sand” method works for many different cabinet types, but the preparation steps might vary slightly depending on the material.
Can You Paint Wood Cabinets Without Sanding?
Yes, you absolutely can you paint wood cabinets without sanding. The key is the cleaning and bonding primer. If the wood has a clear coat (like polyurethane or varnish), treat it like a shiny surface. Clean it thoroughly with a degreaser. Then, use a liquid deglosser to dull the finish or rely solely on a high-quality bonding primer made for glossy surfaces. The bonding primer will stick to the clean, dull surface, providing a base for your paint. If the wood is unfinished or previously painted with a flat paint, cleaning is still vital, but you might skip the deglosser. However, a bonding primer is still highly recommended for best adhesion and durability on wood.
How to Paint Laminate Cabinets Without Sanding
Laminate is a very smooth, non-porous surface. This makes paint adhesion tricky. This is why learning how to paint laminate cabinets without sanding relies heavily on the right primer. After a very thorough cleaning with a strong degreaser, a liquid deglosser can help slightly. But the real hero here is a premium bonding primer specifically designed for laminate, plastics, or other difficult-to-stick-to surfaces. A shellac-based primer or a specialized water-based bonding primer is usually the best choice. Apply at least two thin coats of the bonding primer, allowing proper dry time, before applying your cabinet paint.
Painting Previously Painted Cabinets No Sanding
If your cabinets were painted before, you can often repaint them without sanding, as long as the old paint is in good condition (not peeling or chipping). First, clean them extremely well with a degreaser to remove any kitchen grime. If the old paint is glossy, using a liquid deglosser will help the new primer stick. Then, apply a high-quality bonding primer suitable for previously painted surfaces. This method for painting previously painted cabinets no sanding makes refreshing cabinets much faster. If the old paint is peeling or damaged, you might need to scrape off the loose paint and possibly do some light sanding just on those repair spots, even when aiming for a no-sand approach on the rest.
Step-by-Step Guide for No-Sand Cabinet Painting
Here is a simple outline of the process:
- Remove: Take off all doors, drawers, and hardware. Label everything.
- Clean: Use a strong degreaser for cabinets before painting to scrub away all grease and grime from doors, drawers, and cabinet frames. Rinse very well with clean water and dry fully. This is key for prep cabinets for painting without sanding.
- Dull: If cabinets are shiny, apply liquid deglosser cabinet painting following product instructions. Wipe off residue if required and let dry.
- Prime: Apply a high-quality bonding primer for cabinets no sanding. Use thin coats. A roller is good for flat areas. Let the primer dry completely according to the can. Apply a second coat if needed and let it dry completely. This ensures the paint will stick without sanding (painting cabinets without sanding primer).
- Paint: Apply your chosen no sand cabinet paint (like a durable acrylic or hybrid enamel). Use thin, even coats. Let each coat dry fully. Apply a second coat (or third, if needed). Use the best paint for cabinets no sanding for durability.
- Protect (Optional but Recommended): For extra durability, especially on high-use cabinets, you can apply a clear topcoat after the paint has fully dried and cured. Water-based polyurethanes or clear acrylic topcoats work well over acrylic paints. Make sure the topcoat is compatible with your paint.
- Reassemble: Once all coats are dry and cured (check product for cure times – this can take several days or even weeks for full hardness), reattach hinges, knobs, and pulls. Hang the doors and put drawers back in place.
Making it Last: Tips for Success
- Take Your Time: Do not rush drying times. Paint and primer need to dry fully to create a hard, durable finish. Rushing will lead to problems.
- Thin Coats are Best: Applying many thin layers gives a smoother, more durable finish than one or two thick, drippy coats.
- Work Area: Paint in a well-lit, well-ventilated area. Use drop cloths to protect floors.
- Quality Tools: Good brushes and rollers make a big difference in the final look.
- Edge Control: Use a brush for edges and inside panels first, then roll the flat areas quickly before the brush marks dry.
- Humidity and Temperature: Avoid painting in very humid or very cold/hot conditions. This affects how the paint dries and cures.
This method works for can you paint wood cabinets without sanding and how to paint laminate cabinets without sanding, making kitchen updates easier.
Pros and Cons of No-Sand Cabinet Painting
Pros:
- Less mess (no sanding dust everywhere).
- Saves time compared to traditional sanding.
- Less physical effort.
- Good option for tricky surfaces like laminate where sanding isn’t practical.
- Prep cabinets for painting without sanding is mostly about cleaning and applying a specific product.
Cons:
- Requires very thorough cleaning and the right cleaner (degreaser for cabinets before painting).
- Relies heavily on using the correct high-quality bonding primer for cabinets no sanding and no sand cabinet paint. Using the wrong product means failure.
- Minor surface flaws will not be smoothed out by sanding. You need to fix these before cleaning and priming.
- If the existing finish is in bad shape (peeling), this method might not work without fixing those areas first.
Why the Right Products Matter
Using standard paint and primer on cabinets without sanding will likely result in the paint scratching, chipping, or peeling off easily. Products like no sand cabinet paint and bonding primer for cabinets no sanding are specially made to stick to slick surfaces. They create a strong bond that lets the paint stick tightly, even without the rough surface sanding creates. Don’t try to cut corners on the primer or paint quality if you are skipping the sand step.
Frequently Asked Questions
Can I use regular primer if I skip sanding?
No. Regular primers are not made to stick to smooth, non-sanded surfaces. You need a special bonding primer designed for this purpose. Using regular primer is a common mistake that leads to paint peeling.
What is liquid deglosser? Is it necessary?
Liquid deglosser is a chemical that dulls shiny surfaces. It helps the primer stick better. It is highly recommended for very glossy surfaces, but a top-quality bonding primer might be enough on its own. Read the primer label to see if it requires deglossing glossy surfaces first.
How long does the paint need to dry before putting doors back?
Drying time (when it’s dry to the touch) is different from cure time (when it reaches full hardness). Paint might feel dry in a few hours, but it takes days or even weeks to cure fully. Check the paint can for cure times. Wait as long as possible before rehanging doors to avoid scratching or damaging the new paint. At least 2-3 days is good, but a week or more is better if possible. Be gentle with the cabinets for the first few weeks.
What is the best roller for painting cabinets without sanding?
Use a small foam roller or a roller labeled for “smooth surfaces” or “fine finish.” These types of rollers help the paint lay down smoothly and reduce texture or stippling on the cabinet surface.
Do I need a topcoat?
A topcoat adds an extra layer of protection and durability, especially in a kitchen environment. While some cabinet paints are tough enough on their own, a clear topcoat can help the paint resist scratches, scuffs, and stains, making your finish last longer. Make sure the topcoat is compatible with your paint.
Can this method be used on bathroom cabinets?
Yes, the same method can be used on bathroom cabinets. You still need to clean them very well to remove grime and use a quality bonding primer and durable paint. In a bathroom, make sure the paint and any topcoat can handle moisture.
What if my cabinets have deep scratches or dents?
This no-sand method won’t hide surface flaws like scratches or dents. These need to be filled with wood filler (for wood cabinets) or a suitable filler, sanded smooth just in that spot, and then primed before painting.
Wrapping Up
Painting kitchen cabinets without sanding is not only possible, but it can also be a smart way to update your kitchen without the mess and hard work of traditional sanding. The key to success lies in thorough cleaning with a good degreaser for cabinets before painting, preparing the surface (possibly with liquid deglosser cabinet painting), and using a high-quality bonding primer for cabinets no sanding. Then, follow up with a durable no sand cabinet paint, ideally one of the best paint for cabinets no sanding, applied in thin coats.
Whether you are painting laminate cabinets without sanding, previously painted cabinets no sanding, or wood cabinets without sanding, the principles are the same: clean, prime, and paint with the right products and patience. By focusing on proper prep cabinets for painting without sanding, you can achieve a beautiful, long-lasting finish that revitalizes your kitchen. It requires attention to detail, but the payoff is a fresh new look without the dust cloud.