Can I paint metal kitchen chairs? Yes, absolutely! What is the best paint for kitchen chairs? There isn’t one single “best” paint for kitchen chairs; the right choice depends on the chair’s material, the look you want, and how much use the chair gets. Painting your kitchen chairs yourself is a great way to give them a fresh new look without spending a lot of money. It lets you match your chairs to your room’s style or give an old set a completely new life. You can change a worn-out set into a stylish part of your home.
Kitchen chairs get a lot of use. They face spills, scrapes, and bumps every day. Because of this, painting them needs careful steps and the right stuff. You need to pick paint that lasts and make sure it sticks well. This guide will walk you through everything, from getting the chairs ready to sealing the final coat. We will cover different chair types, like painting wooden dining chairs and painting metal kitchen chairs. We will also talk about how to use chalk paint on chairs and the best ways to use spray paint. By the end, you will know how to refinish dining chair set pieces like a pro.
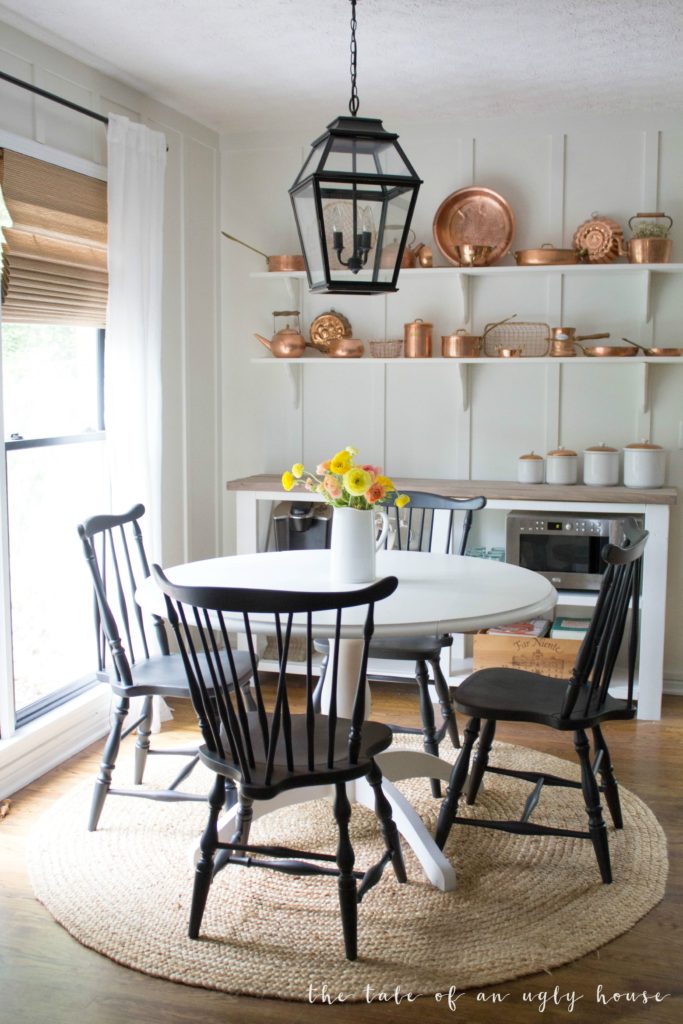
Image Source: sincerelymariedesigns.com
Gathering What You Need
Before you start painting, gather all your tools and materials. Having everything ready saves time and makes the job easier. Think about the kind of chair you have and the paint you want to use. This will help you pick the right tools.
Essential Tools and Materials
- Safety glasses or goggles
- Dust mask or respirator
- Gloves
- Drop cloths or old sheets
- Screwdriver (to remove seat cushions)
- Cleaner (like TSP substitute or just warm soapy water)
- Sponges or rags
- Sandpaper (various grits: 80, 120, 220, 320)
- Sanding block or electric sander (optional)
- Tack cloth or microfiber cloths
- Primer (suited for your chair material and paint type)
- Paint (chosen color and type)
- Paintbrushes (good quality angled brushes work well)
- Paint rollers (small foam rollers are good for flat areas)
- Paint tray (if using brushes/rollers)
- Spray paint handle (optional, for spray painting furniture tutorial)
- Sealer or topcoat (polyurethane, polycrylic, wax, etc.)
- Small container for hardware (screws, bolts)
- Wood filler or epoxy (for repairs)
- Putty knife
Make sure you have enough space to work. Painting outside is best if the weather is good. If you paint inside, make sure the area has good air flow. Open windows or use fans. Protect your floors and furniture with drop cloths.
Getting Your Chairs Ready for Paint
Good preparation is key to a lasting paint job. Skipping steps here will show in the final look. Taking time now means your chairs will look great for years. This is the most important part of how to prepare chairs for painting.
Step 1: Take Chairs Apart
If your chairs have seat cushions, remove them first. Most cushions are held on by screws from underneath. Keep the screws in a small bag or container. This keeps them safe and makes putting the chair back together easy. If chairs have other parts that can be removed easily, take them off too. This lets you paint each part better.
Step 2: Clean the Chairs Well
Kitchen chairs can have grease, food bits, and dirt. Paint will not stick to dirty surfaces. Clean every part of the chair with a good cleaner. A TSP substitute mixed with water works well for cutting grease. Warm water and dish soap can also work for light dirt. Use a sponge or rag to scrub all surfaces. Pay attention to corners and underneath parts. Rinse the chair with clean water. Make sure all soap residue is gone. Let the chair dry completely. This might take several hours or overnight.
Step 3: Fix Any Damage
Look over each chair carefully. Check for loose joints, cracks, or chips. Tighten any loose screws or bolts. If a joint is wobbly, you might need to use wood glue to fix it. Clamp the joint tightly until the glue dries. Fill any small holes, dents, or cracks with wood filler. For metal chairs, use a suitable metal epoxy or filler. Let the filler dry completely. Sand the filled area smooth with fine-grit sandpaper.
Step 4: Sand the Chairs
Sanding kitchen chairs is a very important step for most paint types, especially on wood. Sanding helps the new paint stick by making the surface a little rough. It also smooths out old finishes and imperfections. The amount of sanding needed depends on the chair’s original finish.
- If the chair has a thick, glossy finish or old paint: Start with rougher sandpaper, like 80 or 120 grit. This removes the top layer faster.
- If the chair has a light finish or is bare wood: You can start with a medium grit, like 150 or 180.
Sand in the direction of the wood grain if you are working on wood. Use a sanding block for flat areas and flexible sandpaper or sanding sponges for curved parts and legs. An electric orbital sander can speed things up on large, flat surfaces, but you will still need to hand-sand detailed areas. Sand every surface that will be painted.
After using the rougher grit, sand again with a finer grit, like 220. This makes the surface smoother and ready for primer. You want the surface to feel smooth but look dull, not shiny. For a very smooth finish, you can even use 320 grit after the 220.
If you are using chalk paint, you might not need to sand as much. How to use chalk paint on chairs often involves less prep. You usually only need to clean the chair well and do a light scuff sand if the finish is very glossy. Read the instructions for your specific chalk paint.
Step 5: Clean Off Dust
Sanding creates a lot of dust. This dust will prevent paint from sticking well. Use a brush or vacuum with a brush attachment to remove most of the dust. Then, use a tack cloth or a damp microfiber cloth to wipe down every part of the chair. Make sure all the fine dust is gone. Let the chair dry completely before moving on.
Choosing the Right Paint
Picking the best paint for kitchen chairs is crucial. It needs to be durable because chairs are used so much. Different types of paint offer different finishes and require different prep.
Paint Options Explained
- Latex/Acrylic Enamel: This is a popular choice for furniture. It is water-based, easy to clean up, and less smelly than oil paint. Look for high-quality acrylic enamel paint. Enamels dry to a hard, durable finish. It is a good choice for painting wooden dining chairs. Many brands now offer furniture-specific acrylic paints that are extra tough.
- Oil-Based Paint: This paint is very durable and creates a hard finish. It works well on wood and metal. However, it has strong fumes, takes longer to dry, and needs mineral spirits for cleanup. It is a tough option if you need maximum durability and don’t mind the smell and cleanup.
- Chalk Paint: This paint is known for sticking to almost any surface with very little preparation. You often don’t need to sand or prime much. It dries to a matte, chalky finish. How to use chalk paint on chairs often involves distressing for a vintage look. Chalk paint is less durable on its own and must be sealed with wax or a topcoat (like polycrylic) to protect it, especially on a kitchen chair.
- Milk Paint (True Milk Paint): Traditional milk paint comes as a powder you mix with water. It can chip for a very old, rustic look, or you can add a bonding agent for better adhesion. It is durable once sealed. Modern “milk paint” might be more like acrylic paint with a matte finish. Check the label.
- Spray Paint: Spray paint is great for getting a smooth, factory-like finish with no brush strokes. It is fast for covering intricate parts like spindles. You can find spray paints specifically made for furniture or multi-surface use. Spray painting furniture tutorial steps usually involve light, even coats. There are even spray paints for metal chairs (painting metal kitchen chairs needs a spray paint designed for metal, often with rust protection).
Table: Comparing Paint Types
| Paint Type | Durability | Prep Needed (General) | Cleanup | Finish (Typical) | Sealing Required | Best For… |
|---|---|---|---|---|---|---|
| Latex/Acrylic Enamel | Good to Very Good | Moderate | Water | Smooth, Satin/Semi-Gloss | Recommended/Optional | Wood, previously painted surfaces |
| Oil-Based Paint | Excellent | Moderate | Mineral Spirits | Smooth, Glossy | Optional | Wood, Metal, High-traffic items |
| Chalk Paint | Low (Unsealed) | Minimal | Water | Matte, Chalky | Always | Wood, Easy distressing, Minimal prep needed |
| Milk Paint (Trad.) | Good (Sealed) | Varies (can chip) | Water | Matte, sometimes chippy | Always | Rustic looks, Wood |
| Spray Paint (Furniture) | Good | Varies by Type | Varies | Smooth, Even | Recommended/Optional | Intricate parts, Fast coverage, Metal |
For kitchen chairs, durability is key. Acrylic enamel or oil-based paints are often recommended for the painted surface itself. If using chalk or traditional milk paint, choose a very durable topcoat.
Applying Primer
Primer is the next critical step after preparing the chairs. Do not skip this! Apply primer to furniture for several reasons.
Why Primer Matters
- Adhesion: Primer helps the paint stick better to the surface, whether it is bare wood, metal, or a slick old finish. It creates a surface that paint can grip onto.
- Blocking Stains: Primer seals the old finish. This prevents stains, tannins (in wood), or previous colors from bleeding through your new paint color. This is extra important when painting a light color over a dark one.
- Even Color: Primer provides a uniform base color. This helps the final paint color look true and reduces the number of paint coats needed.
- Durability: Some primers add an extra layer of toughness to the finished surface.
Choosing the Right Primer
The best primer depends on the chair material and the paint you chose.
- Water-Based Primer: Good for clean, lightly sanded surfaces. Works well under latex or acrylic paints. Less smelly and easier cleanup. May not block stains as well as oil or shellac.
- Oil-Based Primer: Excellent at blocking stains and odors. Sticks well to glossy surfaces and bare wood. Very durable. Use under oil or latex paint. Has strong fumes and needs mineral spirits cleanup.
- Shellac-Based Primer: The best at blocking tough stains, knots in wood, and odors. Dries very fast. Works under almost any paint. Can be applied over many finishes. Contains alcohol and has fumes. Cleans up with denatured alcohol. BIN primer is a common shellac-based type.
If you are painting wood chairs that have knots or are made of wood like oak or pine (which can bleed tannins), a shellac-based or oil-based primer is usually the best choice to prevent bleed-through. If painting metal chairs, use a primer designed for metal, possibly one that prevents rust (a rust-inhibiting primer).
Applying Primer
Apply primer in a well-ventilated area. You can use a brush, roller, or spray can, depending on the primer type and your preference.
- Brushing/Rolling: Use a good quality brush for detailed areas and a small foam roller for flatter parts. Apply thin, even coats. Avoid drips.
- Spraying: If using spray primer, follow the instructions on the can. Hold the can about 10-12 inches away and use steady, back-and-forth motions. Overlap your passes slightly. Spray in thin layers.
Allow the primer to dry completely according to the product instructions. Drying times can vary greatly (from 30 minutes to several hours). Applying the next coat too soon can cause problems. If the primer coat feels rough after drying, you can lightly sand it with very fine grit sandpaper (320 grit or higher) for an extra smooth base. Then, wipe away the dust with a tack cloth.
Painting the Chairs
Now for the fun part – adding color! Whether you are painting wooden dining chairs or giving metal chairs a new look, the technique matters for a smooth, lasting finish. Remember the steps from any spray painting furniture tutorial if you choose that method.
Applying Paint
Apply paint in thin, even coats. This is much better than one thick coat, which can drip, run, and take forever to dry. Thin coats dry faster and harder.
- Brushing/Rolling: Use a high-quality angled brush for legs, spindles, and detailed parts. Use a small foam roller for seats and backs. Dip only the tip of the brush into the paint. Apply paint smoothly, working from one area to the next. Follow the grain on wood where possible. Avoid going back over paint that is already starting to dry.
- Spraying: If using spray paint, shake the can well. Hold the can 10-12 inches away from the chair. Start spraying off the chair, move across the surface in a steady motion, and stop spraying after you pass the edge. Overlap each pass by about one-third. Keep the can moving constantly to avoid drips and uneven spots. Spray in light, sweeping motions. Practice on a piece of scrap wood or cardboard first. This method is excellent for intricate parts and painting metal kitchen chairs.
Painting Wooden Dining Chairs
When painting wooden dining chairs with brushes, work on one section at a time. Start from the top and work down. Paint legs last. For parts with spindles or rungs, paint them lengthwise, making sure to get all sides without drips. An angled brush helps get into tight spots.
Painting Metal Kitchen Chairs
Painting metal kitchen chairs often goes well with spray paint designed for metal. Make sure your metal primer is compatible if you used one. Follow the spray painting steps above. Metal chairs, especially outdoor ones or those prone to rust, benefit from paints that offer rust resistance. Ensure the metal is completely clean and rust-free before priming and painting.
How to Use Chalk Paint on Chairs
If you chose chalk paint, you can apply it with a brush. Chalk paint is thick and can be applied with textured brush strokes for a distressed look, or smoothed out for a more modern feel. It dries quickly. You likely won’t need multiple coats for coverage due to its thickness. The key steps for chalk paint involve application and then the specific sealing process (see the next section).
Multiple Coats Are Best
Most chairs will need at least two coats of paint for full coverage and durability. Some colors, especially reds or yellows, might need three coats. Allow each coat to dry completely before applying the next. Check the paint can for recommended drying times. Applying a second coat too soon can lift the first coat or cause cracking.
Light Sanding (Optional)
For a very smooth finish, you can lightly sand the first coat of paint after it is fully dry. Use very fine grit sandpaper (around 320 grit). This removes any small bumps or imperfections. Clean off the sanding dust before applying the next coat.
Sealing the Painted Surface
Once the paint is dry, you need to protect it, especially on kitchen chairs that see heavy use. Sealing painted wood chairs adds a layer of defense against scratches, spills, and wear.
Why Sealing is Important
Kitchen chairs take a beating. A protective topcoat makes your paint job last much longer. It makes the surface easy to clean and resists marks.
Choosing a Sealer
The type of sealer depends on the paint you used and the finish you want.
- Polycrylic: A water-based topcoat. It is clear, low odor, and dries fast. It works well over water-based paints. It is durable but may yellow slightly over very light colors over time, although this is less common now. It is good for painting wooden dining chairs. It comes in different sheens (matte, satin, semi-gloss).
- Polyurethane: Comes in both oil-based and water-based versions. Oil-based polyurethane is very durable and adds a warm, slightly amber tone to the paint, which might affect light colors. Water-based polyurethane is clearer and faster drying. Both offer excellent protection. Oil-based is generally considered the toughest.
- Wax: Often used over chalk paint or milk paint for a soft, matte finish. Wax needs to be buffed after drying. It offers less protection than polycrylic or polyurethane and may need reapplication over time, especially on high-contact areas like chair seats. It is not the most durable option for busy kitchen chairs unless the look is the top priority.
- Varnish: Similar to polyurethane, often solvent-based, providing a hard, durable finish.
For the most durable finish on kitchen chairs, especially on seats and arms, polycrylic (water-based) or polyurethane (oil-based for maximum toughness, water-based for clarity) are generally recommended.
Applying the Sealer
Apply the sealer in thin, even coats. Just like with paint, multiple thin coats are better than one thick one.
- Brushing: Use a good quality synthetic brush for water-based sealers (polycrylic, water-based poly) and a natural bristle brush for oil-based sealers (oil-based poly). Apply along the grain on wood. Avoid overworking the sealer, which can cause bubbles.
- Wiping: Some sealers come as wipe-on versions. These are applied with a cloth and are great for getting a thin, even coat with no brush strokes.
- Spraying: Some sealers are available in spray cans. This is good for getting a smooth finish, especially over spray-painted chairs. Follow spray technique rules: thin coats, keep the can moving.
Apply at least two coats of sealer. For seats or areas that get a lot of wear, three or even four coats are better. Allow each coat to dry completely before applying the next. Check the product label for drying times.
For polycrylic or polyurethane, lightly sand between coats (after they are fully dry) with very fine grit sandpaper (400 grit or higher). This makes the surface smoother and helps the next coat stick. Wipe away all dust with a tack cloth before applying the next coat.
If using wax over chalk paint (how to use chalk paint on chairs often involves this), apply the wax with a brush or cloth. Work it into the surface. Wipe off the excess. Let it cure for the time recommended by the manufacturer (this can be short or long, depending on the wax). Then, buff the surface with a clean, soft cloth to get a slight sheen and smooth feel. Remember that wax is less durable for heavy-use items like kitchen chair seats.
Drying and Curing
This is a step that many people rush, leading to problems. Drying time is how long until the surface is dry to the touch. Curing time is how long it takes for the paint or sealer to reach its full hardness and durability.
- Drying: Usually takes hours. You can apply the next coat of paint or sealer once it is dry to the touch (check product labels for specifics).
- Curing: This takes much longer – days or even weeks! During the curing time, the finish is still hardening. It is important to be gentle with the chairs during this time. Avoid heavy use, putting heavy objects on them, or scraping them.
Allow your chairs to cure fully before putting them back into daily use in the kitchen. This is especially important for the seats. Rushing the curing process is a common mistake that leads to paint chipping or scratching easily.
Putting the Chairs Back Together
Once the paint and sealer are fully cured, reattach the seat cushions or any other parts you removed. Use the screws you saved earlier. Be careful not to scratch the new finish while doing this.
Refinishing a Dining Chair Set
Painting a whole dining chair set takes planning. Work on chairs in batches if you need the dining table quickly. Ensure you have enough space to lay out multiple chair pieces for drying. Buy enough paint, primer, and sealer for all chairs from the start to ensure color consistency. Follow the same steps for each chair: prepare chairs for painting, sand (sanding kitchen chairs), apply primer to furniture, paint (painting wooden dining chairs or painting metal kitchen chairs), and seal (sealing painted wood chairs). Doing steps for all chairs at once (e.g., cleaning all, then sanding all, then priming all) helps keep the process efficient and ensures consistency.
Specific Considerations
- Painting Wooden Dining Chairs: Pay attention to wood grain when sanding and brushing. Knots may need extra layers of shellac primer.
- Painting Metal Kitchen Chairs: Ensure all rust is removed before priming. Use a primer and paint designed for metal. Spray painting often works best for a smooth finish on metal.
- How to Use Chalk Paint on Chairs: This method is forgiving on prep but requires proper sealing. Practice distressing techniques if you want that look.
- Spray Painting Furniture Tutorial: Practice your technique first. Spray in a well-ventilated area or outside. Protect nearby items from overspray. Use light, overlapping passes.
Maintaining Your Painted Chairs
Once painted and cured, your chairs will last longer with simple care. Clean spills quickly. Use gentle cleaners. Avoid harsh chemicals or abrasive scrubbers that could damage the finish. Touch up small nicks or scratches as needed using your leftover paint and sealer.
Troubleshooting Common Problems
- Drips and Runs: Applied paint too thickly. Sand the dried drip smooth and apply another thin coat.
- Brush Strokes: Using the wrong brush, applying paint too thickly, or overworking the paint as it dries. Use a high-quality brush, apply thin coats, and let the paint flow without over-brushing. Spraying avoids brush strokes entirely.
- Paint Peeling/Chipping: Poor preparation (not cleaning or sanding enough), not using primer, or using the wrong type of paint/primer for the surface. The best fix is often to sand the peeling area back, clean, prime, and repaint.
- Rough Finish: Dust on the surface during painting, not sanding between coats of primer/sealer, or applying paint/sealer too thickly. Ensure your work area is clean. Lightly sand between coats.
- Bleed-Through (Stains showing): Not using the right primer or not enough coats of primer. Use an oil-based or shellac-based primer. Apply multiple coats if needed.
Estimated Time and Cost
The time and cost to refinish dining chair set pieces vary greatly.
- Time: Painting one chair with full prep, multiple coats, and drying/curing can take several days, though active work time might only be a few hours per coat. A set of four chairs will take longer.
- Cost: Costs include sandpaper, cleaner, primer, paint, sealer, brushes/rollers, and safety gear. This can range from $50 to $200+ depending on the quality and types of materials chosen, and how many chairs you paint. It is almost always cheaper than buying new chairs.
Frequently Asked Questions
How long does painted kitchen furniture need to cure?
Curing takes longer than just drying. It can take anywhere from a few days to up to 30 days for paint and sealers to reach their full hardness. Check the product label for the specific curing time. Be gentle with the chairs during this period.
Can I paint kitchen chairs without sanding?
You can often paint kitchen chairs without heavy sanding if you use a special bonding primer or chalk paint. However, cleaning the chair very well is always needed. A light “scuff sand” to dull any glossy finish is often recommended even with these paints to help with adhesion. For the most durable finish, proper sanding is usually best practice.
What kind of finish is best for kitchen chairs?
For kitchen chairs, a durable finish is key. Satin or semi-gloss are popular sheens because they are easier to clean than matte finishes. Use a high-quality acrylic enamel paint or an oil-based paint, and seal with a durable topcoat like polycrylic or polyurethane, especially on the seat.
How do I get a smooth finish when painting chairs?
To get a smooth finish: start with proper preparation (cleaning, sanding smooth). Use a good quality primer. Apply thin coats of paint and sealer. Sand lightly with very fine grit paper between coats of primer and sealer. Using a foam roller on flat parts and a quality angled brush can help. Spray painting gives the smoothest finish if done correctly.
Can I use interior house paint on kitchen chairs?
Yes, you can use high-quality interior paint, but it is better to use paints labeled as “enamel” or specifically for furniture. These paints are designed to dry to a harder, more durable finish that can withstand more wear and tear than standard wall paint. Always seal with a protective topcoat for added durability.
Painting your kitchen chairs is a rewarding DIY project. It saves money and lets you create custom pieces that fit your home perfectly. With careful preparation, the right materials, and patience, you can turn old chairs into beautiful, functional pieces you will enjoy for years. Remember that taking the time to prepare chairs for painting properly is the most important step for a successful outcome. Good luck with your project!