Can you take apart a KitchenAid mixer for repair and servicing? Yes, you absolutely can. While these mixers are built to last, sometimes a little bit of maintenance or a specific fix is needed. This guide will walk you through the process of KitchenAid mixer disassembly, helping you get your beloved appliance back in top working order. Whether you’re dealing with a slow motor, a grinding noise, or just want to give it a deep clean, knowing how to take it apart is the first step towards effective KitchenAid mixer repair and KitchenAid mixer servicing.
Image Source: guide-images.cdn.ifixit.com
Why You Might Need to Take Your KitchenAid Mixer Apart
There are several common reasons why you might find yourself needing to perform KitchenAid mixer maintenance.
- Grinding Noises: This often indicates worn-out gears or lubrication issues.
- Slow or Weak Motor: The motor itself might need cleaning, lubrication, or in some cases, replacement.
- Oil Leaks: This usually points to a problem with the gearbox seals.
- Worn-Out Components: Over time, parts like the tilt-head mechanism or internal brushes can wear down.
- Deep Cleaning: Sometimes, a thorough cleaning goes beyond what the exterior allows.
- Troubleshooting Attachments: If your KitchenAid mixer attachments aren’t working correctly, the issue might lie within the mixer’s power hub.
Essential Tools for KitchenAid Mixer Disassembly
Before you begin, gather these necessary tools to make the process smoother and safer:
- Screwdriver Set: You’ll likely need Phillips head screwdrivers in various sizes. Some older models might require flathead screwdrivers.
- Nut Drivers or Socket Set: Small sizes (e.g., 7/32 inch, 1/4 inch) are commonly used.
- Pliers: Needle-nose pliers can be helpful for gripping small parts or clips.
- Allen Wrenches (Hex Keys): Some models use Allen screws.
- Plastic Pry Tools or Spudgers: These are useful for gently separating plastic casings without causing damage.
- Small Container or Tray: To keep screws and small parts organized. Labeling them as you remove them is a great idea.
- Lubricant: Food-grade grease (like white lithium grease or specialized mixer grease) is essential for reassembly.
- Clean Cloths: For wiping down parts.
- Camera or Smartphone: To take pictures as you disassemble. This is invaluable for remembering where parts go.
Step-by-Step KitchenAid Mixer Disassembly
This guide focuses on the most common KitchenAid stand mixer models, typically the tilt-head versions. Older or different models might have slight variations.
H3: Step 1: Safety First – Unplug Your Mixer
This might seem obvious, but it’s the most crucial step. Always ensure your KitchenAid mixer is completely unplugged from the power outlet before you begin any disassembly.
H3: Step 2: Removing the Bottom Cover and Trim Band
Many KitchenAid mixers have a bottom cover that needs to be removed first.
- Locate Screws: Turn the mixer upside down. You’ll typically find screws securing the base. These are often Phillips head screws.
- Remove Screws: Carefully unscrew them. Keep them in your labeled container.
- Gently Pry Off: The bottom cover might be held in place with clips as well. Use a plastic pry tool to gently work your way around the edge to release it.
- Trim Band: On tilt-head models, there’s usually a decorative trim band around the base of the head. This often slides upwards or is secured by screws from underneath. Look for screws accessible after removing the bottom cover. On some models, you might need to gently twist and pull this band upwards.
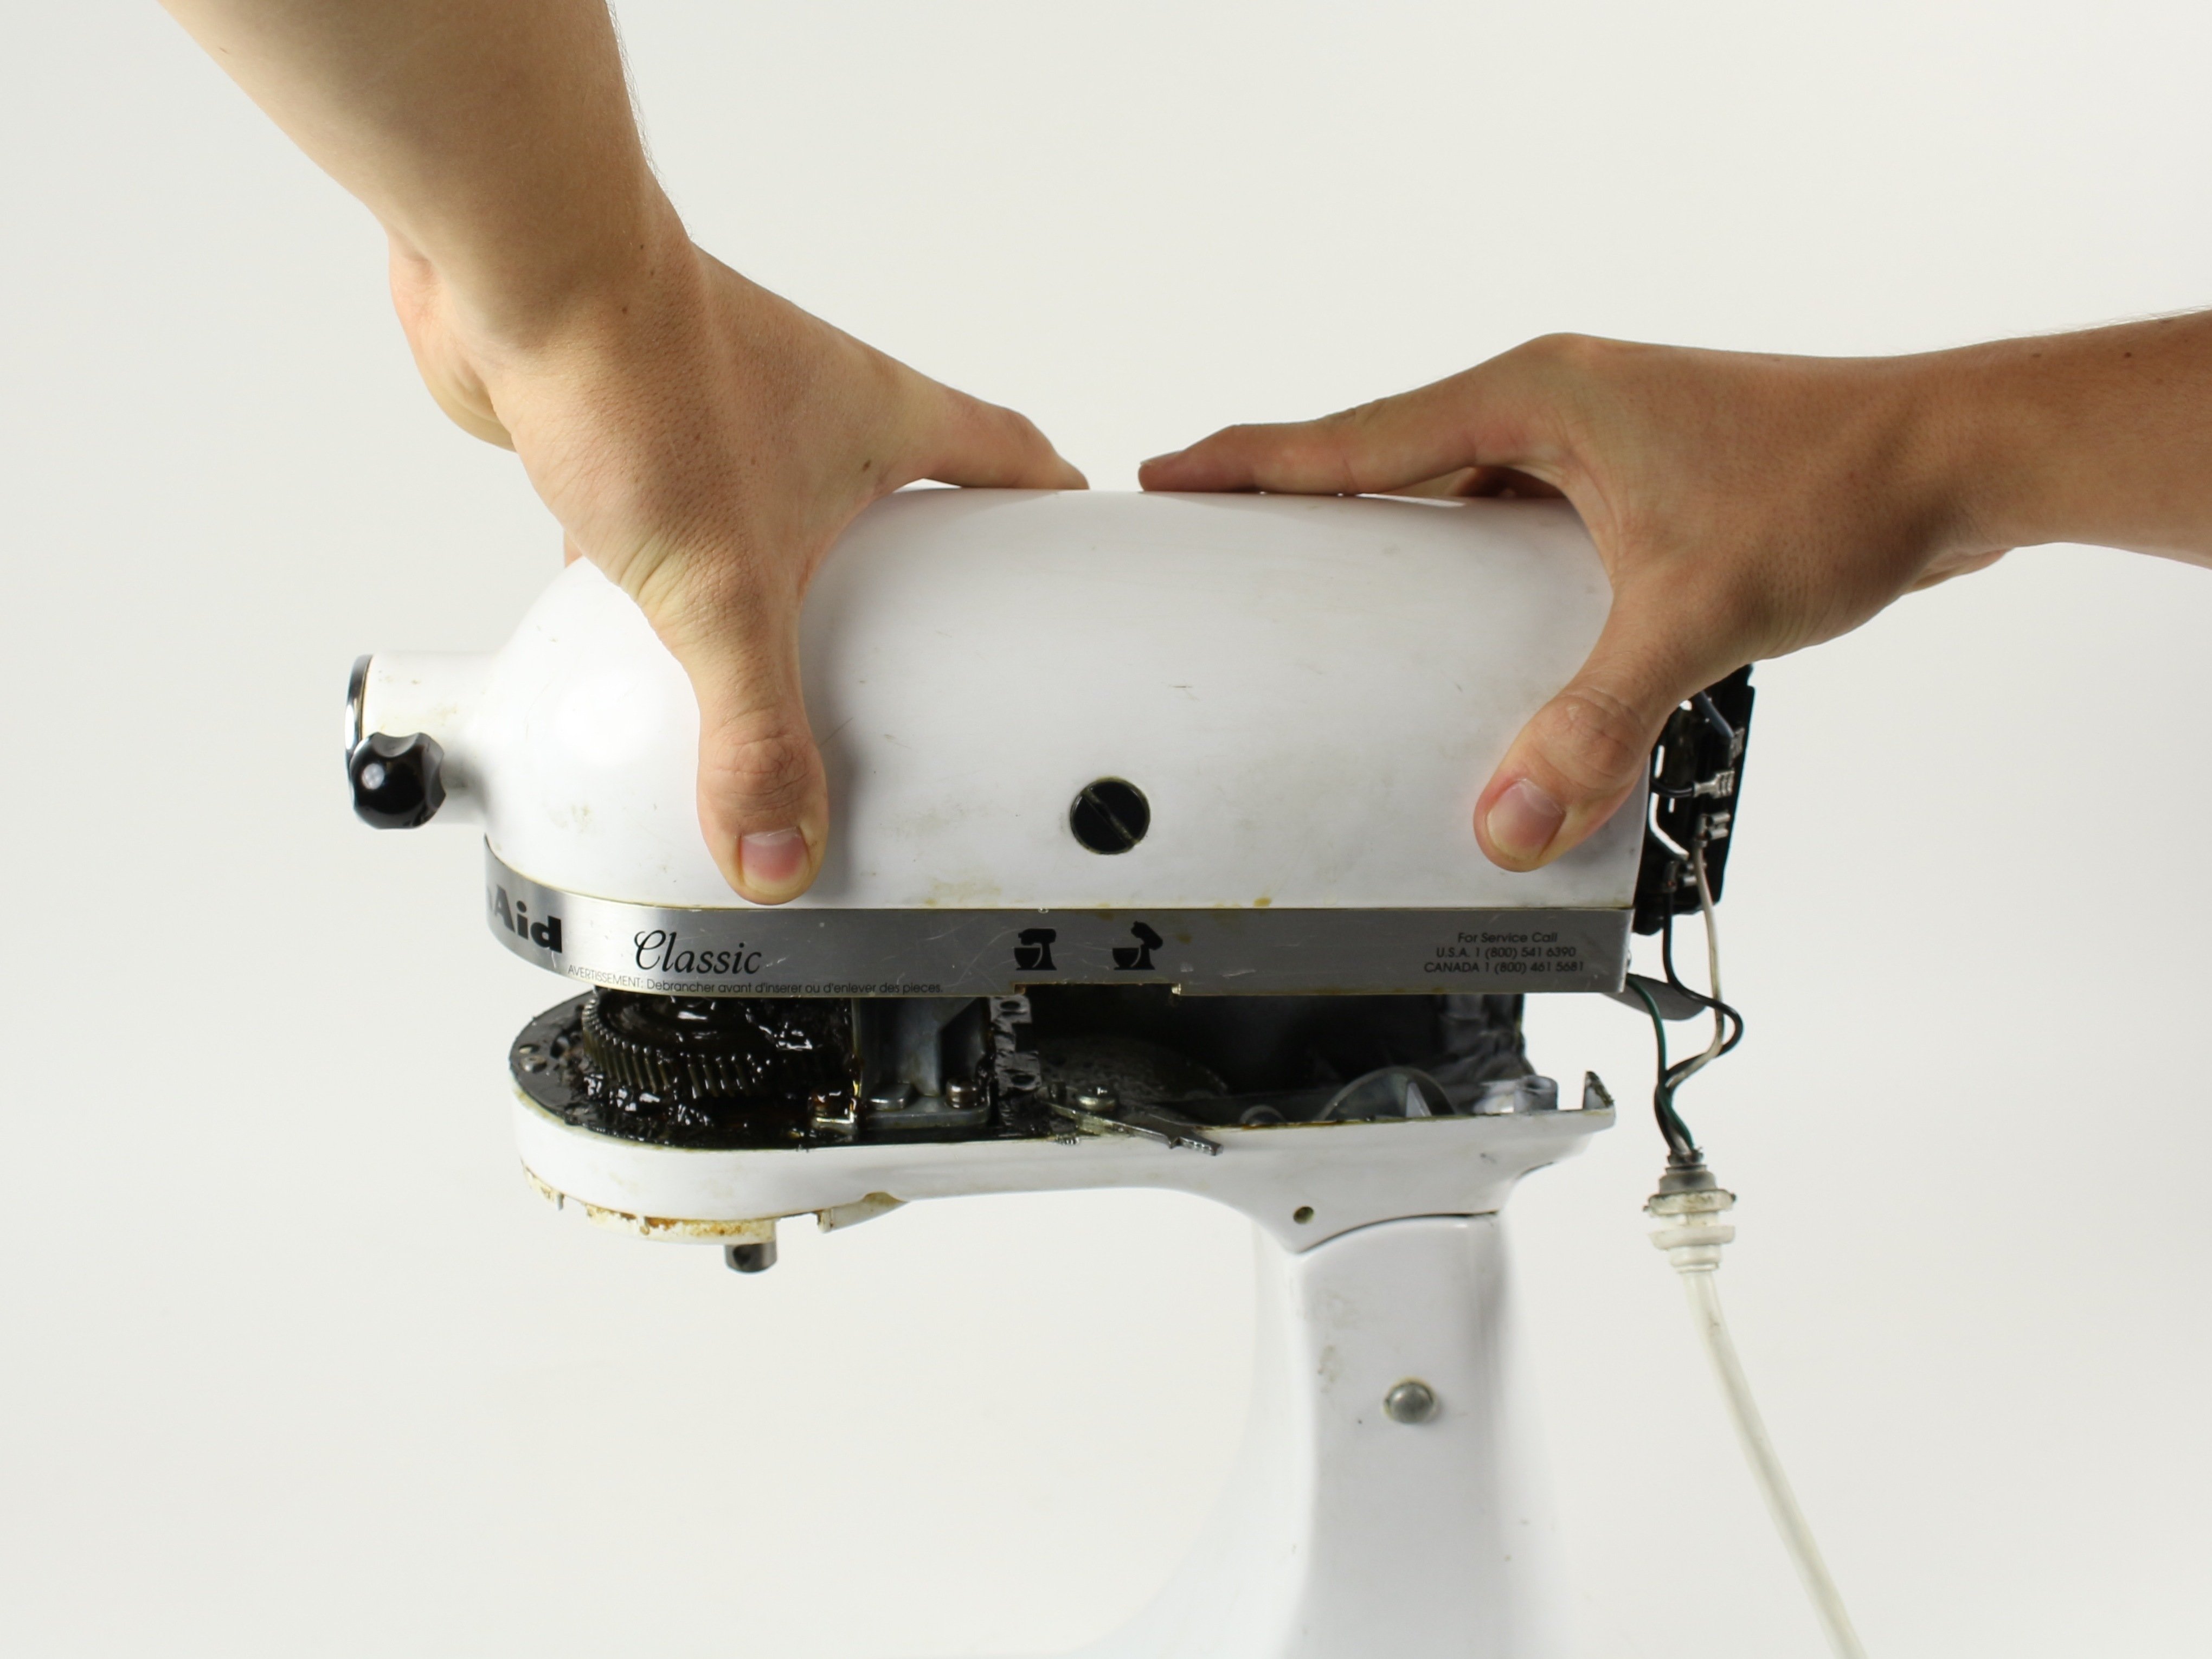
H3: Step 4: Accessing the Motor Housing and Gearbox
Once the bottom cover and trim band are off, you’ll start seeing the internal components.
- Tilt-Head Pivot: For tilt-head models, you’ll need to address the pivot mechanism. There are usually screws on the sides that hold the head to the base.
- Removing the Head (Optional but Recommended): In many cases, it’s easier to work on the mixer if the head is detached from the base. Look for screws that secure the head assembly to the main column. These might be on the sides or underneath the pivot point.
- Accessing the Motor: The motor is usually located within the main body of the mixer. You’ll likely need to remove further screws to access the motor housing.
H3: Step 5: Dealing with the Speed Control and Wiring
- Speed Control Lever: The speed control lever is often connected to a printed circuit board (PCB) or a series of switches. You might need to gently disconnect wires or remove small screws holding the control assembly in place.
- Wiring Harness: Take pictures of how the wires are connected. KitchenAid mixers have a wiring harness that connects the motor, speed control, and power cord. You might need to disconnect these wires. Small spade connectors are common. Use needle-nose pliers to gently pull them off.
H3: Step 6: KitchenAid Mixer Motor Replacement or Servicing
This is where you’ll directly access the motor.
- Motor Mounting Screws: The motor is typically held in place by several screws. Remove these.
- Lifting the Motor: Carefully lift the motor out of its housing. Be mindful of any wires still attached.
- Motor Brushes: If your motor is weak or not running, worn-out carbon brushes are a common culprit. These are usually small cylindrical components with springs behind them. They are often held in place by a small clip or screw. You can purchase replacement brushes and carefully swap them out.
- Lubrication: While the motor is out, you can check its bearings for dryness. A small amount of food-grade lubricant can help.
H3: Step 7: Gearbox and Lubrication for KitchenAid Mixer Servicing
The gearbox is crucial for the mixer’s operation.
- Accessing the Gearbox: The gearbox is usually located at the top of the mixer, near the attachment hub. You’ll likely need to remove the planetary assembly and any covers protecting the gearbox.
- Gear Inspection: Look for any signs of wear or damage on the gears. If teeth are broken or worn, the gears may need replacement.
- Re-lubrication: This is a vital part of KitchenAid mixer maintenance. Old grease dries out and loses its effectiveness.
- Clean Old Grease: Thoroughly clean all old grease from the gears and housing using a clean cloth and a degreaser (ensure it’s safe for plastics if applicable).
- Apply New Grease: Apply a generous amount of food-grade grease to all gear teeth and moving parts. Don’t be shy with the grease; it helps protect and lubricate effectively.
H3: Step 8: Planetary and Beater Mechanism
This is where your KitchenAid mixer beater replacement comes into play, or you might be cleaning the planetary assembly.
- Planetary Assembly: This is the mechanism that makes the beater rotate around the bowl. It’s usually held in place by screws or clips.
- Beater Shaft: The shaft that holds your beaters, whisks, and dough hooks is connected to the planetary. Ensure it spins freely.
- Beater Shaft Seal: If you notice oil leaks around the beater shaft, the seal might be compromised and needs replacement.
H3: Step 9: Reassembly
Reassembly is essentially the reverse of disassembly.
- Reverse Order: Follow your photos to put everything back in the correct order.
- Screw Tightness: Don’t overtighten screws, especially when dealing with plastic parts.
- Wire Connections: Ensure all wire connectors are firmly seated.
- Lubricate Moving Parts: Apply grease to all metal-on-metal contact points in the gearbox and tilt mechanism.
Common KitchenAid Mixer Repair Scenarios and Troubleshooting
Let’s delve into specific KitchenAid mixer troubleshooting issues and how disassembly helps.
H4: Troubleshooting a Stuck Tilt-Head
If your tilt-head is stuck:
- Unplug: Always start by unplugging the mixer.
- Examine Pivot Points: Look for any obstructions or bent metal around the hinge points.
- Remove Trim Band: Accessing the pivot mechanism usually requires removing the trim band (as described in Step 2).
- Check the Lock Mechanism: Some models have a lock lever or mechanism. Ensure it’s not jammed. You might need to gently pry or tap it.
- Lubricate: Apply a bit of lubricant to the pivot points and locking mechanism.
H4: Addressing a Noisy or Slow Motor
This is often related to the motor itself or the gearbox.
- Disassemble to Motor: Follow steps to access the motor (Step 6).
- Check Motor Brushes: Worn brushes are a very common cause of a weak or non-starting motor. Replace if needed.
- Inspect Motor Bearings: If the motor spins with difficulty or makes a grinding noise, the motor bearings might be worn. Lubrication might help temporarily, but replacement is often the long-term solution.
- Disassemble Gearbox: Access the gearbox (Step 7) and check for dried-out grease or damaged gears. Re-greasing the gearbox can often resolve noise issues.
H4: Fixing Oil Leaks
Oil leaks usually stem from the gearbox or the planetary assembly.
- Identify Leak Source: Pinpoint where the oil is coming from.
- Gearbox Seals: If oil is leaking from the planetary hub or around the gearbox housing, the seals are likely compromised. These require disassembly of the gearbox to replace.
- Planetary Bearing Seal: A leak around the beater shaft itself often means the planetary bearing seal needs replacement.
H4: KitchenAid Mixer Attachments Not Working
If your KitchenAid mixer attachments aren’t engaging or working properly, the issue could be in the power hub or the mixer’s internal drive.
- Check the Power Hub: Ensure the attachment is correctly seated and locked into the power hub.
- Inspect Drive Pin: Look at the drive pin on the attachment and the corresponding slot in the mixer’s hub. Both should be clean and free of debris.
- Internal Drive Gears: If the attachment spins but doesn’t engage properly, or if there’s a clicking sound, there might be an issue with the internal drive gears connecting the motor to the attachment hub. This requires significant disassembly of the mixer’s head.
Replacing KitchenAid Stand Mixer Parts
When performing KitchenAid mixer repair, you might need to replace specific KitchenAid stand mixer parts.
H5: Common Replacement Parts
- Motor Brushes: Readily available and a common fix for motor issues.
- Gears: If gears are damaged, you can order specific replacement gear sets for your model.
- Belts: Some older models might have drive belts that can wear out.
- Seals and Gaskets: Essential for preventing oil leaks.
- Wire Harnesses: If a wire is damaged.
- Speed Control Board: For issues with speed regulation.
H5: Sourcing KitchenAid Mixer Parts
- Official KitchenAid Website: They offer genuine replacement parts.
- Authorized Service Centers: They can also supply parts and perform repairs.
- Appliance Parts Retailers: Online and local stores often carry a wide range of KitchenAid stand mixer parts.
- Third-Party Retailers: Be cautious with aftermarket parts; ensure they are compatible with your specific mixer model.
Maintaining Your KitchenAid Mixer for Longevity
Regular KitchenAid mixer maintenance can prevent the need for major repairs and extend the life of your appliance.
H5: Lubrication Schedule
- Gearbox Re-lubrication: It’s recommended to re-grease the gearbox every 5-10 years, depending on usage. If you notice any grinding or resistance, it’s a good time to do it.
- Motor Lubrication: Motors typically have sealed bearings that don’t require user lubrication. If they are failing, replacement is usually necessary.
H5: Cleaning Best Practices
- Exterior Cleaning: Wipe down the exterior with a damp cloth and mild soap. Avoid harsh chemicals.
- Interior Cleaning: After disassembly for servicing, clean all metal parts thoroughly. Ensure all grease is removed before applying new food-grade grease to the gearbox.
- Bowl and Accessories: Wash the bowl, beaters, whisks, and dough hooks according to the manufacturer’s instructions. Many are dishwasher safe, but check your model’s manual.
H5: Storage
- Clean and Dry: Store your mixer in a clean, dry place when not in use.
- Protect the Power Hub: Cover the power hub with the included cap to prevent dust and debris from entering.
Frequently Asked Questions (FAQ)
Q1: How often should I lubricate my KitchenAid mixer gearbox?
A1: It’s generally recommended to re-grease the gearbox every 5 to 10 years, depending on how frequently you use your mixer. If you hear grinding noises or notice decreased performance, it’s a good indicator it’s time for lubrication.
Q2: Can I use any grease to lubricate my KitchenAid mixer?
A2: No, it’s crucial to use food-grade grease specifically designed for mixers or kitchen appliances. White lithium grease or a specialized food-grade gearbox lubricant is recommended. Avoid petroleum-based greases or general-purpose lubricants, as they can be harmful if they come into contact with food.
Q3: My KitchenAid mixer stopped working mid-mix. What should I check first?
A3: First, ensure the mixer is properly plugged into a working outlet. Check your home’s circuit breaker. If those are fine, the issue might be internal. This could be a blown thermal fuse, worn motor brushes, or a problem with the speed control. Disassembly might be necessary to diagnose and fix these.
Q4: My KitchenAid mixer is making a grinding noise. What could be the problem?
A4: A grinding noise usually indicates a problem with the gearbox. This could be due to dried-out or insufficient lubrication, or worn-out gears. Disassembling the gearbox to clean and re-grease it, or to inspect and replace damaged gears, is the likely solution.
Q5: Where can I find replacement parts for my KitchenAid mixer?
A5: You can find genuine KitchenAid stand mixer parts on the official KitchenAid website, through authorized service centers, and from reputable appliance parts retailers online and in stores.
Q6: Is it difficult to replace the motor in a KitchenAid mixer?
A6: KitchenAid mixer motor replacement is a moderately complex task. It requires careful disassembly to access the motor, disconnect wiring, remove the old motor, and install the new one. Taking detailed photos during disassembly is highly recommended. If you’re not comfortable with electrical components or mechanical assembly, it’s best to seek professional help.
Q7: My KitchenAid mixer attachments are not working properly. What should I check?
A7: Ensure the attachment is correctly seated and locked into the power hub. Check the drive pin on the attachment and the corresponding slot on the mixer’s hub for any damage or debris. If the attachment itself is functioning, the issue might be internal drive gears within the mixer’s head.
Q8: How do I remove the planetary assembly for cleaning?
A8: To remove the planetary assembly, you’ll typically need to detach the mixer head from the base (if applicable), remove any covers around the top of the mixer, and then unscrew the planetary unit itself. Be mindful of any springs or small parts that might be released.
Q9: My KitchenAid mixer smells like burning. What should I do?
A9: A burning smell often indicates an overheating motor or electrical issue. Immediately unplug the mixer. Do not attempt to use it again until the issue is diagnosed. This could be due to worn motor brushes causing excessive friction, a failing motor bearing, or an electrical short. This is a situation where professional inspection might be warranted.
This comprehensive guide provides the foundational knowledge for tackling KitchenAid mixer disassembly for repair and KitchenAid mixer servicing. Remember to work patiently, keep your parts organized, and consult your specific mixer model’s manual if available for any variations. With a little care and the right approach, you can keep your KitchenAid mixer performing beautifully for years to come.