Can you knead dough in a KitchenAid mixer? Yes, you absolutely can knead dough in a KitchenAid mixer. In fact, it’s one of the most efficient and user-friendly ways to develop gluten for perfect bread.
Kneading dough is the magical step that transforms a shaggy mess of ingredients into a smooth, elastic foundation for delicious bread. While many bakers still swear by the rhythmic push-and-fold of hand-kneading, the KitchenAid stand mixer has revolutionized home bread making. This powerful appliance can do the heavy lifting for you, ensuring consistent results and saving your arms. But how long exactly should you let your KitchenAid work its magic? Let’s dive into the fascinating world of Kitchenaid dough kneading time and discover the secrets to achieving perfectly kneaded dough every single time.
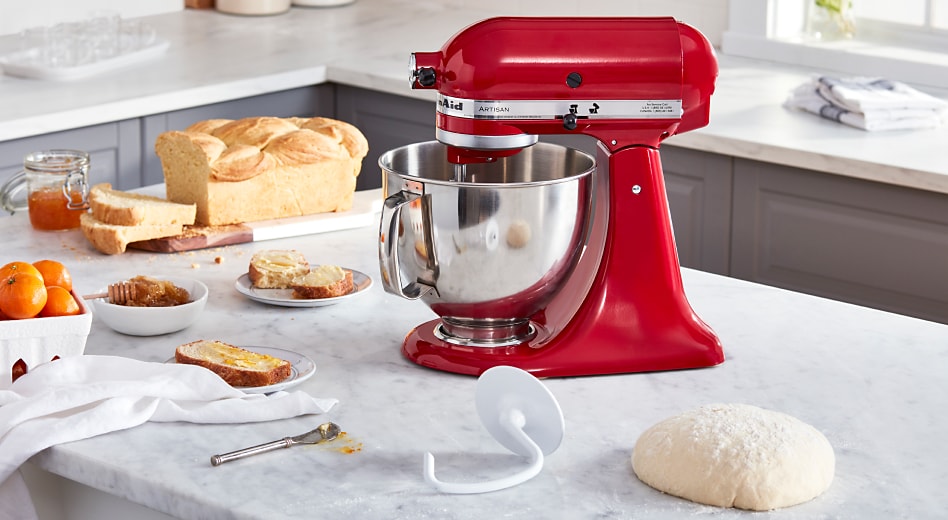
Image Source: www.kitchenaid.com
Deciphering Dough Consistency in a KitchenAid
The key to successful bread making with a stand mixer lies in knowing what to look for. A well-kneaded dough will exhibit specific characteristics, indicating that the gluten network is properly developed. This is where Kitchenaid mixer dough consistency becomes your most reliable guide.
The Science Behind Gluten Development
Gluten is a protein complex formed when flour mixes with water and is then worked. Kneading aligns and stretches these gluten strands, creating a strong, elastic network. This network traps the gases produced by yeast, allowing the dough to rise and giving bread its structure and chewy texture.
Visual Cues of Well-Kneaded Dough
- Smoothness: The dough should transition from a sticky, lumpy mass to a smooth, homogenous ball.
- Elasticity: It should feel slightly firm but spring back when gently pressed with a finger.
- The Windowpane Test: This is the gold standard. Take a small piece of dough and gently stretch it between your fingers. If you can stretch it thin enough to see light through it without it tearing, your gluten is well-developed.
How Long to Knead Dough in KitchenAid: A Detailed Approach
The bread making mixer kneading duration isn’t a fixed number. It depends on several factors, including the type of flour, the hydration level of the dough, and the specific KitchenAid model you’re using. However, we can establish general guidelines to help you achieve optimal results.
Standard White Bread Dough
For most basic white bread recipes, you’ll be aiming for a KitchenAid dough hook kneading process of approximately 6-10 minutes at speed 2.
- Initial Mixing: After combining your ingredients in the mixer bowl, let the dough hook mix for about 1-2 minutes until the ingredients are just combined and a shaggy dough forms.
- Kneading Phase: Increase the speed to 2 and let the mixer knead.
- Monitoring: Periodically check the dough. It should start to pull away from the sides of the bowl and gather around the dough hook.
- Windowpane Test: Perform the windowpane test regularly to gauge gluten development.
- Over-Kneading: Be aware that over-kneading can toughen the dough and result in a dense loaf. It’s better to err on the side of slightly under-kneaded than over-kneaded.
Whole Wheat and Multigrain Doughs
Whole wheat flour contains bran and germ, which can cut gluten strands. This means these doughs often require slightly longer kneading times and may not achieve the same level of elasticity as white flour doughs.
- Kneading Time: Expect to knead whole wheat or multigrain doughs for 8-12 minutes on speed 2.
- Consistency: The dough might remain slightly stickier and less elastic than white bread dough, even after proper kneading. Focus on the windowpane test as your primary indicator.
Enriched Doughs (Brioche, Challah)
Doughs enriched with eggs, butter, or sugar are often softer and stickier. The fat and sugar can interfere with gluten development, requiring a slightly different approach.
- Kneading Time: These doughs might need 10-15 minutes of kneading on speed 2.
- Adding Fat: If your recipe calls for adding softened butter or oil, do so gradually once the dough has started to form. This prevents the fat from coating the flour and inhibiting gluten formation.
- Stickiness: It’s normal for enriched doughs to remain somewhat sticky. The windowpane test is still crucial, but don’t be surprised if it doesn’t stretch as thinly as a lean dough.
Pizza Dough
For pizza dough, the goal is a dough that’s elastic and has a good chew, but not necessarily the super-aerated structure of bread.
- How long to knead pizza dough in KitchenAid: Generally, 5-8 minutes on speed 2 is sufficient.
- Texture: The dough should be smooth and elastic, able to be stretched without tearing easily.
- Hydration: Pizza dough can vary in hydration, which will affect kneading time. Higher hydration doughs might require a bit longer.
Optimizing Dough Elasticity KitchenAid
Achieving optimal dough elasticity Kitchenaid relies on consistent speed and attentive observation. Using the correct attachments and speeds plays a vital role.
The Importance of the Dough Hook
The C-shaped or spiral dough hook attachment is specifically designed for kneading. It mimics the action of hand-kneading, folding and stretching the dough effectively. Always ensure you are using the correct dough hook for your KitchenAid model.
Stand Mixer Dough Proofing Considerations
While kneading develops gluten, proofing (or fermentation) allows yeast to work its magic. Proper kneading is essential for a good proof.
- After Kneading: Once the dough is kneaded, transfer it to a lightly oiled bowl, cover it, and let it rise in a warm place.
- First Rise (Bulk Fermentation): This is where the dough significantly increases in volume. The time will vary based on temperature and yeast activity, but typically ranges from 1 to 2 hours.
- Second Rise (Proofing): After shaping, the dough undergoes a second rise, preparing it for baking.
The KitchenAid Dough Hook Kneading Process: Step-by-Step
Let’s break down the Kitchenaid dough hook kneading process into actionable steps:
- Assemble Ingredients: Ensure all your ingredients are measured accurately and at the correct temperature (usually room temperature or slightly warm for yeast activation).
- Combine in Mixer Bowl: Add dry ingredients first, followed by wet ingredients.
- Attach Dough Hook: Securely attach the dough hook to your KitchenAid mixer.
- Initial Mix: Start the mixer on speed 1 or 2 for about 1-2 minutes until a shaggy dough forms.
- Increase Speed: Gradually increase the speed to 2.
- Knead and Observe: Let the mixer knead the dough. Watch as it begins to gather around the hook and pull away from the sides of the bowl.
- Perform Windowpane Test: Every few minutes, stop the mixer and test a small piece of dough for elasticity.
- Adjusting as Needed: If the dough is too dry and not coming together, add a teaspoon of water at a time. If it’s too wet and sticky, add a teaspoon of flour at a time. Do this sparingly!
- Reaching Ideal Consistency: Continue kneading until the dough passes the windowpane test. This usually takes 6-10 minutes for white flour doughs.
- Remove and Proceed: Once kneaded, remove the dough from the bowl, shape it as needed, and proceed with your recipe’s proofing instructions.
Best Kneading Time for Bread Machine vs. KitchenAid
It’s important to distinguish between best kneading time for bread machine and using a stand mixer. Bread machines have built-in kneading cycles that are optimized for their internal mechanisms.
- Bread Machines: These typically have pre-programmed cycles that include kneading, resting, and baking. You don’t manually control kneading time; the machine does it for you. The total cycle time can range from 3 to 4 hours.
- KitchenAid Stand Mixers: These offer flexibility. You control the kneading time and can stop the process once the desired gluten development is achieved, allowing for greater precision and experimentation.
Effective Dough Kneading Techniques with Your Stand Mixer
While the mixer does the work, employing certain effective dough kneading techniques can enhance your results.
Understanding Your Flour
Different flours have varying protein content. High-protein flours (like bread flour) will develop gluten more readily and might require slightly less kneading time compared to all-purpose flour.
Hydration Levels
Dough hydration (the ratio of water to flour) significantly impacts kneading.
- Low Hydration (Stiff Dough): Denser doughs with less water might need slightly longer to develop gluten.
- High Hydration (Sticky Dough): Wetter doughs can be stickier and might seem to knead faster, but it’s crucial to ensure the gluten network is properly formed. Adding fat or sugar can also affect how the dough behaves during kneading.
Speed Control
Always start on a lower speed to combine ingredients and prevent splattering. Gradually increase to speed 2 for efficient kneading. Avoid going to higher speeds, as this can overheat the motor and damage the gluten structure.
Troubleshooting Common Kneading Issues
Even with a KitchenAid, you might encounter a few bumps in the road.
Dough Too Sticky
- Cause: Too much liquid, or flour not absorbing liquid properly.
- Solution: Resist the urge to add too much flour. Let the mixer knead for a few more minutes. If it remains excessively sticky after 10-12 minutes, add flour very gradually, one teaspoon at a time. Sometimes, a little extra chilling can firm up a sticky dough.
Dough Too Stiff/Dry
- Cause: Not enough liquid, or flour is too absorbent.
- Solution: Add liquid very gradually, one teaspoon of water or milk at a time, until the dough starts to come together.
Dough Tearing During Windowpane Test
- Cause: Insufficient kneading or over-handling the dough.
- Solution: Continue kneading. If it consistently tears after extended kneading, the flour might have a lower protein content, or the dough might have been handled too roughly before or during kneading.
KitchenAid Mixer Dough Consistency: A Quick Reference Table
| Dough Type | Typical Kneading Time (Speed 2) | Visual Cues |
|---|---|---|
| Basic White Bread | 6-10 minutes | Smooth, elastic, pulls from sides, passes windowpane test. |
| Whole Wheat/Multigrain | 8-12 minutes | Less elastic than white, may remain slightly stickier, but should pass windowpane test. |
| Enriched Doughs | 10-15 minutes | Soft, potentially sticky, smooth surface, may not stretch as thinly in windowpane test. |
| Pizza Dough | 5-8 minutes | Smooth, elastic, holds shape well, can be stretched without tearing easily. |
The Role of Stand Mixer Dough Proofing in Baking Success
While kneading is about gluten development, stand mixer dough proofing is about fermentation and flavor development. After optimal kneading, the dough needs time to rise.
- Yeast Activity: Properly kneaded dough provides a strong structure to hold the gases produced by yeast during proofing.
- Flavor Development: Longer, slower proofing times generally lead to more complex flavors.
- Temperature Control: Proofing temperature is critical. A warm environment (around 75-80°F or 24-27°C) is ideal for most yeasted doughs.
Frequently Asked Questions (FAQ)
Q1: Can I over-knead dough in a KitchenAid?
A: Yes, it’s possible. Over-kneading can break down the gluten strands, making the dough tough and dense. Stick to the recommended times and the windowpane test as your guide.
Q2: My KitchenAid dough hook seems to be missing spots while kneading. What should I do?
A: Stop the mixer occasionally and scrape down the sides and bottom of the bowl with a spatula to ensure all the flour is incorporated.
Q3: Does the wattage of my KitchenAid mixer affect kneading time?
A: Higher wattage mixers generally have more power and can handle thicker, stiffer doughs more easily. However, the principles of kneading time and consistency remain the same.
Q4: What if my dough is too dry for the dough hook to work effectively?
A: Add liquid very gradually (1 teaspoon at a time) until the dough starts to come together and the hook can catch it.
Q5: How do I know if my dough is “proofed” enough?
A: During the first rise, poke the dough gently with a floured finger. If the indentation springs back slowly, the dough is ready. If it springs back immediately, it needs more time. If it deflates, it may be over-proofed.
Q6: Is it necessary to use the dough hook for kneading? Can I use the paddle attachment?
A: It’s highly recommended to use the dough hook. The paddle attachment is designed for mixing batters and creaming, not for developing the strong gluten network needed for bread. Using the paddle can result in under-kneaded dough.
By mastering the Kitchenaid dough kneading time and paying attention to the Kitchenaid mixer dough consistency, you’ll be well on your way to baking consistently delicious bread at home. Happy baking!