Can you spray paint kitchen cabinets for professional results? Yes, absolutely! Using a sprayer is the secret weapon for achieving a smooth, factory-like finish on your kitchen cabinets. It’s a game-changer for DIY cabinet painting and a true cabinet refinishing method that elevates your kitchen’s look.
Painting kitchen cabinets can seem like a daunting task, but with the right tools and techniques, you can achieve a beautiful, durable finish that rivals professional jobs. While brushing and rolling are options, spray painting cabinets offers a superior result, especially when aiming for that coveted smooth, even coat. This guide will walk you through everything you need to know to successfully paint your kitchen cabinets with a sprayer, turning your DIY cabinet sprayer project into a stunning success. We’ll cover choosing the best sprayer for cabinets, proper preparation, the painting process itself, and essential tips for a flawless finish. Get ready to give your kitchen a major facelift!
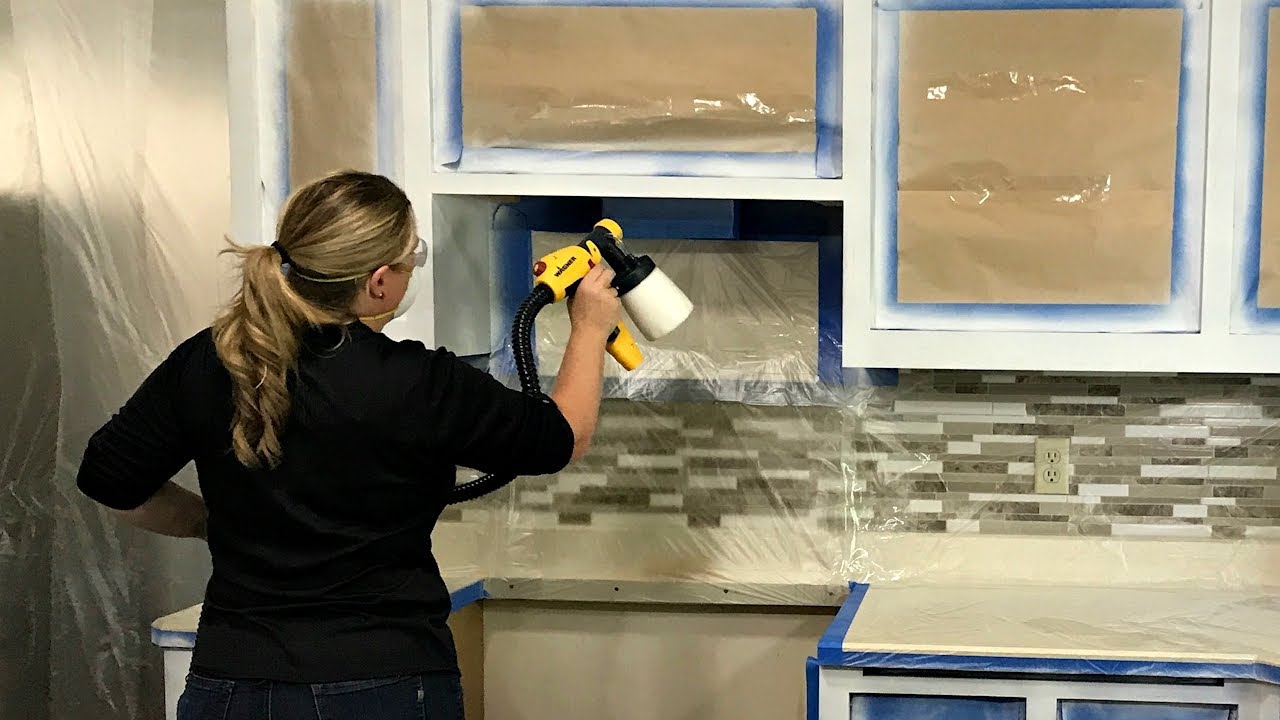
Image Source: i.ytimg.com
Deciphering the Right Sprayer for Your Project
Choosing the best sprayer for cabinets is crucial for achieving professional results. Not all sprayers are created equal, and selecting the right one will make a significant difference in the quality of your finish and the ease of your project. For cabinet painting, you’ll primarily be looking at two main types: airless sprayers and HVLP (High Volume, Low Pressure) sprayers.
HVLP Sprayer for Cabinets: The Gold Standard
When it comes to kitchen cabinet painting, an HVLP sprayer for cabinets is generally considered the top choice. The “High Volume, Low Pressure” technology means it atomizes paint efficiently, delivering a fine mist with minimal overspray. This results in a much smoother, more controlled application, which is ideal for the detailed work of cabinets.
Why HVLP is Ideal for Cabinets:
- Superior Finish: The fine atomization creates an incredibly smooth, streak-free finish, similar to factory finishes.
- Less Overspray: HVLP sprayers use lower pressure, meaning less paint bounces off the surface and ends up in the air or on surrounding areas. This is a huge advantage when working in your kitchen.
- Paint Economy: Because of reduced overspray, you’ll use less paint overall, making it a more cost-effective option in the long run.
- Control: The lower pressure gives you more control over the paint flow, which is essential for achieving even coats on cabinet doors and frames.
Types of HVLP Systems:
- Turbine HVLP: These systems have a separate motor (turbine) that generates the air. They are powerful and can handle thicker paints. They are often more expensive but offer excellent performance.
- Compressed Air HVLP: These require an air compressor to supply the air. If you already own a compressor, this can be a more budget-friendly option. You’ll need to ensure your compressor has enough CFM (Cubic Feet per Minute) to power the spray gun effectively.
Airless Sprayers: For Larger Projects or Faster Application
While HVLP sprayers are preferred for fine finishes on cabinets, airless sprayers can also be used. They work by forcing paint through a small tip at very high pressure.
Consider Airless Sprayers If:
- Speed is a Priority: Airless sprayers apply paint much faster than HVLP sprayers.
- You Have a Large Area: If you’re painting a vast number of cabinets or entire rooms, an airless sprayer can significantly cut down on your work time.
- Budget is a Concern (for the sprayer itself): Entry-level airless sprayers can sometimes be more affordable than comparable HVLP systems.
Drawbacks of Airless Sprayers for Cabinets:
- More Overspray: The high pressure creates significantly more overspray, requiring extensive masking and ventilation.
- Less Fine Finish: While you can achieve good results, it’s harder to get the ultra-smooth, factory-like finish that HVLP sprayers are known for, especially with thinner paints.
- Requires Thinner Paint: You might need to thin your paint more than with an HVLP sprayer to avoid clogging.
Choosing the Right Sprayer: Key Features to Look For
Regardless of the type of sprayer you choose, keep these features in mind:
- Adjustable Pressure/Flow: This is vital for controlling the paint output and achieving the right atomization.
- Multiple Spray Tips: Different tip sizes are designed for different paint viscosities and application types. Having a few options allows for greater versatility.
- Ease of Cleaning: Cabinet painting involves multiple coats and potentially different colors. A sprayer that’s easy to disassemble and clean will save you a lot of hassle.
- Power (for HVLP): For turbine HVLP systems, check the motor’s wattage. For compressed air systems, ensure your compressor can provide adequate CFM at the required PSI (Pounds per Square Inch).
Recommendation: For the best results in how to paint kitchen cabinets with sprayer, an HVLP sprayer, particularly a turbine-powered unit, is highly recommended for the DIYer. It strikes the perfect balance between finish quality, control, and ease of use for cabinet refinishing.
The Foundation of a Flawless Finish: Preparation is Key
Before you even think about picking up a sprayer, meticulous preparation is paramount. This is arguably the most critical step in achieving professional-looking kitchen cabinet painting. Skipping or rushing through preparation is the fastest way to sabotage your efforts.
Step 1: Detach and Organize
- Remove Doors and Drawers: Take all cabinet doors and drawer fronts off their hinges and slides. This allows you to spray them flat, ensuring even coverage on all sides and edges without drips.
- Label Everything: Use painter’s tape and a marker to label each door and drawer front with its corresponding location in the kitchen. This is crucial for reassembly. A simple system like “Upper Left 1,” “Lower Right 2” works well.
- Remove Hardware: Take off all hinges, knobs, and pulls. Store them in labeled bags or containers.
Step 2: Deep Cleaning for Superior Adhesion
Cabinet surfaces accumulate grease, grime, and cooking residue, especially in kitchens. If not removed, this can prevent paint from adhering properly, leading to peeling and a poor finish.
- Degrease Thoroughly: Use a good quality degreaser. A solution of TSP (Trisodium Phosphate) substitute, Simple Green, or a dedicated cabinet cleaner works well. Wear gloves and eye protection.
- Scrub Gently: Use a non-abrasive sponge or cloth to scrub all surfaces of the doors, drawer fronts, and cabinet boxes. Pay attention to corners and crevices.
- Rinse and Dry: Rinse all surfaces thoroughly with clean water and a clean cloth to remove any degreaser residue. Allow everything to dry completely.
Step 3: Repairing Imperfections
- Fill Holes and Dents: Use wood filler to fill any nail holes, dents, or minor damage. Let the filler dry completely according to the product instructions.
- Sand Fills: Once the filler is dry, sand it smooth with fine-grit sandpaper (120-180 grit). Ensure the repaired areas are flush with the surrounding surface.
Step 4: Sanding for Adhesion
Sanding creates a “tooth” on the surface, allowing the primer and paint to adhere better. This step is vital for long-lasting results.
- Choose the Right Grit: For most cabinet finishes, start with a medium-grit sandpaper (120-150 grit) to scuff up the surface. Follow this with a fine-grit sandpaper (180-220 grit) for a smoother finish.
- Sanding Technique: Lightly sand all surfaces you intend to paint. The goal is to dull the existing finish, not to remove it entirely.
- Clean the Dust: After sanding, it’s essential to remove all dust. Use a shop vacuum with a brush attachment, followed by tack cloths. Tack cloths are specifically designed to pick up fine dust particles.
Step 5: Priming for a Perfect Base Coat
Primer is non-negotiable when painting cabinets. It seals the surface, blocks stains, promotes adhesion, and provides a uniform base for your topcoat, ensuring better color depth and durability.
- Select the Right Primer: For cabinets, especially if they are stained or laminate, a high-quality adhesion-promoting primer is best. Look for primers specifically designed for cabinetry or for difficult-to-paint surfaces. Oil-based primers are excellent for blocking stains but can be harder to clean. Water-based (latex or acrylic) primers are easier to work with and clean up. Tinting your primer to match your paint color can also improve the final result.
- Apply Thin, Even Coats: Apply the primer using your sprayer, following the same techniques you’ll use for the paint. Aim for thin, even coats.
- Light Sanding Between Coats: After the primer has dried completely, lightly sand with 220-grit sandpaper and wipe with a tack cloth. This step, often called “de-nibbing,” removes any small imperfections or dust nibs that may have settled, ensuring a super smooth surface for the paint.
Step 6: Masking is Your Best Friend
Thorough masking is crucial to protect areas you don’t want to paint, especially when spray painting cabinets.
- Protect Adjacent Surfaces: Use painter’s tape along edges of walls, countertops, backsplashes, and appliance openings. Ensure the tape is pressed down firmly to prevent paint bleed.
- Cover Floors and Counters: Lay down drop cloths or plastic sheeting to protect your floors and countertops. Use large rolls of paper or plastic for extensive coverage.
- Mask Cabinet Interiors: Decide if you will paint the inside of your cabinets. If not, carefully mask the interior surfaces and shelf edges.
- Ventilation: Ensure you have adequate ventilation, especially if using oil-based products. Open windows and use fans to circulate air.
Mastering the Art of Spray Painting Cabinets
With preparation complete and your workspace set up, it’s time to bring your kitchen cabinets to life with the sprayer. How to spray paint cabinets effectively requires practice and attention to detail.
Step 1: Prepare Your Sprayer
- Read the Manual: Familiarize yourself with your specific sprayer model, its assembly, and its operating instructions.
- Choose the Right Spray Tip: For cabinets, a fine-finish tip is recommended. These tips produce a finer atomization and a more controlled spray pattern. Tip sizes vary (e.g., 310, 410, 515), with the first digit indicating the fan width (e.g., 4 means a 4-inch fan at 12 inches away), and the last two digits indicating the orifice size in thousandths of an inch (e.g., 10 means a 0.010-inch orifice). For cabinets, a tip between 310 and 515 is usually appropriate, depending on the paint.
- Thin Paint (If Necessary): Check your paint manufacturer’s recommendations for thinning. Most paints need to be thinned for spraying, especially with HVLP systems. Use the recommended thinner and strain the paint before putting it in the sprayer.
- Prime the Sprayer: Follow the manufacturer’s instructions to prime the sprayer with the paint or primer you are using.
Step 2: Practice Your Technique
This is where the magic happens, but it’s best to practice before spraying your actual cabinets.
- Scrap Material: Use a large piece of cardboard, MDF, or an old cabinet door to practice your spraying technique.
- Maintain Consistent Distance: Hold the sprayer perpendicular to the surface and maintain a consistent distance of 10-12 inches. Too close will cause drips; too far will result in a poor, dry spray.
- Consistent Speed: Move the sprayer at a steady, even pace. Avoid stopping and starting on the surface.
- Trigger Control: Start your spray off the surface, trigger the sprayer, move across the surface, and release the trigger after you have passed the edge. This prevents over-spraying at the beginning and end of each pass.
- Overlap Passes: Each spray pass should overlap the previous one by about 50%. This ensures complete, even coverage and avoids holidays (missed spots).
Step 3: Spraying the Doors and Drawer Fronts
- Lay Them Flat: Spray doors and drawer fronts horizontally on sawhorses or a spray tent setup. This prevents runs and sags.
- Spray Edges First: Lightly spray the edges of the doors and drawer fronts. Then, spray the main surface.
- Apply Thin Coats: It’s always better to apply multiple thin coats than one thick coat. This allows for better flow and leveling, minimizing the risk of drips.
- Allow Drying Time: Let each coat dry thoroughly according to the paint manufacturer’s recommendations before applying the next coat. Proper drying is essential for adhesion between coats.
- Light Sanding Between Coats: After the first coat of paint has dried, lightly sand any imperfections with a fine-grit (220-320 grit) sanding sponge or sandpaper. Wipe away dust with a tack cloth. Repeat this for subsequent coats as needed.
Step 4: Spraying the Cabinet Boxes (Frames)
- Mask Thoroughly: Ensure all interiors and adjacent surfaces are impeccably masked.
- Work Systematically: Start with one cabinet box at a time. Spray the inside of the doors first if you are painting them.
- Spray Back to Front: A common technique is to spray the back of the cabinet interior, then the sides, and finally the front face frame. This minimizes overspray onto already painted surfaces.
- Use a 50% Overlap: As practiced, maintain a consistent 10-12 inch distance and overlap each pass by 50% for even coverage.
Step 5: Drying and Curing
- Drying vs. Curing: Understand the difference. Drying is when the paint feels dry to the touch. Curing is the process where the paint hardens completely, which can take several days or even weeks depending on the paint type and environmental conditions.
- Handle with Care: During the curing period, be gentle with the cabinets. Avoid placing heavy objects on them or slamming doors.
Step 6: Reassembly
- Allow Adequate Curing Time: Wait at least 24-48 hours, or as recommended by the paint manufacturer, before reattaching doors and drawers.
- Attach Hardware: Reinstall your cleaned or new hardware.
- Check Operation: Ensure doors and drawers open and close smoothly.
Choosing the Right Cabinet Coating for Spray Application
The type of paint or cabinet coating you choose will significantly impact the final finish and durability. For kitchen cabinet painting with a sprayer, you need a coating that sprays well and provides a hard, durable finish.
Popular Cabinet Coating Options:
- Water-Based Acrylic Enamels: These are the most popular choice for DIY cabinet painting today. They offer excellent durability, flexibility, and are easy to clean up with water. Many high-quality acrylic enamels are formulated for spray application and provide a smooth, hard finish.
- Pros: Low VOCs, easy cleanup, quick drying, good durability.
- Cons: May require more coats for deep color coverage, can sometimes be prone to scratching if not the highest quality.
- Water-Based Alkyd Enamels (Hybrid Enamels): These combine the best features of latex and oil-based paints. They offer the hardness and durability of oil-based paints with the ease of cleanup of latex paints. They spray beautifully and provide a very durable, smooth finish.
- Pros: Excellent durability and hardness, smooth finish, good adhesion, easier cleanup than oil-based.
- Cons: Higher cost than standard latex, may have a slight odor during application.
- Oil-Based Enamels: Traditionally, these were the go-to for cabinets due to their exceptional hardness, durability, and smooth finish.
- Pros: Very hard, durable finish, excellent leveling, resistant to chipping and staining.
- Cons: Strong fumes, require mineral spirits for cleanup, longer drying times, can yellow over time, higher VOCs. While offering a superior finish, the cleanup and VOCs make them less appealing for many DIYers.
- Lacquer/Conversion Varnish: These are professional-grade finishes typically applied by cabinet manufacturers or professional painters using specialized equipment. They offer an extremely hard, smooth, and durable finish.
- Pros: Extremely durable, smooth, hard finish, fast drying.
- Cons: Require specialized spray equipment and ventilation due to high VOCs and flammability, difficult for DIY application.
What to Look for in a Cabinet Paint for Spraying:
- Sprayability: Check the product label or description. Many paints specifically state they are suitable for spraying or recommend thinning ratios for sprayer application.
- Durability: Kitchen cabinets are high-traffic surfaces. Choose a paint known for its hardness and resistance to chipping, scratching, and moisture.
- Leveling Properties: Good leveling means the paint flows out smoothly and the brush or spray marks disappear as it dries, contributing to that sought-after smooth finish.
- Adhesion: The paint must adhere well to your primed surface.
Recommendation: For the average DIYer tackling kitchen cabinet painting, high-quality water-based acrylic enamels or hybrid alkyd enamels are the best choice for spray painting cabinets. They offer a fantastic balance of ease of use, durability, and a professional-looking finish.
Tips and Tricks for Pro Results
Achieving a pro-level finish with a cabinet painting sprayer comes down to attention to detail and employing best practices.
Ventilation is Non-Negotiable
- Safety First: Paint fumes can be harmful and flammable. Ensure you have excellent ventilation. Open windows, use fans to create cross-breeze, and consider a respirator mask rated for organic vapors.
- Airflow Direction: Position fans to pull fumes away from you and out of the work area.
Lighting Matters
- Good Lighting: Proper lighting is essential to see high spots, low spots, and ensure even coverage. Use work lights that illuminate your spraying area thoroughly.
Control Your Spray Pattern
- Fan Width: Adjust the spray gun to achieve the desired fan width. A wider fan covers more area quickly, but a narrower fan might be better for tighter spaces or more precise control on edges.
- Fan Shape: Ensure your spray pattern is consistent. If it’s heavier in the middle or on the edges, adjust your spray gun’s fluid and air settings.
Don’t Skimp on Coats
- Multiple Thin Coats: As mentioned, multiple thin coats are far superior to one thick coat. This allows for proper drying, adhesion, and a smoother finish.
- Drying Times: Adhere to recommended drying times between coats. Rushing this can lead to adhesion issues or lifting of previous coats.
Clean Your Sprayer Religiously
- Immediate Cleaning: Clean your sprayer immediately after you finish spraying, and also between color changes or if you take a break longer than 10-15 minutes. Dried paint in the sprayer can cause clogs and ruin your equipment.
- Follow Manufacturer Instructions: Each sprayer has specific cleaning procedures. Follow them diligently.
Consider a Spray Booth or Tent
- Containment: For a truly dust-free environment, consider setting up a temporary spray booth using plastic sheeting. This helps contain overspray and prevents dust and debris from settling on your wet paint.
- Elevate Doors: Using sawhorses or risers to elevate doors and drawer fronts allows you to spray all edges easily and avoids them sticking to the surface when they are wet.
Final Touches for a Polished Look
- Cabinet Frames: When painting the cabinet boxes, pay attention to the inside edges of the doors and drawer openings. These are often visible and should have a clean, finished look.
- Hardware: Consider upgrading your hardware for a refreshed look. New knobs and pulls can make a big difference.
Frequently Asked Questions (FAQ)
Here are some common questions people have when undertaking DIY cabinet sprayer projects for painting kitchen cabinets:
-
Q: Do I need a special sprayer for kitchen cabinets?
A: While you can use various sprayers, an HVLP sprayer is highly recommended for achieving a smooth, professional finish on kitchen cabinets due to its fine atomization and reduced overspray. -
Q: What kind of paint should I use for spray painting cabinets?
A: High-quality water-based acrylic enamels or hybrid alkyd enamels are excellent choices. They offer durability, good sprayability, and easy cleanup. -
Q: How many coats of paint do I need?
A: Typically, two to three thin coats of primer and two to three thin coats of paint are recommended for a durable and even finish. Always follow the paint manufacturer’s guidelines. -
Q: What’s the best way to clean my sprayer?
A: Clean your sprayer immediately after use according to the manufacturer’s instructions. This usually involves flushing the system with water (for water-based paints) or the appropriate solvent (for oil-based paints) and disassembling and cleaning the parts. -
Q: How long should I wait between coats?
A: Always check the paint manufacturer’s recommendations. Generally, wait until the paint is dry to the touch, which can range from 1 to 4 hours for water-based paints, before applying the next coat. -
Q: Can I spray laminate cabinets?
A: Yes, but it requires careful preparation. Thorough cleaning, scuff sanding, and a high-adhesion primer specifically designed for laminate are crucial for the paint to adhere properly. -
Q: What’s the difference between drying and curing for paint?
A: Drying means the paint is no longer wet and is safe to touch. Curing is a longer process where the paint hardens completely and reaches its maximum durability, which can take several days to weeks. Handle cabinets gently during the curing period.
By following these steps and tips, you can confidently tackle painting kitchen cabinets with a sprayer and achieve a beautiful, professional-looking cabinet refinishing with sprayer that revitalizes your kitchen. Happy spraying!