Can you frame an outdoor kitchen yourself? Yes, with careful planning and the right materials, you can absolutely frame your own outdoor kitchen. This guide will walk you through the entire process, from initial design to the final framing touches, ensuring your backyard culinary haven is built sturdy and looks fantastic. Building an outdoor cooking area requires attention to detail, but by following these steps, you can achieve a professional-looking result.
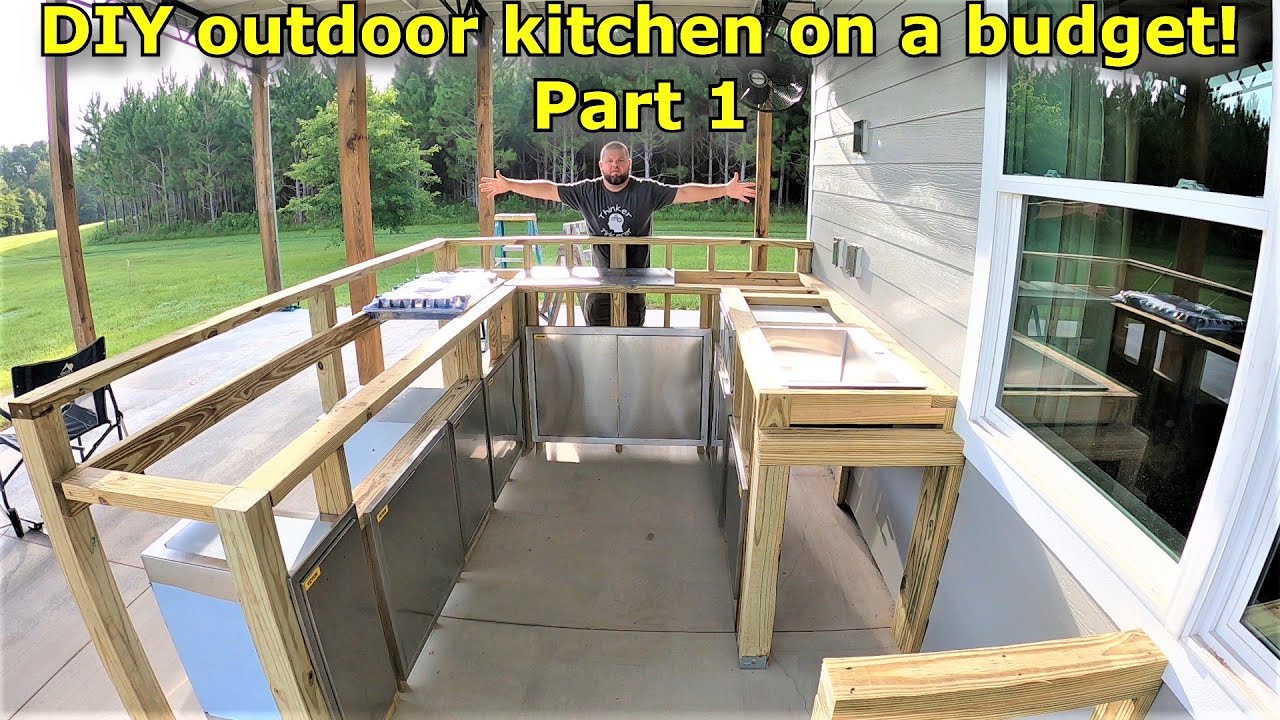
Image Source: i.ytimg.com
Planning Your Outdoor Kitchen Frame
Before you pick up a single tool, thorough planning is crucial for successful outdoor kitchen construction. This phase dictates the longevity and functionality of your entire backyard kitchen structure.
Designing Your Patio Kitchen Layout
Your patio kitchen design is the blueprint for your entire project. Think about how you’ll use the space. Where will the grill go? Do you want a sink, refrigerator, or bar seating?
- Appliance Placement: Measure your chosen appliances accurately. Ensure enough clearance for opening doors and drawers.
- Workspace: Allocate ample counter space for prep and serving.
- Flow: Consider traffic patterns. How will people move around the kitchen and to seating areas?
- Utilities: Plan for gas lines, electrical outlets, and water supply. This will influence your framing and material choices.
- Permits: Check local building codes and obtain any necessary permits. This is a critical step that many DIYers overlook.
Choosing Your Outdoor Kitchen Framing Materials
The right materials are essential for an outdoor kitchen that can withstand the elements. Durability and resistance to moisture are key.
- Wood Framing: Pressure-treated lumber is a popular choice for its resistance to rot and insects. Cedar and redwood are naturally resistant but can be more expensive.
- Pros: Relatively easy to work with, readily available, cost-effective.
- Cons: Requires regular sealing and maintenance to prevent weathering and decay.
- Metal Framing: Steel studs, particularly galvanized steel, offer excellent durability and resistance to moisture and pests.
- Pros: Highly durable, resistant to rot, fire, and pests, straight and consistent.
- Cons: Can be harder to cut and fasten, requires specialized tools, may be more expensive upfront.
- Concrete Blocks/CMUs: A very robust option, offering excellent structural integrity and fire resistance.
- Pros: Extremely durable, fireproof, insect-proof, low maintenance.
- Cons: Labor-intensive, requires concrete and mortar expertise, less adaptable for future modifications.
Selecting the Right Outdoor Kitchen Foundation
The foundation is the bedrock of your backyard kitchen structure. It needs to be level, stable, and able to support the weight of the framing, countertops, and appliances.
- Concrete Slab: The most common and stable option. It provides a solid, level surface.
- Process: Excavate, lay gravel, install forms, place rebar, and pour concrete. Ensure it’s sloped slightly for drainage.
- Pavers or Decking: If you already have a patio or deck, you might be able to build directly on it. Ensure the existing surface is strong enough and level. Additional support might be needed.
- Concrete Piers: For uneven terrain or if you want to elevate your kitchen, concrete piers can be used. These provide strong support points.
Preparing the Site for Framing
Proper site preparation ensures your frame is built on a stable and level base, preventing future structural issues.
Site Clearing and Leveling
- Clear Debris: Remove any rocks, plants, or old structures from the build area.
- Excavation: If pouring a concrete slab, excavate the area to the required depth.
- Leveling: Use a level and stakes to ensure the ground or existing foundation is perfectly flat. Adjust as needed by adding or removing soil or gravel.
Laying Out the Footprint
Using stakes and string, mark the exact dimensions of your outdoor kitchen island construction.
- Measure Twice, Cut Once: Double-check all measurements for accuracy.
- Square Corners: Use the 3-4-5 method (or a large framing square) to ensure your layout is perfectly square. For a right triangle, if one side is 3 units and the other is 4 units, the hypotenuse will be 5 units.
Framing the Outdoor Kitchen Base
This is where your backyard kitchen structure begins to take shape. The base needs to be robust and square.
Building the Perimeter Frame
This forms the outer walls of your kitchen island.
- Materials: Use pressure-treated 2x4s or 2x6s for the base plate and top plate. For a more robust structure, consider 4×4 posts for corner supports.
- Cutting: Cut your lumber to the precise lengths required for your layout.
- Assembly:
- Lay out the base plates on your prepared foundation.
- Attach them together at the corners using sturdy screws or nails designed for exterior use.
- Ensure the frame is level and square.
- Anchor the base plate securely to the foundation (e.g., using concrete anchors for a slab).
Installing Vertical Supports (Studs)
These provide the vertical strength to your frame.
- Spacing: Studs are typically spaced 16 inches or 24 inches on center, depending on the load they will bear and the sheathing you plan to use. For outdoor kitchens, 16 inches on center provides greater strength.
- Attachment: Securely fasten the studs to the base plate and top plate. Use appropriate exterior-grade screws. Ensure studs are plumb (perfectly vertical).
- Corner Studs: Reinforce corners with extra studs for added stability.
Adding Horizontal Bracing and Blocking
Bracing adds rigidity and prevents the frame from racking (leaning or shifting).
- Blocking: Install short pieces of lumber (blocking) between studs at intervals, especially where heavy items like countertops or appliances will be mounted. This provides solid attachment points.
- Knee Bracing: Diagonal braces installed at corners can significantly increase the structural integrity of your frame.
Framing for Appliances and Features
This stage involves creating openings and supports for specific components of your outdoor kitchen.
Creating Openings for Appliances
- Grill Enclosure: Frame an opening that perfectly fits your built-in grill. Include reinforced headers above the opening to support the weight of the framing above.
- Refrigerator/Storage: Frame standard openings for refrigerators, doors, or drawers. Ensure enough clearance.
- Sink and Countertop Supports: Add extra blocking and support framing where your sink will be installed and along the edges where countertops will rest.
Building Shelving and Storage within the Frame
- Interior Framing: Add horizontal supports within the frame to create shelves or dividers for storage.
- Reinforcement: Use thicker lumber or double up framing members where shelves will bear significant weight.
Covering Your Outdoor Kitchen Frame
Once the basic structure is built, you’ll add sheathing and potentially a roof structure. This is where pergola kitchen framing comes into play if you’re adding a overhead element.
Sheathing the Frame
Sheathing protects the framing and provides a surface for your exterior finish.
- Materials:
- Cement Board: An excellent choice for outdoor kitchens due to its moisture resistance and durability. It’s ideal for areas around grills and sinks.
- Exterior-Grade Plywood: Can be used, but requires a robust waterproofing membrane and is more susceptible to moisture damage over time if not properly maintained.
- Veneer Stone or Stucco Lath: If you plan a stone or stucco finish, you’ll install lath or furring strips over the framing to create a base for these materials.
- Installation: Attach the sheathing securely to the studs using appropriate screws or fasteners. Ensure joints are staggered for added strength.
Framing for a Covered Outdoor Kitchen
If you’re building a covered outdoor kitchen, you’ll need to frame the roof structure.
- Pergola Kitchen Framing: This typically involves adding support posts that extend upwards and are capped with beams and rafters.
- Post Placement: Ensure posts are securely anchored to the foundation or the main kitchen structure.
- Beam Installation: Install beams that run perpendicular to the rafters, supporting them.
- Rafters: Cut and install rafters to create the roof slope.
- Roofing Material: Consider materials like polycarbonate panels, corrugated metal, or even rafters for a slatted roof, depending on your desired aesthetic and weather protection.
- Solid Roof Framing: If you’re aiming for a more enclosed structure, you’ll frame a more traditional roof with rafters, joists, and potentially a decking material for shingles or other roofing.
Finishing Touches and Considerations
With the framing complete, you’re ready for the next steps, but a few extra considerations can enhance your outdoor kitchen.
Installing Countertops
Countertops are a significant part of your outdoor kitchen island construction.
- Materials: Granite, concrete, tile, or stainless steel are common choices.
- Support: Ensure your framing provides adequate support for the weight of the countertop material. Add extra blocking where needed.
Exterior Finishes
- Stucco: Applied over lath, it provides a seamless, durable finish.
- Stone Veneer: Offers a natural, rustic look. Requires a solid base for adhesion.
- Tile: Can be used for a decorative and durable finish, especially on backsplashes.
- Wood Siding: If using a wood frame, consider treated wood siding or composite materials that are weather-resistant.
Weatherproofing and Sealing
- Waterproofing Membranes: Apply waterproof membranes to any exposed wood or areas prone to moisture before applying finishes.
- Sealants: Regularly seal wood components and grout lines in tile to protect against water damage and staining.
Building an Outdoor Cooking Area: A Visual Walkthrough (Conceptual)
Imagine you’re building a simple, rectangular outdoor kitchen island frame using pressure-treated lumber.
Table 1: Basic Wood Frame Components
| Component | Material (Typical) | Dimensions (Example) | Purpose |
|---|---|---|---|
| Base Plate | Pressure-Treated 2×6 | 2×6 inches | The bottom-most horizontal piece, secured to the foundation. |
| Studs | Pressure-Treated 2×4 | 2×4 inches | Vertical supports for the walls. |
| Top Plate | Pressure-Treated 2×4 | 2×4 inches | The top-most horizontal piece, capping the studs. |
| Blocking | Pressure-Treated 2×4 | 2×4 inches | Short horizontal pieces between studs for added stability and support. |
| Corner Posts | Pressure-Treated 4×4 | 4×4 inches | Strong vertical supports at each corner. |
| Headers | Doubled Pressure-Treated 2×6 | 2×6 inches (doubled) | Horizontal beams above openings (like for a grill) to carry loads. |
Step 1: Foundation and Layout
- Pour a concrete slab foundation.
- Once cured, mark the outer perimeter of your kitchen island using chalk lines.
Step 2: Assembling the Base
- Cut your 2×6 base plates to the marked dimensions.
- Screw them together at the corners to form a rectangle.
- Anchor this base frame securely to the concrete slab using concrete anchors. Ensure it’s perfectly level.
Step 3: Installing Corner Posts and Studs
- Cut your 4×4 corner posts to the desired height.
- Plumb and secure these posts to the inside corners of the base frame.
- Cut your 2×4 studs for the wall sections.
- Install studs vertically, spaced 16 inches on center, between the corner posts and along the perimeter. Secure them to the base plate.
Step 4: Adding the Top Plate and Blocking
- Cut 2x4s for the top plate, creating a continuous frame along the top of your studs.
- Screw the top plate to the tops of the studs, ensuring it’s level.
- Install horizontal blocking between studs at strategic locations where countertops will rest or appliances will mount.
Step 5: Framing Openings
- Measure and mark the precise locations for your grill, sink, or storage access.
- Install cripple studs (short studs) above and below openings.
- Install double headers (two pieces of lumber screwed together) above any significant openings like the grill enclosure. These headers carry the weight from above.
- Install jack studs to support the headers.
Step 6: Sheathing
- Cut cement board panels to fit the exterior of your frame.
- Screw the cement board to the studs using appropriate screws, ensuring a flush surface.
This conceptual walkthrough illustrates the core framing process. Remember to adapt these steps based on your specific design and chosen materials.
Frequently Asked Questions (FAQ)
What is the best material for framing an outdoor kitchen?
The best material depends on your climate, budget, and desired longevity. Pressure-treated lumber is common and cost-effective. Galvanized steel offers superior durability and pest resistance. Concrete blocks provide maximum strength and weather resistance but are more labor-intensive.
Can I build an outdoor kitchen frame on a wooden deck?
Yes, you can build an outdoor kitchen frame on a wooden deck, but you must ensure the deck is structurally sound and can support the added weight. You may need to reinforce the deck joists or add additional support posts directly to the ground beneath the deck.
How do I ensure my outdoor kitchen frame is waterproof?
Proper framing involves using weather-resistant materials like pressure-treated lumber or steel. Crucially, you’ll need to apply waterproofing membranes (like house wrap or specific liquid membranes) over the framing and sheathing before applying your final exterior finish. Seal all joints and edges meticulously.
What is the typical spacing for studs in an outdoor kitchen frame?
For most outdoor kitchen applications, spacing studs 16 inches on center provides excellent strength and support for countertops and finishes. In some cases, 24 inches on center might suffice, but 16 inches is generally recommended for robustness.
Do I need a permit for framing an outdoor kitchen?
Yes, in most jurisdictions, you will likely need a building permit for framing an outdoor kitchen, especially if it involves permanent structures, gas lines, or electrical work. Always check with your local building department before starting any construction.
How do I frame an outdoor kitchen island with a sink?
When framing for a sink, ensure you install sturdy blocking both underneath the sink opening and along the edges where the countertop will rest. This blocking provides essential support for the weight of the sink and the water it will hold. You’ll also need to frame for any plumbing connections.
What is pergola kitchen framing?
Pergola kitchen framing refers to the structural framework built to support a pergola roof structure over your outdoor kitchen area. This typically involves sturdy posts, beams, and rafters to create an open-air roof, offering shade and an aesthetic element.
How to make a DIY outdoor kitchen frame sturdy?
To ensure a sturdy DIY outdoor kitchen frame, use quality, weather-resistant materials, anchor the base securely to a solid foundation, use proper fasteners (exterior-grade screws), install ample blocking for support, and incorporate diagonal bracing at corners to prevent racking.
What are common outdoor kitchen framing materials?
Common outdoor kitchen framing materials include pressure-treated lumber (pine, fir), cedar, redwood, galvanized steel studs, and sometimes concrete blocks (CMUs).
How do I frame a covered outdoor kitchen?
Framing a covered outdoor kitchen involves building the base and wall structure as usual, then constructing a roof frame. This could be a simple pergola structure with posts, beams, and rafters, or a more solid roof requiring joists and sheathing, depending on your design and local building codes.
By following these steps and paying close attention to detail, you can successfully frame your own outdoor kitchen, creating a durable and functional extension of your home’s living space.