Can you lay floor tiles in your kitchen yourself? Yes, you absolutely can! With the right preparation, tools, and a bit of patience, tackling DIY kitchen flooring is a rewarding project that can transform your kitchen’s look and feel. This comprehensive guide will walk you through every step of tiling a kitchen floor, from choosing the perfect tiles to the final seal.
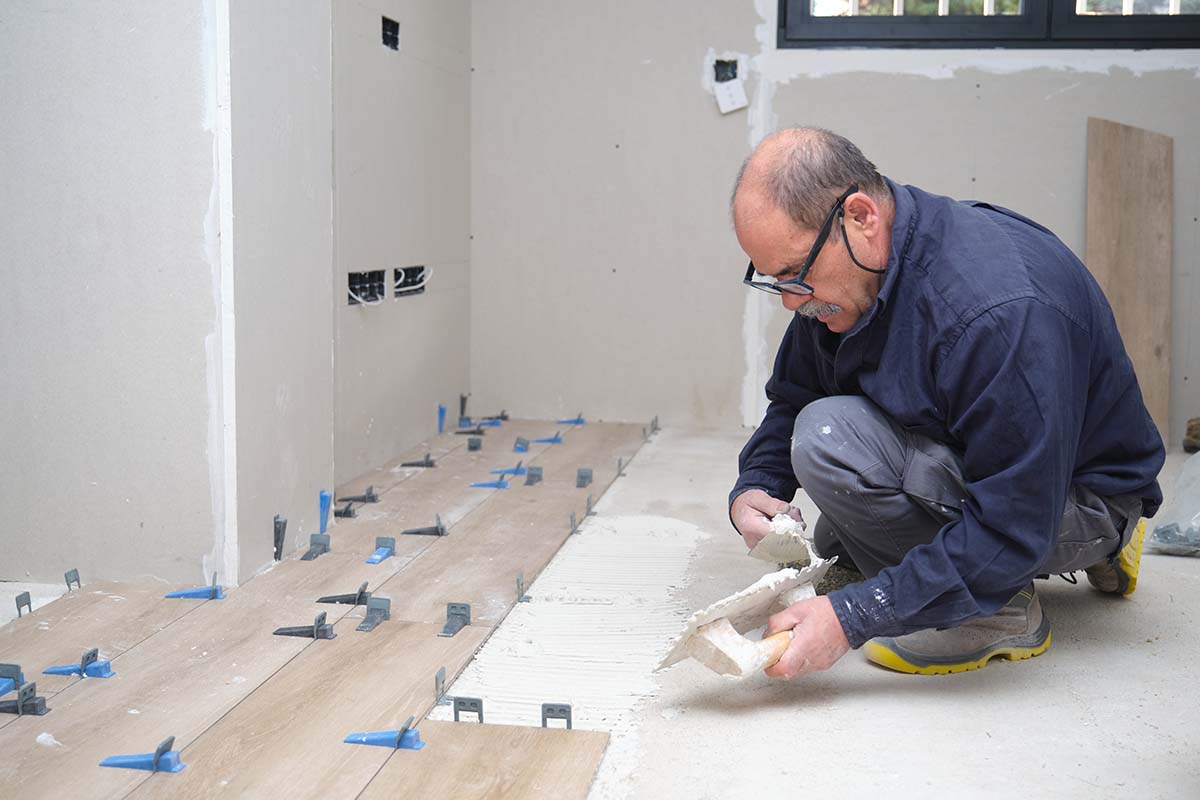
Image Source: acekitchen.co.uk
Choosing Kitchen Tiles: The Foundation of Your Design
The first and arguably most exciting step is choosing kitchen tiles. Your kitchen floor tiles need to be durable, easy to clean, and visually appealing, as they’ll be subjected to spills, dropped items, and heavy foot traffic.
Popular Kitchen Tile Materials
When selecting kitchen tiles, consider the material’s properties:
- Ceramic Tiles: A budget-friendly and versatile option. They come in a vast array of colors, patterns, and styles. Ceramic tiles are generally easy to cut and install, making them a great choice for DIYers. Their porous nature means they require a good sealant, especially in a busy kitchen environment.
- Porcelain Tiles: Denser and less porous than ceramic, porcelain is highly durable and resistant to water, stains, and scratches. This makes it an excellent choice for kitchens where spills and wear are common. Porcelain can be more challenging to cut than ceramic, requiring specialized tools.
- Natural Stone Tiles (Granite, Marble, Slate): These offer a luxurious and unique aesthetic. However, they are often more expensive, porous, and require regular sealing to prevent staining. They can also be slippery and may chip if heavy items are dropped.
- Vinyl Tiles (Luxury Vinyl Tile – LVT): A fantastic DIY-friendly option. LVT is water-resistant, durable, and comes in many designs mimicking wood, stone, or ceramic. Many LVT products feature a click-lock or peel-and-stick system, simplifying installation.
- Quarry Tiles: Unglazed tiles made from natural clay, offering a rustic and earthy look. They are very durable but porous and require sealing.
Factors to Consider When Selecting
- Durability: Look for tiles with a high PEI (Porcelain Enamel Institute) rating for wear resistance, especially for high-traffic kitchen areas. A PEI rating of 4 or 5 is ideal for kitchens.
- Slip Resistance: A textured surface or a high coefficient of friction (COF) rating will help prevent slips, particularly important in a kitchen.
- Water Resistance: Essential for a kitchen. Porcelain and vinyl tiles are excellent choices.
- Ease of Cleaning: Smooth, non-porous surfaces are easiest to wipe clean.
- Style and Aesthetics: Consider the overall design of your kitchen. Do you want a classic look, a modern feel, or something rustic?
- Budget: Prices can vary significantly based on material and brand.
Preparing Your Kitchen Subfloor: The Crucial First Step
A successful kitchen tile installation hinges on a well-prepared subfloor. This is where many DIY projects can go wrong if not given enough attention. A solid, level, and clean subfloor is non-negotiable.
Identifying Your Existing Subfloor
- Concrete Slab: Common in many homes. Ensure it’s clean, dry, and free of cracks or damage. Minor imperfections can often be corrected with a leveling compound.
- Plywood or OSB (Oriented Strand Board): Typically found in older homes or over joists. Plywood should be at least 3/4 inch thick. If you have thinner underlayment, you may need to add another layer of plywood or a cement backer board for a stable base.
Essential Subfloor Preparation Steps
- Remove Existing Flooring: This includes old tiles, vinyl, carpet, or linoleum. Scrape away any old adhesive thoroughly.
- Clean the Subfloor: Sweep, vacuum, and then wash the subfloor to remove all dust, dirt, grease, and debris. A clean surface is vital for adhesive to bond properly.
- Check for Levelness: Use a long, straight edge or a spirit level to identify any high or low spots.
- Leveling the Subfloor:
- High Spots: Grind down high spots on concrete with a concrete grinder. For slight imperfections on wood, you might be able to sand them down, but aggressive sanding can weaken the wood.
- Low Spots: Use a self-leveling compound for significant dips on concrete. For wood subfloors, you can use a wood filler or thin layers of leveling compound specifically designed for wood. Always follow the manufacturer’s instructions for drying times.
- Address Cracks and Damage:
- Concrete: Fill minor cracks with a concrete patching compound. For larger cracks or damage, you might need a specialized repair product or consider a cement backer board over the entire area.
- Wood: Reinforce loose subflooring by screwing it down securely to the joists. Fill cracks with wood filler.
- Install Underlayment (If Necessary):
- Cement Backer Board: This is highly recommended for tiling over wood subfloors, especially in areas prone to moisture like kitchens. It provides a stable, water-resistant base and prevents cracking due to wood expansion and contraction. Cut the backer board to size using a utility knife and score it, or use a specialized scoring tool. Lay the sheets with a slight gap between them (check manufacturer recommendations). Secure with approved screws, ensuring the screw heads are flush with the surface.
- Self-Adhering Waterproof Membrane: Some modern systems incorporate a decoupling membrane that also acts as a waterproofing layer.
Key Point: A solid, flat subfloor is the secret to preventing cracked tiles and loose grout later on. Don’t cut corners here!
Essential Tools for Tiling Kitchen Floors
Having the right tools for tiling kitchen floors will make the job significantly easier and more professional.
- Safety Gear: Safety glasses, work gloves, knee pads, and a dust mask.
- Measuring and Marking: Tape measure, chalk line, pencil, carpenter’s square.
- Tile Cutting Tools:
- Manual Tile Cutter: Good for straight cuts on ceramic and porcelain tiles.
- Wet Saw: Essential for complex cuts, curves, and cutting harder materials like porcelain and natural stone.
- Angle Grinder with Diamond Blade: Useful for small adjustments and cuts, but generates a lot of dust.
- Adhesive Application: Notched trowel (the notch size depends on the tile size and type – check adhesive recommendations), margin trowel.
- Grouting Tools: Grout float (rubber), buckets for water, sponges (large grout sponge), trowel or putty knife for scraping excess grout.
- Tile Spacers: To ensure consistent grout lines.
- Level: For checking the flatness of your tiles as you lay them.
- Rubber Mallet: To gently tap tiles into the adhesive.
- Utility Knife: For cutting backer board or vinyl.
- Tile Nippers: For small, irregular cuts or to shape edges.
- Buckets: For mixing adhesive and grout, and for rinsing sponges.
- Cleaning Supplies: Rags, mops, grout cleaner.
Laying Out Your Tile Pattern: Planning is Key
Before you mix any adhesive, take time to plan your layout. This step is crucial for achieving a professional look and minimizing waste.
Dry Laying the Tiles
- Find the Center Point: Measure the room and find the center point. This is often where you’ll want to start, especially if you have a central feature like an island or range.
- Mark Your Lines: Use a chalk line to mark a straight line from the center point to one wall. Mark a second perpendicular line to create a cross.
- Dry Lay Tiles: Place tiles along these lines, using spacers. This will help you see how the tiles fit and where cuts will be needed.
- Check Edge Cuts: See if the cuts at the walls are too small or awkward. If so, you may need to adjust your starting point slightly to have wider, more consistent cuts on all sides. A common strategy is to aim for cuts that are at least half a tile width.
Considerations for Layout
- Grout Lines: Decide on the width of your grout lines. Consistent grout lines are aesthetically pleasing.
- Obstacles: Plan around kitchen islands, cabinets, doorways, and appliances.
- Doorways: Ensure tiles meet doorways cleanly. You might need special transition strips.
- Pattern: Some tiles look best laid straight (grid pattern), while others can be laid diagonally, in a brick pattern, or a herringbone pattern.
Mixing and Applying Tile Adhesive for Kitchen
Tile adhesive for kitchen needs to be strong, durable, and suitable for the environment. For most kitchen floors, a good quality thin-set mortar is the standard.
What is Thin-Set Mortar?
Thin-set mortar is a cement-based adhesive mixed with water or a latex additive. It’s ideal for most tile installations, including ceramic and porcelain, and bonds directly to the subfloor.
Mixing Thin-Set Mortar
- Read the Instructions: Always follow the manufacturer’s mixing instructions precisely.
- Use a Clean Bucket: Start with a clean bucket and fresh water.
- Add Powder to Water: Gradually add the thin-set powder to the water while mixing. This helps prevent clumps.
- Mix Thoroughly: Use a drill with a mixing paddle attachment for best results. Mix until you achieve a smooth, peanut-butter-like consistency. It should hold its shape on the trowel but spread easily.
- Let it Slake: Most thin-sets require a “slake” period (usually 5-10 minutes) where the mixture rests. After slaking, remix for a minute or two. This allows the chemicals to fully activate.
- Working Time: Thin-set has a limited working time (usually 20-30 minutes), so only mix what you can use within that period.
Applying the Adhesive
- Start in a Small Area: Begin in a corner or along your chalk line, working in small sections (about 2×2 feet) that you can tile before the adhesive dries.
- Spread with the Smooth Trowel: Use the flat side of your notched trowel to spread a thin, even layer of adhesive onto the subfloor.
- Create Ridges with the Notched Trowel: Hold the trowel at a 45-degree angle and comb the adhesive to create uniform ridges. The size of the notches should match the tile size – larger tiles require larger notches for better coverage. This ensures good contact and eliminates air pockets.
- Back-Butter (Optional but Recommended): For larger tiles or uneven surfaces, apply a thin layer of adhesive to the back of each tile (back-buttering) as well. This ensures full coverage and a stronger bond.
Laying Your First Tiles: Precision and Patience
This is where your planning pays off. Work methodically, ensuring each tile is set correctly.
Setting the Tiles
- Place the First Tile: Carefully place your first tile into the adhesive along your chalk lines.
- Press and Twist: Gently press the tile into the adhesive and give it a slight twist. This helps embed it and create a strong bond.
- Use Spacers: Insert tile spacers at the corners of each tile to maintain consistent grout lines.
- Check for Levelness: As you lay each row, use your level to ensure the tiles are flat and even. Tap down any high tiles with a rubber mallet.
- Work Outwards: Continue laying tiles outwards from your starting point, working in manageable sections.
- Clean Excess Adhesive: Immediately wipe away any adhesive that squeezes up between tiles or onto the tile surface with a damp sponge or rag. Dried adhesive is much harder to remove.
Cutting Kitchen Tiles: Precision for a Perfect Fit
Cutting kitchen tiles is a necessary part of the process, especially around edges, corners, and obstacles.
- Straight Cuts: A manual tile cutter is perfect for this. Score the tile firmly, then snap it over an edge.
- Complex Cuts (Curves, Outlets): A wet saw is the best tool for intricate cuts. Mark your cut line clearly and carefully guide the tile through the blade. Always wear safety glasses.
- Small Adjustments: Tile nippers can be used for small, precise cuts or to shape edges.
- Measure Twice, Cut Once: Always measure your cut piece against the space it needs to fill before cutting.
Tip: When cutting tiles for a border or wall, ensure your cut edge faces the wall, so the factory edge is visible if the tile is slightly off.
Grouting Your Kitchen Tiles: Filling the Gaps
Once the adhesive has fully cured (check the manufacturer’s recommended drying time, typically 24-48 hours), it’s time for grouting.
Choosing the Right Grout
- Sanded Grout: Contains sand and is ideal for wider grout lines (1/8 inch or larger). It’s strong and durable.
- Unsanded Grout: Finer and used for narrower grout lines (less than 1/8 inch). It’s less prone to cracking in thin lines but can be slightly more prone to shrinking.
- Epoxy Grout: Highly stain-resistant and waterproof. It’s more difficult to work with and more expensive but offers superior performance in high-moisture areas.
- Consider Grout Color: Lighter grout can make a space feel brighter but shows dirt more easily. Darker grout hides dirt but can make a floor look busy.
Mixing and Applying Grout
- Mix Grout: Similar to thin-set, mix grout according to the manufacturer’s instructions. Aim for a thick, toothpaste-like consistency.
- Apply with a Grout Float: Load the grout onto your grout float and spread it across the tiles at an angle, forcing it into the grout lines. Ensure all gaps are filled completely.
- Diagonal Strokes: Work in diagonal strokes across the tiles to avoid pulling grout out of the joints.
- Scrape Off Excess: Once all joints are filled, hold the grout float at a steeper angle (almost 90 degrees) and scrape off the excess grout from the tile surface.
Cleaning Grout
- Initial Wipe: Wait about 15-30 minutes for the grout to set slightly. Then, using a damp (not wet) grout sponge, gently wipe the tile surface in a circular motion to remove the grout haze. Rinse the sponge frequently in a separate bucket of clean water. Avoid pressing too hard, which can pull grout out of the lines.
- Second Cleaning: After a couple of hours, you may notice a slight haze. Use a clean, dry cloth or a microfibre mop to buff the tiles and remove any remaining haze.
Sealing Your Kitchen Tiles and Grout: Protection for Longevity
Sealing kitchen tiles and grout is a vital step to protect them from stains, moisture, and wear.
Why Seal?
- Stain Resistance: Unsealed grout and porous tiles can absorb spills like wine, oil, or juice, leading to permanent stains.
- Waterproofing: Sealing helps prevent water from seeping into the grout and subfloor, which can cause damage.
- Easier Cleaning: A sealed surface is less likely to hold onto dirt and grime, making cleaning much easier.
Sealing the Grout
- When to Seal: Wait at least 24-72 hours after grouting for the grout to cure fully.
- Application: Use a high-quality grout sealer. Apply it with a small brush or applicator, ensuring you only apply it to the grout lines. Wipe off any excess sealer that gets onto the tile surface immediately.
- Frequency: Grout typically needs resealing every 6-12 months, depending on traffic and cleaning habits.
Sealing Porous Tiles
- Natural Stone: Absolutely requires sealing. Follow the stone manufacturer’s recommendations for the type of sealer.
- Ceramic Tiles: While less porous, sealing ceramic can add an extra layer of protection, especially in a busy kitchen.
- Porcelain Tiles: Generally don’t require sealing, but some very matte or textured finishes might benefit from a light sealant to prevent staining. Always check the tile manufacturer’s guidelines.
Frequently Asked Questions (FAQ)
Q1: How long does it take to tile a kitchen floor?
A: The time it takes depends on the size of your kitchen, the complexity of the layout, your experience level, and drying times for adhesive and grout. A typical DIY kitchen floor might take 2-4 days, spread over a week to allow for drying.
Q2: Can I tile over existing vinyl flooring?
A: Generally, no. Most tile manufacturers specify that tiles must be installed over a rigid, stable subfloor like concrete or cement backer board. Existing vinyl needs to be removed entirely.
Q3: How do I clean up after tiling?
A: Use a damp sponge and clean water to wipe up excess adhesive and grout. For haze, a dry cloth or microfiber mop works well. Keep a bucket of water handy for rinsing sponges and tools.
Q4: How often should I reseal my kitchen tile grout?
A: It’s generally recommended to reseal grout every 6-12 months, depending on how heavily the floor is used and how it’s cleaned.
Q5: What if I make a mistake?
A: If you notice a mistake while the adhesive is still wet (e.g., a tile is crooked or an air bubble), you can carefully lift the tile, remove the old adhesive, and reapply fresh adhesive before setting the tile again. Once the adhesive starts to set, it becomes much harder to correct.
By following these detailed steps, you’ll be well on your way to a beautiful and durable tiled kitchen floor. Enjoy your new DIY masterpiece!