Image Source: historichousesalvage.com
How To Salvage Kitchen Cabinets: DIY Cabinet Makeovers & Restoration
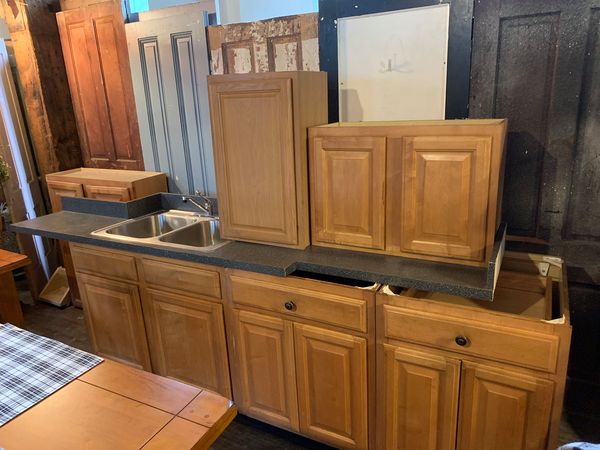
Can you salvage old kitchen cabinets? Absolutely! By doing some DIY work, you can give your old kitchen cabinets a fresh, new look without the high cost of replacement. This guide will walk you through how to salvage your kitchen cabinets, covering everything from simple updates to full-blown restorations.
Breathing New Life into Old Cabinets: The Power of DIY
Kitchen cabinets often bear the brunt of daily wear and tear. Scratches, fading finishes, and outdated styles can make them look tired and worn. But before you decide to replace them, consider the potential hidden within your existing cabinets. Salvaging them through DIY projects can be incredibly rewarding, saving you money and offering a creative outlet. Whether you’re aiming for a quick DIY cabinet update or a complete cabinet restoration, there are many ways to transform your kitchen.
Assessing Your Cabinets: What Can Be Saved?
The first step in any cabinet makeover project is to carefully assess the condition of your existing cabinets. Not all cabinets are created equal, and some may be beyond repair.
Structural Integrity Check
- Check for water damage: Look for warped wood, peeling veneer, or soft spots, especially around sinks and dishwashers.
- Inspect for rot or mold: These issues are serious and may require professional intervention or replacement of affected parts.
- Examine joinery: Ensure doors and drawers still fit properly. Loose hinges or drawer slides can often be fixed easily.
- Assess the wood itself: Are the cabinets made of solid wood, particleboard, or MDF? Solid wood is the most durable and easiest to work with for restoration.
Cosmetic Condition
- Surface scratches and dents: Minor imperfections can usually be addressed with touch-up paint, wood filler, or sanding.
- Faded or chipped finishes: This is a common problem that can be fixed with cabinet painting or cabinet staining.
- Outdated hardware: Swapping out knobs and pulls is one of the easiest and most impactful updates you can make.
DIY Cabinet Makeover Strategies
Once you know what you’re working with, you can choose the best strategy for your cabinet makeovers. Here are some popular and effective DIY methods:
1. Cabinet Painting: A Colorful Transformation
Cabinet painting is one of the most popular and transformative DIY projects. It allows for a complete style change with a relatively small investment of time and money.
Preparing for Painting
Proper preparation is key to a smooth, durable paint finish.
- Remove doors and drawers: Take everything off the cabinet boxes. Label them so you know where they go.
- Clean thoroughly: Use a degreaser to remove any grease or grime. A solution of TSP (trisodium phosphate) or a strong all-purpose cleaner works well.
- Sand surfaces: Lightly sand all surfaces to be painted with fine-grit sandpaper (120-220 grit). This creates a surface the paint can adhere to. Wipe away dust with a tack cloth.
- Fill imperfections: Use wood filler to patch any holes, cracks, or deep scratches. Let it dry completely and then sand smooth.
- Prime: Apply a high-quality primer. This is crucial for ensuring good adhesion and a uniform color. Use a primer specifically designed for cabinets or furniture. For slick surfaces like laminate, a bonding primer is essential.
Painting Techniques
- Choose the right paint: Use a durable, high-quality paint. Alkyd enamel or a high-quality latex enamel with a good sheen (satin or semi-gloss) are excellent choices for cabinets. They are more durable and easier to clean than flat finishes.
- Application:
- Spraying: For the smoothest, most professional finish, consider using a paint sprayer. This requires a bit of practice and good ventilation, but the results are often worth it.
- Rolling and Brushing: If you don’t have a sprayer, use a high-density foam roller for large, flat surfaces and a good quality synthetic brush for edges and details. Apply thin, even coats.
- Multiple Coats: Allow each coat of paint to dry thoroughly according to the manufacturer’s instructions before applying the next. Typically, two to three coats are needed for full coverage.
- Topcoat (Optional but Recommended): For added durability and protection, especially in high-traffic areas like kitchens, consider applying a clear polyurethane topcoat.
2. Cabinet Staining: Enhancing Natural Beauty
If your cabinets are made of good quality wood and you love the grain, cabinet staining can bring out their natural beauty.
Preparing for Staining
The preparation is similar to painting, but the goal is to reveal the wood, not cover it.
- Strip existing finish (if necessary): If cabinets have a thick, dark, or damaged finish, you might need to strip it using a chemical stripper or by sanding. Always follow safety precautions when using chemical strippers.
- Sand thoroughly: Sand the wood to a smooth finish, starting with a coarser grit (e.g., 80-100) and progressing to finer grits (e.g., 150-220).
- Clean and neutralize: Wipe down the cabinets to remove all dust. If you used a chemical stripper, you may need to neutralize it according to the product’s instructions.
- Pre-stain conditioner: For some woods (like pine or maple), applying a pre-stain wood conditioner helps the stain penetrate evenly, preventing blotchiness.
Staining Process
- Choose your stain: Stains come in various colors and types (oil-based, water-based, gel stain). Gel stains are often easier for DIYers to use as they tend to be less prone to drips and blotches.
- Apply the stain: Apply the stain with a brush or rag, working in the direction of the wood grain. Wipe off excess stain with a clean, dry rag. The longer you leave the stain on, the darker the color will be.
- Multiple coats: You can apply multiple coats of stain to achieve a deeper color. Allow each coat to dry completely before applying the next.
- Topcoat: Once the stain is dry, apply a protective topcoat, such as polyurethane or lacquer, to seal and protect the wood.
3. Cabinet Refacing: A New Look, Existing Structure
Cabinet refacing is a more involved process that involves replacing the visible parts of your cabinets – the doors and drawer fronts – while keeping the existing cabinet boxes. This can dramatically change the look of your kitchen.
What is Cabinet Refacing?
- New Doors and Drawer Fronts: You order new doors and drawer fronts in your desired style and material. These can be made of solid wood, MDF, or thermofoil.
- Veneer or Laminate Overlay: The visible sides of your existing cabinet boxes are covered with a thin layer of wood veneer or laminate to match the new doors.
- New Hardware: New hinges and drawer pulls are installed.
DIY Refacing vs. Professional
While professional cabinet refacing services are available, you can do much of this yourself.
- Ordering: You’ll need to carefully measure your existing cabinet boxes and order custom-sized doors and drawer fronts. Many companies specialize in this.
- Installation: Installing new doors and drawer fronts is usually straightforward, involving attaching hinges and drawer slides. Applying the veneer or laminate overlay to the cabinet boxes can be the trickiest part of a DIY refacing project.
4. Cabinet Resurfacing: A Modern Update
Cabinet resurfacing is a broader term that can encompass painting, staining, or applying new veneers or laminates. It’s about giving the surface a refreshed appearance. If your cabinets have a laminate or thermofoil finish that’s peeling, cabinet resurfacing with a new laminate or a good quality cabinet paint is an excellent option.
5. Cabinet Repair: Fixing the Flaws
Before you do any cosmetic updates, address any necessary cabinet repair.
- Loose Hinges: Tighten screws. If the screw holes are stripped, you can repair them by inserting wooden dowels or golf tees with wood glue into the holes, letting them dry, and then re-drilling pilot holes for the screws.
- Sagging Doors: Adjust hinges or consider reinforcing the cabinet box corners with brackets.
- Drawer Slides: Clean and lubricate drawer slides. If they are bent or broken, they may need to be replaced.
- Warped Wood: Minor warping can sometimes be corrected with careful clamping and drying, but severe warping might mean replacing the affected part.
- Cracked Wood: Use wood glue and clamps for clean breaks. For larger cracks, wood filler might be necessary after gluing.
6. Cabinet Repurposing: Creative Reuse
Sometimes, the best way to salvage kitchen cabinets is to repurpose them for a different use.
- Storage Units: Old base cabinets can become freestanding storage units in a garage, laundry room, or basement.
- Workbenches: A sturdy base cabinet can be topped with a piece of butcher block or plywood to create a functional workbench.
- Plant Stands: Wall cabinets can be used as attractive planters for herbs or small plants.
- Furniture Accents: A set of drawers might be perfect for a dresser or a side table.
Choosing the Right Finish: Paint vs. Stain vs. Other Options
The decision between painting, staining, or other finishes depends on the material of your cabinets and the look you want to achieve.
| Finish Type | Best For | Pros | Cons |
|---|---|---|---|
| Cabinet Painting | Wood, MDF, laminate, thermofoil (with proper prep and primer) | Wide color variety, hides imperfections, modern look, relatively easy | Can chip if not done properly, requires good prep, can look “painted” |
| Cabinet Staining | Solid wood (especially hardwoods like oak, maple, cherry), veneer | Enhances wood grain, classic look, durable finish, rich depth of color | Limited color options (stain adds color, doesn’t replace), reveals imperfections |
| Cabinet Refacing | Existing cabinet boxes | Dramatic style change, durable new surfaces, wide material options | More expensive than painting/staining, requires precise measurements |
| Cabinet Resurfacing | Laminate, thermofoil, painted surfaces | Modernizes outdated looks, can cover damaged surfaces, versatile | Can be labor-intensive, results vary based on method and materials |
| Wood Dye | Woods that take dye well (e.g., maple, birch, pine) | Allows wood grain to show through vibrantly, deep color penetration | Can be tricky to apply evenly, might require a glaze or topcoat |
| Glazing | Any painted or stained surface | Adds depth, an antique or aged look, highlights details | Requires practice, can easily go too far |
Step-by-Step Guide to Cabinet Restoration
For a full cabinet restoration, you’ll be combining repair, preparation, and refinishing.
Step 1: Disassembly and Cleaning
- Remove all doors, drawer fronts, hinges, and hardware.
- Label everything clearly to ensure correct reassembly.
- Clean all components thoroughly with a degreaser to remove any grease, grime, or food residue.
Step 2: Repairing Damage
- Wood Filler: Fill any gouges, dents, or scratches with a good quality wood filler. For deeper repairs, you may need to apply filler in layers.
- Cracks and Splits: Use wood glue and clamps to repair any cracks or splits. Wipe away excess glue immediately.
- Loose Joints: Re-glue any loose joints using wood glue and reinforcing with screws or nails if necessary.
Step 3: Sanding
- Start with a medium-grit sandpaper (100-120) to remove the old finish and smooth out repairs.
- Progress to finer grits (150, then 220) to create a smooth surface ready for the new finish.
- For painted cabinets, a light sanding is usually sufficient to create “tooth” for the new paint.
- Always sand in the direction of the wood grain.
- Use a tack cloth to remove all sanding dust.
Step 4: Applying the New Finish
Choose your preferred method: cabinet painting, cabinet staining, or applying a new veneer.
- For Painting: Follow the detailed steps outlined earlier, focusing on primer, thin coats, and proper drying times.
- For Staining: Apply stain evenly, wipe off excess, and allow to dry thoroughly before applying a protective topcoat.
- For Veneering: Carefully apply wood veneer to the cabinet boxes and edges. Use contact cement or a specialized veneer adhesive, and use a J-roller or block to ensure good adhesion and avoid bubbles. Trim excess veneer with a sharp utility knife or veneer trimmer.
Step 5: Reassembling and Hardware Update
- Once the finish is completely dry and cured, reattach the doors and drawers.
- Install new or cleaned hardware (knobs, pulls). This is a great opportunity to update the style of your kitchen.
- Adjust hinges as needed to ensure doors hang straight and close properly.
Tips for a Professional Finish
- Work in a well-ventilated area: Especially important when using paints, stains, or strippers.
- Use high-quality tools and materials: Cheap brushes, rollers, or paints will lead to a less desirable finish.
- Patience is key: Rushing the drying times between coats will lead to streaks, drips, and a poor-quality finish.
- Practice on scrap wood: If you’re trying a new technique like spraying or glazing, practice on a piece of scrap wood first.
- Clean as you go: Wipe up any spills or drips immediately.
Frequently Asked Questions (FAQ)
Q: How long does it take to paint kitchen cabinets?
A: This varies greatly depending on the size of your kitchen and your experience. A typical DIY cabinet painting project can take anywhere from a weekend to a week or more, allowing for proper drying times between coats.
Q: Can I paint over stained cabinets?
A: Yes, you can paint over stained cabinets. The key is proper preparation: clean thoroughly, lightly sand, and apply a high-quality primer designed for stained surfaces.
Q: Is cabinet refacing cheaper than replacing cabinets?
A: Generally, yes. Cabinet refacing is typically about 50-70% of the cost of replacing your entire kitchen cabinets, offering a significant cost saving while providing a brand-new look.
Q: What is the most durable finish for kitchen cabinets?
A: For painted cabinets, a high-quality enamel paint (alkyd or acrylic) with a satin or semi-gloss finish is very durable. For stained cabinets, a durable polyurethane or a catalyzed lacquer offers excellent protection.
Q: How do I fix chipped paint on cabinets?
A: For small chips, you can lightly sand the edges of the chip, apply a thin layer of wood filler if the chip is deep, let it dry, sand smooth, prime the spot, and then touch up with matching paint. For larger areas of chipping, you may need to repaint the entire door or drawer.
Q: What’s the difference between cabinet refinishing and cabinet restoration?
A: Cabinet refinishing generally refers to reapplying a new finish (paint, stain, or lacquer) to existing cabinets to refresh their appearance. Cabinet restoration is a broader term that includes repairing structural damage, stripping old finishes, and then refinishing the cabinets to bring them back to their original or improved condition.
Conclusion: Your Kitchen’s Second Act
Salvaging your kitchen cabinets through DIY projects is a fantastic way to update your home, save money, and express your personal style. Whether you opt for a simple cabinet painting project, a sophisticated cabinet staining job, or a more involved cabinet refacing, the results can be incredibly satisfying. With careful planning, the right tools, and a bit of patience, you can achieve professional-looking cabinet makeovers that breathe new life into your kitchen. So, roll up your sleeves and get ready to transform your cabinets into the beautiful focal point of your home!