Can you replace a Moen kitchen faucet handle yourself? Yes, you absolutely can replace a Moen kitchen faucet handle yourself with basic tools and a little patience. This guide will walk you through the entire process, from identifying the issue to enjoying your newly functional faucet.
Dealing with a faulty or outdated kitchen faucet handle can be frustrating. Whether it’s a persistent drip, a stiff operation, or simply a desire for an updated look, replacing a Moen kitchen faucet handle is a common DIY task that can save you money and give you a sense of accomplishment. Moen is a trusted brand known for its durable and reliable products, and their faucet handles are no exception. Often, a worn-out handle is the culprit behind many Moen faucet handle dripping issues or other operational problems.
This comprehensive guide will cover everything you need to know about Moen faucet handle repair, helping you tackle this project with confidence. We’ll delve into identifying the right parts, the tools you’ll need, and the step-by-step process for a smooth replacement.
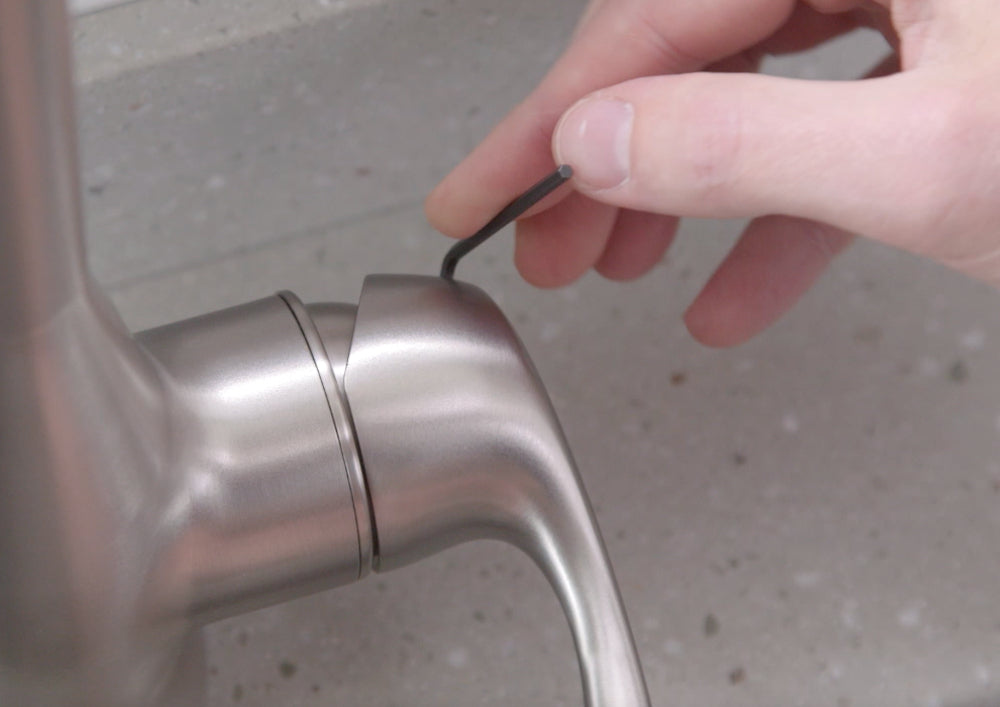
Image Source: shop.moen.com
Why Replace Your Moen Faucet Handle?
There are several reasons why you might need to replace your Moen kitchen faucet handle:
- Leaking Faucet: A common issue is a fix leaky Moen faucet handle situation where the handle itself or the seals within it are compromised. This leads to drips and wasted water.
- Stiff or Difficult Operation: Over time, the internal components of the handle can wear down, making it hard to turn or adjust the water flow.
- Damage or Wear: The handle might be cracked, chipped, or have its finish worn away due to regular use.
- Aesthetic Update: You might simply want to update the style or finish of your faucet to match your kitchen’s decor.
- Single Handle Moen Faucet Repair: For single handle Moen faucet repair, the handle is often the primary component responsible for controlling both temperature and flow, making its condition crucial.
Gathering Your Supplies: What You’ll Need
Before you begin, it’s essential to have all the necessary tools and parts on hand. This will make the process much smoother and prevent interruptions.
Essential Tools:
- Screwdriver Set: You’ll likely need both Phillips head and flathead screwdrivers.
- Allen Wrench Set (Hex Keys): Many Moen faucet handles are secured with a small set screw that requires an Allen wrench.
- Adjustable Wrench or Pliers: Useful for loosening or tightening certain components if needed.
- Utility Knife or Small Flathead Screwdriver: To pry off decorative caps.
- Towel or Rag: To protect the sink surface and for cleaning up.
- Bucket: To catch any residual water.
- Penetrating Oil (Optional): If screws are stubborn or corroded.
- Safety Glasses: Always protect your eyes.
Moen Kitchen Faucet Parts:
The most crucial part is the replacement handle itself. For a successful Moen faucet handle replacement kit, you need to ensure you get the correct part for your specific Moen faucet model.
-
Identifying Your Moen Faucet Model: This is the most important step.
- Check the Faucet Itself: Look for a brand name or model number etched or printed on the faucet body, often on the back or underside of the spout.
- Check Your Purchase Records: If you recently bought the house or the faucet, your sales receipt or warranty information might have the model details.
- Consult the Moen Website: Moen has an excellent website with a “Support” section where you can often identify your faucet by description, by uploading a picture, or by checking common model series.
- Contact Moen Customer Service: If you’re still unsure, Moen’s customer service is very helpful and can often identify your faucet based on a description or a photo you can send them.
-
Purchasing the Replacement Handle: Once you know your model, you can purchase a replacement handle.
- Moen Faucet Handle Replacement Kit: Many Moen handles are sold as a kit, which may include the handle, any necessary screws, and sometimes even decorative caps.
- Individual Parts: In some cases, you might only need to buy the handle itself.
Step-by-Step Guide to Replacing Your Moen Kitchen Faucet Handle
Let’s get started! Follow these steps carefully for a successful DIY replacement.
Step 1: Turn Off the Water Supply
This is a critical safety step to prevent water from spraying everywhere when you remove the handle.
- Locate the Shut-Off Valves: Look under your kitchen sink for two valves, one for hot water and one for cold water. They usually have oval or round handles.
- Close the Valves: Turn both valve handles clockwise until they are completely shut.
- Test the Faucet: Turn on the faucet to ensure the water supply has been cut off. Let any remaining water drain out.
Step 2: Remove the Decorative Cap
Most Moen faucet handles have a small decorative cap that hides the set screw. This cap often indicates whether the handle is for hot or cold water (usually red for hot, blue for cold) or is simply a brand logo.
- Locate the Cap: It’s usually a small plastic or metal piece on the front or top of the handle.
- Gently Pry it Off: Use a small flathead screwdriver or a utility knife to carefully pry off the cap. Be gentle to avoid scratching the handle or the surrounding finish. Some caps may unscrew.
Step 3: Locate and Remove the Set Screw
Once the decorative cap is removed, you’ll find the set screw that holds the handle in place.
- Identify the Screw: This is typically a small screw.
- Determine the Tool Needed: For most Moen faucets, you’ll need an Allen wrench (hex key) of the correct size. If you don’t have an Allen wrench set, you can often find the right size at a hardware store.
- Loosen the Screw: Insert the Allen wrench into the set screw. Turn it counter-clockwise to loosen. You don’t need to remove the screw completely, just loosen it enough to allow the handle to slide off. If the screw is tight, you might need a drop of penetrating oil.
Step 4: Remove the Faucet Handle
With the set screw loosened, the handle should now be free to be removed.
- Pull the Handle Straight Up: Grip the handle firmly and pull it straight up and off the faucet stem.
- Handle Stubbornness: If the handle is stuck, don’t force it too aggressively. Wiggling it gently while pulling upwards can help. Sometimes, a bit of penetrating oil applied around the stem and allowed to sit for a few minutes can loosen it.
- Troubleshooting Moen Faucet Handle Removal: If the handle still won’t budge, check if you’ve fully loosened the set screw. Ensure there isn’t another securing mechanism or a hidden screw.
Step 5: Examine and Clean the Faucet Stem
Before installing the new handle, take a moment to inspect the faucet stem for any debris or corrosion.
- Clean the Stem: Wipe down the stem with a clean cloth. If there’s any buildup or mineral deposits, you can use a soft brush and a little vinegar to clean it.
- Check for Damage: Ensure the stem itself is not damaged or stripped, as this could affect the new handle’s fit.
Step 6: Install the New Moen Faucet Handle
Now it’s time to put on your new handle!
- Align the New Handle: Position the new handle onto the faucet stem, ensuring it’s oriented correctly.
- Slide it Down: Gently slide the new handle down onto the stem until it sits flush against the faucet body.
- Tighten the Set Screw: Re-insert the set screw (if it was removed) or tighten the existing one. Turn it clockwise with the Allen wrench until it’s snug. Again, don’t overtighten, as this can strip the screw or damage the handle.
Step 7: Replace the Decorative Cap
Once the handle is secured, it’s time to put the cap back on.
- Press or Screw the Cap: If your cap snaps on, press it firmly into place. If it screws on, gently twist it clockwise until it’s secure.
Step 8: Turn the Water Supply Back On
The final step is to restore the water supply and test your work.
- Open the Shut-Off Valves: Slowly turn both the hot and cold water shut-off valves counter-clockwise.
- Check for Leaks: Turn the faucet handle on and off to check for proper operation. Look for any leaks around the handle or the faucet base.
Troubleshooting Common Moen Faucet Handle Issues
Even with a straightforward guide, you might encounter a few hiccups. Here’s how to handle them.
Problem: The new handle is loose.
- Cause: The set screw is not tight enough.
- Solution: Turn off the water supply again. Remove the decorative cap and tighten the set screw further. Make sure you are using the correct size Allen wrench.
Problem: The handle still drips after replacement.
- Cause: The issue might not have been the handle itself, but rather the cartridge inside the faucet.
- Solution: This often means you need to replace the Moen faucet cartridge. This is a more involved process, but still manageable for a DIYer. You’ll need to identify your faucet model to get the correct replacement cartridge. Turn off the water, remove the handle, and then you’ll see a retaining nut holding the cartridge in place. Loosen this nut, pull out the old cartridge, and insert the new one.
Problem: The handle is difficult to remove or install.
- Cause: Mineral buildup, corrosion, or misalignment.
- Solution:
- For Removal: Apply a penetrating oil and let it sit. Try gently wiggling the handle. Ensure the set screw is fully loosened.
- For Installation: Make sure the new handle is aligned correctly with the stem. Ensure there’s no debris obstructing the fit.
Problem: The faucet is still leaking from the base of the handle.
- Cause: A worn-out O-ring or packing nut.
- Solution: You may need to replace the O-rings or tighten the packing nut, which is located beneath the handle and behind the cartridge. This is part of regular Moen faucet maintenance.
Maintaining Your Moen Faucet Handle
Proper Moen faucet maintenance can prolong the life of your faucet and prevent future issues.
- Regular Cleaning: Clean your faucet regularly with a soft cloth and mild soap. Avoid abrasive cleaners that can damage the finish.
- Check for Leaks: Periodically check for any drips or leaks and address them promptly.
- Tighten Loose Parts: If you notice any looseness in the handle or other parts, tighten them gently.
Frequently Asked Questions (FAQ)
Q1: How do I know if I need to replace the handle or the cartridge?
A1: If the handle itself is physically damaged, cracked, or the finish is significantly worn, you likely need a new handle. If the handle operates smoothly but the faucet still drips or has poor flow control, the problem is more likely with the internal cartridge.
Q2: Can I use any Moen faucet handle for my faucet?
A2: No, you must use a handle that is specifically designed for your Moen faucet model. Moen has various series and designs, and handles are not universally interchangeable. Always identify your faucet model first.
Q3: How tight should the set screw be?
A3: The set screw should be snug enough to hold the handle securely in place without allowing it to wobble. Overtightening can strip the threads of the screw or damage the handle or faucet stem.
Q4: What if I can’t find the exact replacement handle for my old Moen faucet?
A4: For very old or discontinued models, it might be challenging to find an exact match. In such cases, you might need to consider replacing the entire faucet or looking for universal handle adapter kits if available for Moen. Contacting Moen customer support is your best bet.
Q5: Is it possible to replace just the screw for the handle?
A5: Yes, if the handle itself is fine but the screw is stripped or missing, you can often purchase replacement screws or a Moen faucet handle screw pack. Ensure you get the correct thread size for your faucet.
Replacing a Moen kitchen faucet handle is a rewarding DIY project that can restore your faucet’s functionality and appearance. By following these detailed steps and using the right tools and parts, you can confidently tackle this repair and keep your kitchen running smoothly. Remember, if you encounter persistent problems or are unsure about any step, consulting a professional plumber is always an option.