The optimal number of can lights for your kitchen depends on several factors, including the size of your kitchen, the layout, the types of fixtures you choose, and the desired lighting effect. Generally, a good starting point is to aim for one can light per every 4 to 6 feet of ceiling space in general living areas.
Brightening up your kitchen with can lights is a fantastic idea! Can lights, also known as recessed lighting, offer a clean, modern look and provide excellent illumination. But figuring out how many can lights in your kitchen is crucial for effective kitchen lighting design. Too few, and you’ll have dark corners. Too many, and your kitchen can feel like an operating room. This guide will walk you through everything you need to know to get your recessed lighting layout just right.
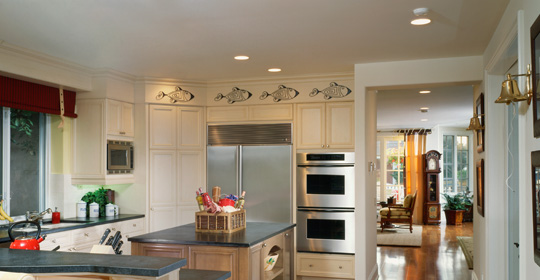
Image Source: www.lampsplus.com
Fathoming Your Kitchen’s Lighting Needs
Before we dive into calculations, let’s appreciate why proper kitchen lighting design is so important. Your kitchen is often the heart of the home. It’s where you prepare meals, entertain guests, and gather with family. Good lighting enhances functionality, creates atmosphere, and can even make your kitchen feel larger and more inviting.
The Dual Role of Kitchen Lighting
Effective kitchen lighting design typically involves layers of light:
- Ambient Lighting: This is the general, overall illumination that fills the room. Can lights are excellent for providing this base layer. They ensure the entire kitchen is well-lit, creating a comfortable and safe environment.
- Task Lighting: This is focused light for specific activities, like chopping vegetables or reading recipes. While can lights can contribute to task lighting, they are often supplemented by under-cabinet lights, pendant lights over an island, or adjustable spotlights.
- Accent Lighting: This type of lighting highlights architectural features, artwork, or decorative elements. It adds depth and visual interest to your kitchen.
Calculating the Number of Recessed Lights
So, how do we determine the number of recessed lights kitchen spaces need? There are a few popular methods, each with its own nuances.
The Grid Method: Simple and Effective
This is perhaps the most straightforward way to estimate can light spacing.
- Measure Your Ceiling: Get the length and width of your kitchen in feet.
- Determine Spacing: For general ambient lighting, a common rule of thumb is to space can lights every 4 to 6 feet. The best can light spacing will depend on the beam spread of your chosen fixtures.
- Calculate Lights per Row: Divide the length of the room by your chosen spacing to find out how many lights fit along one wall.
- Calculate Rows: Divide the width of the room by your chosen spacing to find out how many rows of lights you’ll need.
- Total Lights: Multiply the number of lights per row by the number of rows.
Example:
Let’s say you have a 12-foot by 15-foot kitchen.
-
If you choose 5-foot spacing:
- Along the 15-foot wall: 15 feet / 5 feet = 3 lights
- Along the 12-foot wall: 12 feet / 5 feet = 2.4, so 2 lights (you can round down or adjust spacing slightly)
- Total lights: 3 lights/row * 2 rows = 6 lights
-
If you choose 4-foot spacing:
- Along the 15-foot wall: 15 feet / 4 feet = 3.75, so 3 lights
- Along the 12-foot wall: 12 feet / 4 feet = 3 lights
- Total lights: 3 lights/row * 3 rows = 9 lights
This method gives you a good starting point for your recessed lighting layout.
The Square Foot Method: Another Way to Calculate
This method focuses on the total square footage of your kitchen and the lumens (brightness) of your light bulbs.
- Calculate Total Square Footage: Length x Width = Square Footage.
- For our 12ft x 15ft kitchen: 12 x 15 = 180 sq ft.
- Determine Lumens per Square Foot: For a kitchen, which is a high-activity area, you’ll want around 20-30 lumens per square foot for general ambient lighting. Let’s aim for 25 lumens per square foot.
- Calculate Total Lumens Needed: Total Square Footage x Lumens per Square Foot = Total Lumens.
- 180 sq ft x 25 lumens/sq ft = 4500 lumens.
- Choose Your Can Lights: Now, consider the lumens each can light fixture (with bulb) will provide. Most LED downlights with a standard 4-inch or 6-inch aperture will provide anywhere from 600 to 900 lumens. Let’s assume you’re using lights that provide 800 lumens each.
- Calculate the Number of Lights: Total Lumens Needed / Lumens per Light = Number of Lights.
- 4500 lumens / 800 lumens/light = 5.625 lights.
- You would likely round up to 6 lights in this scenario.
This kitchen lighting calculation method is great for ensuring you have adequate overall brightness.
The “Distance from Wall” Rule: For Perimeter Illumination
This rule is particularly useful when planning recessed lighting layout near walls or cabinetry.
- General Rule: Place can lights about half the distance of your planned spacing away from walls.
- Example: If you’re spacing lights 5 feet apart in the field of the room, you might place them 2.5 feet away from the walls. This helps avoid harsh shadows along the perimeter and ensures even light distribution.
This method is vital for ensuring your ambient lighting kitchen is truly effective and doesn’t leave edges of your kitchen feeling dim.
Key Factors Influencing Your Kitchen’s Recessed Lighting
Several elements will sway your decision on how many can lights in your kitchen and where they go.
Ceiling Height
- Standard Ceilings (8-9 feet): Can lights spaced 4-6 feet apart are generally suitable.
- High Ceilings (10+ feet): You might need to place lights closer together, perhaps 3-4 feet apart, or use wider beam spread fixtures to achieve adequate illumination without excessive glare. For very high ceilings, consider larger aperture fixtures or a mix of recessed and pendant lighting.
Beam Spread of Fixtures
The beam spread (how widely the light disperses) of your can lights is a critical factor for can light spacing.
- Narrow Beam (Spot/Flood): Best for accent lighting or highlighting specific areas. Requires more fixtures for general illumination.
- Medium Beam (Flood/Wide Flood): A good all-around choice for general ambient lighting.
- Wide Beam (Very Wide Flood/Pinhole): Excellent for broad, even illumination, especially in lower ceiling heights.
Table: Typical Beam Spreads and Spacing Recommendations
| Beam Spread Type | Beam Angle | Recommended Spacing (for 8-9 ft ceilings) | Primary Use |
|---|---|---|---|
| Spot | 10-25° | 2-3 ft | Accent, task (focused) |
| Narrow Flood | 25-35° | 3-4 ft | Accent, task |
| Flood | 35-50° | 4-5 ft | Ambient, task |
| Wide Flood | 50-60° | 5-6 ft | Ambient |
| Very Wide Flood | 60°+ | 6-7 ft | Ambient (even wash) |
When planning your recessed lighting layout, check the manufacturer’s specifications for beam angle and recommended spacing.
Kitchen Layout and Features
- Kitchen Island: You’ll likely want can lights over the island, but also consider pendant lights for a more decorative and focused lighting effect. Ensure your can lights don’t compete with pendants.
- Work Zones: Areas like the sink, stovetop, and countertops need good task lighting. You might need to adjust your can light spacing or add dedicated task lights (like under-cabinet lighting) in these zones.
- Cabinets: Recessed lights can sometimes create shadows in upper cabinets. Consider adjustable trim kits or a slightly different placement to ensure good light flow.
- Obstructions: Be mindful of ceiling beams, HVAC ducts, or structural elements that might limit where you can install fixtures.
Personal Preference and Mood
Do you prefer a bright, airy kitchen, or a more subdued, cozy atmosphere? Your desired mood will influence your kitchen lighting calculation. Dimmers are an excellent addition to any recessed lighting layout, allowing you to adjust the brightness to suit the occasion.
Designing Your Recessed Lighting Layout
Let’s put it all together for a practical recessed lighting layout.
Step-by-Step Layout Planning
- Start with the Perimeter: Mark your walls. Using the “distance from wall” rule, draw a line indicating where your first row of lights will be, typically 2-3 feet from the wall.
- Plan the Field: If your kitchen is wider than the perimeter spacing allows for good coverage, plan a second (or third) row in the middle of the room. Use your chosen spacing (e.g., 4-6 feet) to mark the centers of these lights.
- Center on Features: If you have a large island or a significant walkway, ensure a light is centered over these key areas.
- Avoid Overlap: Try to ensure the light cones from your fixtures overlap slightly for smooth coverage, but avoid placing them so close they create a “spotlight” effect for general lighting.
- Consider Task Areas: Position lights to illuminate countertops, sink, and cooking surfaces effectively. You might need closer spacing in these specific zones.
Lighting Specific Kitchen Zones
- Sink Area: Bright light is essential here. Consider placing a can light directly over the sink or slightly in front of it, ensuring no shadows are cast when you’re standing at the sink.
- Cooktop/Stovetop: While range hoods often have built-in lights, additional recessed lighting can improve visibility. Place them so they don’t create glare on shiny surfaces.
- Countertops: These are your primary work surfaces. Ensure they are well-lit. A row of lights running parallel to the countertops, about 2-3 feet away, is often effective.
- Kitchen Island: If you have an island, think about whether you want it to be the focal point. Pendant lights are popular, but recessed lights can provide excellent general illumination that complements them.
How to Choose Can Lights
Selecting the right kitchen ceiling lights (specifically recessed cans) is as important as determining the number.
Types of Recessed Fixtures
- Standard Baffle Trim: Features ribbed interior surfaces that reduce glare. A classic choice for general lighting.
- Gimbal Trim: Allows the light to be angled, useful for highlighting specific objects or areas.
- Wall Wash Trim: Designed to direct light evenly down a wall, ideal for showcasing artwork or cabinetry.
- Eyeball Trim: Similar to gimbal, the fixture can be swiveled and tilted.
Bulb Types and Considerations
- LEDs: The undisputed champions of modern lighting. They are energy-efficient, long-lasting, and come in various color temperatures and brightness levels.
- Color Temperature: Measured in Kelvin (K).
- Warm White (2700K-3000K): Creates a cozy, inviting atmosphere. Good for dining areas or spaces where relaxation is key.
- Cool White/Bright White (3500K-4000K): Offers a more neutral, crisp light. Excellent for general ambient lighting kitchen work areas.
- Daylight (5000K-6500K): Mimics natural daylight. Can be too harsh for some kitchens but is great for intense task lighting.
- Color Rendering Index (CRI): A measure of how accurately a light source reveals the true colors of objects. Aim for a CRI of 90+ for kitchens to ensure food and decor look their best.
- Color Temperature: Measured in Kelvin (K).
- Dimmable Options: Crucial for flexibility. Ensure your LED lights and dimmer switch are compatible.
Fixture Size (Aperture)
- 3-inch: Smaller, more discreet. Good for accent lighting or smaller kitchens where a less intrusive look is desired.
- 4-inch: A popular mid-size option, offering a good balance of light output and discretion.
- 6-inch: The most common size. Provides more light output and can be spaced further apart. Ideal for larger kitchens or when high brightness is needed.
- 8-inch: Less common in residential kitchens, but can be used for very large spaces or where a very strong light source is required.
How to Choose Can Lights involves matching the fixture’s aperture, beam spread, and bulb type to your specific lighting needs and aesthetic preferences.
Common Recessed Lighting Mistakes to Avoid
Even with the best intentions, kitchen lighting design can go awry. Here are pitfalls to sidestep:
- Too Few Lights: Leading to dark spots and an uninviting atmosphere.
- Lights Too Close Together: Creating a “chicken coop” effect with too many overlapping spotlights and a harsh, overly bright environment.
- Lights Too Far Apart: Resulting in uneven illumination and shadows.
- Incorrect Spacing from Walls: Causing dark perimeters.
- Wrong Color Temperature: Using overly cool lights in a space meant for relaxation can feel sterile.
- Ignoring Dimmers: Limiting your ability to control the mood and brightness.
- Not Considering Task Areas: Overlooking the need for focused light where you work.
Bringing it All Together: A Sample Kitchen Lighting Plan
Let’s revisit our 12ft x 15ft kitchen (180 sq ft).
Scenario: We want good ambient light, with flexibility for task work. We have standard 8ft ceilings. We’ll use 6-inch LED downlights with a flood beam spread, a color temperature of 3500K, and a CRI of 90+.
Method: We’ll use a combination of the grid method and the distance from wall rule.
- Perimeter Spacing: We’ll place the first row of lights 2.5 feet from the 15-foot walls. This means we’ll need lights at 2.5 ft, 7.5 ft, and 12.5 ft along the 15-foot length. That’s 3 lights per side.
- Field Spacing: The remaining space in the middle is 15 ft – 2.5 ft – 2.5 ft = 10 feet. To maintain good coverage, we’ll place a second row of lights in the center, about 5 feet from the perimeter rows. So, lights at 5 ft and 10 ft along the 15-foot length. This gives us 2 lights in this middle section.
- Crosswise Spacing: We’ll do the same for the 12-foot width. Lights 2.5 feet from the walls, and then one row in the center.
- Along the 12ft width: 2.5 ft, 6 ft, 9.5 ft. That’s 3 lights per row.
- If we have 3 rows of lights spaced about 3.5 feet apart:
- Row 1: 3 lights
- Row 2: 3 lights
- Row 3: 3 lights
- Total = 9 lights.
This layout (9 lights) gives us coverage every ~3.5-4 feet across the ceiling, ensuring excellent ambient light. We’d then evaluate if specific task areas (like the sink or island) need an extra dedicated light or if the existing layout is sufficient. Using dimmers would allow us to adjust the overall brightness for different activities.
Frequently Asked Questions About Kitchen Can Lights
Q1: What is the best can light spacing for a kitchen?
The best can light spacing for a kitchen typically ranges from 4 to 6 feet apart for general ambient lighting, depending on the beam spread of your fixtures and ceiling height. You might need closer spacing for task areas or higher ceilings.
Q2: How many recessed lights do I need for my kitchen?
To determine the number of recessed lights kitchen spaces require, you can use the grid method (spacing lights 4-6 feet apart) or the square foot method (calculating total lumens needed). A 12ft x 15ft kitchen might need 6-9 general ambient lights.
Q3: Can I use recessed lighting as my only kitchen lighting?
While recessed lights provide excellent ambient lighting kitchen spaces, it’s often best to layer your lighting. Supplementing with under-cabinet lighting for task lighting kitchen workspaces and perhaps a pendant over an island or dining area will create a more functional and aesthetically pleasing environment.
Q4: What is the ideal placement for can lights over a kitchen island?
For a kitchen island, place can lights to complement any pendant lights you might use. They should be spaced to provide general illumination without being directly in the line of sight if pendants are the primary focus. A common approach is to have them spaced similarly to the rest of the room or slightly closer if they are the sole overhead light source.
Q5: How close should can lights be to the walls?
For effective recessed lighting layout, place can lights about half the distance of your general spacing away from the walls. If your lights are spaced 5 feet apart, place them 2.5 feet from the walls to avoid shadows and ensure even coverage.
Q6: What’s the difference between a 4-inch and 6-inch can light?
A 4-inch can light is smaller and more discreet, often used in smaller kitchens or for accent lighting. A 6-inch can light is larger, provides more light output, and can be spaced further apart, making it a popular choice for general ambient lighting in most kitchens. The best can light spacing will depend on the size of the fixture and its light output.
Q7: How do I calculate the total lumens needed for my kitchen?
To calculate total lumens, first find your kitchen’s square footage (length x width). Then, multiply this by the desired lumens per square foot (20-30 lumens/sq ft for general kitchen lighting). For example, a 180 sq ft kitchen would need approximately 3600-5400 lumens. This forms the basis of your kitchen lighting calculation.
By carefully considering these factors and using the various calculation methods, you can achieve a beautiful and functional recessed lighting layout that perfectly illuminates your kitchen. Happy lighting!