Can you resurface a kitchen sink? Yes, you absolutely can resurface a kitchen sink, and it’s a fantastic way to breathe new life into an old, worn-out fixture without the expense and hassle of replacement. This guide will walk you through the process, whether you’re dealing with chips, stains, or just a dull finish. We’ll cover everything you need to know for a successful kitchen sink refinishing, including when it’s the right solution and how to achieve a professional-looking result yourself.
Resurfacing your sink is a DIY-friendly project that can dramatically improve your kitchen’s appearance. It’s a cost-effective alternative to replacing a damaged or outdated sink, especially if you’re working with a beloved vintage piece or want to update the look of your kitchen on a budget. This process is also known as how to reglaze a sink and can be applied to various materials, making it a versatile option for DIY sink repair.
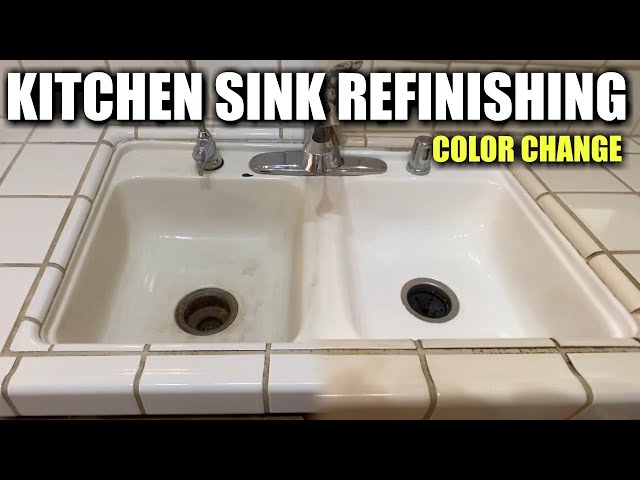
Image Source: i.ytimg.com
Why Resurface Your Kitchen Sink?
Several reasons make sink resurfacing a smart choice:
- Cost Savings: Replacing a kitchen sink can be expensive, involving the cost of the sink itself, plus plumbing and potential countertop modifications. Resurfacing is significantly cheaper.
- Aesthetic Improvement: Tarnished, chipped, or stained sinks can make your entire kitchen look tired. Resurfacing provides a fresh, clean, and updated look.
- Extends Sink Life: By covering minor damage and wear, resurfacing can prolong the lifespan of your existing sink.
- Versatility: Many sink materials can be resurfaced, including porcelain, stainless steel (though often a different process), and even some composite materials. This guide focuses primarily on porcelain and enamel-coated sinks, as they are the most common candidates for home resurfacing.
- Less Disruptive: Unlike a full replacement, resurfacing typically involves less mess and fewer plumbing disconnections, meaning your kitchen is out of commission for a shorter period.
When is Resurfacing the Right Choice?
Resurfacing is ideal for sinks that have:
- Surface Scratches and Scuffs: Minor abrasions that dull the finish.
- Stains and Discoloration: Stubborn marks that regular cleaning can’t remove.
- Small Chips and Cracks: Superficial damage to the surface layer.
- Dull or Chipped Enamel: The original protective coating is worn.
- Outdated Color: You want to change the sink’s color to match new kitchen decor.
It’s important to note that resurfacing is generally not recommended for sinks with deep structural damage, major cracks that compromise the sink’s integrity, or severe rust that has eaten through the metal. For these issues, replacement is usually the better option.
Preparing for Your Kitchen Sink Refinishing Project
Proper preparation is crucial for a lasting and beautiful finish. Rushing this stage can lead to peeling, chipping, or an uneven look.
Choosing the Right Sink Resurfacing Kit
The market offers various sink resurfacing kit options. When selecting one, consider:
- Material Compatibility: Ensure the kit is designed for your sink’s material (e.g., porcelain, enamel).
- Durability: Look for kits that promise a hard, durable finish resistant to water and cleaning products. Epoxy-based coatings are often a good choice for their toughness.
- Ease of Application: Some kits are spray-on, while others are brush or roller applied. Read reviews to gauge application difficulty.
- Color Options: Most kits come in white or off-white, but some offer a limited range of colors.
- Brand Reputation: Choose reputable brands known for quality refinishing products.
Table 1: Common Sink Resurfacing Kit Components
| Component | Purpose | Notes |
|---|---|---|
| Cleaner/Degreaser | Removes grease, soap scum, and grime. | Essential for proper adhesion. |
| Etching Solution | Creates a slightly rough surface for better coating adhesion. | Often an acid-based solution; handle with care. |
| Primer | Provides a uniform base and improves adhesion of the topcoat. | Important for porcelain and enamel. |
| Topcoat (Resin/Epoxy) | The main coating that forms the new surface. | Choose based on desired finish (gloss, satin) and durability. |
| Catalyst/Hardener | Activates the curing process for two-part coatings. | Mix precisely as directed. |
| Applicators | Brushes, rollers, or spray cans for applying the coating. | Specific tools may be included or need to be purchased separately. |
| Sandpaper/Scuff Pads | For smoothing imperfections and creating a surface for adhesion. | Various grits might be needed. |
| Masking Tape | To protect surrounding areas (countertops, faucets, walls). | High-quality painter’s tape is recommended. |
| Gloves & Eye Protection | Safety gear to protect yourself from chemicals and dust. | Always use appropriate personal protective equipment (PPE). |
| Respirator Mask | For protection against fumes from solvents and coatings. | Crucial for spray applications or when working in enclosed spaces. |
Gathering Your Tools and Materials
Beyond the kit, you’ll need:
- Screwdriver: To remove faucet and drain hardware.
- Pliers: For stubborn fittings.
- Putty Knife or Scraper: For removing old caulk or debris.
- Rags and Sponges: For cleaning and wiping.
- Bucket: For cleaning solutions and rinsing.
- Drop Cloths: To protect your floor and surrounding areas.
- Safety Glasses/Goggles: Essential eye protection.
- Chemical-Resistant Gloves: To protect your skin.
- Respirator Mask: Crucial for preventing inhalation of fumes and dust.
- Good Ventilation: Open windows and use fans.
- Lamp or Work Light: To ensure you can see all areas clearly.
Preparing the Sink Area
This is arguably the most important step.
- Clear the Sink: Remove all dishes, sponges, soap dispensers, and anything else stored in or around the sink.
- Remove Hardware: Carefully remove the faucet, handles, drain assembly, and stopper. This prevents them from getting coated and makes it easier to access all sink surfaces. Store screws and small parts in a labeled bag.
- Remove Old Caulk: Use a putty knife or a razor blade to carefully scrape away any old caulk around the sink’s edge where it meets the countertop.
- Protect Surroundings: Use painter’s tape to meticulously mask off the countertop, backsplash, faucet holes, and any other areas you don’t want to get paint on. Overlapping the tape slightly onto the sink rim can provide extra protection. Cover the floor with drop cloths.
The Step-by-Step Resurfacing Process
Now that everything is prepped, it’s time to get down to business. Follow these steps for a successful kitchen sink coating.
Step 1: Thorough Cleaning and Degreasing
A pristine surface is key to adhesion.
- Initial Wash: Use a good kitchen cleaner or degreaser to wash the entire sink. Pay attention to areas with soap scum, grease, or hard water deposits.
- Rinse Well: Rinse the sink thoroughly with clean water and dry it completely with a lint-free cloth.
Step 2: Repairing Imperfections
Address any chips or cracks before applying the coating.
- Chip Filling: For small chips in porcelain or enamel, you can use a specialized sink repair epoxy or filler. Apply it according to the product’s instructions, ensuring it’s flush with the sink surface. Allow it to cure completely.
- Sanding Minor Damage: If there are minor scratches or rough spots, you can gently sand them with fine-grit sandpaper (220-320 grit) to smooth them out.
Step 3: Etching the Surface
This step creates microscopic pores in the sink’s surface, allowing the new coating to bond properly. This is vital for the longevity of your porcelain sink refinishing.
- Apply Etching Solution: Many kits come with an etching solution or a scuff pad. If using a liquid etcher, apply it evenly to the entire sink surface with a sponge or cloth as directed in the kit instructions. Always wear gloves and a respirator during this step.
- Scrubbing: Gently scrub the sink with the etching solution or scuff pad. You’re not trying to remove material, just create a dull, matte finish.
- Rinse Thoroughly: Rinse the sink extremely well with clean water. Ensure no etching solution residue remains.
- Dry Completely: Dry the sink thoroughly with a clean, lint-free cloth.
Step 4: Applying the Primer (If Included)
Some kits recommend or require a primer for optimal adhesion and a more uniform color.
- Mix Primer: If your kit includes a primer, mix it according to the manufacturer’s instructions.
- Apply Thin Coat: Apply a thin, even coat of primer using the recommended applicator (usually a brush or foam roller). Avoid drips and runs.
- Allow to Dry: Let the primer dry completely according to the kit’s specifications. This can range from 30 minutes to several hours.
Step 5: Applying the Kitchen Sink Coating
This is where your sink gets its new lease on life. Whether you’re how to paint a kitchen sink or applying an epoxy, technique matters.
- Mix the Topcoat: If your topcoat is a two-part system (like many epoxy kits), mix the resin and hardener precisely as directed. Do not eyeball measurements. Stir gently to avoid introducing too many air bubbles. Mix only what you can apply within the product’s pot life (the time it remains usable after mixing).
- Application Method:
- Spray Application (Recommended for Best Finish): If you’re using a spray kit, ensure you have a well-ventilated area. Apply thin, even coats, holding the spray can or gun at a consistent distance. Overlap each pass by about 50%.
- Brush/Roller Application: Use a high-quality foam roller or a good-quality brush. Apply thin, even coats, working in one direction. For corners and edges, use a brush. Be careful not to overwork the coating, which can lead to brush marks or unevenness.
- Work Systematically: Start from the highest point of the sink and work your way down. Ensure you cover all areas, including the sides and corners.
- Apply Multiple Coats: Most projects require two to three thin coats for full coverage and durability.
- Drying Time Between Coats: Allow the recommended drying time between each coat as specified by the kit manufacturer. This is crucial to prevent lifting or poor adhesion.
Step 6: Curing the Coating
This is the longest and most critical waiting period.
- Full Cure Time: The coating needs to cure fully before you can use the sink. This can take anywhere from 24 hours to several days, depending on the product and environmental conditions (temperature and humidity).
- Avoid Water and Use: Do not expose the sink to water, cleaning chemicals, or heavy use until the curing process is complete.
Step 7: Reassembly and Final Touches
Once the coating is fully cured:
- Remove Masking Tape: Carefully peel off all the painter’s tape.
- Reinstall Hardware: Reattach the faucet, drain assembly, and stopper.
- Clean Up: Clean up your workspace, disposing of used materials properly.
Maintaining Your Newly Resurfaced Sink
Proper care will ensure your resurfaced sink looks great for years to come.
- Gentle Cleaning: Use mild dish soap and a soft sponge or cloth for daily cleaning.
- Avoid Abrasives: Never use abrasive cleaners, steel wool, scouring pads, or harsh chemicals (like bleach or ammonia) on the new surface. These can scratch or damage the coating.
- Wipe Dry: Wiping the sink dry after each use can help prevent water spots and mineral buildup.
- Be Mindful of Heavy Items: Avoid dropping heavy pots, pans, or utensils into the sink, as this can chip the coating.
Special Considerations for Different Sink Types
While this guide is primarily for porcelain and enamel sinks, here are brief notes on others:
Porcelain Sink Refinishing
This is the most common DIY resurfacing scenario. The process outlined above is ideal for porcelain sinks. The etching step is particularly important to ensure the coating bonds to the hard, non-porous porcelain surface.
Laminate Countertop Sink Repair
If you have a sink integrated into a laminate countertop, the process is similar, but you must be extremely careful not to damage the laminate. Use extra caution with tape and ensure no coating drips onto the laminate. For laminate, using a specialized laminate repair kit or a spray paint designed for laminate might be a better alternative for minor surface issues, rather than a full epoxy resurfacing kit meant for sinks.
Stainless Steel Sink Refinishing
While you can paint a stainless steel sink, it’s a different process and often less durable than traditional resurfacing. Typically, stainless steel sinks are cleaned, degreased, scuffed, primed with a metal primer, and then painted with a high-quality spray paint designed for metal. Some people opt for a “brushed” look achieved with specific abrasives and compounds. True resurfacing of stainless steel often involves specialized industrial coatings.
Epoxy Sink Refinishing
Epoxy coatings are highly recommended for their durability and chemical resistance. When your sink resurfacing kit uses epoxy, ensure you mix the two parts accurately and work within the pot life. The curing process is critical for the strength of the epoxy. This method offers excellent results for DIY sink repair.
When to Call a Professional
While DIY resurfacing can be rewarding, there are times when professional help is advisable:
- Deep Damage: Significant cracks, large chips, or extensive rust that penetrate the sink material.
- Difficult Materials: If you have a sink made of an unusual material not covered by standard kits.
- High-End or Antique Sinks: If the sink is very valuable or has historical significance, professional refinishing ensures the best possible outcome without risking damage.
- Lack of Confidence: If you’re not comfortable with the preparation or application process, a professional can achieve a superior finish.
- Spraying Equipment: Professionals have access to industrial sprayers that provide a smoother, more even finish than aerosol cans or basic kits.
Frequently Asked Questions (FAQ)
Q1: How long does a resurfaced sink last?
A1: With proper care and maintenance, a professionally resurfaced sink can last anywhere from 5 to 15 years. DIY results may vary depending on the kit quality and application technique, but can also last for many years if done correctly.
Q2: Can I resurface a stainless steel sink?
A2: Yes, but it’s often done by painting rather than a chemical resurfacing process. You’ll need specific primers and paints designed for metal surfaces. The durability might not match that of a refinished porcelain sink.
Q3: What is the best sink resurfacing kit?
A3: There isn’t one single “best” kit, as it depends on your sink material and desired finish. However, kits with epoxy-based topcoats and those specifically designed for porcelain or enamel sinks are generally considered high-quality options. Reading recent customer reviews is a good way to find reliable products.
Q4: Can I change the color of my sink when resurfacing?
A4: Yes, some kits offer a limited color selection. If you want a specific color, you might need to look for kits that allow tinting or use a high-quality appliance or enamel paint designed for sinks after proper priming.
Q5: Do I need special ventilation for sink resurfacing?
A5: Absolutely. Most resurfacing kits contain chemicals with strong fumes. Ensure the area is well-ventilated by opening windows and using fans. Always wear a respirator mask approved for chemical fumes.
Q6: How do I repair a chip in my sink before resurfacing?
A6: For small chips, use a specialized sink repair epoxy or filler. Clean the area thoroughly, apply the filler to be flush with the surface, and allow it to cure completely before proceeding with the resurfacing process.
Q7: Is it hard to resurface a kitchen sink?
A7: It’s a moderately difficult DIY project that requires careful preparation, attention to detail, and patience. The most challenging parts are thorough cleaning, proper surface preparation (etching), and achieving a smooth, even application of the coating.
By following this comprehensive guide, you can confidently tackle the project of kitchen sink refinishing and enjoy a beautiful, revitalized sink in your kitchen.